Make Your Posters Stand Out With the Photo Editor

Posters need to draw attention – meaning that when it comes to posters for your event, concert, workshop, or small business, you need to design for maximum visual impact. Whether you’re an experienced designer or not, BeFunky's Poster Maker is the perfect online poster maker for crafting eye-catching designs. With a vast collection of free poster templates tailored to a variety of needs – from event posters and marketing posters to hiring announcements – you're sure to find one that aligns perfectly with your goals. And when you're ready to elevate your design even further, the Poster Maker’s integrated Photo Editor can help you achieve next-level creative results.
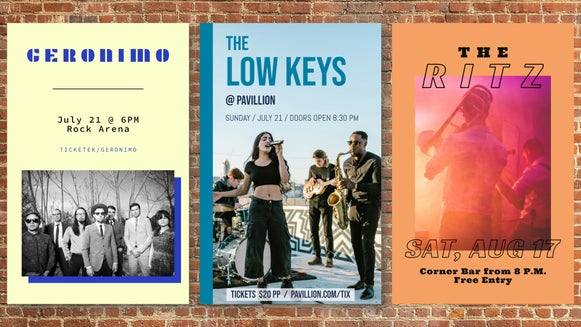
With the Poster Maker, you can easily produce vibrant event posters to announce concerts, workshops, fundraisers, and other events. Add creative flair with the Photo Editor’s painting effects, glitch effects, lens flares, and more. If you’re a small business owner, you can use the Photo Editor’s AI Image Enhancer right within the Poster Maker to enhance posters for sales promotions, new product announcements, and seasonal specials. Use the Background Remover to elevate posters for workshops and classes, or polish your hiring posters with Touch Up tools. Whatever your creative vision, the combined powers of the Poster Maker and Photo Editor will help you bring it to life.
How to Enhance Your Posters With the Photo Editor
Once you've selected your ideal template from Poster Maker, fine-tuning your poster’s imagery with BeFunky's Photo Editor can dramatically enhance your final design. With the Poster Maker, you can also make as many or as few adjustments to the existing template as you’d like. Here we’ll walk through the process step-by-step, using a poster for a tea workshop as an example.
Step 1: Choose a Poster Template
First, open up the Poster Maker and select a template to work from. These poster templates have been professionally designed so that you don’t need to worry about coming up with an eye-catching composition on your own.To make the most of the Photo Editor, make sure to choose one that showcases 1-3 images.

Step 2: Replace Images
Replace the placeholder images with photos of your choice using the Image Manager. Simply upload photos from your computer or the cloud, then drag them onto the canvas to replace the existing imagery.

Step 3: Make Your Photo Edits
Click any image and select Edit Image to be brought to the in-platform Photo Editor. Here you’ll find hundreds of professional editing tools that are all intuitive to use.

A good first step is to use the Exposure tool in the Edit tab to bring balance and clarity to your image. If your original photo appears dark or dull, increasing the brightness and contrast can immediately enhance your image.

Next, for an extra creative touch, try layering some photo filters from the Effects tab. Here we’re using the Chromatic 1 effect to create warm colors and add extra contrast, followed by Film Grain from the Cinematic effects for some texture.

We’re then finishing our enhancements off with the Glow tool and a Vignette to add to the vintage look of our photos.

Click Done Editing Image to seamlessly return to your poster design. You can repeat this process with your remaining photos to make your poster as cohesive as possible.
Step 4: Customize Colors and Text
Once you’re happy with your photo enhancements, it’s time to work on the rest of your poster design. You can change the background color of your canvas in the Customize tab.

Click any text to edit it and adjust the colors and typeface if necessary. Here we’re also adding a Glow layer effect to some of the text to echo the Glow effect used in the images.

Step 5: Save It
Click Save at the top of the page to save your design for printing. All poster templates are already in a standard letter size, but make sure to save your file as a print-quality PDF for the best possible print results.

And that’s it! With a few simple enhancements in the Photo Editor, this poster is sure to stand out no matter where it’s pinned up.


Creative Poster Inspiration
The Photo Editor is great for basic photo adjustments that can help elevate your poster designs, but you can also combine effects to infuse your posters with unique character and creativity. Here are some creative photo editing ideas for your next poster design.
Create Better Hiring Posters With the Background Remover
Creating a hiring poster for your small business? Take advantage of the Background Remover to isolate the portraits of key personnel or featured team members from cluttered or busy backgrounds. You can even remove foreground items with the Object Eraser. Doing this can give your hiring poster a more polished look, and helps it stand out from more basic designs.


Design Eye-Catching Event Posters With Artsy Effects
Make your event posters unforgettable by using one (or a few) of the Photo Editor’s many Artsy effects. Choose from various painting or drawing filters like Oil Painting, Cartoonizer, or Watercolor to transform standard event imagery into visually striking artwork. An artful twist not only catches the viewer's eye but also conveys creativity and originality, setting the perfect tone for artistic events, music festivals, or unique community gatherings. This design combines Vector Pop GFX with Crosshatch GFX for contrast.

Enhance Workshop Posters With Touch Up Tools
Workshop and seminar posters often feature speakers or instructors front and center. To boost credibility and expand your poster’s appeal, ensure these portraits look polished and professional with Touch Up tools like our AI Portrait Enhancer and the Wrinkle tool.


Make Marketing Posters More Dynamic With Textures
Give your marketing posters additional depth and interest by incorporating Textures in the Photo Editor. Applying subtle textures like Grunge, Paper, or Fabric can create visual intrigue and help emphasize key elements or text.


Take Your Poster Designs to the Next Level Today
While each tool is powerful on their own, using the Photo Editor and Poster Maker together can significantly enhance your poster designs for maximum appeal. No matter what you’re promoting or what your creative vision looks like, you’ll find the right tools to make it happen, from free poster templates to unique filters and effects. Start designing today in the Poster Maker!