Perfect Your Photos With BeFunky’s A.I. Image Enhancer
While cameras aim to capture the world as we see it, they often fall short of showcasing the true richness of what's around us. From the soft haze of a morning sunset to the crisp edges of a fallen leaf; it's these minute details of everyday life that are worth preserving.
While photo editing can go a long way, it's tiresome having to adjust each element individually to get your image looking just right. Thankfully, this is where BeFunky's AI Image Enhancer comes to the rescue, as it addresses in-camera limitations and brings back the magic in your photo within a single click.
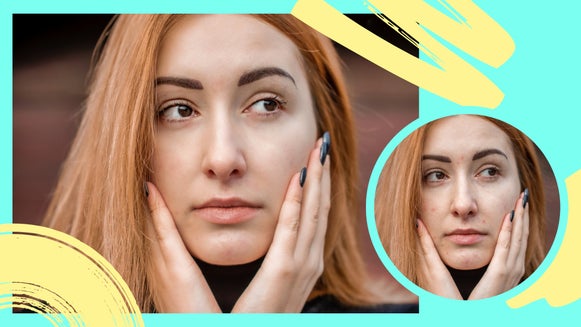
You may have heard of our revolutionary AI Portrait Enhancer, which reduces imperfections and blemishes, whitens teeth, reduces red eyes, and more with only one click. Our AI Image Enhancer also uses advanced AI technology to balance image exposure, adjust highlights and shadows, and enhance the colors in your image – all without any effort on your part.
Keep reading, because we’ll show you how you can perfect low-quality images in just seconds!


How Does the AI Image Enhancer Work?
Our AI Image Enhancer uses advanced deep learning algorithms to really understand what's going on in an image. It has been trained on tons of data, so it knows all about patterns and how to make intelligent decisions to enhance a photo.
The process typically involves several steps. First, the AI model takes a close look at the image and figures out what's in it, such as objects, people, backgrounds, etc. Then, it dives even deeper and analyzes aspects like lighting, color, and texture for each component.
Once it has all this information, the AI model gets to work and starts making some magic happen. It applies a series of adjustments and enhancements to the image, including noise reduction, sharpening, color correction, and exposure adjustment – all to make your photo look its absolute best!
Our Image Enhancer has been in development for over ten years, so with a decade of research, tweaking, and testing behind it, it’s the real deal.
How to Use BeFunky’s AI Image Enhancer to Improve Image Quality
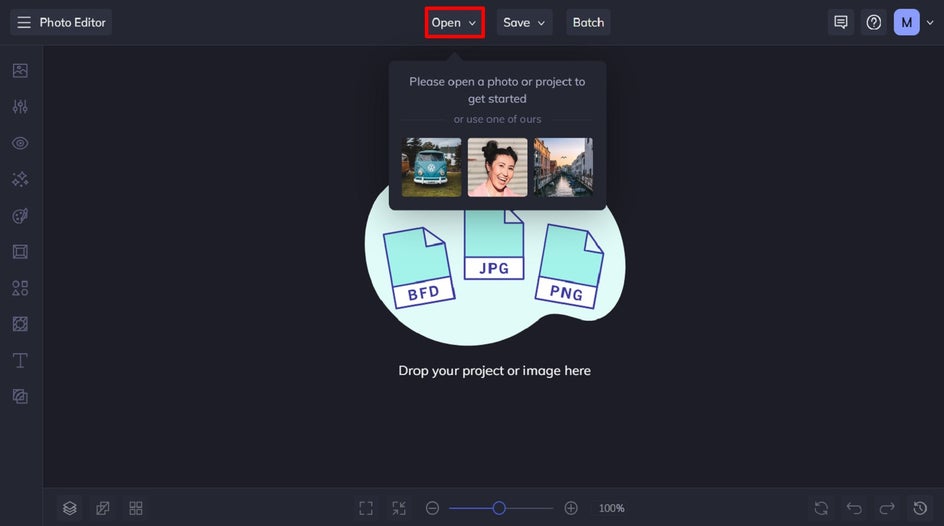
Ready to try out this awesome AI photo enhancement tool? Click this link to head straight to the AI Image Enhancer or open the Photo Editor first. Then, upload the image you wish to enhance.
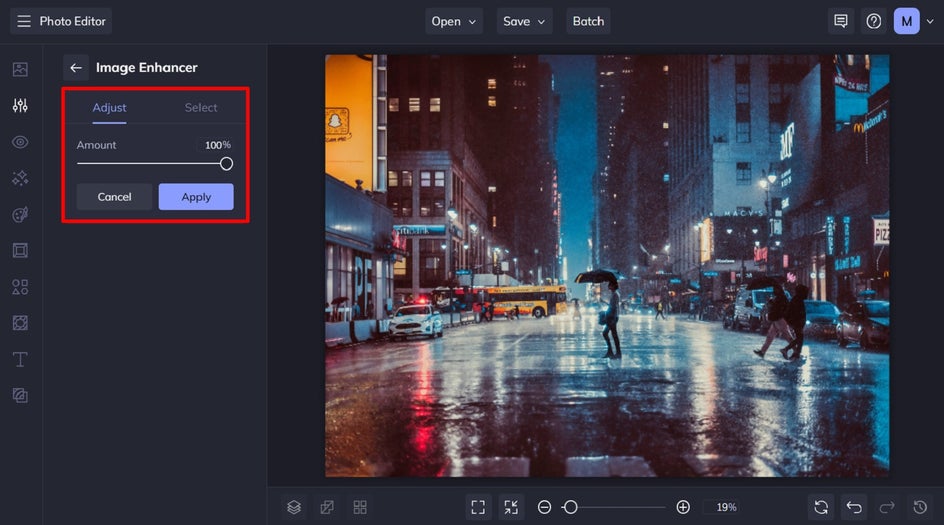
Step 1: Use the Image Enhancer on Your Entire Photo
When you access the AI Image Enhancer, the tool will instantly enhance your entire image. You can then use the Amount slider to increase or decrease the effect for your desired look.
Once you’re happy with your new photo quality, you can simply click Apply to keep those changes.
Alternatively, if you wish to only use the photo enhancer tool on selected parts of your image (such as just your foreground or background, for example), then follow Step 2 below.
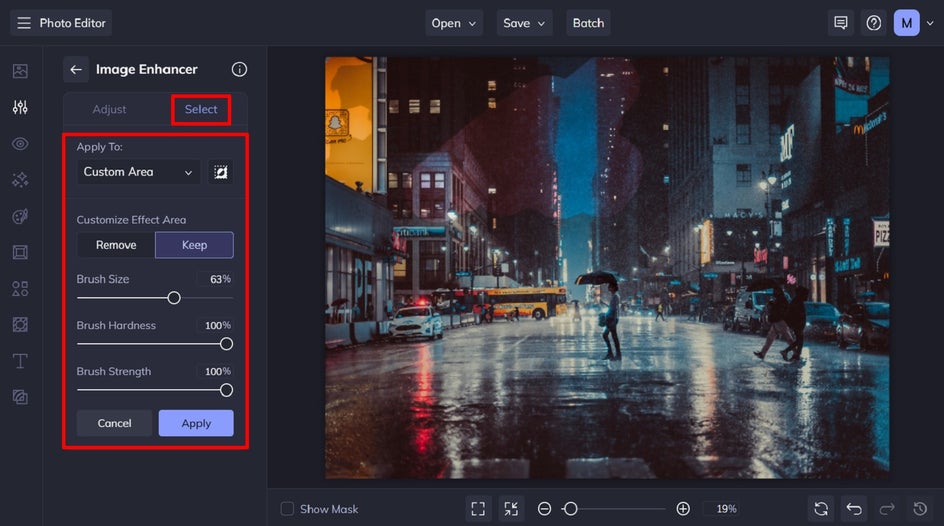
Step 2: Apply the Image Enhancer to Selected Parts of Your Image
When you click Select at the top of the AI Image Enhancer menu, you have access to even more customization options. You can choose to enhance the image quality of your whole image, foreground only, or background only. You can also click the Invert Selection button next to this section to reverse your choice.
Within the Customize Effect Area section below, you have several additional options which allow you to ‘paint on’ your desired image enhancement effect. For example, you can adjust the sliders underneath Brush Size, Brush Hardness, and Brush Strength to customize the tool to your needs. You can also toggle between the options to remove or keep the effect while using the Select options.
Simply click Apply once you’re happy with your changes.
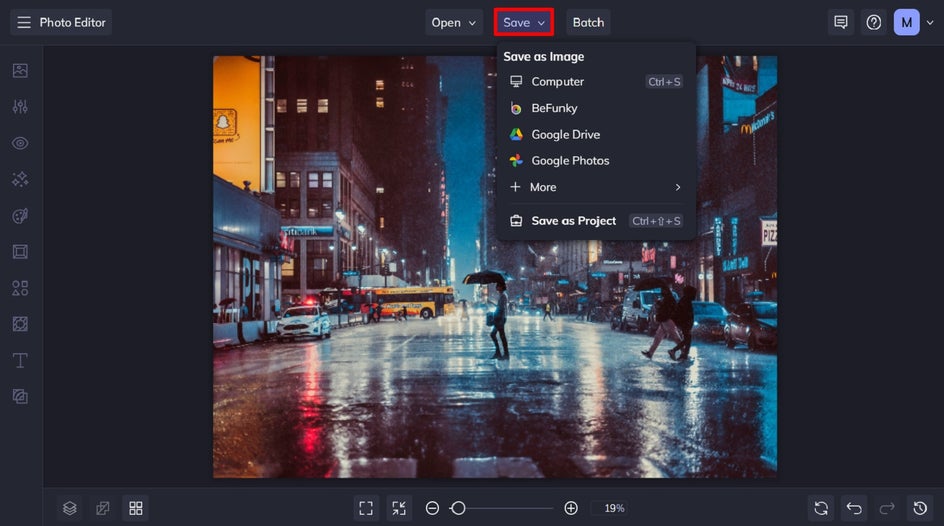
Step 3: Save Your Improved Image
Once your low-quality image has been transformed, all that’s left to do is to save it. Click Save at the top of the screen, then select your desired save location.
Final Results: Enhanced Image Quality in a Click
If you’re looking for a way to improve image quality automatically and within seconds, look no further than BeFunky’s AI Image Enhancer. We think the results speak for themselves, don’t you?
What Other Types of Images Can the AI Image Enhancer Perfect?
Our impressive tool is the easiest way to enhance photo quality across all types of photos – from landscapes and cityscapes, to action shots, and so much more. Here are just some of our favorite transformations.
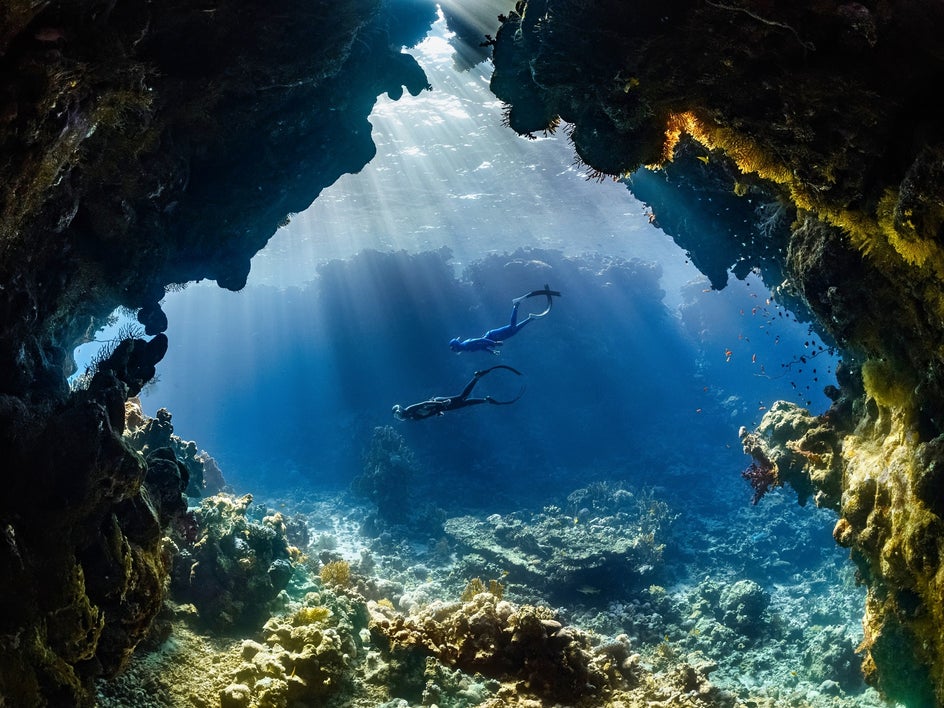
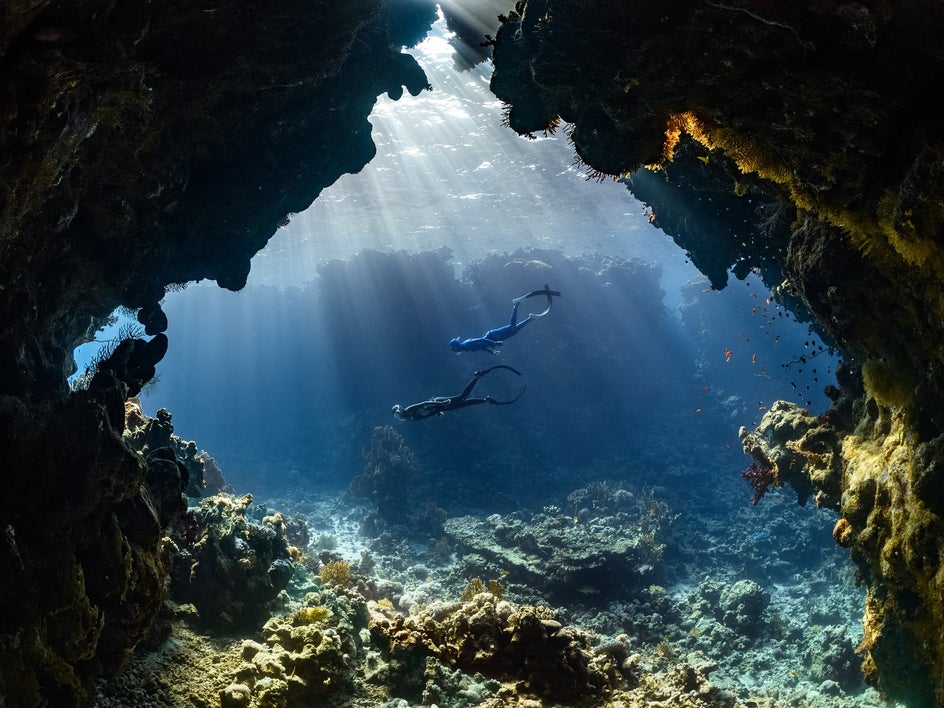
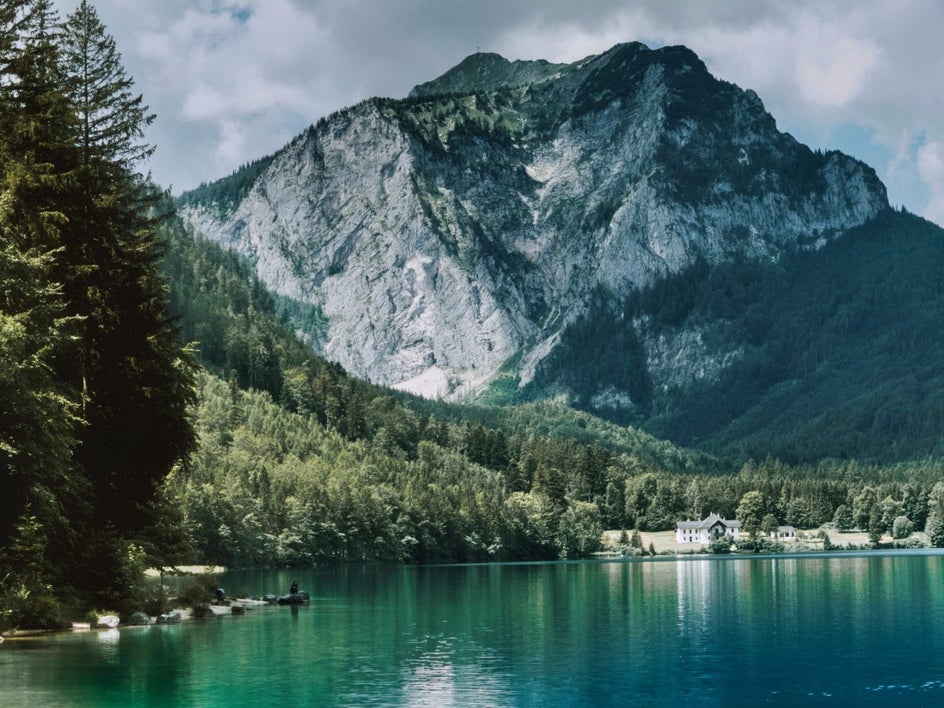
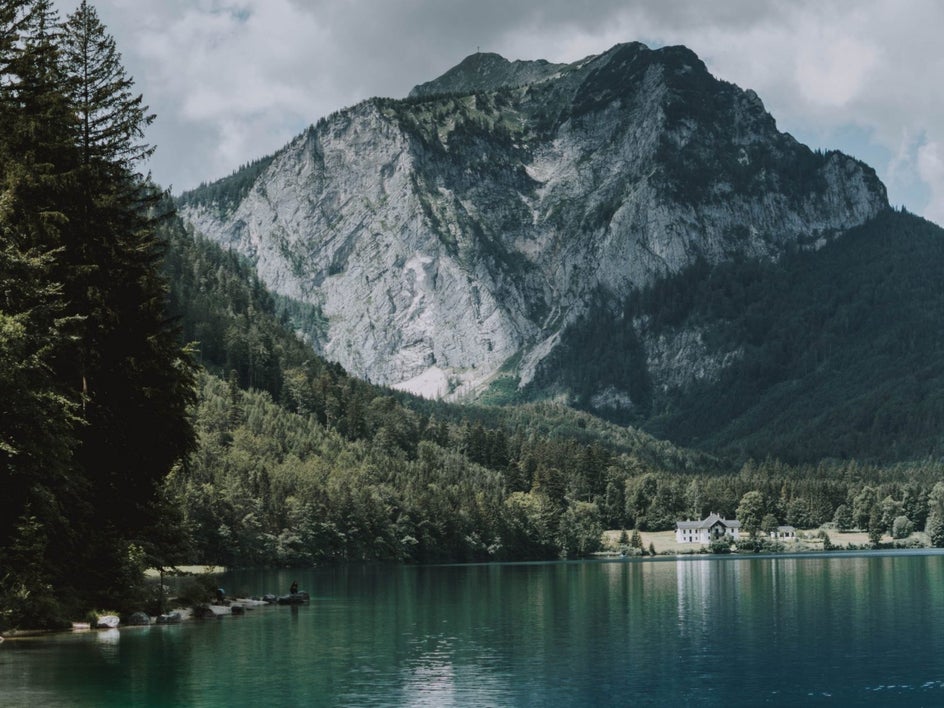
Landscapes
The original colors within this photo looked lackluster and certainly didn’t do justice to the stunning scenery captured. Thankfully, with one-click magic from the AI Image Enhancer, we were able to transform this image into a vibrant image that’s also sharper and more balanced in terms of contrast.
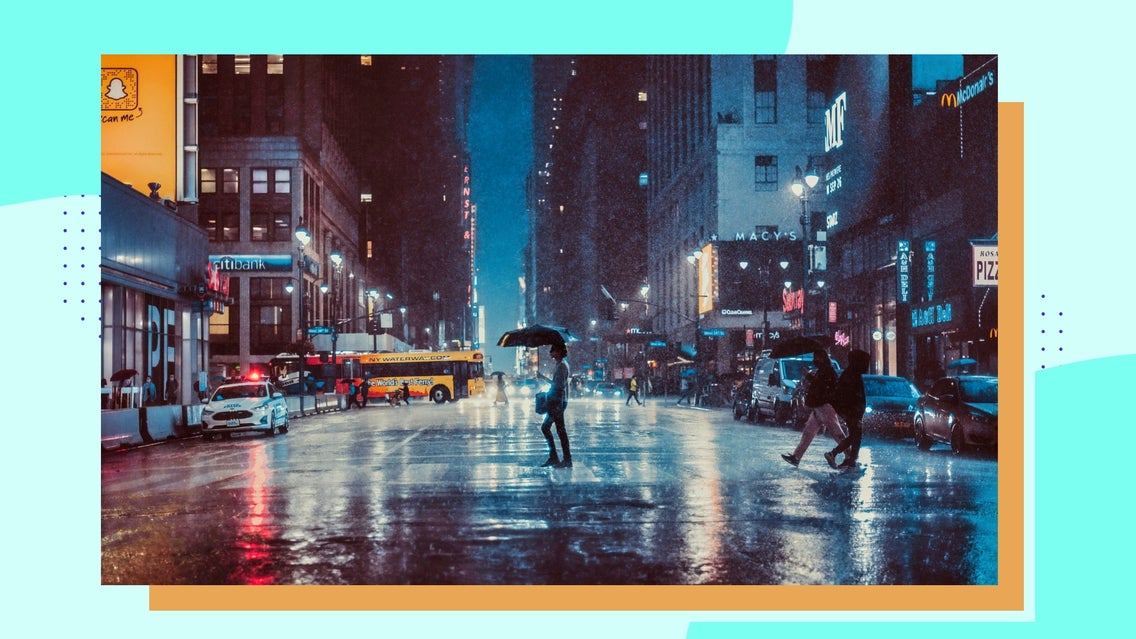
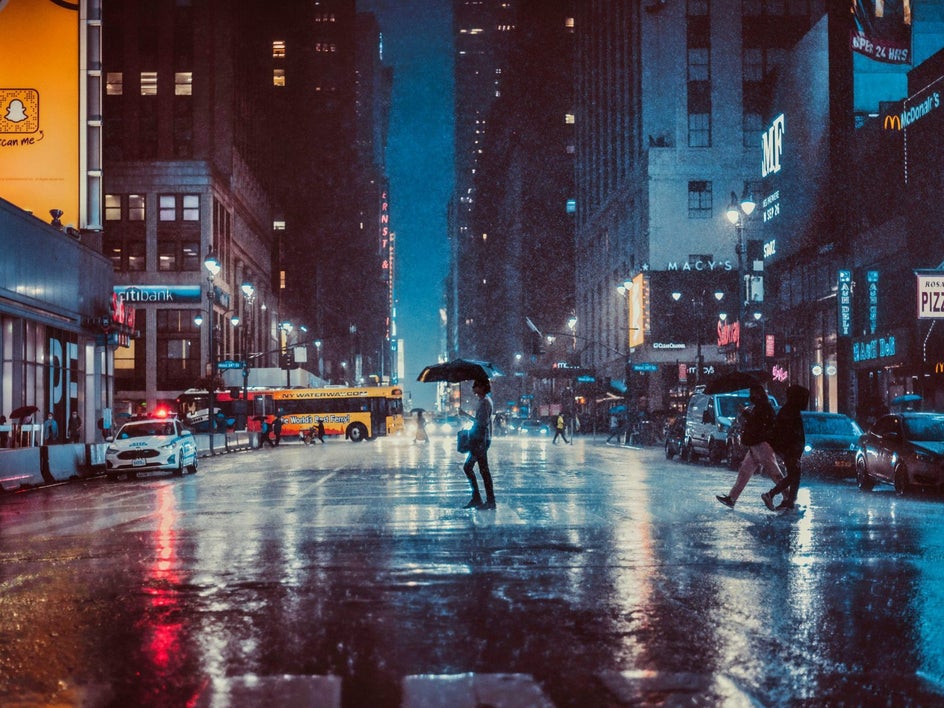
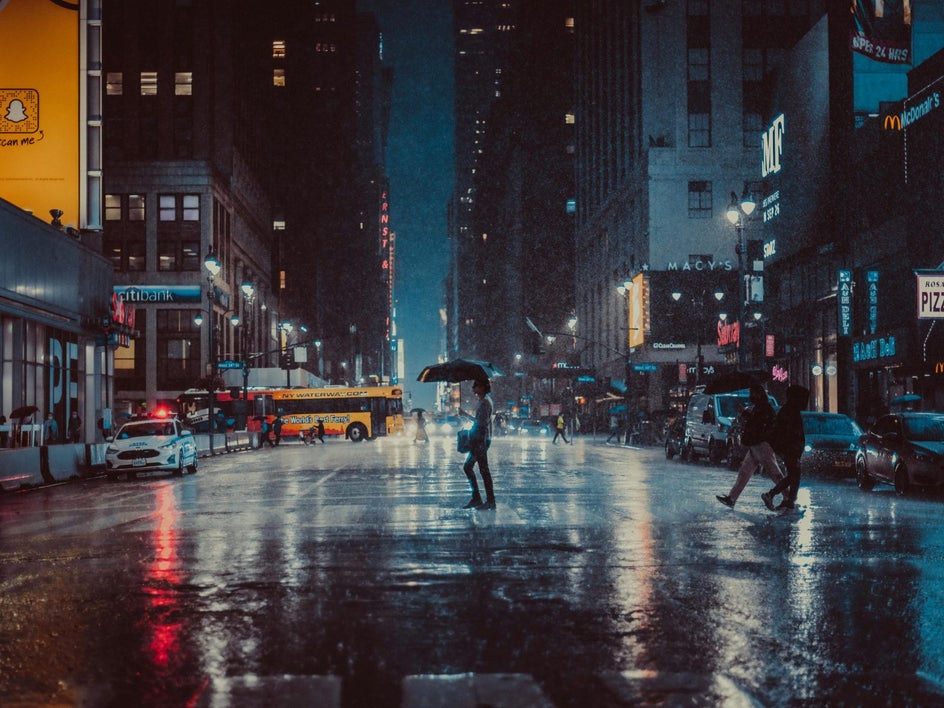
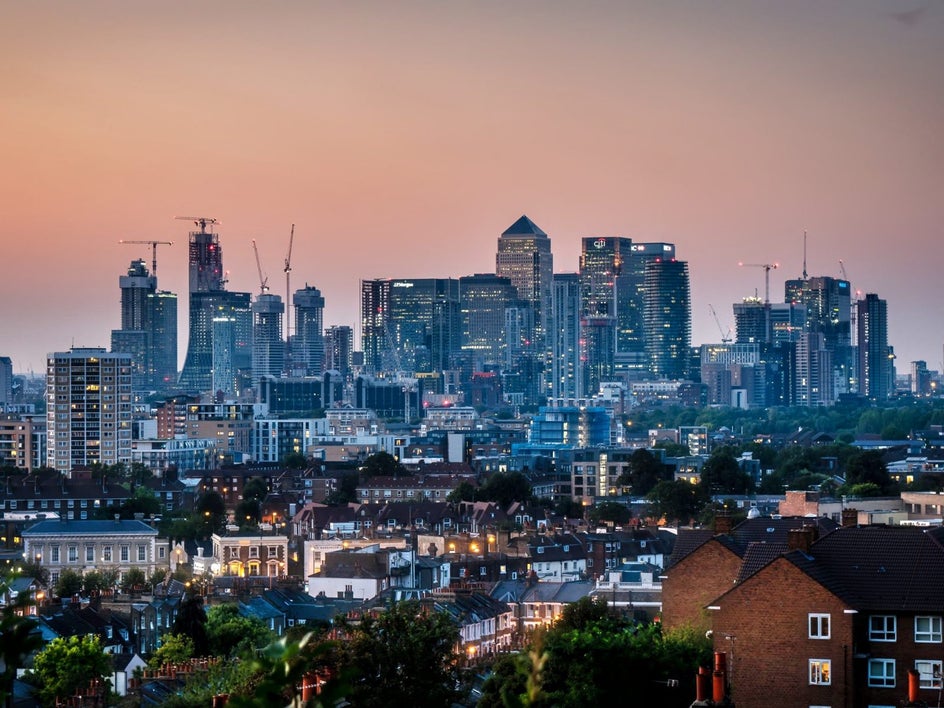
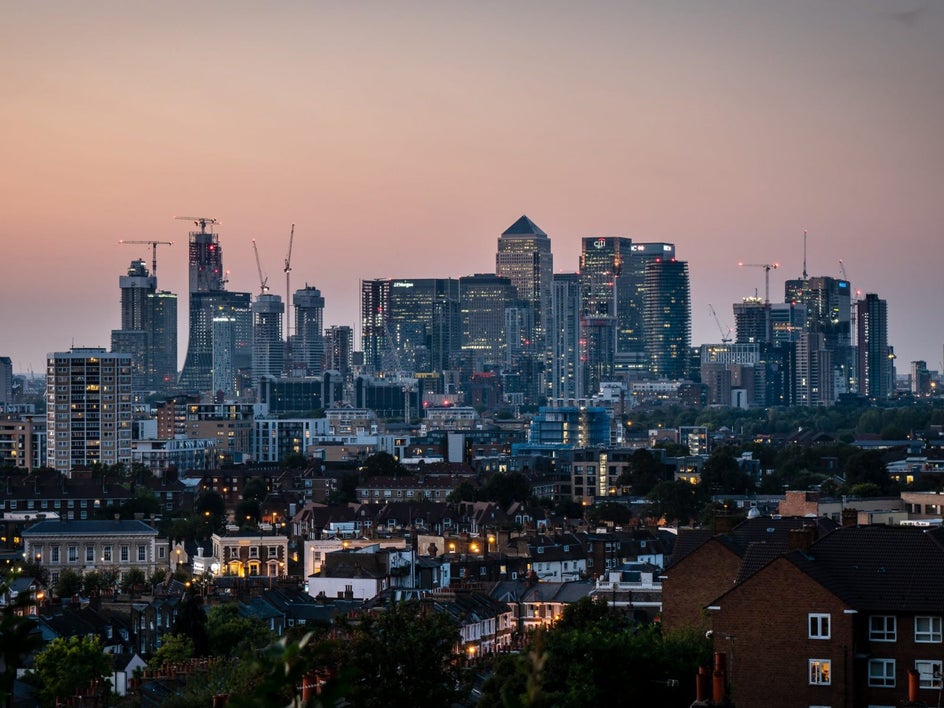
Cityscapes
Despite the twinkling lights and hustle and bustle, cityscapes can still look a little dull in-camera. With this photo, we used the image enhancement tool to automatically brighten the foreground and increase the scene’s vibrance. The result is a perfectly balanced image in terms of clarity and exposure, as well as a more saturated sunset that still looks natural.
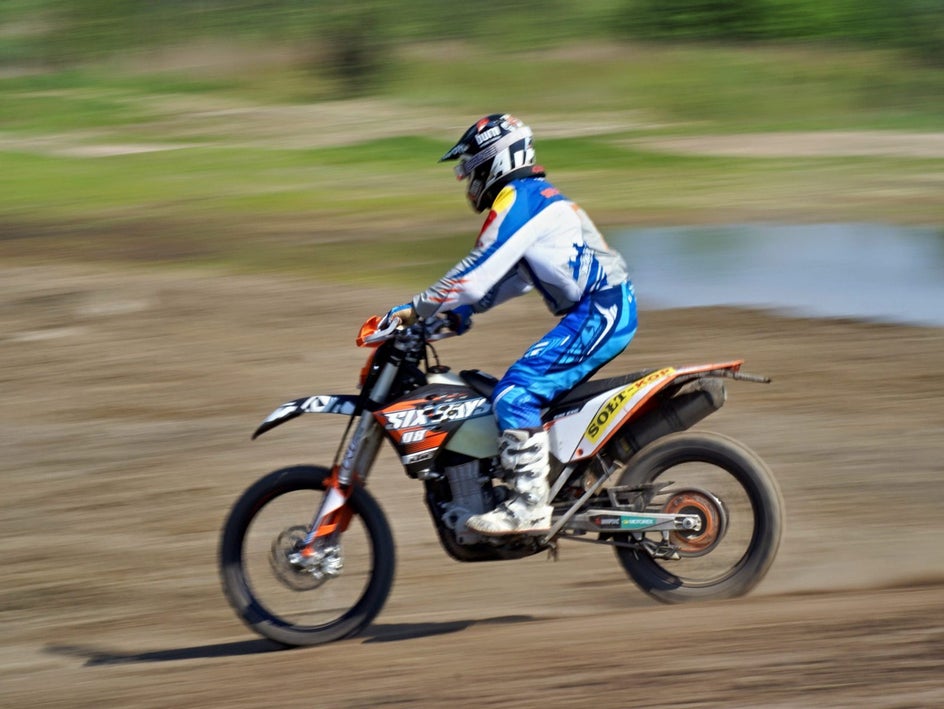
Action Shots
Capturing high-action scenes like sporting games, marathons, dancing, and more requires professional equipment and a thorough knowledge of in-camera settings – especially if you want to avoid too much blur. With the Image Enhancer tool, however, you can now capture action shots on your phone or everyday digital camera and still achieve that high-quality look. Just check out this example below to see how we transformed an average image into something awe-inspiring.

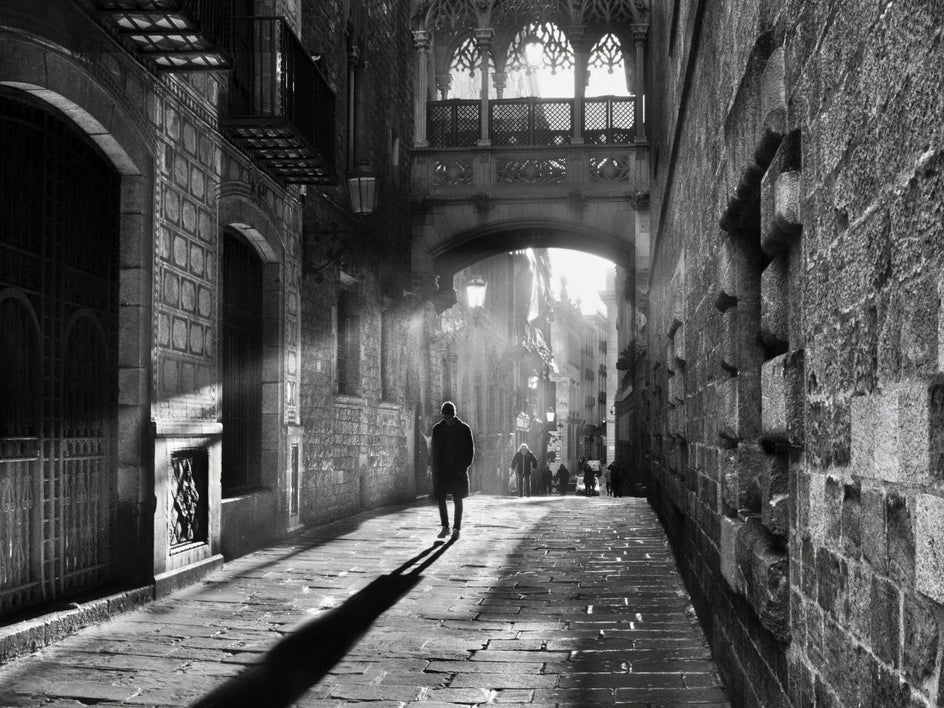
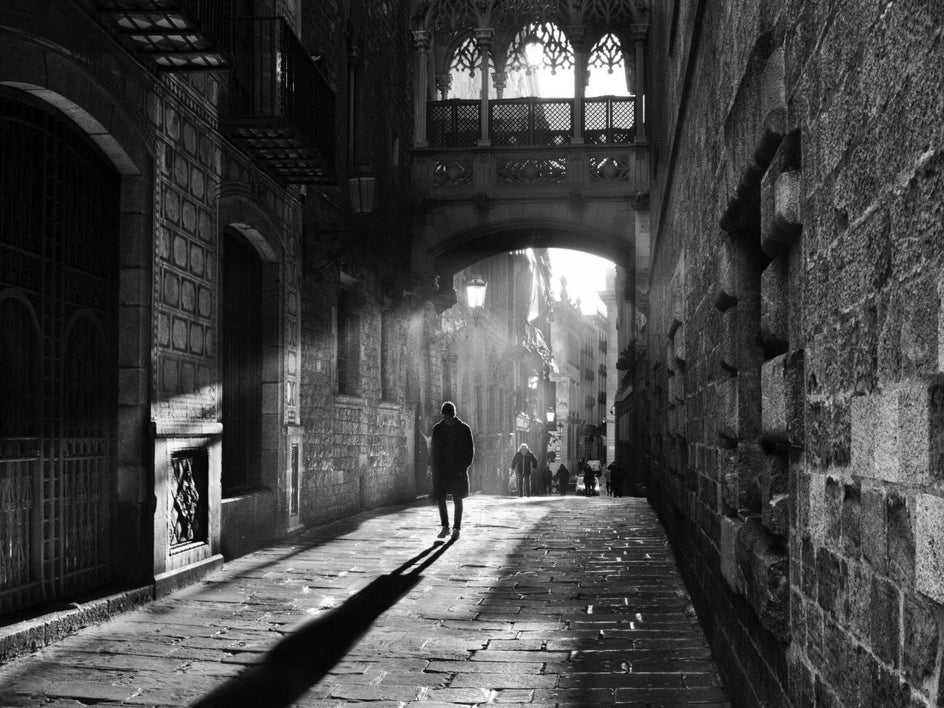
Black and White Photography
The AI Image Enhancer isn’t just effective in color photography. It’s also highly effective at bringing out the best in your black-and-white images, as it balances brightness, boosts contrast, and brings out clarity like no other. In the image below, the tool increased the original image’s highlights, brightness, and clarity to truly make this scene pop. Ornate details within the buildings are made more obvious, while evenly dispersed lighting softens the entire image.
Make a Good Photo Great With BeFunky's Image Quality Enhancer
The AI Image Enhancer is just one part of our entire AI photo enhancement suite, which features advanced tools like Deblur, Denoise, Old Photo Restorer, and more. Thanks to BeFunky’s incredible photo editing range, creating high-quality and eye-catching photos has never been so quick and easy.
Ready to instantly perfect your own photo using the power of AI? Check out the AI Image Enhancer to see just how amazing it really is!