Online Background Remover: Edit & Remove Image Backgrounds

With so many expensive editing programs on the market, having a tool that could remove a background in a single click sounds like it would be easy to find. That’s not the case. Typically, you have to learn these complicated programs, and then learn how to use the tools in them to achieve the same results that you can get with BeFunky’s Photo Editor in a single click – yep, it’s that good.
Built entirely by our in-house team, the Background Remover uses artificial intelligence to automatically detect the main subject in your image and remove your background in just a few seconds. We’ll show you how it works, plus a few of our favorite ways to get creative with the best online background remover available.
One-Click AI Background Remover Tutorial
Let's learn how to quickly remove the background of any image. Then, we'll go over some other use cases for the tool. When you are ready to get started, head to the Background Remover and upload the photo of your choice. Alternatively, you can find the Background Remover tool in the Remove/Replace category of the Edit tab.
Step 1: Apply the Background Remover
Once you click on it, the Background Remover tool will automatically get to work. Your image will appear with a transparent background and your subject intact.
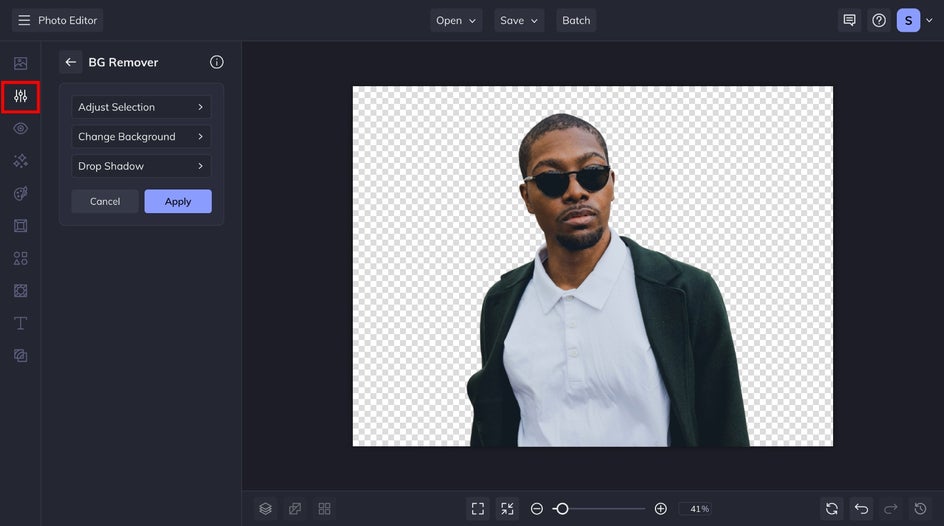
Step 2: Make Adjustments
If you need to make any changes to the removed areas, head to the Adjust Selection menu. Here, you'll find the Keep and Remove tabs for selecting or deleting areas affected by the tool.

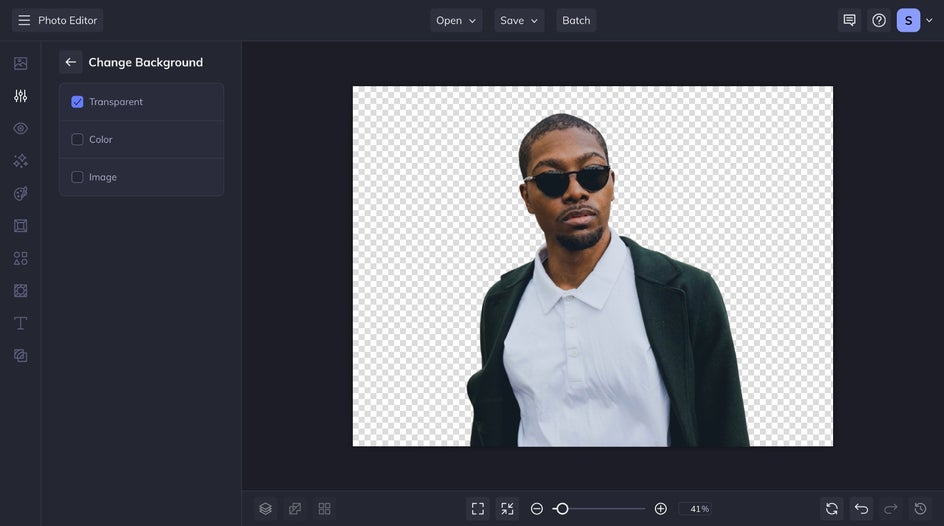
Step 3: Add a New Background
Once your background is removed, you can then replace it with a new one in just seconds. To do this, select Change Background from the main menu.
Once here, you can replace the background with a single color, a new image, or even keep it transparent. We're going to add a new image, so let's head to the Image tab.
Next, upload an image or select one from our massive Stock Image Library. Your new photo will appear as a swatch in the Select Background menu. Click on the Settings icon to make further customizations.
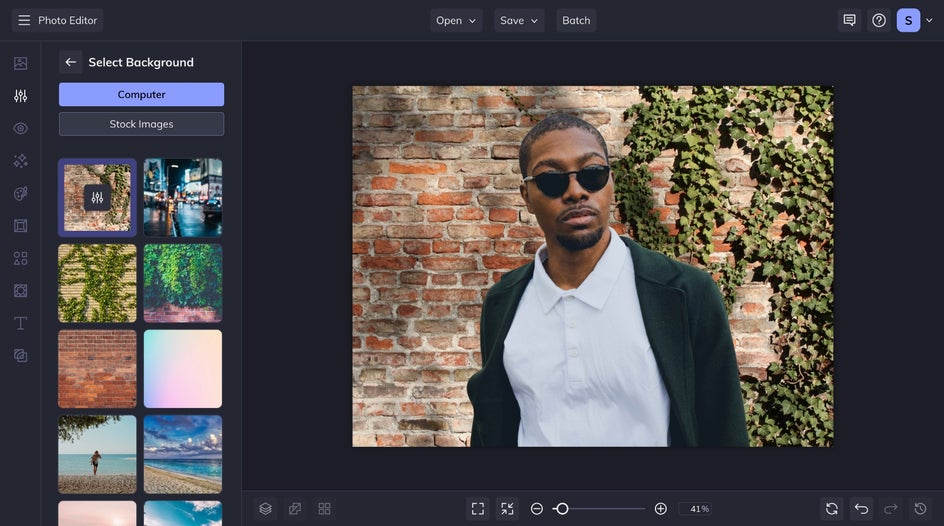
For our example, we scaled the new background to fit our subject more realistically. Then, we fiddled with the various sliders to blend the two seamlessly.

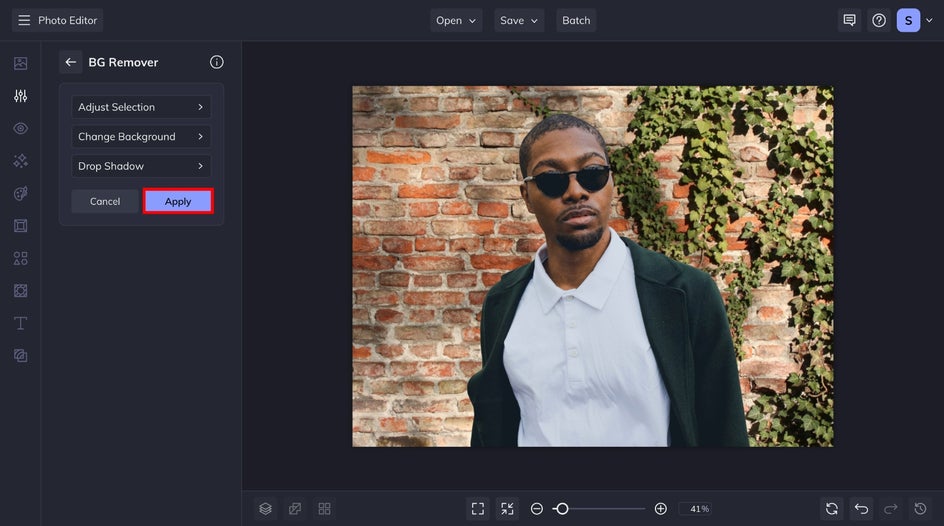
Step 4: Apply and Save Your New Background
Finally, let's head back to the main menu of the Background Remover. Note that you can also add a drop shadow to your subject if you want to pop more. When you're ready, hit Apply.
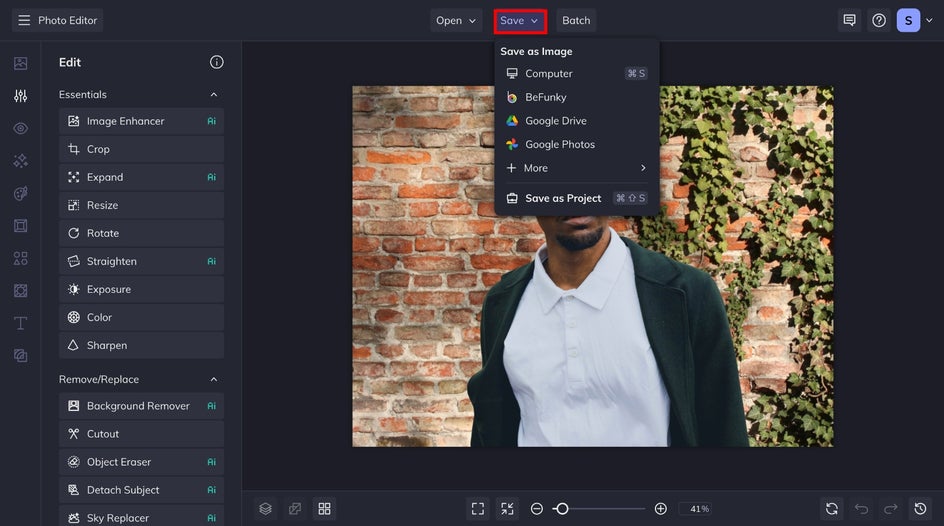
If this is your final destination, go ahead and click on the Save menu at the top of your canvas, followed by your desired location.
Remove, Replace, and Edit Backgrounds in Seconds
As you can see, there are so many uses for this tool and it is incredibly easy to use. Choose the Background Remover in BeFunky’s Photo Editor any time you need to remove an unwanted background, keep it transparent, or swap it with a different photo or color.


Background Remover Inspiration
Whether you need to erase or replace your image background, the Background Remover is going to be your new go-to. Here are a few more creative ways to use this AI-powered tool:
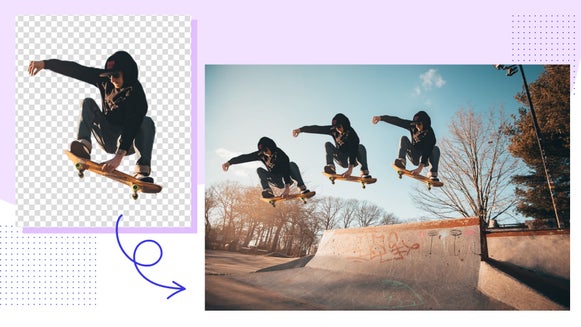
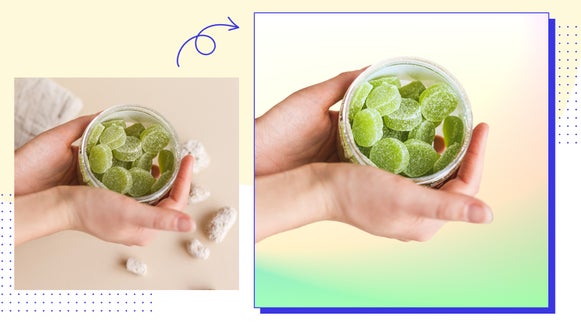
Go Transparent for Product Photography
A transparent background allows you to create cohesive product photography, website graphics, and logos that stand out. Brand marketing has never been easier! A transparent background can be trimmed and exported as a layer to then be applied to both print and digital materials.

Remove Distractions With a Solid Color Background
In some cases, adding a solid-colored background is the best way to make your main subject pop and remove distractions.
With our Background Remover, you have your choice of any background color imaginable – even the ability to match a color in your image. After removing the background with the Cutout tool, simply select Background Color and replace the transparent background of your original image with a new hue.


Create Eye-Catching YouTube Thumbnails
Add a new background to your YouTube thumbnail image for extra intrigue. Maybe the original background wasn't bold enough, or maybe you need to change the subject's location to better fit the video topic. Check out our handy guide for more thumbnail inspiration!