Make Design Projects Stand Out With the Background Remover

Background removal is one of the most useful tools in a graphic designer’s arsenal. Removing a background from an image or isolating a subject makes it possible to create visually stunning posters, professional-looking invites, unique album art, and more. In the past, erasing backgrounds used to require plenty of time and years of photo editing experience. These days, AI and other algorithms can complete the task in one click. But not all background removal tools are created equal.
The Cutout tool can be used directly within the Graphic Designer to erase backgrounds and instantly elevate graphic design projects. With it, you can turn any photo into a flexible design asset that can be layered in front of other objects. Additionally, the AI Background Remover can be found just a click away in the in-platform Photo Editor. With this comprehensive tool, you can replace backgrounds and customize your background removal further.
The Graphic Designer already offers hundreds of customizable templates, from social media templates to business marketing designs. Combined with one-click tools like the AI Background Remover, this gives you the ability to create better designs quicker. In this article, we’ll show you how to use BeFunky’s background remover tools to speed up the design process and enhance your creations, plus share some unique inspo and design ideas for your next project. Let’s get started!
How to Easily Remove Backgrounds in Design Projects
First, open up the Graphic Designer and choose a customizable design template. You can remove a background from a photo in any design, but here we’re using a poster design that already has an isolated subject as the central visual.

Step 1: Upload Any Photo to Your Project
Start by uploading the photo you want to use to the Image Manager. Double click or drag and drop to add the image to the canvas.

Step 2: Remove the Background
The simplest way to remove the background from a photo in the Designer is to click on it and then select Cutout/Remove BG in the Image Properties menu.

Once here, click Remove Background AI and the tool will instantly remove the background of your image, leaving just the subject. You can also use the selection tools to cut out any other parts of the photo that you may want to discard – or to restore parts of the photo you want to keep. Once satisfied with the results, click Apply.

Another option for erasing the background is to click Edit Image in the Image Properties menu. This will bring you to the in-platform Photo Editor, which features comprehensive, professional-grade photo editing tools including lighting adjustment and color grading filters.

The Photo Editor also features the AI Background Remover, located in the Edit tab. Like the Cutout tool in the Designer, this feature uses AI to remove the background instantly – with a few more customization options to try. Once you’re done, click Apply, followed by Done Editing Image to head back to your canvas.

Both methods are effective for erasing backgrounds from images, but have slightly different uses. The Cutout tool is ideal when you want fast, one-click background removal right inside the Graphic Designer. The Background Remover in the Photo Editor is a great choice if you plan to replace the background with a new image or make additional edits to your subject.
Step 3: Finish Up Your Design
Use the Customize, Text, and Graphic tabs to wrap up the remainder of your design. Simply click on any existing asset to edit color and content. The canvas background color can be edited in the Customize tab, while the Graphics Library can be used to add new vector graphics. The easy drag-and-drop interface makes rearranging objects a breeze.

Finally, click Save at the top of your canvas to save as a high-quality PNG for digital use or a print-quality PDF for print use like flyers, brochures, and posters like this one.

And that’s it! With BeFunky’s professionally designed templates and one-click background removal tools, creating a beautiful design can be accomplished in minutes, no matter your experience level.

Creative Design Ideas Using the Background Remover
The Background Remover is one of the most versatile tools in graphic design, allowing you to better layer assets, add greater depth, and create more visual interest. Here are a few instances where you may want to use it to enhance a creative project:
Create a Pet Portrait
Design printable art of your favorite furry friend by combining the Background Remover with Artsy effects. You can use these digital pet portraits as wall art, greeting cards, and more.

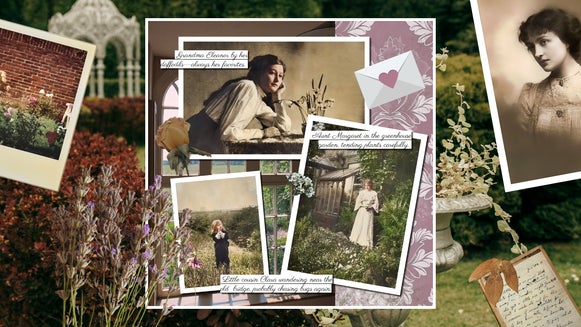
Add Depth to a Collage
The Collage Maker is great for stitching together multiple photos in one image, with tons of different grids and other layout options. But you can also take things a step further by creating a custom collage, using the Background Remover to layer photos and create a design that’s reminiscent of a physical mixed-media collage. It’s also the perfect tool for digital scrapbook collages.

DIY a Birthday Card
Make a loved one’s day special with a custom birthday card using one of BeFunky’s digital birthday card templates. The Background Remover can be used to put your recipient’s photo front and center while still layering text in the background.

Elevate Designs With the Background Remover
From creating book covers to enhancing Instagram stories, a whole new world of design opens up when you learn how to utilize the Background Remover. The Graphic Designer makes it easy by integrating photo editing and background removal into an intuitive design interface. Try it for yourself today and achieve cleaner, more professional-looking designs in minutes with the Graphic Designer!