Learn the Basics of Removing and Replacing Elements in BeFunky’s Photo Editor
Before BeFunky’s Photo Editor, removing or replacing certain aspects of your photos was something that could only be done with expensive programs like Photoshop. Now, with BeFunky’s incredible AI-powered tools, removing, replacing, cutting out, and erasing objects just got a whole lot easier and cost-effective!
We are going to show you the top five tools for removing and replacing objects and colors in your photos. We are also going to break these tools down in order so you can follow along and see which is the best tool for the photo you’re looking to edit.
To start, we are going to look at the Remove/Replace tools in the Edit tab of BeFunky’s Photo Editor, which has tools that can be used on both Mobile and Desktop.
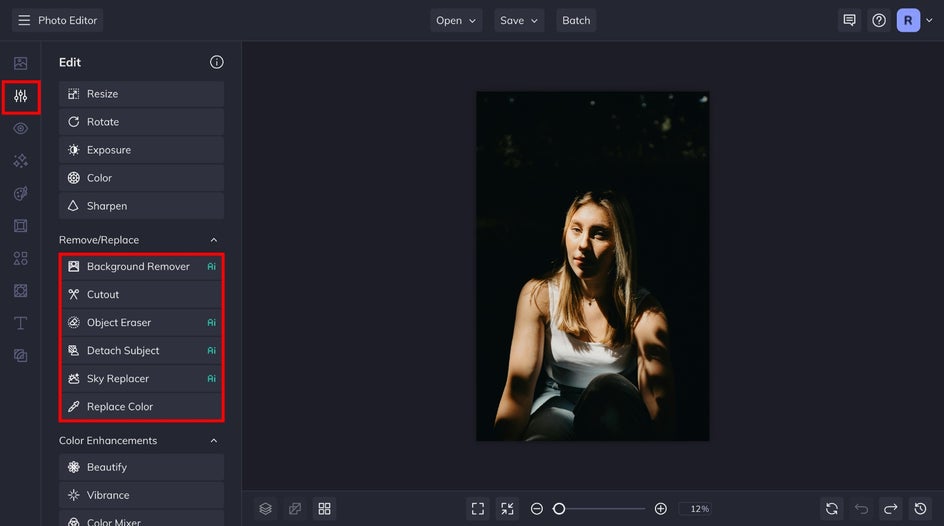
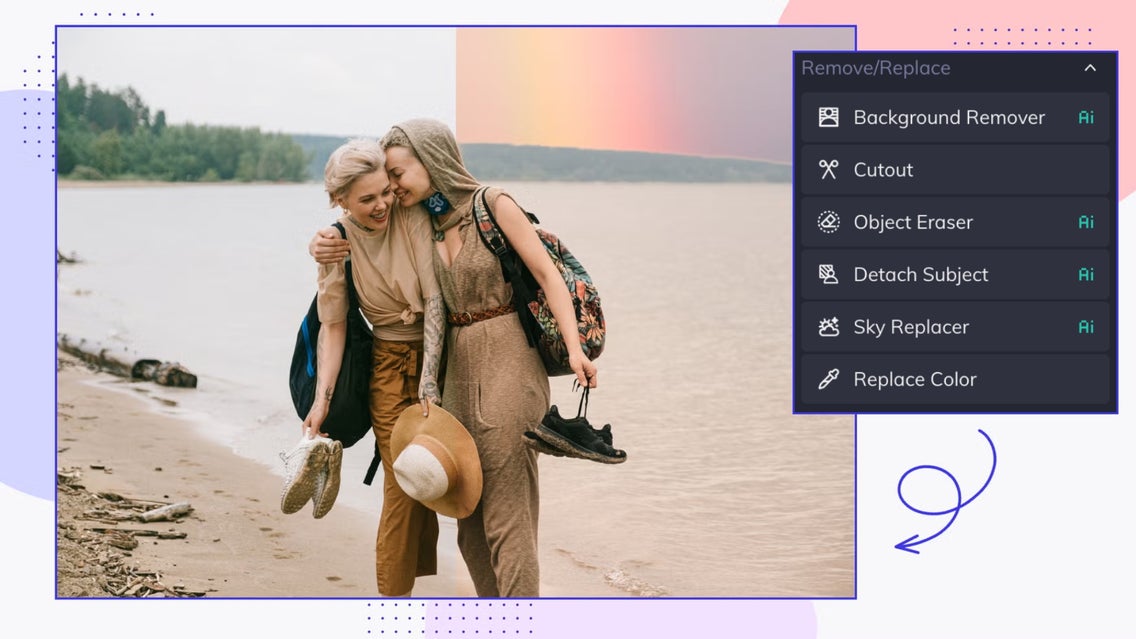
The Edit Tab’s Tools for Removing and Replacing Anything
We are going to look at the top five tools in the Remove/Replace tab. These include removing backgrounds with the Background Remover, cutting out objects with the Cutout tool, using the Obejct Eraser to erase any object in seconds, using the Sky Replacer tool specifically for replacing and enhancing skies, and using the Replace Color tool to replace any color in your image for another one.
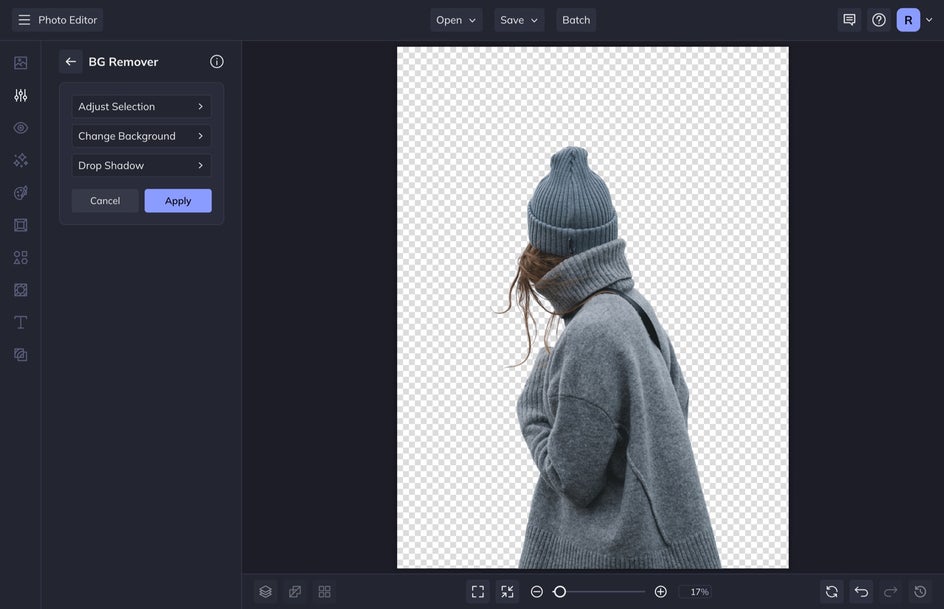
Background Remover
Built entirely by our in-house team, the Background Remover uses artificial intelligence to automatically detect the main subject in your image and remove your background in just a few seconds. This is the fastest tool for removing the background of any image. Not only that, but you can either keep the background Transparent, set it as a single Color, or as an entirely new Image.
From the Edit menu, select the Background Remover tool under the Remove/Replace tab. The AI will automatically get to work. detecting the main subject in your photo and erasing the background behind it in seconds. Any removed area of your image will look like a checkerboard, which means it’s now transparent. You can stop here or keep going in order to make adjustments like replacing the background with a color or a new image.
I like using this tool most when I want to replace the background of my image with a new, more dynamic image. It can really make a difference to your photo. Just look at the before and after here:


This is also a great tool to use for product photography or when you want to change your background to something more simple like a single color. You can either choose a color from the original background in order to remove the unwanted shadows, or a new color from the product itself to make it pop.
Cutout
The Cutout tool is a powerful tool for when you want to cut out a single subject from an image. This tool is perfect for when you want to cut out a subject from your photo and export it as a layer to use elsewhere in other design work or promotional material.
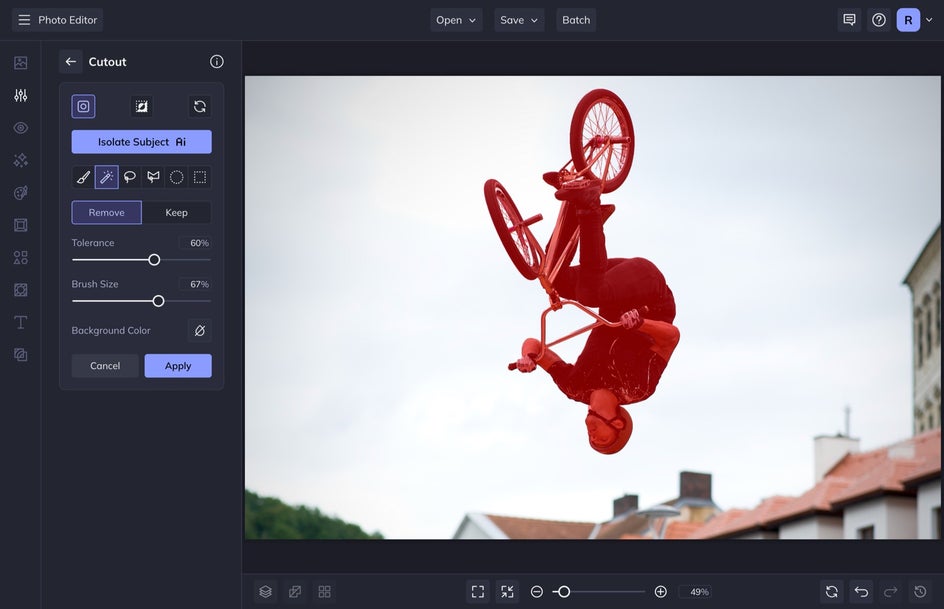
From the Edit menu, select Cutout from the Remove/Replace drop-down. Select Isolate Subject to let BeFunky do all the heavy lifting. There are so many options included within the Cutout tool that it makes cutting out any subject a breeze. Some of my favorite brushes are the Magic Brush, the Lasso, and the Polygon tool. The Magic Brush makes it so simple to clean up any areas where the Isolate Subject tool didn’t quite get it right the first time.
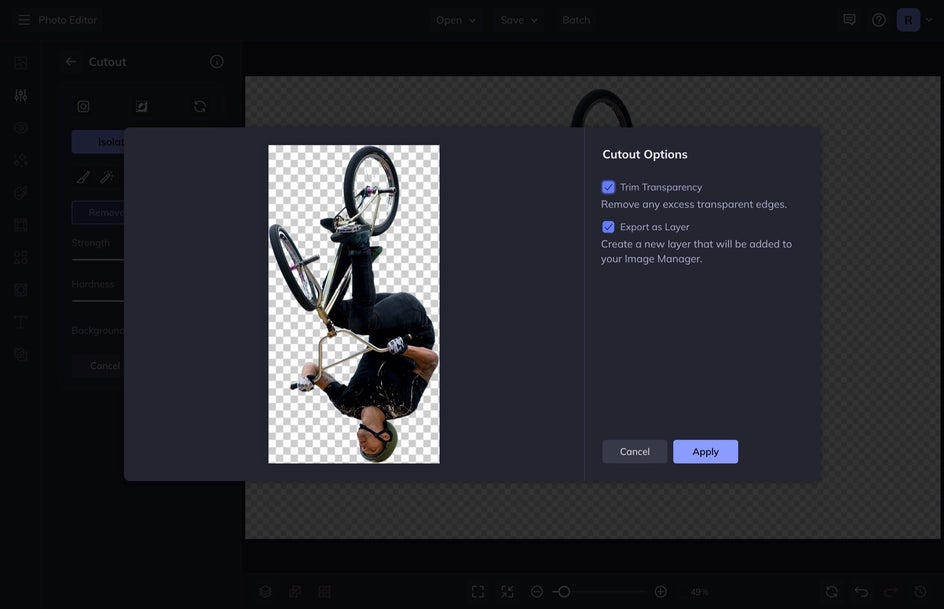
Because this tool gives you the option to Export as Layer at the end, you can literally turn your subject into its own layer that you can then use in other graphic design work.

Object Eraser
The Object Eraser will remove your selected subject and then fill in the blanks of where your subject once was. It is the only object remover on the market that works on high-res images.
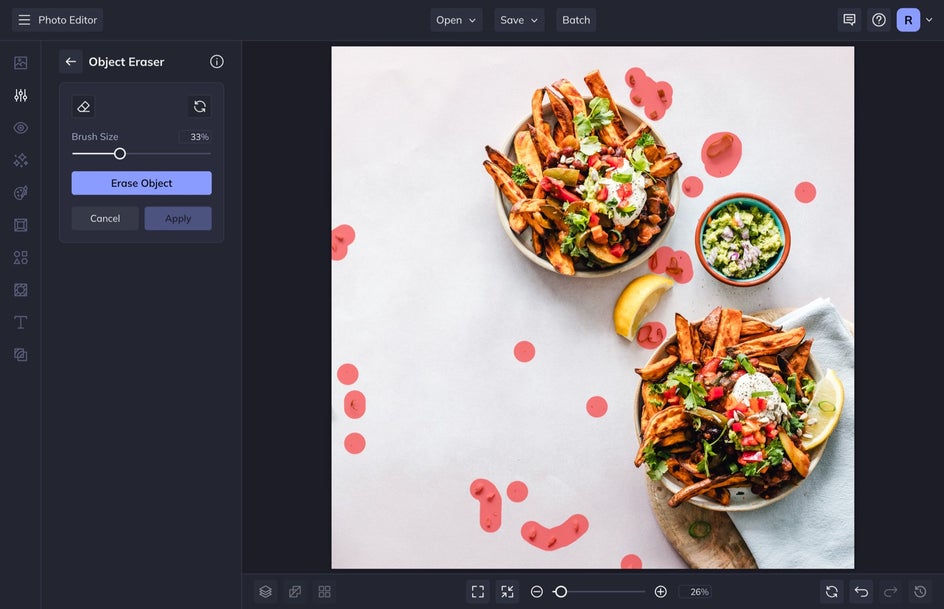
To use this tool, select the Object Eraser tool from the Edit tab. After you select the tool, adjust the Brush Size and paint over the object that you want to erase, making sure to get as close to the edge of the object as you can. If you want to start over, you can select Clear, and if you are happy with your selection, click Apply. Voila!
Not only is the Object Eraser tool helpful for getting rid of distracting objects like photobombs or stop signs, but it can also take care of small things like a stray crumb in your food photography or a tattoo on someone’s arm.


Sky Replacer
The Sky Replacer tool is just as the name suggests, made for skies! This tool uses powerful AI to detect and replace the sky within any photo in just a few clicks.
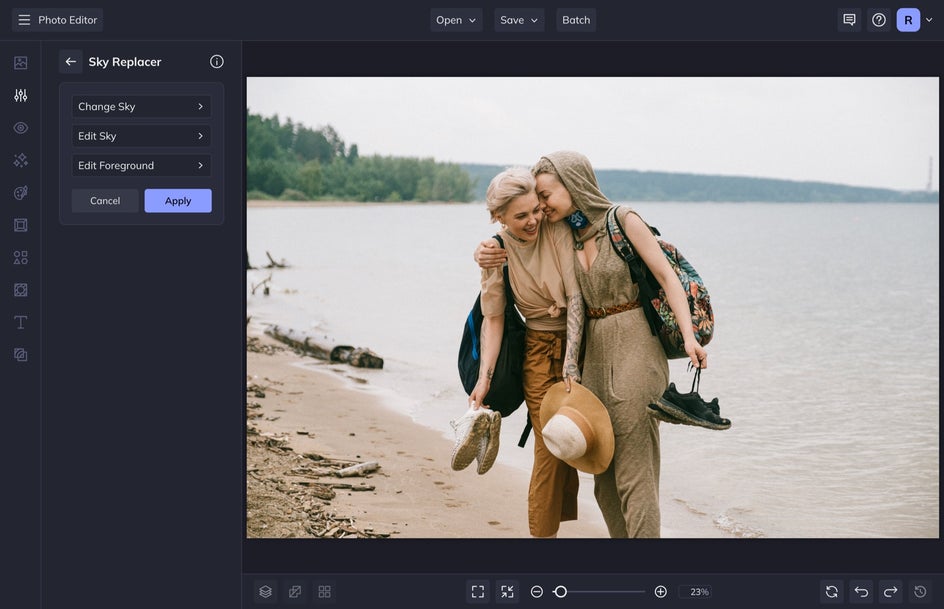
Head to the Edit tab. From here, find the Remove/Replace drop-down and select Sky Replacer. Click on the tool and in seconds you’ll see the A.I. at work analyzing the photo. Once it is finished doing this, you can select Change Sky, Edit Sky, or Edit Foreground. Select Change Sky to find the replacement photo you like. You can either replace the photo with one you have by selecting Computer, or you can select Stock Image to choose from hundreds of stock sky images we have in BeFunky.
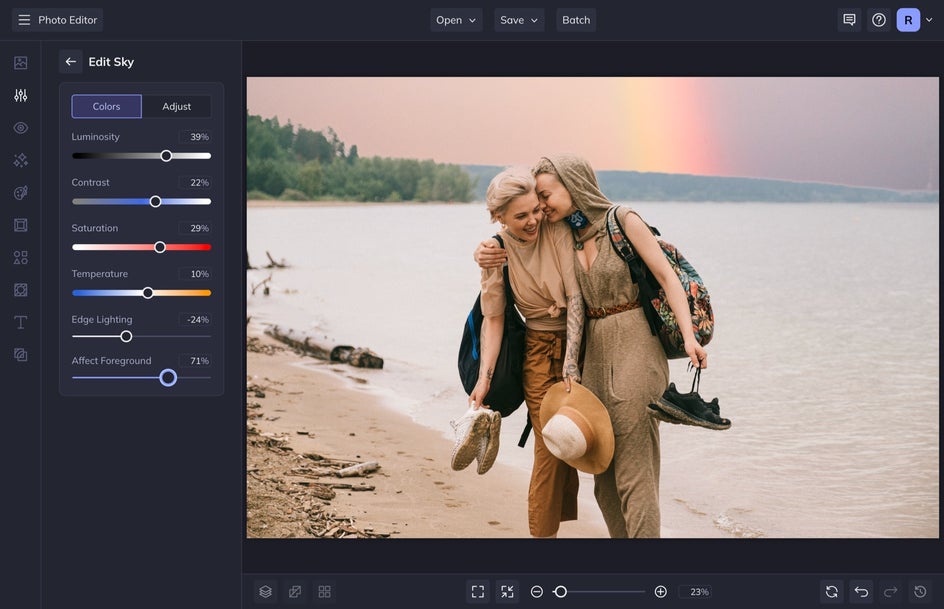
It also has foreground and sky editing options in the tool so that you can make fine-tuned adjustments to blend the sky with the foreground. as well as the Adjust section that has all sorts of ways to blend the new sky.


Detach Subject
Detach Subject utilizes the same super-accurate detection algorithm of the Cutout tool to separate your subject from the image and uses generative AI to fill in the background. This allows you to move and adjust the subject as you please – while keeping your original background intact! You can move, rotate, and scale your image layer for easy subject manipulation.
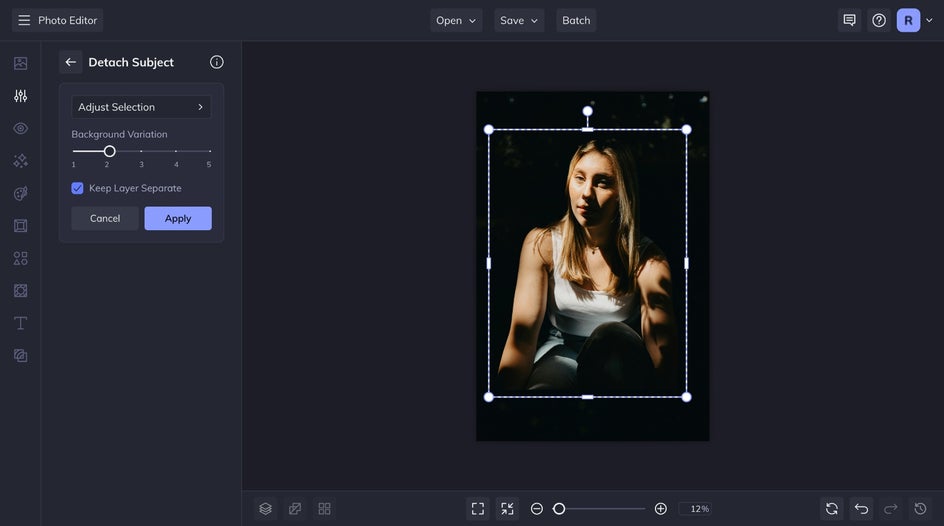
To use Detach Subject, simply click on the tool and watch as your subject is automatically separated from the background. Then, you can move it around as you please. Choose from the available background variations to seamlessly fill in the empty space behind your subject. Keep the Keep Layers Separate box checked if you want to continue manipulating the layers after applying the tool. Finally, click Apply when you're satisfied.


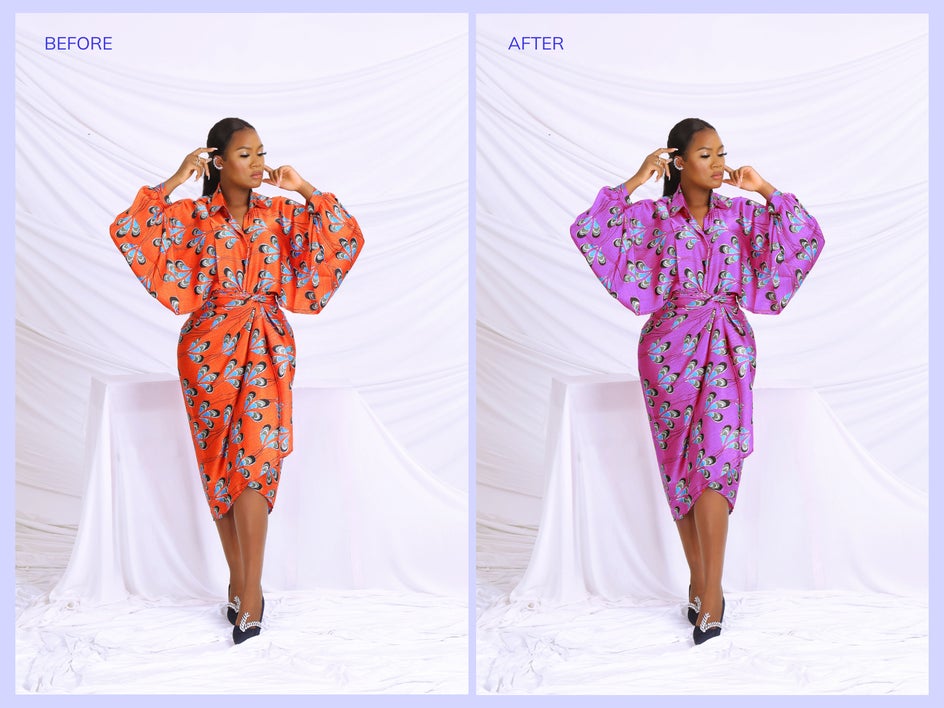
Replace Color
The Replace Color tool allows you to select a specific hue within your image and replace it with a new color. With this tool, you can change the color of an object to show color variation, change your hair color to see what hue looks best, or enhance product photography to give your products a more accurate color to how they appear in real life.
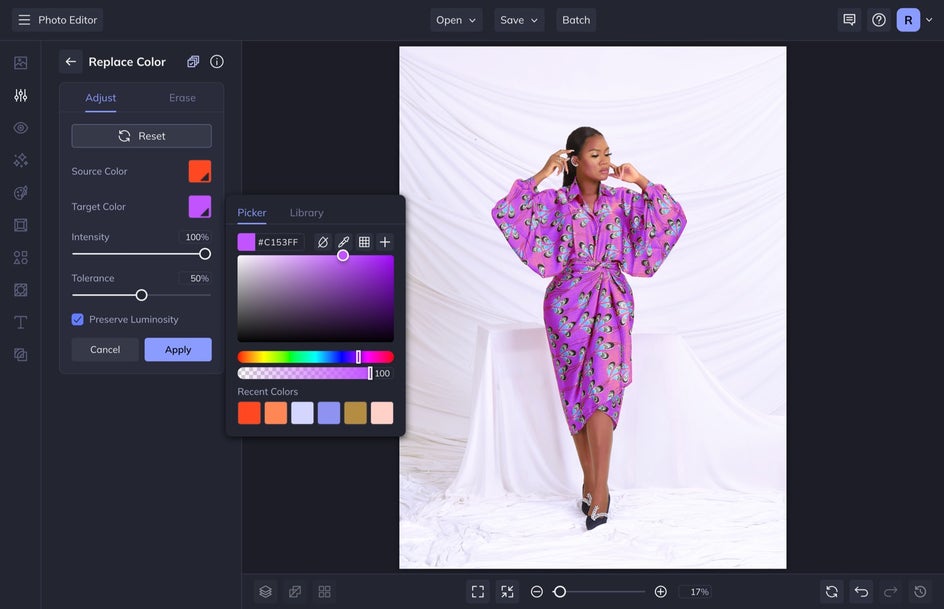
To use this tool, select Replace Color from the Edit menu. Select the Source Color that you want to change and then select the Target Color, which is the color variation you want to showcase.
Easily Remove or Replace Anything in Your Image
These tools in the Remove/Replace drop-down are the best tools to use when you need to remove or replace an object or color in your image. Once you feel you have these tools down, it is time to start using them for bigger design projects like creating a hero image for a marketing campaign. BeFunky’s Photo Editor has so many tools for you to master. Once you learn the Essentials, and then these more advanced tools, check out our other Learn articles for more ideas!