Object Eraser vs. Clone Stamp Tool

When it comes to editing photography, one of the most common dilemmas is when you have to remove an object or person from your image. Whether it’s an unsightly sign or a pesky photobomber, you don’t have to let these unwanted elements ruin your image.
BeFunky’s Photo Editor is home to two exciting tools that allow you to remove these things from your photo while still preserving its integrity: the Clone Stamp tool and the Object Eraser. While each tool has many similarities, they also have some key differences. In this article, we’ll break down exactly what these tools do, as well as how you can use them to edit your photos to perfection!
What are the Differences Between the Clone Tool and Object Eraser?
So, what makes the Clone stamp tool and Object Eraser so unique? While their ability to remove unwanted objects or people from your photos is second to none, they also allow you to achieve so much more. Here’s how each tool works, as well as which one is best for certain scenarios.
Clone Tool
BeFunky's Clone Tool enables you to copy pixels from one part of your image and transfer them onto another. This enables you to duplicate (or, as the name suggests, clone) certain areas of your photo. This action can be beneficial for covering up unwanted things like objects, people, text within your image, and much more.


For example, you can use the Clone stamp tool to create patterns through the repetition of certain elements. You can even duplicate objects or textures within your image to add emphasis. To add more pizzazz to a floral backdrop, for example, you might use the Clone tool to duplicate more of the existing flowers. The same can be done for images featuring confetti, clouds in the sky, or a textured wall – just to name a few.


Object Eraser
The Object Eraser, on the other hand, utilizes A.I. to fill in the blanks of where your subject once was in your photo. This is the major difference between both tools, as the Clone tool only works if you have a source to sample from. It can’t generate entirely new pixels to insert into your image like the A.I.-powered Object Eraser can.
BeFunky’s Object Eraser is also the only one of its kind that works on high-res images. It’s a revolutionary new tool that will transform your photo editing experience like never before.


How to Edit Your Photo Using the Object Eraser
Now that you know the major differences between both the Object Eraser and Clone stamp tools, it’s time to show you exactly how they work. In this tutorial, we’ll be showing you how the incredible new Object Eraser works. Head straight to the Photo Editor and open a photo you wish to edit to begin.
Step 1: Locate the Object Eraser
You’ll find the Object Eraser within the Edit menu, in the Remove/Replace category.

Step 2: Select and Apply Your Selection
Within the tool, you’ll have the option to adjust your Brush Size using the corresponding slider. You can then use your cursor to paint over whatever you wish to remove from your image.
If you need to remove areas you’ve selected with your brush, just click the Erase Selection button in the top left corner. If you want to start over, you can also click the Clear button in the top right corner.
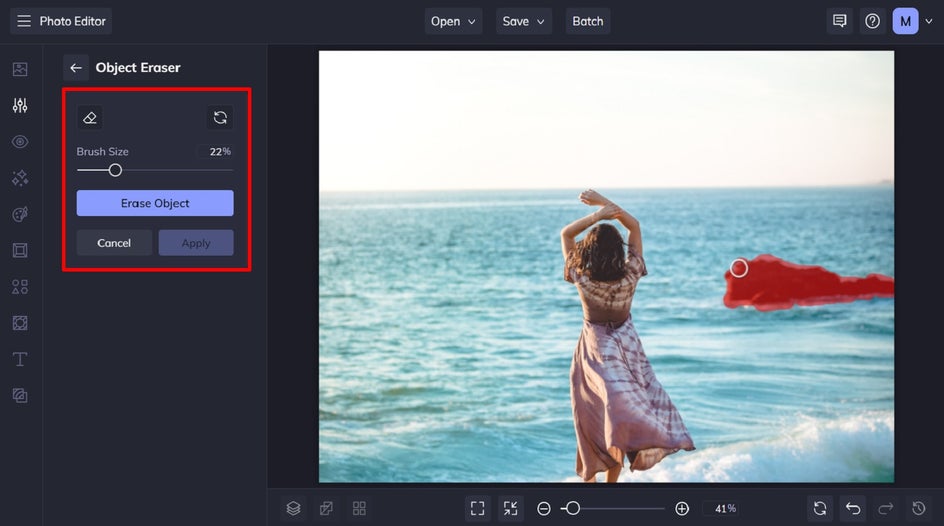
Once you’re happy with your selection, just click the Erase Object button to make it disappear before your eyes. If you don’t wish to make any more adjustments to your object removal, then click Apply.
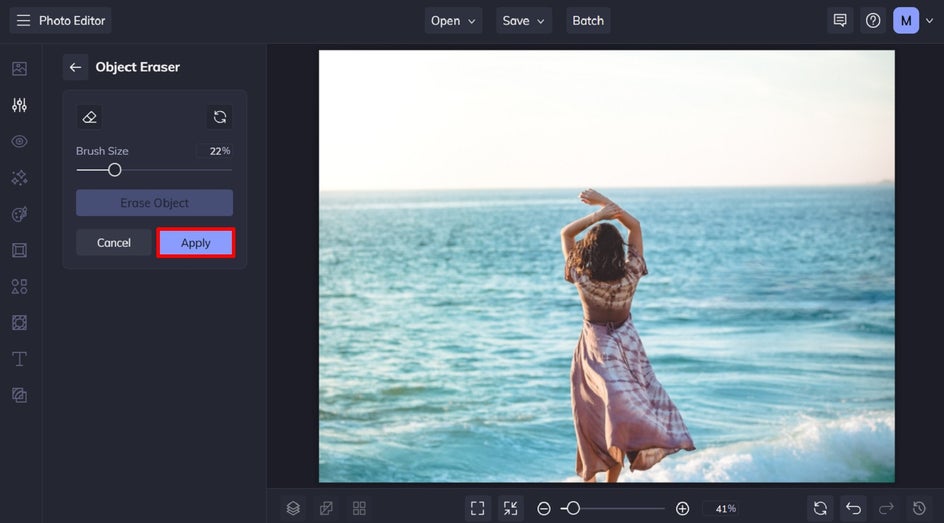
Seamless Object Removal Using the Object Eraser
The Object Eraser tool works just like magic! It’s hard to believe there were any rocks within this image in the first place.
How to Edit Your Photo Using the Clone Stamp Tool
Want to use the Clone stamp tool to edit your photo instead? Head to the Photo Editor and open your image. Then, follow the simple steps below.
Step 1: Locate the Clone Tool
Navigate to the Touch Up menu, then select Clone. You’ll find it located within the Skin category.

Step 2: Adjust the Brush Size, Hardness, and Strength
Your Brush Size determines the surface area of your Clone tool, while Brush Hardness determines how soft the outlines of your edits will be. Generally, using a lower Brush Hardness can help your chosen source blend in with the target area and appear more natural-looking. Finally, Brush Strength simply determines how strong or obvious the effect will be.
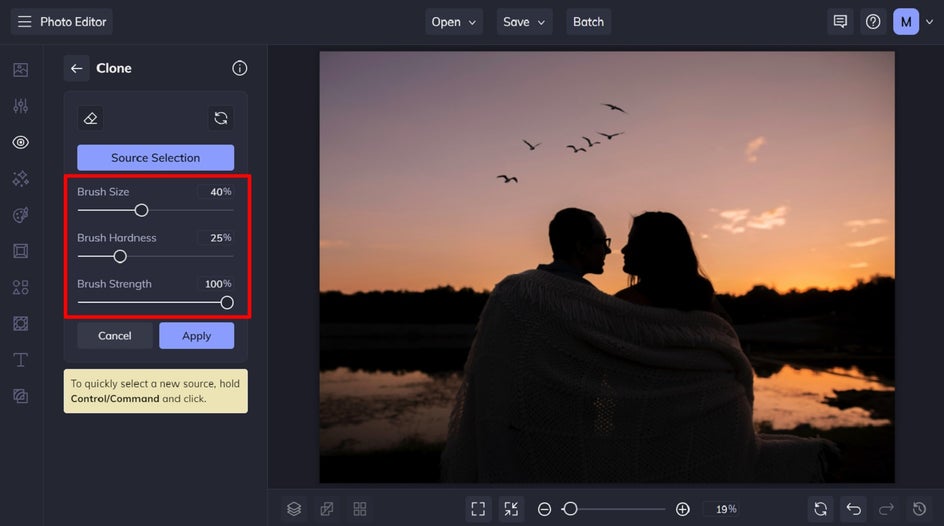
Your clone source is the element of your photo that you wish to duplicate and then use to cover up any unwanted sections. When you hover your cursor over your image, you'll notice a circular-shaped target appear. This target will be used to select your Clone source.

Step 3: Start Cloning
Place your cursor over the area you wish to paint in the cloned area, then click and drag to begin painting. The source selection target will move in unison with your cursor to show you both the source selection and the area you're duplicating.

Pro Tip: Need to switch up your source selection? Just hold the Command/CTRL key and click on the new area of the image you want to use to clone.
When you’ve finished removing your unwanted objects, simply click Apply to apply your changes.
Image Cloning Made Easy With the Clone Stamp Tool
Within just a few clicks, we were able to remove the birds from the sky in this photo to keep the focus entirely on the couple in the foreground.


Ready to Use BeFunky’s Object Eraser or Clone Tool?
Thanks to BeFunky’s revolutionary Object Eraser and Clone tools, removing unwanted areas of an image has never been so intuitive. Rather than letting an unwanted object, photobomb, or anything else ruin a perfectly good photo, you can simply make a few tweaks within the Photo Editor to achieve photo perfection.
Head to the Photo Editor to try both of these object-removal tools for yourself. You won’t believe how realistic your results are!