


Learn the Essentials of the Edit Tab in BeFunky’s Photo Editor

As a photo editing beginner, it is difficult to know where to start or what the most efficient editing process is. Not only is this process different for each photographer, but most of the time, “creatives” are extremely private and gatekeep a lot of their information, since it is their business after all. We aren’t like that here and want to explain the top five tools every photo editor needs.
We are also going to break these tips down in order so you can follow along and start building your own customizable process. Each time I edit photos, I tend to follow this order – this helps to keep my images looking consistent and it saves me time in the long run.
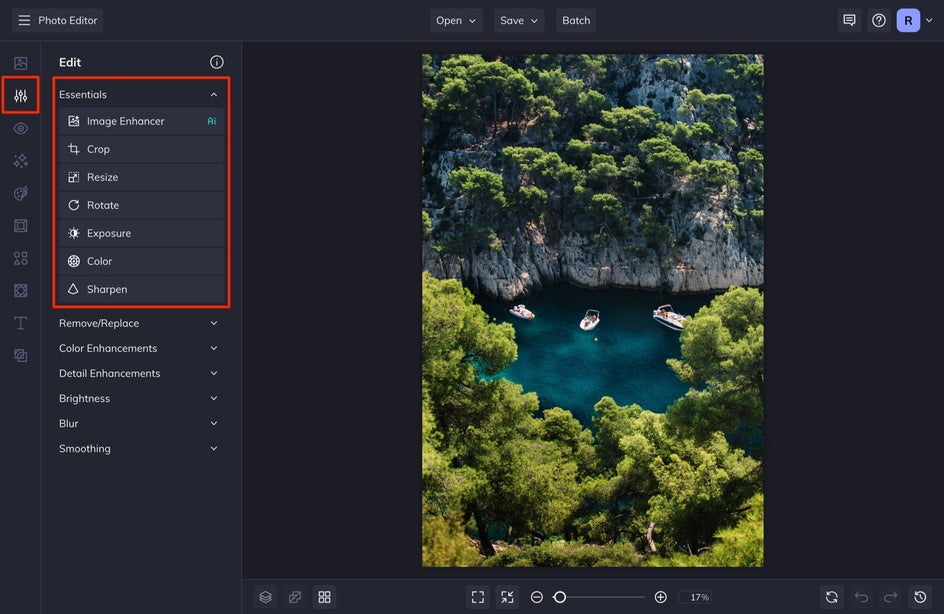
To start, we are going to look at the Essential tools in the Edit tab of BeFunky’s Photo Editor. The best part about these photo editing tools is that they are all free to use on both Mobile and Desktop.
Essential Tools for Photo Editing in the Edit Tab
To start, upload your image to BeFunky’s Photo Editor by selecting Open and then Computer, or simply dragging and dropping your image straight onto the canvas. After you do this, select Edit from the left-hand menu. We are going to look at the top five tools in the Essentials tab.
Crop Tool
Whenever I start editing an image, I want the composition to be correct before I start with anything else. The Crop Tool is the way to achieve the perfect composition.
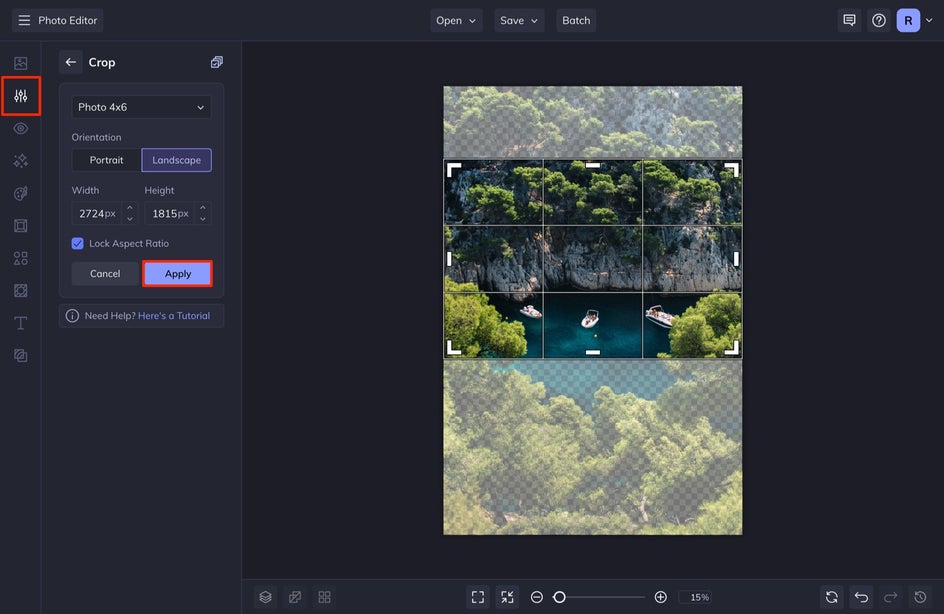
Select Crop from the Essentials dropdown menu. From here, you can select from our pre-made dimensions or customize them by entering your own values in the Weight and Height sections. If you want to maintain the same ratio as a 4x6 but need your long edge to be 1800px, you can select Lock Aspect Ratio and enter 1800 in either the Weight or Height section (depending on if you want a Landscape or Portrait photo). This will allow you to maintain the same ratio with the correct dimension. When you are done, select Apply.
Exposure Tool
Next is the Exposure tool. From the Essentials drop-down, select Exposure. From here, you can adjust the Brightness, Contrast, Highlights, and Shadows. If you simply need a quick adjustment, you can edit these and press Apply. If you want to have greater control over the exposure of your image, select the Erase tab.
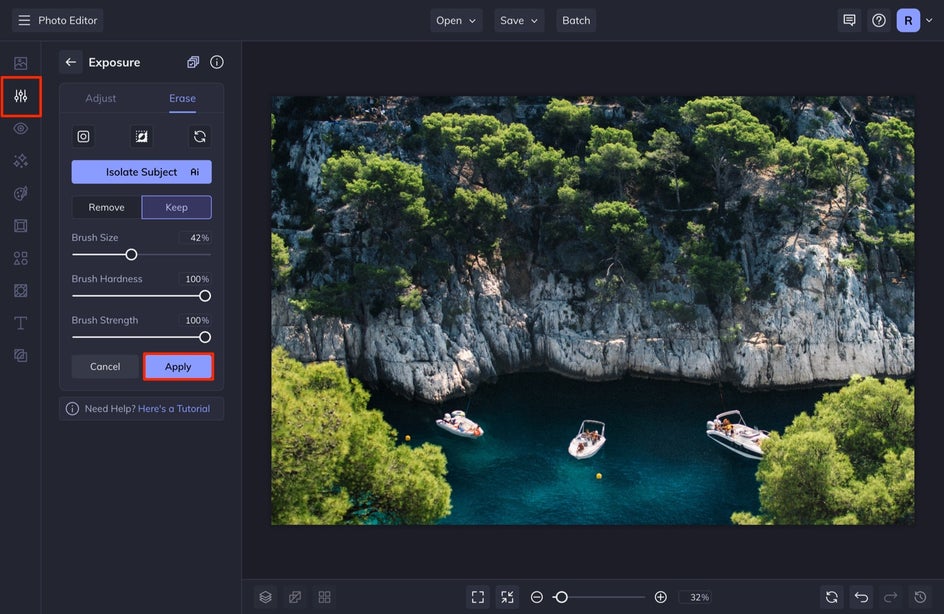
Once you select the Erase tab, you can then use the brush to paint over sections of your image that you want brighter or darker. If you have a subject that you want to make brighter, you can use the Isolate Subject tool. This tool isolates your subject so that you can edit the exposure of your subject and your background separately.


Color Tool
The Color Tool is the next step in our process! After you’ve adjusted the composition and the exposure, there is magic to be done with the Color Tool. This is singlehandedly one of the quickest ways to adjust the overall impact of your image With a few simple tweaks of the Hue, Saturation, and Temperature, you can turn an ordinary photo into something truly high-end.
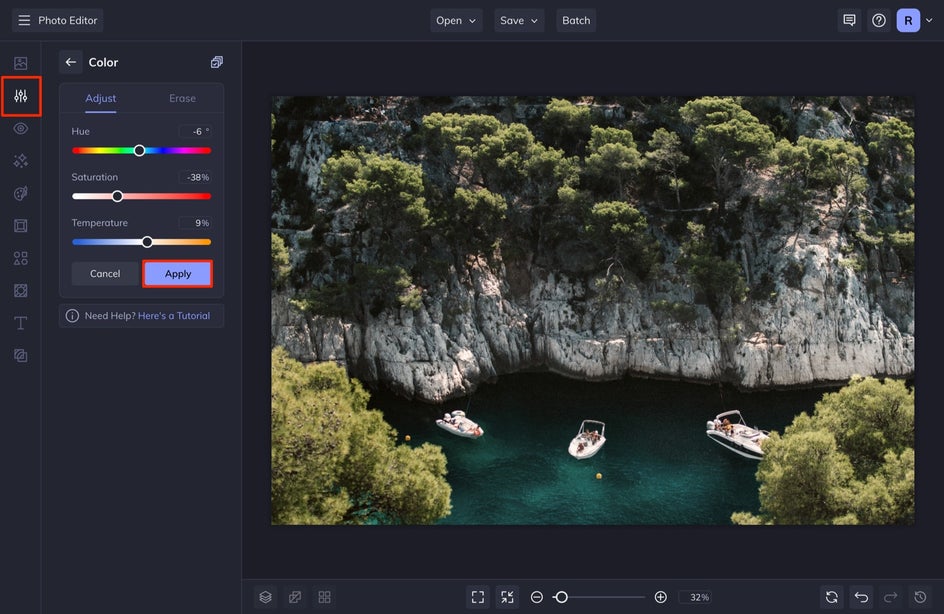
The trick here is to make subtle adjustments to color. Unless you want to go all out, subtlety is your best friend. You want someone to see your image and imagine themselves in this place, feeling the things you want them to feel while looking at your image.


Before selecting Apply, you can even select the Erase tab to have more control over which parts of your image you want the color adjusted and which you do not. If you want to have a single color pop on your image, while slightly drowning out the rest, select the Isolate Subject button to achieve this.
A.I. Image Enhancer
If you don’t have the brain power to focus on editing or if you just need a little help in this department, our A.I. Image Enhancer is the tool for you.
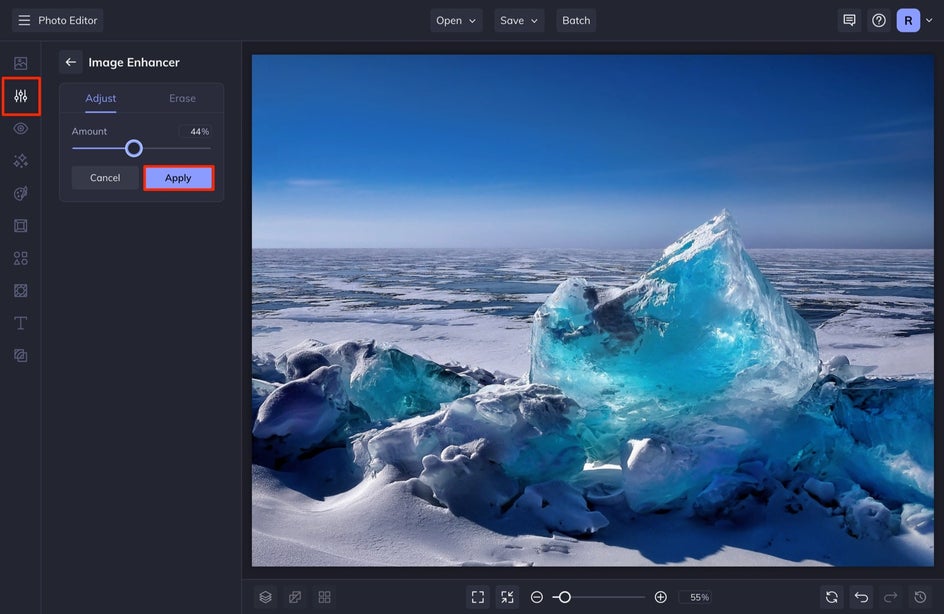
This is a smart tool that quickly enhances the brightness and color of your image in a single click. I like to make sure that my image looks natural, so I always slide the scale up and down to get the perfect color and brightness combination.
Rotate Tool
If your image was uploaded sideways and you need to quickly rotate it, simply select the Rotate tool from the Essentials drop-down and rotate it either Clockwise or Counterclockwise. Here, you can also flip your image by selecting Flip Horizontal or Flip Vertical.
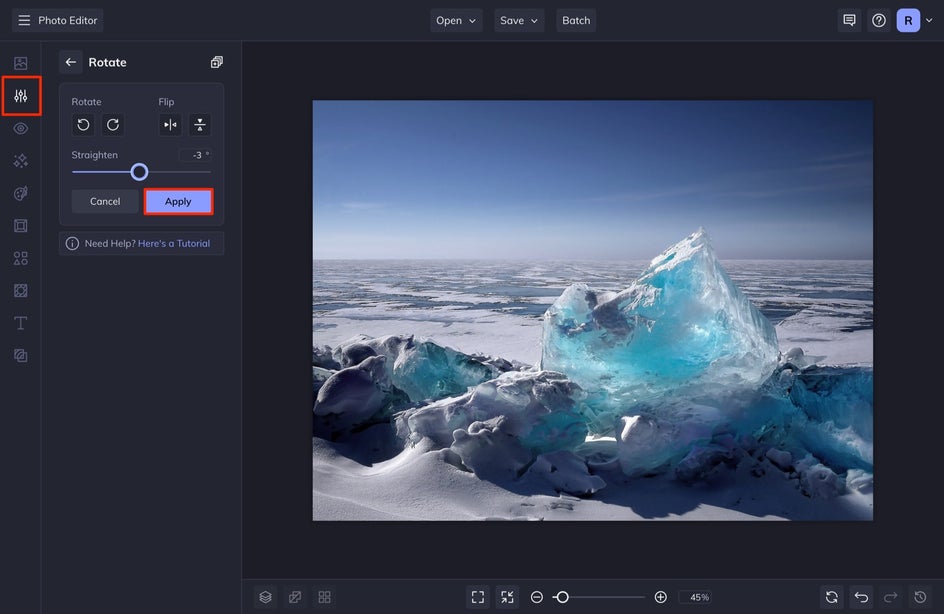
If you need help adjusting the straightness of your image (which I definitely need sometimes), move the Straighten selector from right to left to adjust this. You will see a grid appear that will help you align to something in your image like a horizon.


Resize Tool
The Resize tool allows you to quickly resize your image. This is helpful if you need to resize it for a print. I usually achieve resizing with the Crop Tool as mentioned above, but sometimes you need to work in percentages while keeping the same ratio. This tool helps you to dial in on the specifics of the sizing you need.
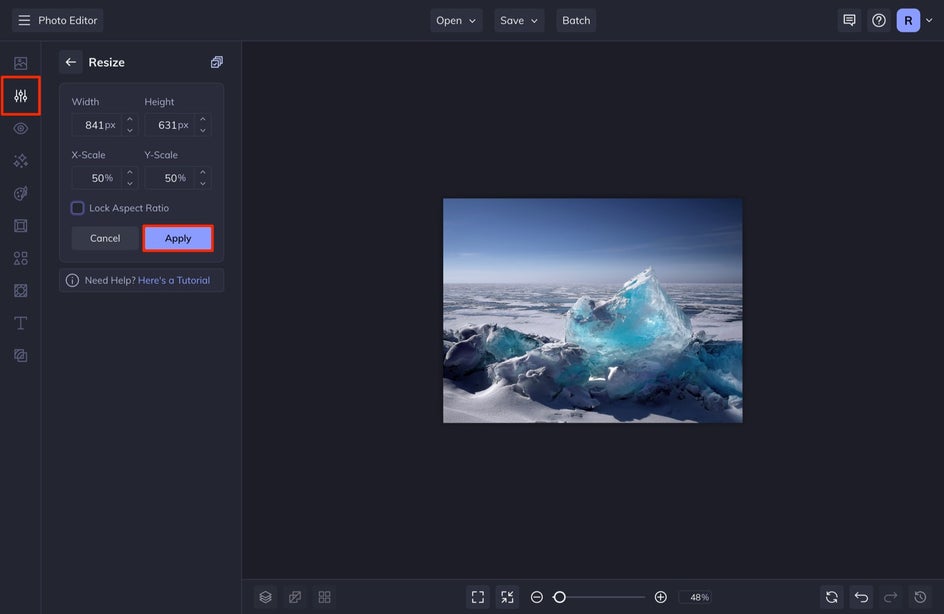
The other cool thing about this tool is if you need to quickly increase or decrease your image by a certain percentage, you can do that here by entering that value in the X-Scale or Y-Scale.
Sharpen Tool
The Sharpen tool can be great if you are trying to add dimension to your image. If it looks a little blurry, this tool can do wonders, especially if you select the Smart tab.
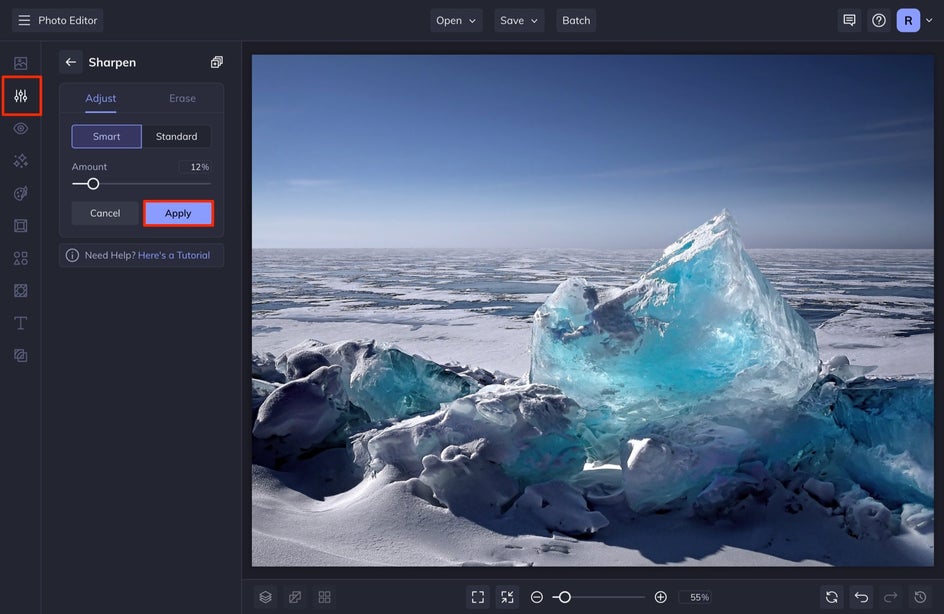
Truth be told, I use the Sharpen tool very sparingly, as it can get out of hand and make things look a little cartoonish very quickly. I tend to only add 10-15%, but experiment with what you like.
Easily Edit Your Image With the Essentials
These tools in the Essentials drop-down are the best tools for beginner photo editors to learn. Once you feel you have these tools down, it is time to enhance your skills with more tools like the Cutout tool or the Levels tool. BeFunky’s Photo Editor has so many tools for you to master. Start with these and check out our other Learn articles for more help!


