Sky Replacer Vs. Background Remover – Which Is Better for Your Project?

If you’ve been photographing for a while, you may have experienced a situation where you had to sacrifice one part of your photo in order to capture another. Often, we sacrifice the backgrounds of our images to capture our subjects in the correct lighting and focus. This could be over-exposing the sky or choosing a less-than-ideal location. Sometimes a photo would have turned out perfectly if there were slight adjustments you could make to it. Now, with BeFunky’s amazing A.I. generated tools, you can edit all of the backgrounds in your photos to perfection.
If you need to cut out and replace certain parts of your photo and don’t know where to start, BeFunky has a few options. We are going to look at the Sky Replacer tool and the Background Remover tool in BeFunky’s Photo Editor.
When and How to Use the Sky Replacer Tool
The Sky Replacer tool is just as the name suggests, made for skies! Realistically, you can set any photo as the background, but it’s best for skies!
This tool uses powerful A.I. to detect and replace the sky within any photo in just a few clicks. It also has foreground and sky editing options in the tool so that you can make fine-tuned adjustments to blend the sky with the foreground. as well as the Adjust section that has all sorts of ways to blend the new sky. Take a look at how easy this tool is to use in this short tutorial.
Step 1: Choose a Photo
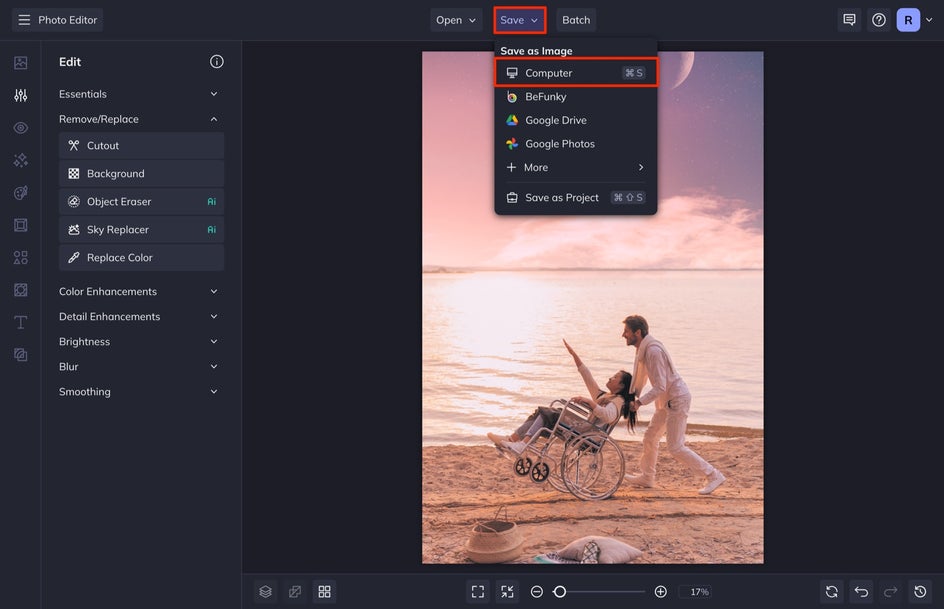
To get started, head to BeFunky’s Photo Editor and upload your photo by selecting Open and then Computer at the top of the screen. You can also drag and drop an image file directly onto the canvas, which is my preferred method.
Step 2: Click on the Sky Replacer Tool and Make Adjustments
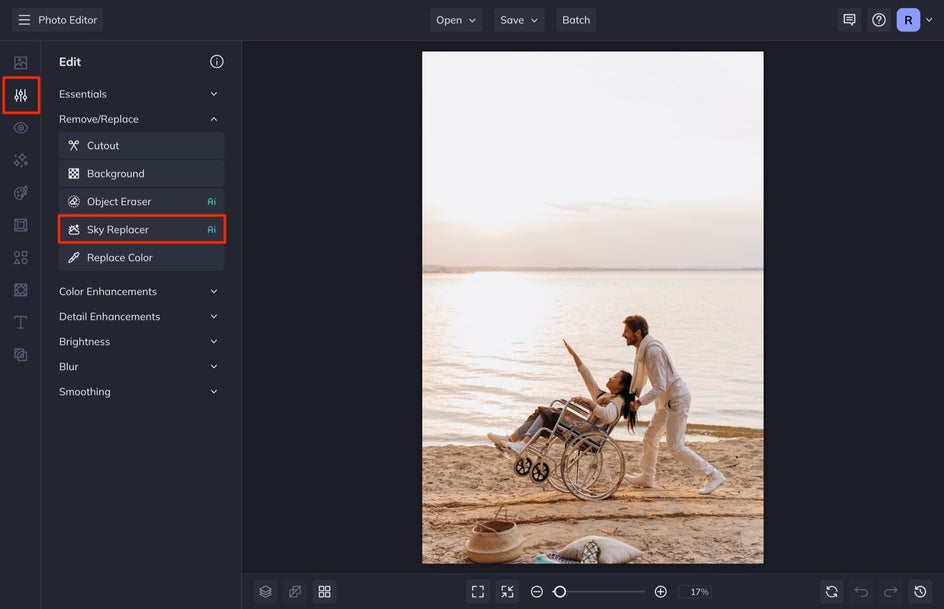
Head to the Edit tab. From here, find the Remove/Replace drop-down and select Sky Replacer. Click on the tool and in seconds you’ll see the A.I. at work analyzing the photo.
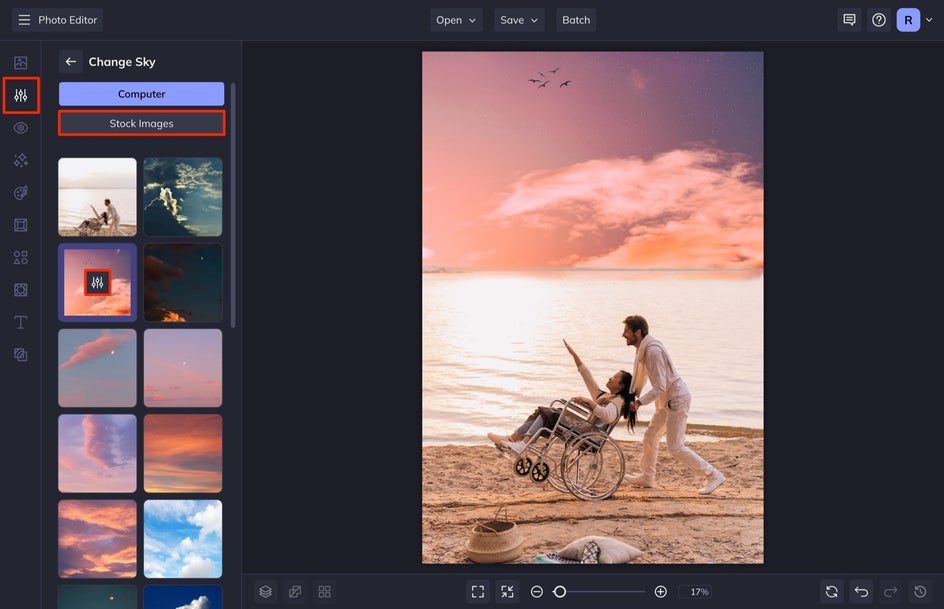
Once it is finished doing this, you can select Change Sky, Edit Sky, or Edit Foreground. Select Change Sky to find the replacement photo you like. You can either replace the photo with one you have by selecting Computer, or you can select Stock Image to choose from hundreds of stock sky images we have in BeFunky.
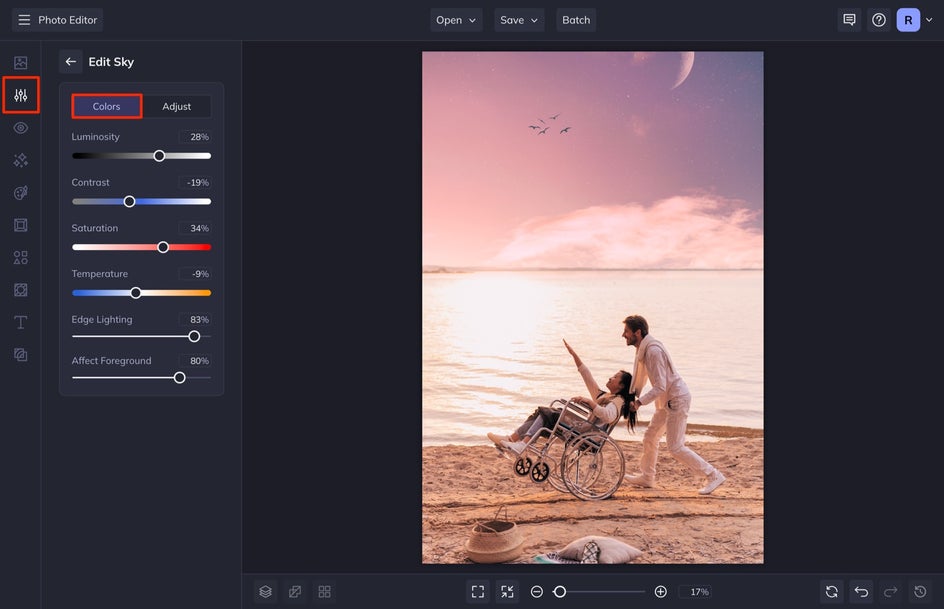
Once you select your photo, you can click on the Settings option. This allows you to adjust things like the Saturation and Contrast of your background so that it can better blend into the foreground of your image. I adjust each of these options to create a blended and cohesive look.
After you’re done, select the back arrow next to Edit Sky and again next to Change Sky to get back to the main Sky Replacer tool menu. Here, you can select Edit Foreground for even better blending. When you are finished, select Apply in the Sky Replacer main menu.
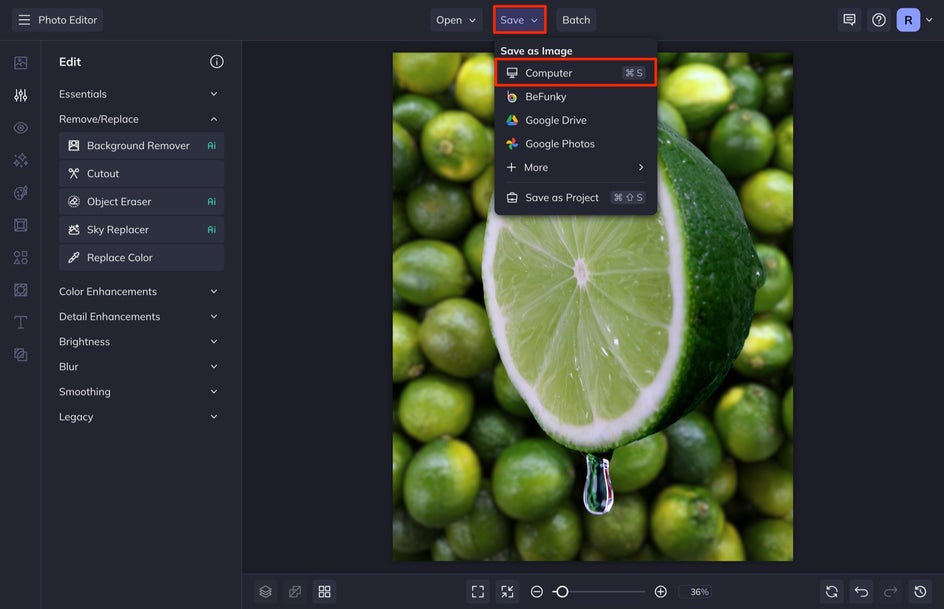
Step 3: Save Your New Sky
When you've finished editing, click the Save button at the top of the screen and then select Computer. Save your image as a high-quality JPG.
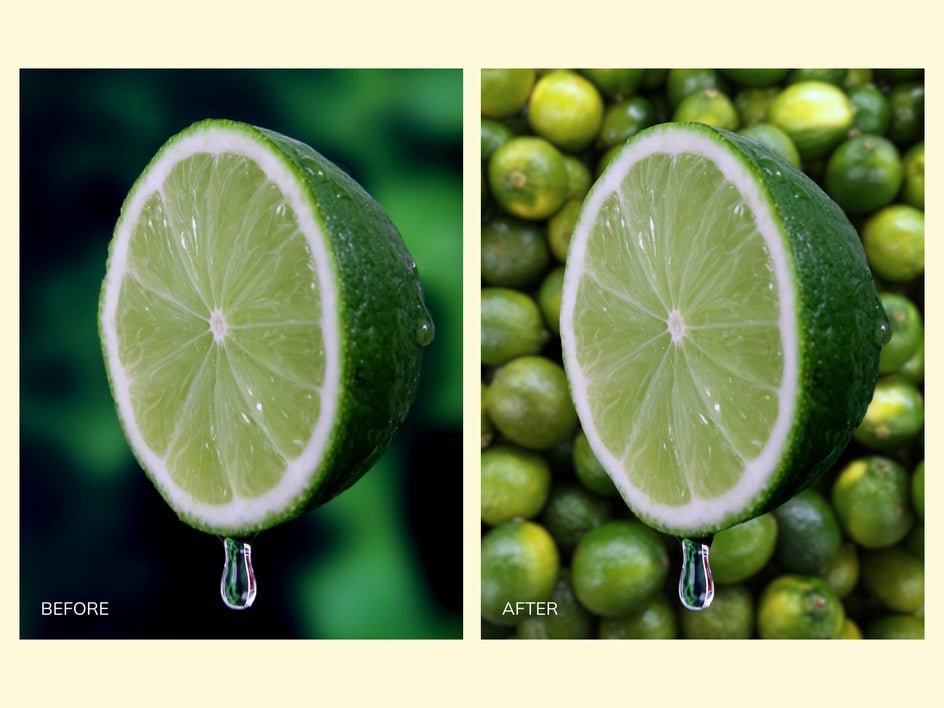
Take a look at the before and after of this image – it's near impossible to tell that we've swapped out the sky.

When and How to Use the Background Remover Tool
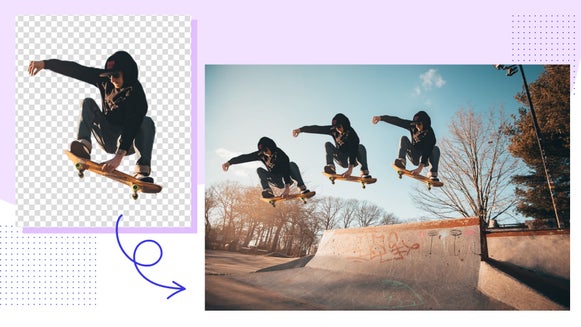
The Background Remover uses artificial intelligence to detect the main subject in your image and create a transparent background in just a few seconds. This tool works best with an image that has a clearly defined subject for the A.I. to detect. You can also invert the selection to keep the background and remove the subject, which isn’t possible with the Sky Replacer tool.
The Background Remover is a much better tool to completely remove the background of an image and isolate a subject. I use this tool a lot for product photography and creating marketing assets. In this short tutorial, we'll show you how to use BeFunky’s Background Remover to create the best promotional shots!
To begin, follow Step 1 above and then continue in this tutorial.
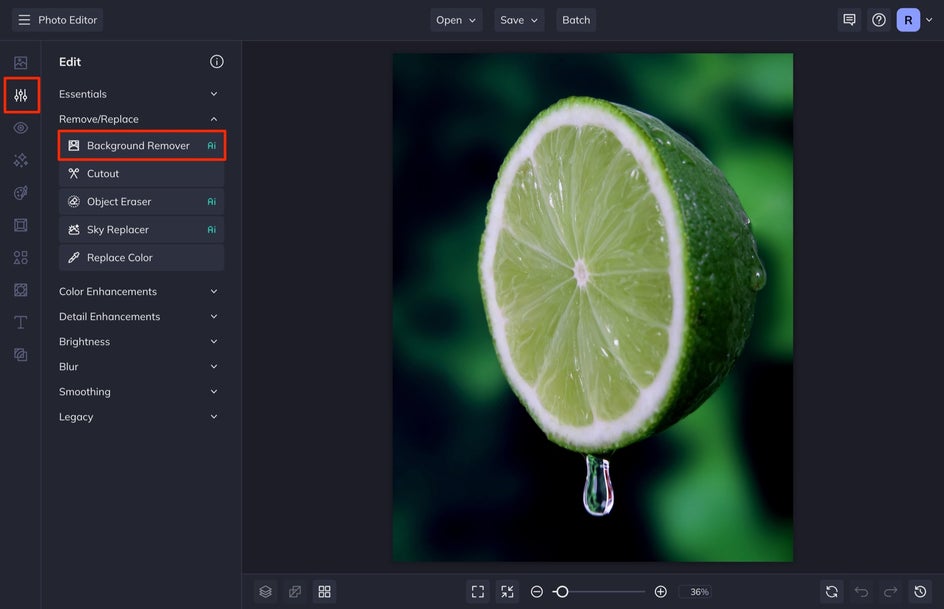
Step 1: Find the Background Remover and Edit
Head to the Edit tab. From here, find the Remove/Replace drop-down and select Background.
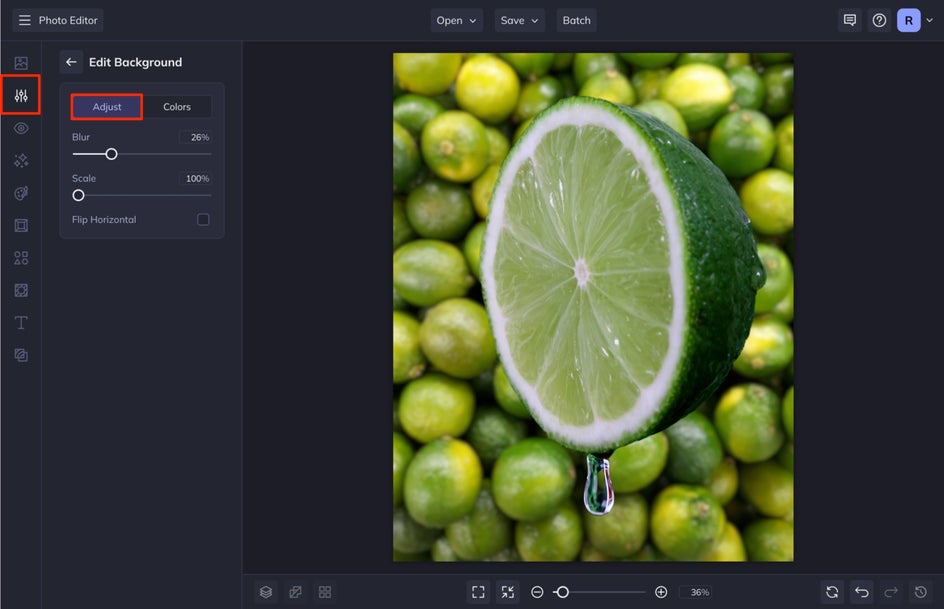
Instantly, the A.I. will go to work and remove the background from your image. You’ll see that the background is replaced by this checkerboard pattern. This means that your background is now transparent. You can keep it this way or you can easily choose a different background color by selecting Change Background from the BG Remover menu, and then selecting Color or Image to choose your bckground.
We chose the Image option here so that we could create ingredient cards for a recipe we are launching for a food blog. The cool thing when selecting the Image option is that you can select Edit Background and adjust the photo Blur, Scale, and Colors. We increased the Blur.
When you change the background, you may notice that there are some areas that need a touch up. To do this, select Adjust Selection from the BG Remover menu. Your image will automatically change color to differentiate the background from the part that is selected. If you want to turn this feature off, de-select Show/Hide Mask.
Zoom in on the areas that you need to touch up so that you can get precise. Select the Remove tab and then adjust your Brush Hardness and Brush Strength all the way to the right. This will make it so that your brush is precise and not feathered. Take your brush and go over the areas that you want to remove. Here, the mask makes it really easy to see the parts of your image that need to be cleaned up. When you are finished, select the Back arrow.
The other cool feature of the Background Remover is that you can add a drop shadow directly onto the selection before saving. This will give your product some dimension so that it looks more natural and not as flat.
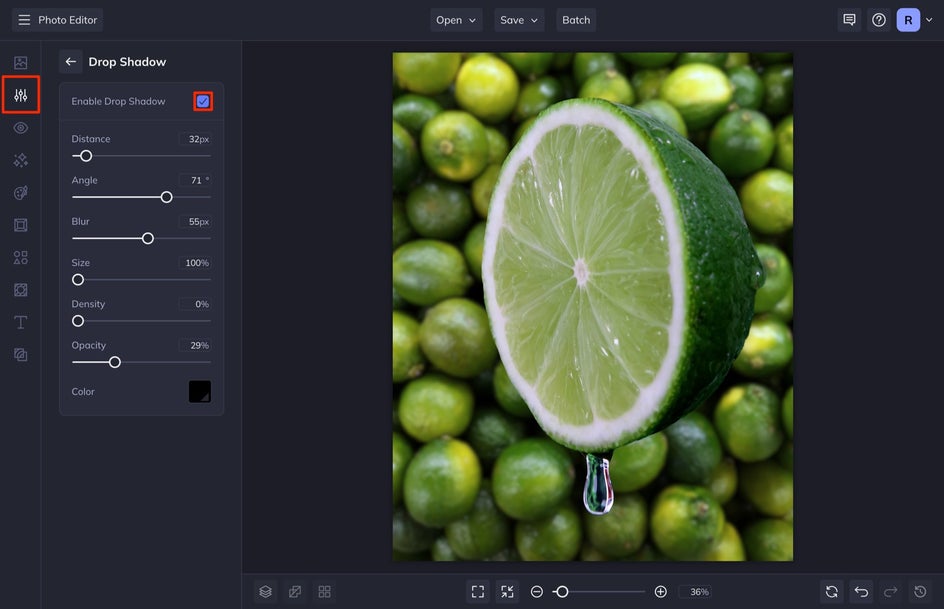
Select Drop Shadow and then adjust the settings so that the shadow Angle is below your subject. Then, you want to increase the Blur and decrease the Opacity so that the drop shadow looks natural. You want this to be subtle. Once you are done, hit the back arrow.
When you are fully finished with the Background Remover, select Apply.
Step 2: Save Your New Background
When you are ready, select Save at the top of your screen and then select Computer.
Check out the difference to this product shot in a couple of clicks.
The Best Tools for Replacing and Removing Backgrounds
The Sky Replacer tool and the Background Remover tool are two of the best options for quickly and effortlessly removing and replacing the backgrounds of your images. Not only that but each of these tools are extremely easy to use. Try each of these in BeFunky’s Photo Editor and show us your edits by tagging us.