


Make Your Profile Picture Stand Out With a Custom Frame

Have you ever struggled to choose a profile picture that really reflects you? You’re a person of many facets, but you can only choose one profile photo, so what do you focus on? Your humor, your hobbies, your style, or something else? In the end, most of us just choose a profile photo where we look our best. But what if you could add more personality to your profile picture in just a few clicks?
This is where customized graphic frames come in. Because of profile pictures’ small size and limited space, it can be difficult to use them to express your individuality, but graphic frames add a little creative flair without taking attention away from your face. The great news is that you can create your own custom profile picture frame with the Graphic Designer – no design experience required.
How Do I Make My Own Profile Picture Frame?
To make your own profile picture frame for Facebook, Instagram, or X, all you need is access to some fun graphics and a way to apply them to your photo. The BeFunky Graphic Designer combines these two by giving you access to user-friendly design software as well as the BeFunky Graphics Library, which features thousands of hand-drawn vector graphics. Show off your hobbies, your style, your career, and more.
With the Graphic Designer, you can also touch up your photo, replace the background, add a creative overlay, and more. You can even add customizable glitch effects. Consider the Designer your one-stop profile picture maker!
How Do I Format a Profile Picture?
Around ten years ago, profile pictures on the Internet were all square, in line with the rectangular nature of a computer or smartphone screen. When Instagram began using circular profile pictures in 2013, it was pretty unique. However, Facebook and Twitter followed Instagram’s lead in 2017, and now all the major platforms including TikTok and LinkedIn use circular photos rather than square.
Circular profile photos eliminate unnecessary negative space and allow you to focus completely on a user’s face, which means there’s less space than there used to be for creative elements like frames. But by using a photo that’s a little bit zoomed out from your face, there will be plenty of room to add some custom flair.

Twitter, or X, recommends a profile picture size of 400px x 400px. Facebook is 170px by 170px, and Instagram is 110px by 110px. Usually, some of these pixels are cut off since images are saved in rectangular format. Because it’s always better to size down than to size up for the sake of resolution, it’s best to use a photo that’s at least 500px x 500px for all platforms.
To make sure your frame is round and shows up properly across your social media, we’ll also be using the Graphic Designer to create a circular clipping mask. This is one of the most important steps automated by many online profile picture makers. It might seem complicated if you’ve never done it before, but we’ll teach you how to do it yourself in just a couple of clicks, so that you can tailor your graphic profile picture frame perfectly to your taste – and not rely on any automatic generators!
How Do You Make a Graphic Frame Look Good?
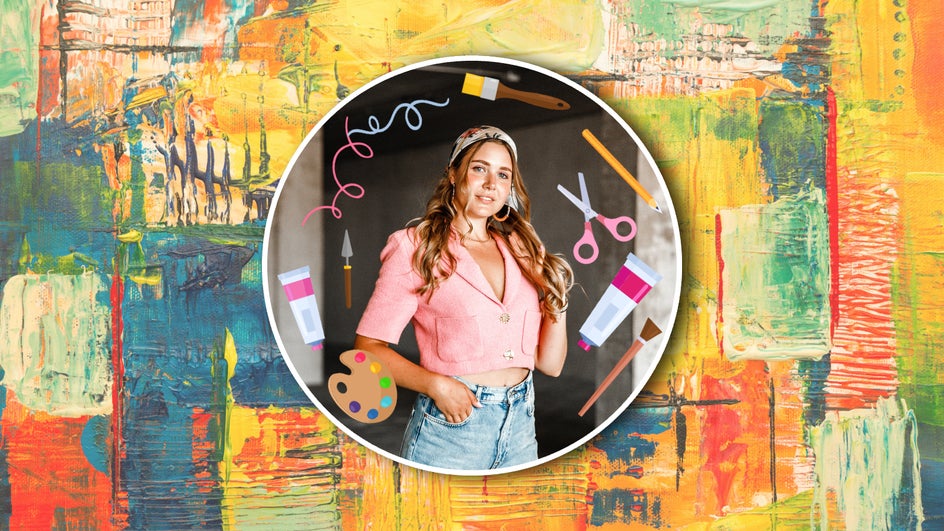
The trick to making a graphic frame that draws attention to you and not away is to use thoughtful color combos and similar graphics for the entire frame. Luckily, the graphics available in the graphic designer are made by real artists who have already picked out amazing colors and designs. They usually come in sets that can be used together. If you’re using graphics from different sets, you can customize your own colors, but use only 3-4 to keep it simple, as we did for this frame:

Make sure to keep the graphics you use to just the edges, and don’t cover up your face or hair. You might have to choose a photo taken at a distance, rather than a close-up selfie. And that’s it!
Is There a Profile Picture Maker App?
The BeFunky mobile app allows you to do everything you can do on a desktop, right from your phone. This includes replacing backgrounds, editing exposure, making touch-ups, and of course, creating graphic frames for your profile pictures. Don’t worry about being hindered by a laggy, complicated interface: The BeFunky mobile app was designed to be intuitive to any smartphone user. Instead of downloading a one-trick app, you can use BeFunky mobile for editing your profile picture and for all your future photo editing needs, like making your smartphone photos look like film.
How to Create a Frame for Your Social Media Profile Picture With Graphics
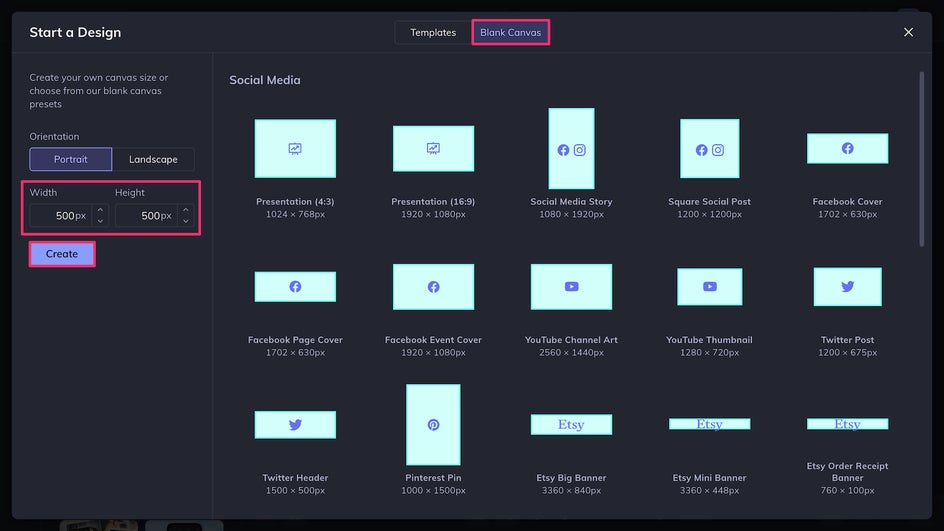
Ready to create your own custom graphic frame for your profile picture? Just open up the Graphic Designer and create a blank 500px x 500px canvas to get started.
Step 1: Add a Clipping Mask
How do you make sure your frame shows up perfectly after your profile photo is uploaded in circular format? The secret is a clipping mask. To create this rounded effect, first, add a circle from the Graphics tab.
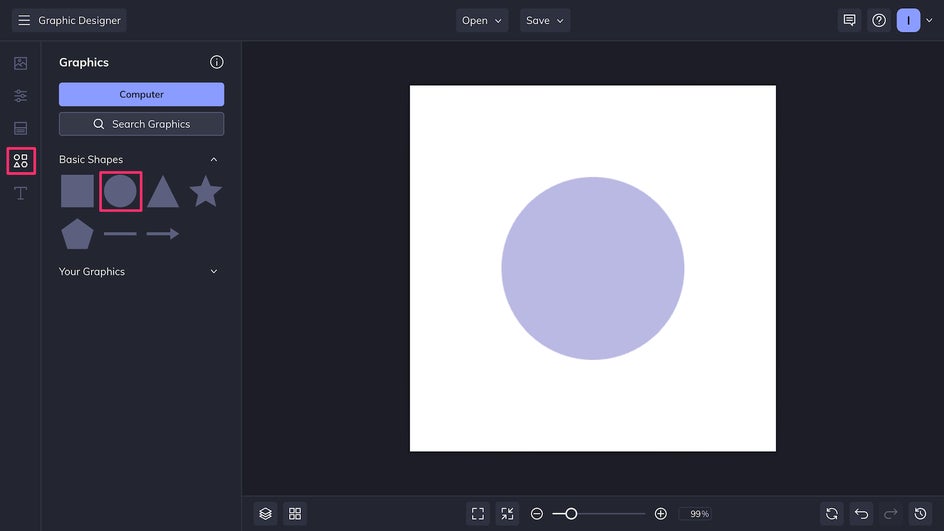
Then, resize it using the white circles to the edges of the image. Now you’re ready to add your profile picture.

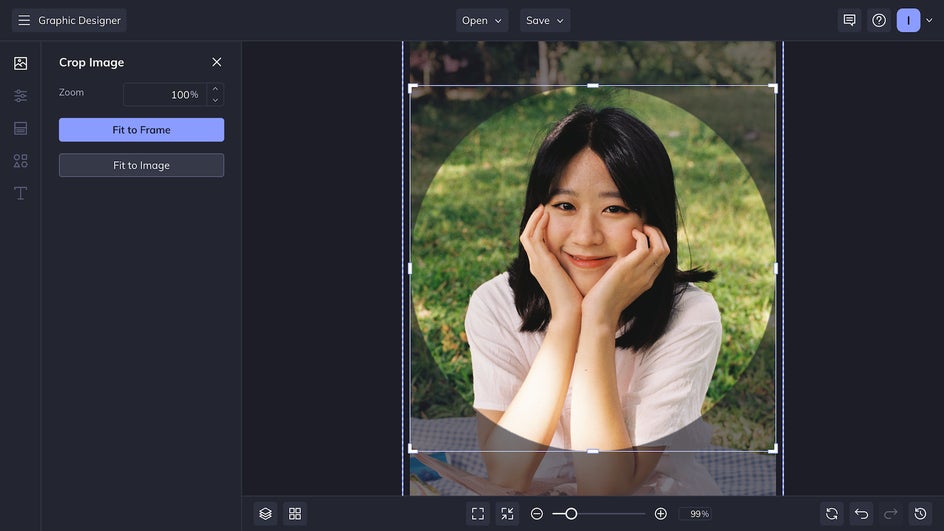
Step 2: Upload Your Profile Image
To add a photo to the Graphic Designer, you can upload an image to the Image Manager by clicking Computer or by dragging it from your computer files directly onto the canvas. Drag it inside the circle to get the clipping mask effect.

Pro Tip: When dragging and dropping into a clipping mask, make sure the circle is highlighted blue before releasing your mouse.
Now, you can double-click the image to adjust it inside its frame.
Step 3: Add and Customize Graphics
Now for the fun part! You can Search Graphics in the Graphics tab and look for whatever elements you want to add to your frame. In this case, we’re adding some flowers, so that’s what we typed into the search bar. Any graphic you click will have a blue checkmark that lets you know it’s been added to your personal library.
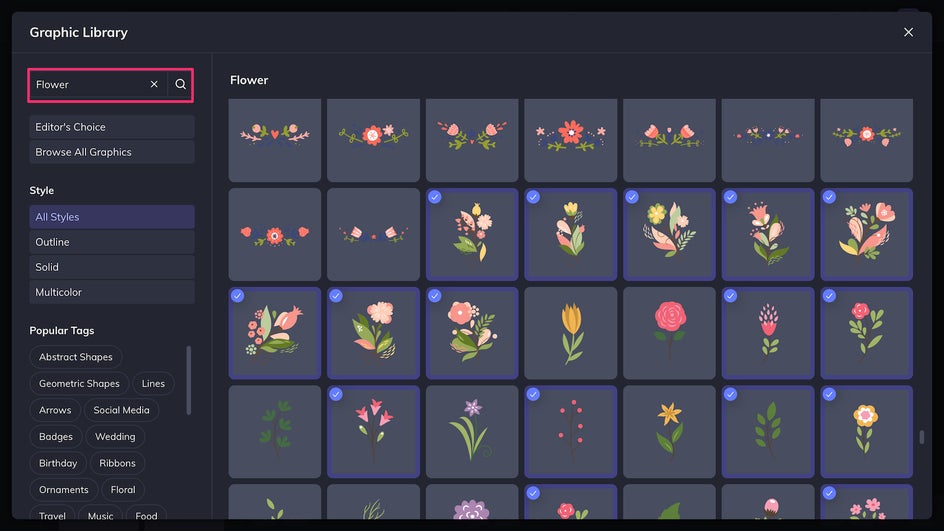
Once you’re done choosing your graphics, you can exit the Search tool. Click and drag from your library to place the graphic elements onto your profile picture. Anything you keep within the circle will show up on your social media bio, and anything outside will be cut off, so make sure to mostly keep your graphics inside the frame!
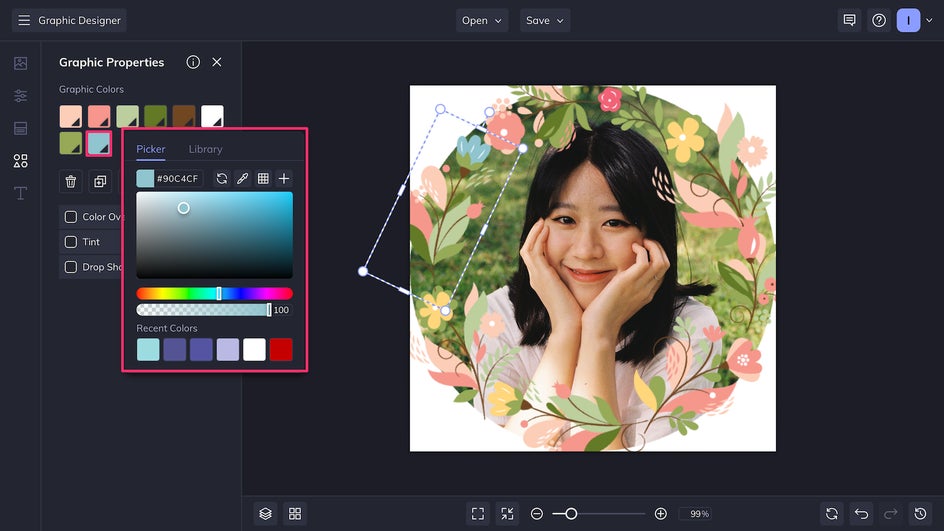
At this stage, you can also customize the colors of your graphics: Just click the graphic you want to change and then pick a specific color to edit. Here, we’re changing the yellow flowers to blue.
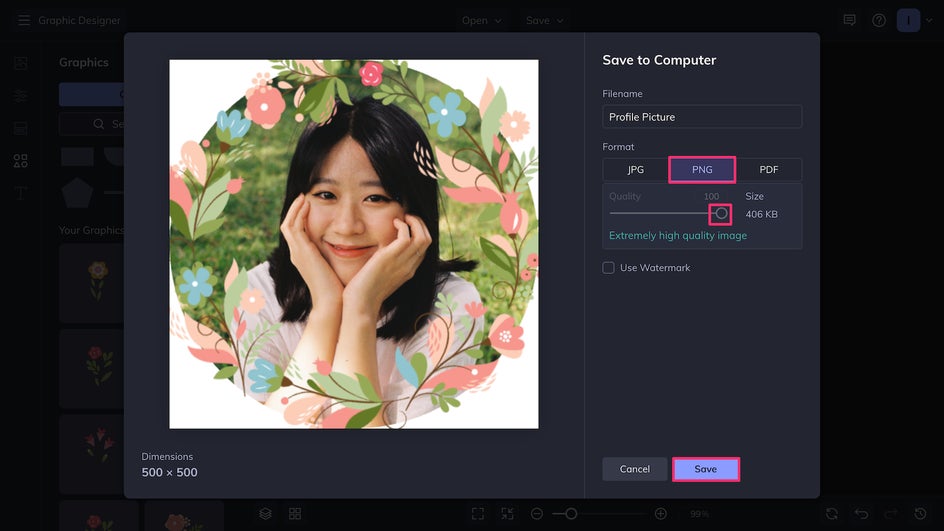
Step 4: Save Your Framed Profile Pic
Just a few steps in and you’re ready to go! Click the Save button at the top of the page to save your profile picture as a high-quality PNG.
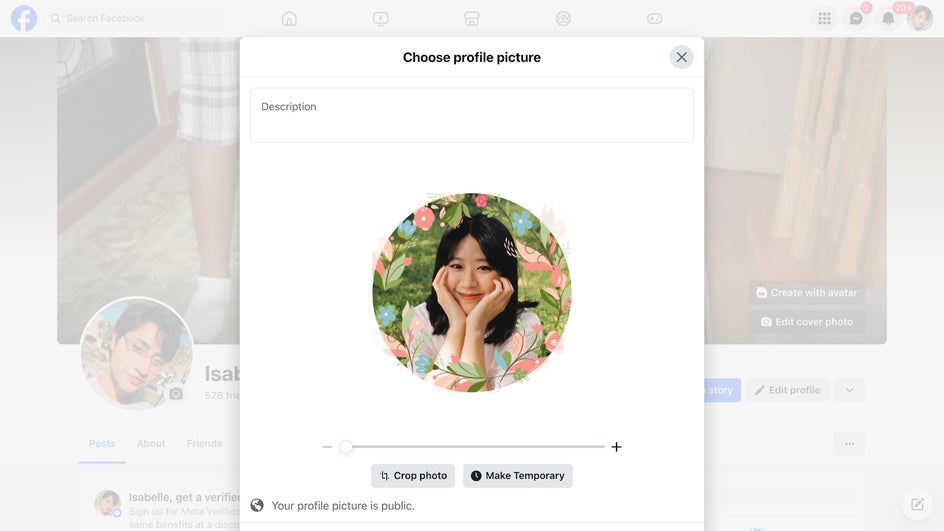
Step 5: Upload to Socials
Now your unique profile photo is ready for uploading to Facebook, Instagram, TikTok, or any other app or site you want to use! Look at how the graphic frame shows up perfectly thanks to our clipping mask.
Create a Standout Social Media Profile Pic!
And that's it! In just a few clicks, you can add some funky flair to your profile picture that will both show off your personality and make you stand out on social media.

Customize your own graphic frame and upload a brand new profile picture today with the Graphic Designer!


