Animated Intros for Your Social Media Accounts
Once you are consistently creating content, you may want to think about making an animated intro for your videos. This kind of intro happens at the beginning of a video and usually includes a short animation of your logo. The reason this works in your favor is that it looks professional, enhances the strength of your branding, and gives your videos a sense of credibility. Think about how on TikTok, there is usually a branded outro with TikTok’s brand colors and the person’s handle – this actually strengthens TikTok’s brand and enhances their marketing every time someone chooses to keep that in their videos.
On YouTube, creators spend thousands of dollars for someone to create their animated intros. YouTube creators make intros of all kinds, with some opting to create an entire introduction video. No matter what kind of intro you choose, these act just like how an introduction in real life would work – it gives your audience context to who you are and what to expect from you. With BeFunky’s Graphic Designer and Photo Editor, you don’t have to pay thousands of dollars for an animated intro. You can use our Effects to achieve the intro you want.
How to Create an Animated Intro With BeFunky
No matter if you are wanting to create an intro for Instagram Reels, Youtube, or TikTok, BeFunky’s Graphic Designer and Photo Editor has got you covered. Simply have your logo file ready and open BeFunky’s Graphic Designer to begin.
Step 1: Select Canvas Size
Start with a canvas size that is appropriate for the platform you are building on. We are going to make an intro for an Instagram Reel, so we want our canvas size to be 1080X1920. Once we are finished with our design, we can resize the canvas and create the same intro for YouTube.

In the Start a Design menu, select the Blank Canvas tab and then select Social Media Story to create a 1080x1920 intro.
Step 2: Upload a Logo to the Canvas
Select the Image Manager tab in the left-hand menu and then select Computer to upload your logo image into the Image Manager. You will want to make sure the file you choose is a PNG file.
Adjust it to the size you want by clicking on the image and dragging the corners outward.
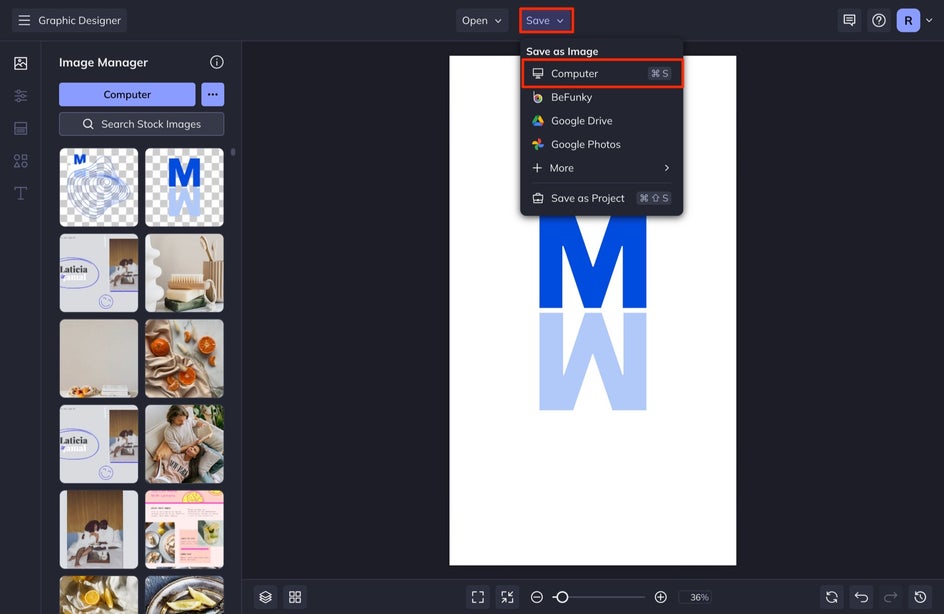
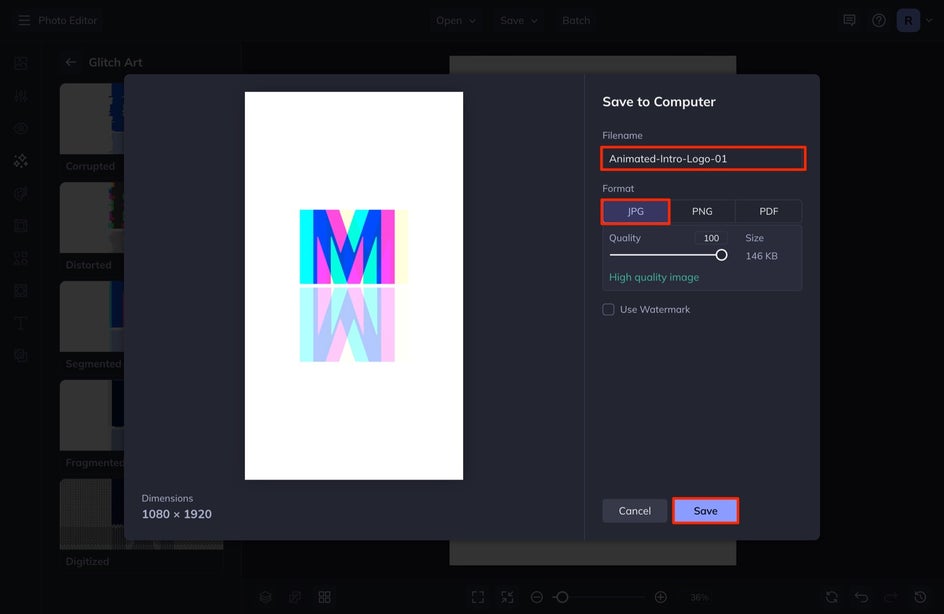
Step 3: Save the File
Once you position your file on your canvas in the way you want it, select Save at the top of the screen and then select Computer. In the menu that appears, select JPEG, name your file, and then press Save.
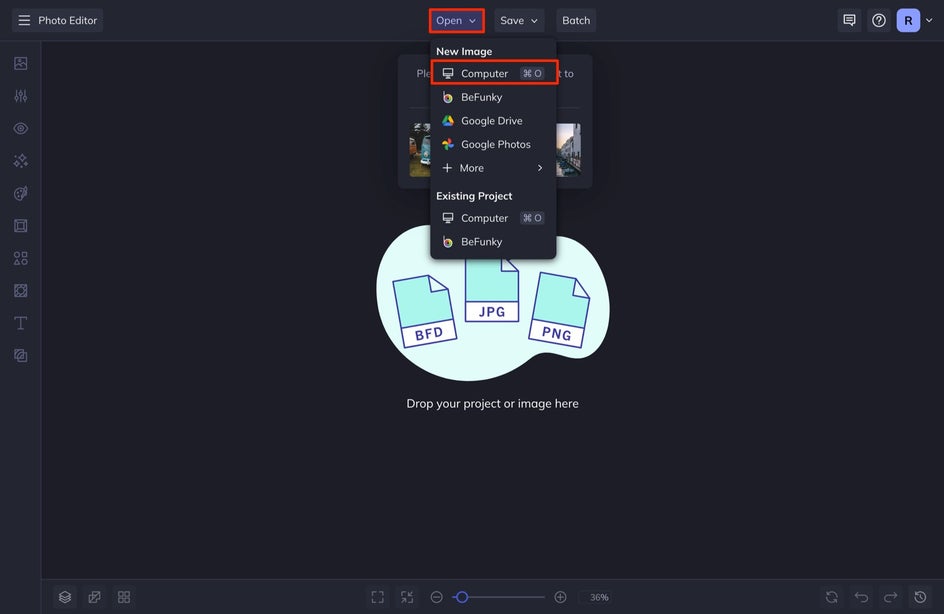
Step 4: Open Saved File in Photo Editor
Select the Graphic Designer menu in the top left corner of your screen and then select the Photo Editor. Once in the Photo Editor, select Open and then Computer and upload the file you saved in Step 3.
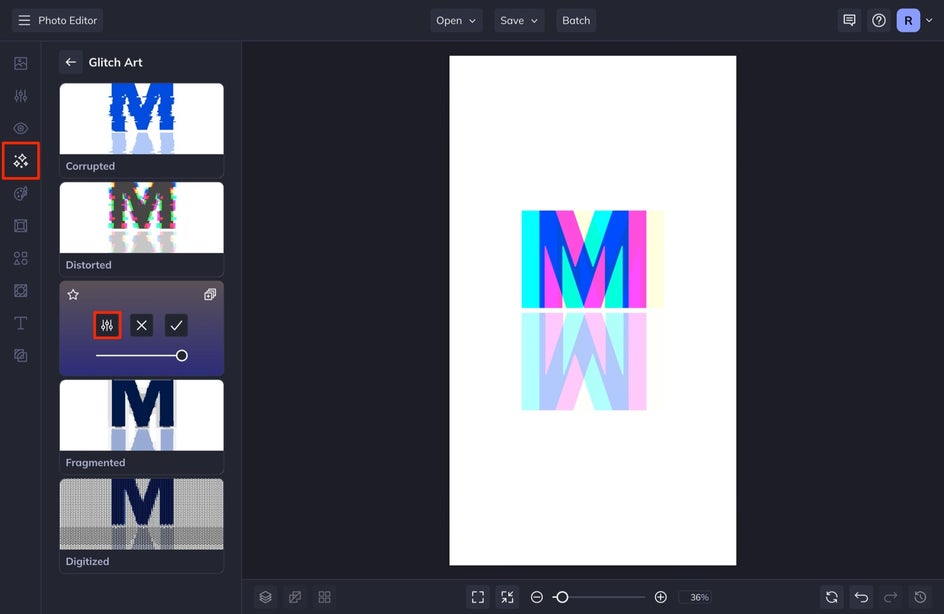
Step 5: Apply Effects
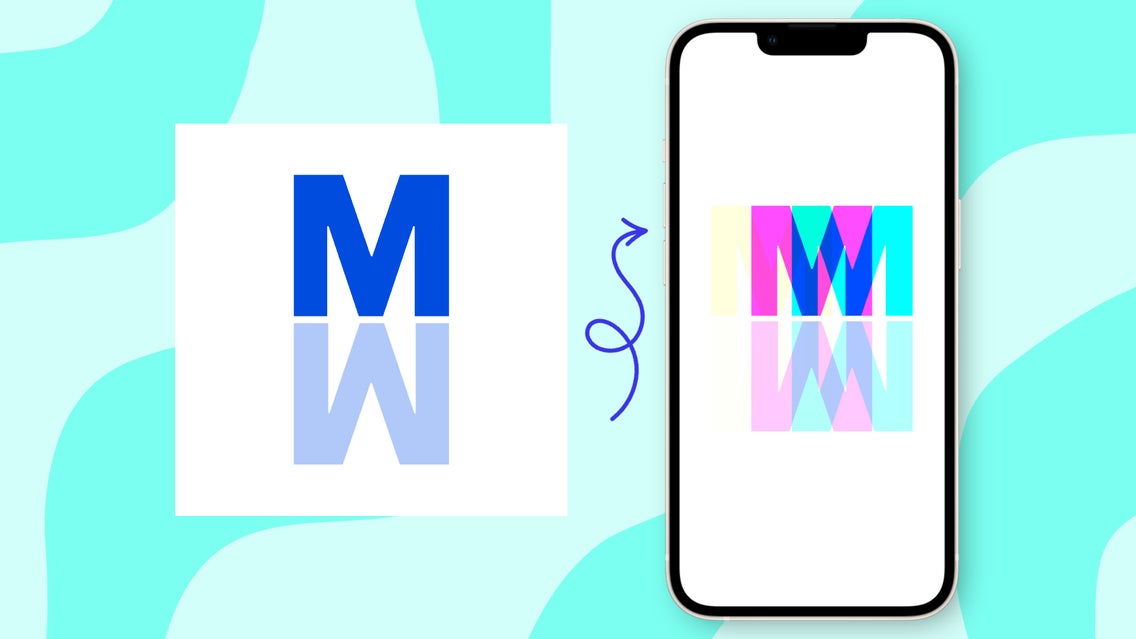
Once here, head into the Effects tab in the left-hand menu. You can select any of these Effects, but we are going to apply a glitch effect. After selecting Effect, select Glitch Art from the options. We are going to choose Segmented.

Select the Settings option to access various slides and Effect Amount. We are going to save multiple files to create our animated intro.
For the first slide, change the Slide Horizontal slider to 25%. Press Apply. Repeat Step 3 above and save this image. Make sure that you save it with a sequential number because we will be saving multiple images to achieve the animation effect.
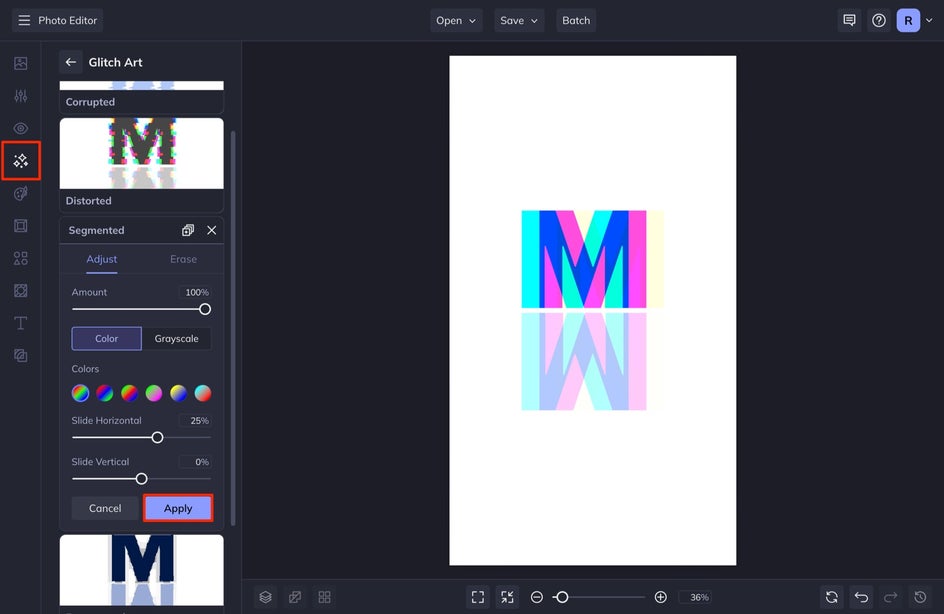
Press Control+Z to undo the Effect you just applied and go back to the original image. We are going to do this process three more times.
Repeat Step 5, but set the Segmented Slide Horizontal slider to 50%. Select Apply and then repeat the Save process but name the file with the next sequential number. At this point, you will have 3 images (the original, 25%, and 50% images).
Press Control+Z to get back to the original image and set the Segmented Slide Horizontal slider to -25%. Press Apply, then Save by repeating the process above. Type Control+Z to get back to the original image and do this whole process one more time but set the Segmented Slide Horizontal slider to -50%.

When you are all finished, you will have 5 images. Once here, follow Step 7 in this article to make your animated intro GIF. Here is the screenshot of the timing that I set for my GIF. When you upload your 5 files, you are going to copy your first file and click and drag it to the middle of the other four files. You will have six in total with two of them being your first file. Click Make a GIF when you are ready to see your results!
You can do this same thing if you want to create an animated intro for YouTube. You can follow the same tutorial but you will adjust Step 1 to be the side of a YouTube video. Make sure that when you create a Reel or YouTube video, you add this file to the beginning of your video.
If you want to make a YouTube intro, you can use this file and then also add some catchy music to the beginning to enhance your intro even further!
Making an Animated Intro for Your Content Is Easy
As you can see, it isn’t that difficult to create an animated intro for your videos with BeFunky’s Photo Editor! You can either do an intro or an outro to enhance the content you are sharing and make people notice how legit your content is. This is an easy way to make people take you seriously and want to listen to what you have to share.