Create Standout YouTube Thumbnails With Simple Photo Edits

Making long form video content for YouTube is no easy task. It takes tons of time, tech, and skill. That means that any tool that makes your workflow more efficient is a game-changer – like BeFunky's online YouTube Thumbnail Maker, which provides eye-catching thumbnail templates, graphic design tools, and photo edit capabilities all in one spot.
With the YouTube Thumbnail Maker, found in the Graphic Designer, you can seamlessly switch between design and editing platforms for more engaging and creative thumbnails. Clear clutter from stills, detach subjects from backgrounds, and add filters and effects that make your video stand out from the rest. With the in-platform Photo Editor at your fingertips, there’s no limit to what you can create.
How to Edit Photos for Eye-Catching Thumbnails
In this tutorial, we’ll show you how to transform a YouTube thumbnail template with simple photo edits, and provide some creative thumbnail ideas that take advantage of what the Photo Editor has to offer. Let’s get started!
Step 1: Choose a YouTube Thumbnail Template
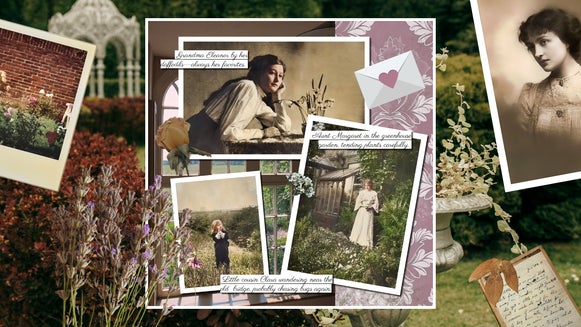
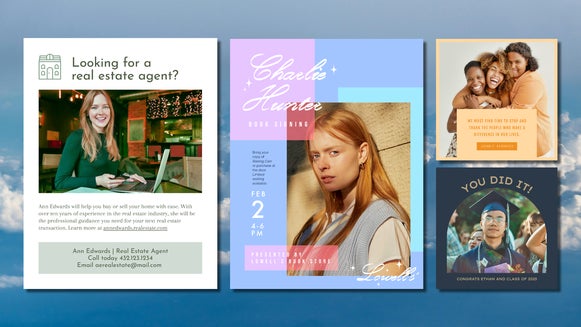
First, open up the YouTube Thumbnail Maker and pick a professionally designed thumbnail template. There are plenty of options to choose from depending on your aesthetic and niche, from colorful cutout thumbnails to simple minimalist designs. For photo edits to have the most effect, choose a template that features 1-2 large images.

Step 2: Replace the Photo
Upload a photo or video still from your device into the Image Manager. Drag and drop it onto the canvas to replace the placeholder image. Make sure to choose a photo that’s clear and readable even at a small size.

Step 3: Get Creative in the Photo Editor
Click on your photo and select Edit Image to access the in-platform Photo Editor. You can switch seamlessly between the Editor and Thumbnail Maker at any time.

This photo isn’t quite the right size for our YouTube thumbnail aspect ratio – it’s too large and zoomed in, and doesn’t leave much space for text. To fix that, we’re going to use the Expand AI tool in the Edit tab. This tool intelligently expands the photo outward to fix any awkward cropping. By applying it twice in a row, we get a perfectly sized thumbnail photo that leaves enough background space for text and embellishments. This is a great way to make any vertical photo thumbnail sized!

While you’re here, free to explore the rest of what the Photo Editor has to offer, like toning filters and sharpening tools.
We're also going to apply the Detach Subject tool, which allows you to separate the main subject of a photo from the background. This tool is useful for creating layered designs with text and graphics. It’s also perfect for adding an outline to the subject of your YouTube thumbnail. Once finished, click Done Editing Image in the top left corner to return to your design.

From the Image Properties menu, we're going to check the Shadow / Glow to add a white outline to the subject of the thumbnail to help them stand out.

Step 4: Customize the Design
Now it’s time to personalize the thumbnail with on-brand fonts and a few graphics for visual interest. For more tips on making a YouTube thumbnail template your own, check out this tutorial.

Step 5: Save Your YouTube Thumbnail
Once you’re satisfied with the design, it’s time to save! Click Save at the top of your canvas and make sure to export the file as a high-quality PNG for the best resolution, or a JPG if you’re trying to save on hard drive space. Alternatively, export it directly to your Google Drive.

A Creative, On-Brand Thumbnail in Seconds
Our attention-grabbing YouTube thumbnail is complete! With just a few edits, we were able to transform a simple photo into an eye-catching and inviting image.

More Photo Edits to Make Thumbnails Pop
Together, the YouTube Thumbnail Maker and Photo Editor allow you to create any kind of thumbnail for any kind of niche – whether you’re a fitness YouTuber, lifestyle vlogger, competitive gamer, or makeup artist. Here are some of our favorite tools for recreating common YouTube thumbnail trends and styles.
Color Tints for Lifestyle Vlogs
Most vloggers publish long-form content twice a week, if not more. That’s a tight update schedule! As such, it doesn’t allow much time for designing custom thumbnails. To achieve a simple but attractive thumbnail no matter how busy you are, simply drop a video still onto a blank thumbnail-sized canvas, add a color tint, then add your text in a bold eye-catching font. You can create your own thumbnail template with the Graphic Designer to make the process even quicker!


Cutout Tool for Product Reviews
For product reviews and roundups, use the Cutout tool to remove the background from multiple products, then layer these on top of an expressive reaction image. This way, you can fit all the main topics of the video into a single clear thumbnail. It’s also a great editing style for shopping hauls and comparison videos!

Object Eraser for Travel Videos
If you’re a travel vlogger, you know it can be tough to capture a beautiful thumbnail. Crowds, vehicles, and signage create tons of background clutter that doesn’t look great in a YouTube feed. Luckily, the AI Object Eraser can be used to clear up any background distractions in a single swipe.


Design Better YouTube Thumbnails!
Putting out consistent YouTube content takes tons of time and energy. That’s why you need a thumbnail maker that makes the design process simple. Between stunning premade templates, easy-to-use design features, and hundreds of one-click photo editing effects, BeFunky’s Youtube Thumbnail Maker is the best time-saving tool for standout thumbnails. Everything can be done online right from your browser – no bulky software downloads required. Try it for yourself and design a better YouTube thumbnail today!