Tint Images Online for a Dynamic New Look
In the dynamic and ever-evolving world of visual storytelling, the significance of color cannot be overstated. The silent yet powerful language speaks volumes within the confines of a single frame, influencing the viewer's perception and emotional connection with the subject matter.
From unlocking hidden depths in black-and-white compositions to unlocking your rose-colored glasses with the BeFunky Photo Editor as your creative accomplice, this becomes a tangible reality. By combining the technical prowess of the BeFunky Photo Editor with creative inspiration, you will not only learn the mechanics of tinting but also discover the profound impact it can have on your visual storytelling. So, let your imagination run wild as we embark on a quest to master the art of tints – a journey that promises to enrich your photographic vision and elevate your creative expression to new heights.
What Is Tint in Photo Editing?
In photo editing, a tint refers to a subtle color cast or hue that is applied to an image. Tinting is a technique used to modify the overall color balance of a photo, infusing it with a specific color or tone. Tinting is often achieved by overlaying a transparent color layer onto the image. This layer can be monochromatic or contain a combination of colors, depending on the desired effect. For example, a sepia tint imparts a warm, brownish tone reminiscent of old photographs, while a blue tint might convey a cool or moody atmosphere.
Photo editors, both traditional and digital, provide tools for adjusting tints. These tools allow users to control the intensity of the tint, blending it with the original colors of the image. Tinting is a versatile technique that photographers and digital artists use to evoke specific emotions, enhance visual appeal, or create a stylized look in their photos.
How to Tint Your Photos for Free
In just a few clicks, you can change the vibe of your photos and make it feel like you're entering a whole new universe. It's like giving your images a magical makeover, instantly turning them into scenes with a different mood and vibe.
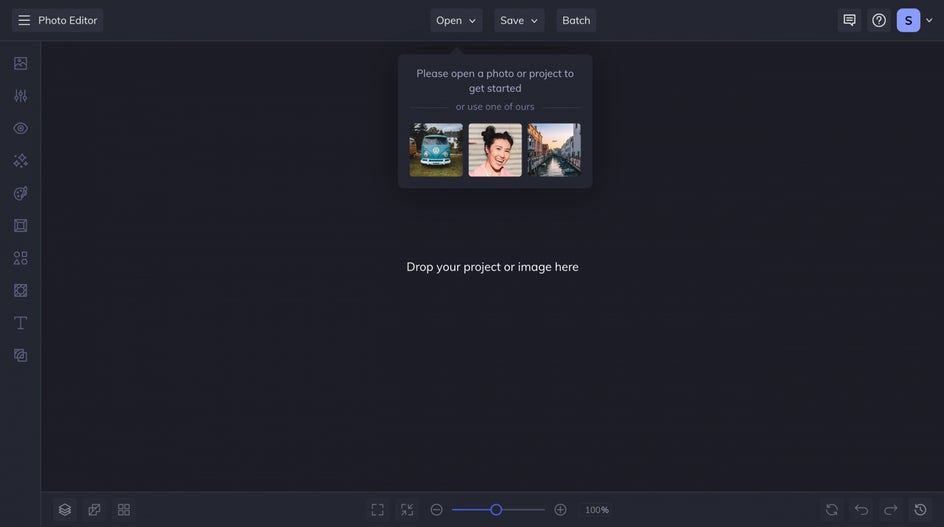
Your photos are ready to transport you to a whole new world of colors and atmospheres. Click here to get started by opening your image from your computer, or drag and drop it into the canvas.
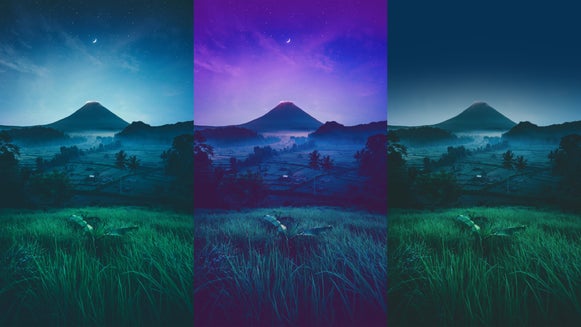
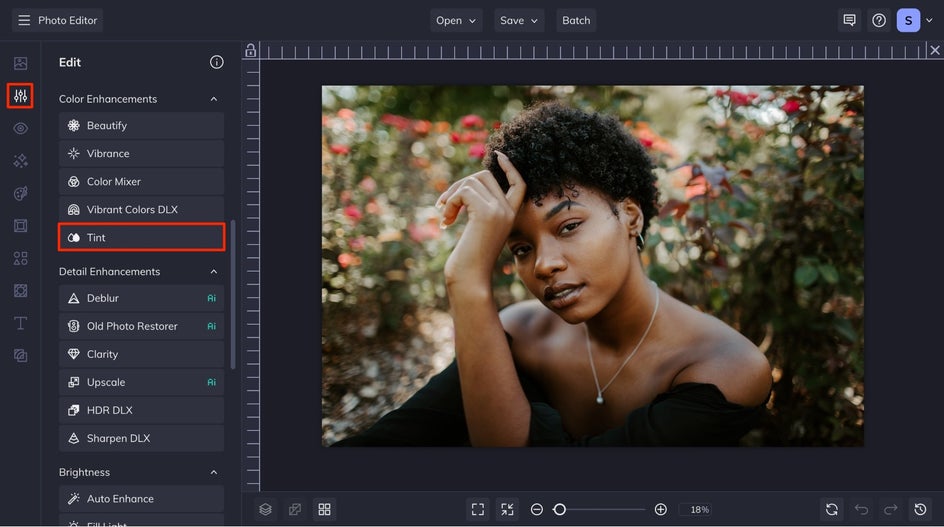
Under the Edit tab, locate the Color Enhancements section. Here you will find Tint.
Here your photo will automatically have white as your color value 1, and nothing as your color value 2, with the intensity set at 100%.
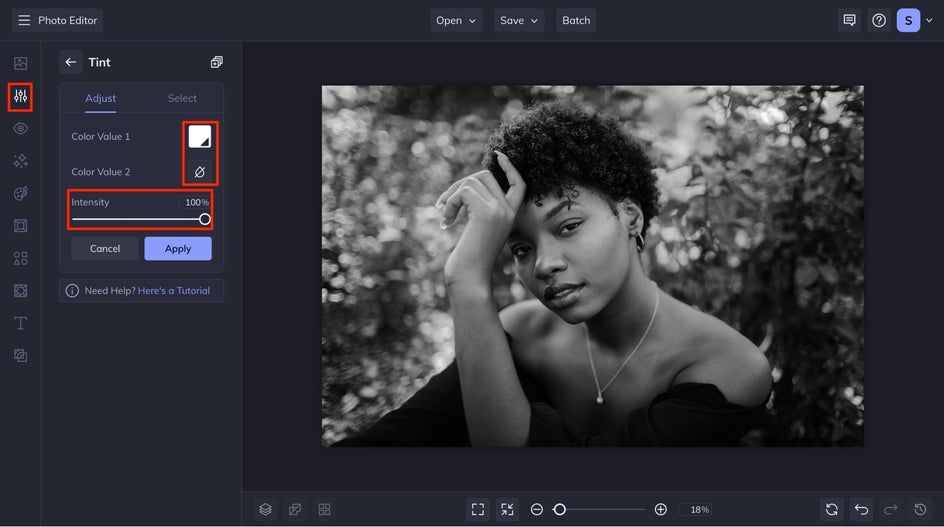
To change the tint of your image, select Color Value 1. If you know the HEX color code that you want to change the tint to, you can insert that, or you can use the Color Picker to find the color you want your image to be tinted to. Once you select the color you want, you can adjust the intensity of the tint by moving the slider till you reach the desired effect. After you have made the desired adjustments to your image, click the Apply button.

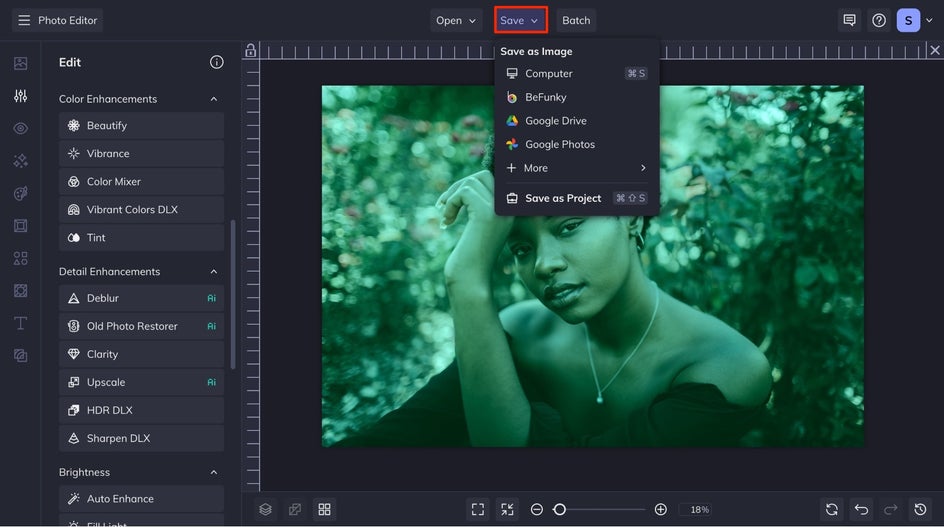
Click Save at the top of your interface, and save to your desired save location.
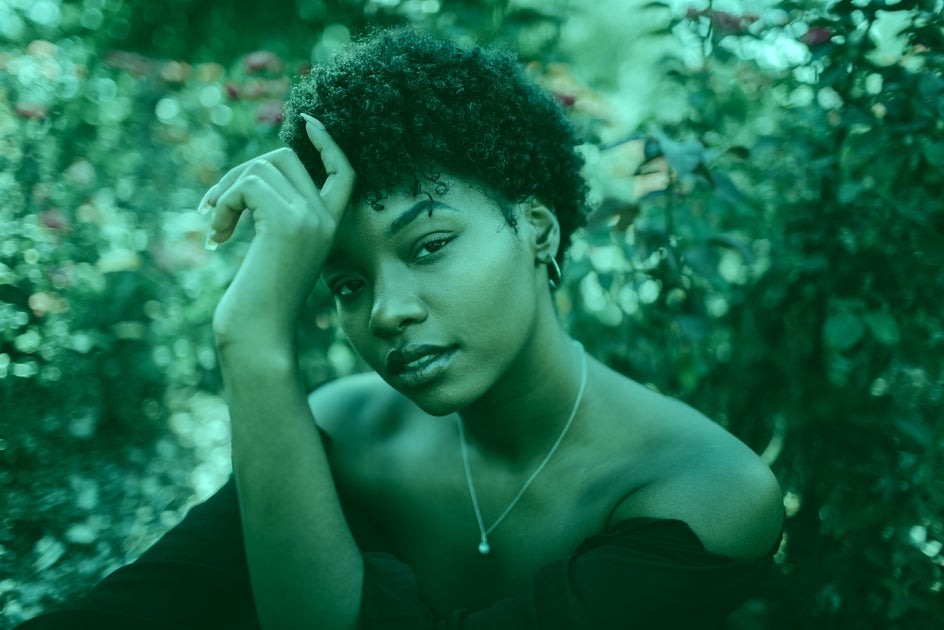
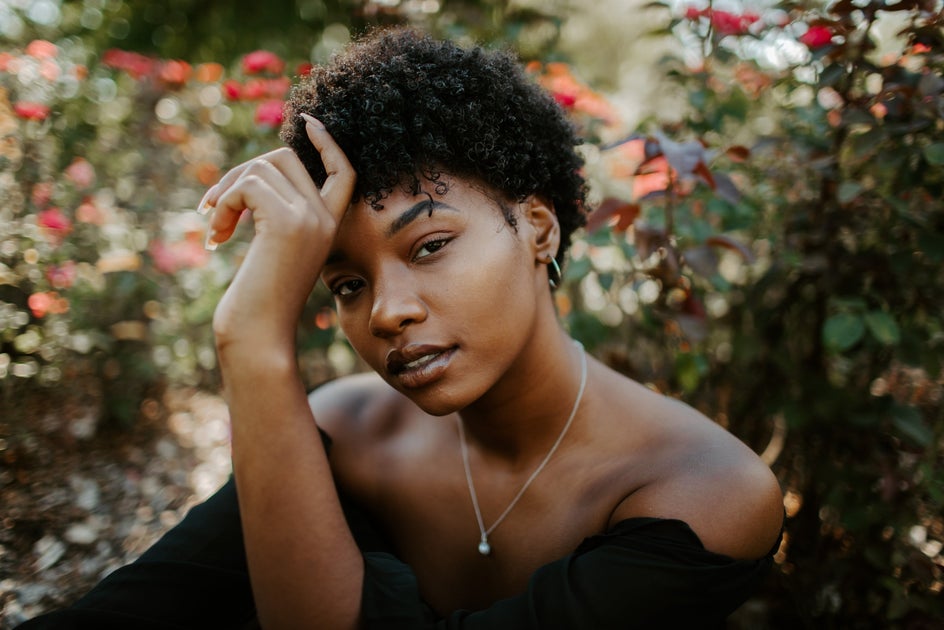
Look at how this photo is transformed in just a few simple clicks! It can go from an ordinary photo to a completely new and beautiful experience.
Get Inspired to Tint Your Images
Let inspiration guide you as you navigate the exciting landscape of tinting, turning ordinary moments into extraordinary visual stories. These are four of our favorite inspirations for tinting your own photos.
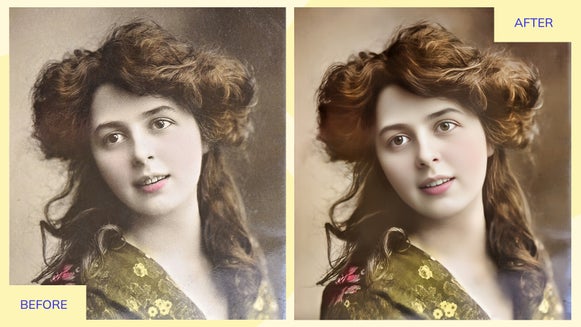
Step Back in Time With a Vintage Look
Opt for a reddish-brown color for a step back in time. Here we used HEX color code #7F2B0A with a 50% intensity to make the perfect sepia tint that feels like a vintage photo.


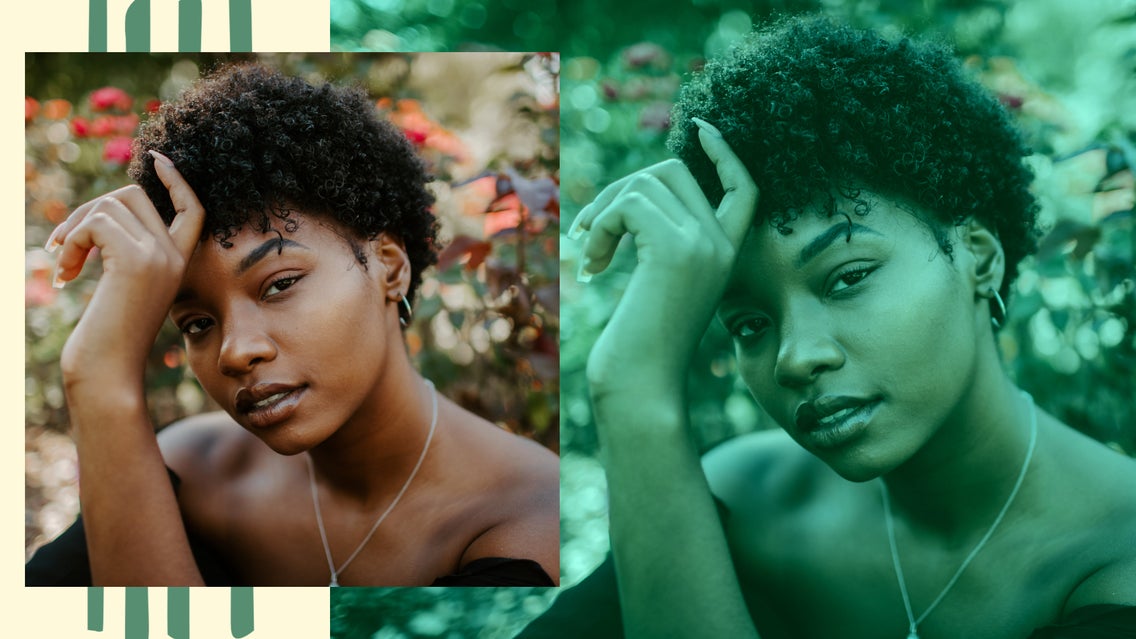
Stay Focused by Isolating Your Subject
After following the tutorial above and selecting the color value, you can use the Select option to isolate the subject of your image. You can either use the drop-down to select the foreground or the background option, or you can make a custom selection and use the brush across your image.
When you have a super impactful background, it can be really cool to keep only the color in the background, especially when you opt for a white or black tint.

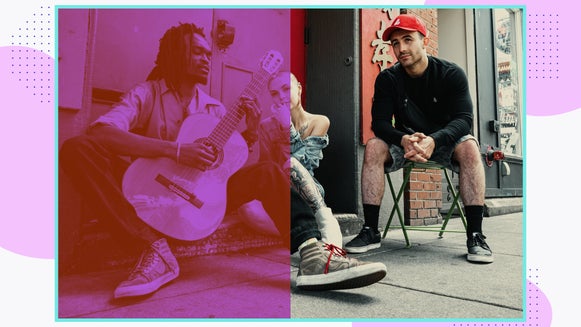
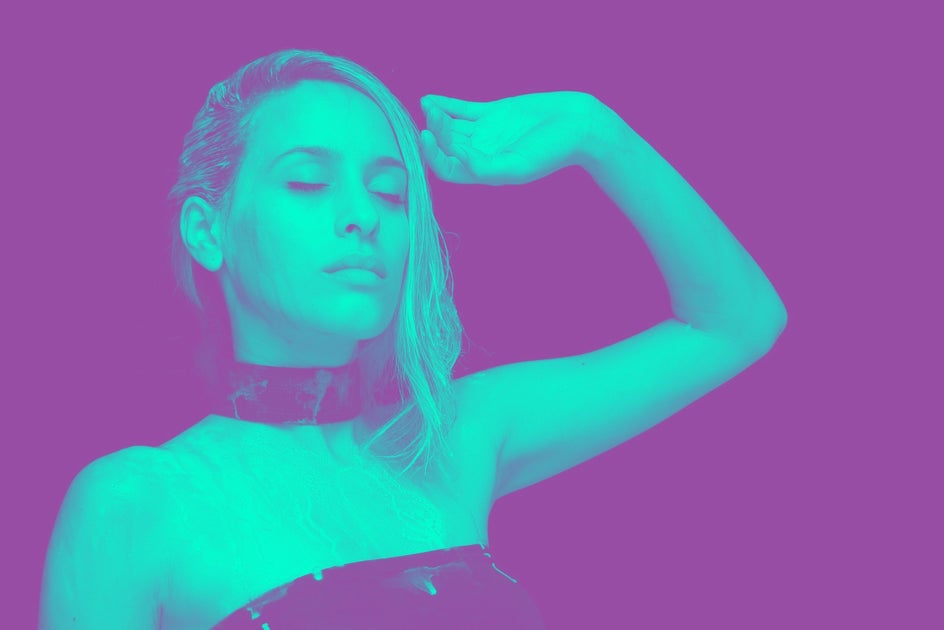
Create Dynamic Duotones
Duotones are a creative way to create an artistic and dynamic image. Select a photo with a high-contrast background, and nothing too busy. When picking colors in the free tint tool, you will want to choose a light color as your Color Value 1, and a darker color as your Color Value 2. This will keep the details of your image, creating a piece of art in the process.
Tint Images for Free!
In the digital age, with tools like the BeFunky Photo Editor and others at our disposal, mastering the art of tints becomes an accessible and rewarding endeavor. It allows creators to move beyond the constraints of reality, unlocking a realm where imagination and technical skill converge to produce images that not only capture moments but also convey the emotions and stories within them.
So, whether you're a seasoned photographer or an aspiring artist, embrace the world of tints as a means to amplify your visual voice. Through this nuanced and dynamic approach to photo editing, you'll discover the extraordinary impact that a touch of color can have on the ordinary, ultimately transforming your images into captivating visual stories. Get started tinting your own images now!