Using Transparent Backgrounds to Elevate Your Marketing Materials
If you run a small business, you’re probably always looking for quick, easy, and affordable ways to take your marketing to the next level. Finding relevant stock imagery can be tricky, however, as there’s no “one size fits all” solution. Every business is unique, and therefore, you want your marketing materials to be as well.
Thankfully, BeFunky has created a simple yet effective solution that allows you to turn your own business-related imagery into a transparent PNG file which can be used across any marketing materials you desire – from social media to brochures, business cards, postcards, and more.
It’s all possible thanks to our Transparent Background Maker, which uses powerful A.I. to give you the results you need in just a few clicks. Keep reading, because we’ll show you how you can use this incredible tool to create your very own transparent PNG files for use across all of your small business marketing!
How to Remove an Image’s Background Using BeFunky’s Transparent Background Maker
To get started, head to the Photo Editor. This is where our Transparent Background Maker is located.
Step 1: Open the Image You Want to Turn Into a Transparent PNG
Click Open at the top of the screen, then select your file’s location.
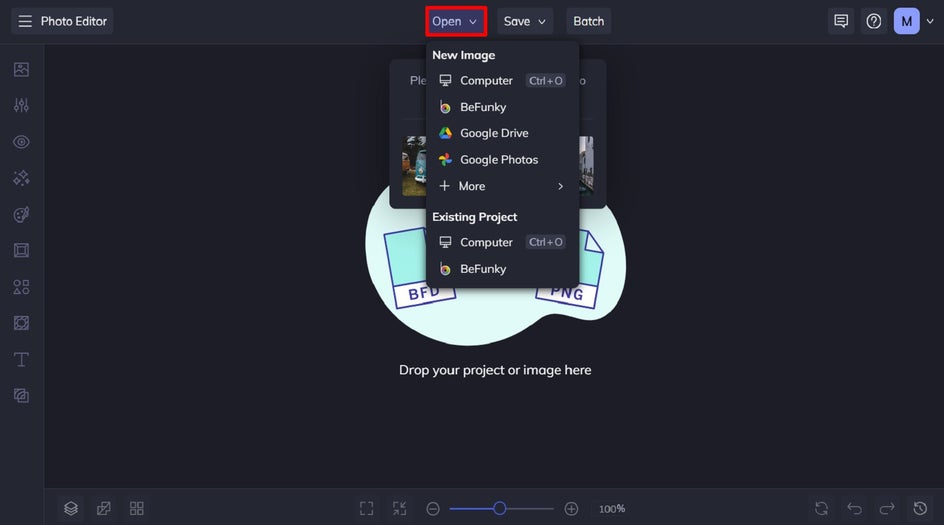
For this tutorial, we’ll be creating marketing materials for a flower shop.
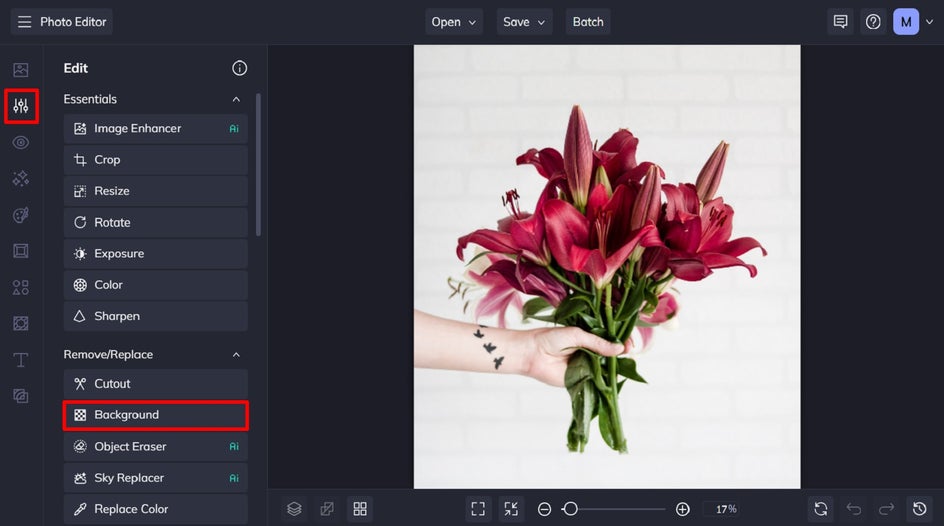
Step 2: Navigate to the Transparent Background Maker
In the Edit menu, click Background. You’ll find it underneath the Remove/Replace section.
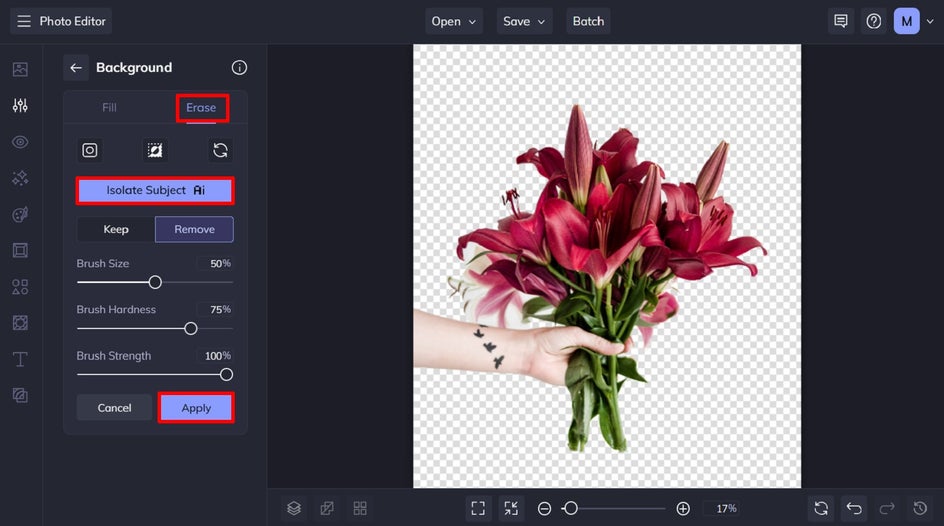
Step 3: Isolate Your Subject
This tool will immediately apply transparency to your entire image. To apply this transparency to the image background only, you’ll need to click on the Erase tab, followed by Isolate Subject. Within seconds, your image will now feature a new background that’s completely transparent.
Then, just click Apply to apply those changes.
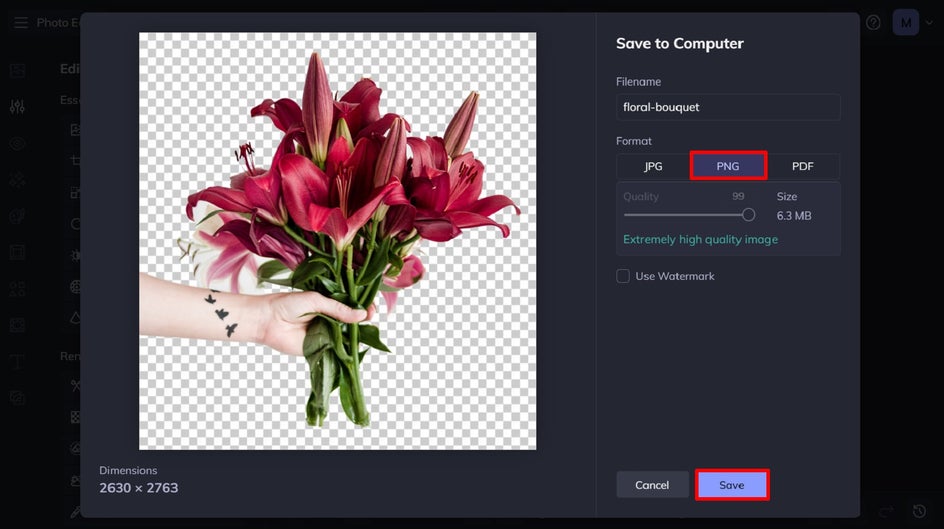
Step 4: Save Your Image as a Transparent PNG File
To save your image and maintain its transparent background, you’ll need to save it as a PNG file. To do this, click Save at the top of the screen, then choose your desired save location.
The most important part is that you select PNG under Format.
How to Create Marketing Materials Using Your Transparent PNG File
Now that you have your new transparent background image, it’s time to add it to one of our pre-designed business marketing templates. To begin, head to the Graphic Designer.
Step 1: Select a Marketing Template Design
Within the Template Library of the Graphic Designer, use the side menu to select the type of marketing material you’re looking to create. Here, you’ll find pre-made templates for everything from social media and banner ads to posters, flyers, postcards, and so much more.
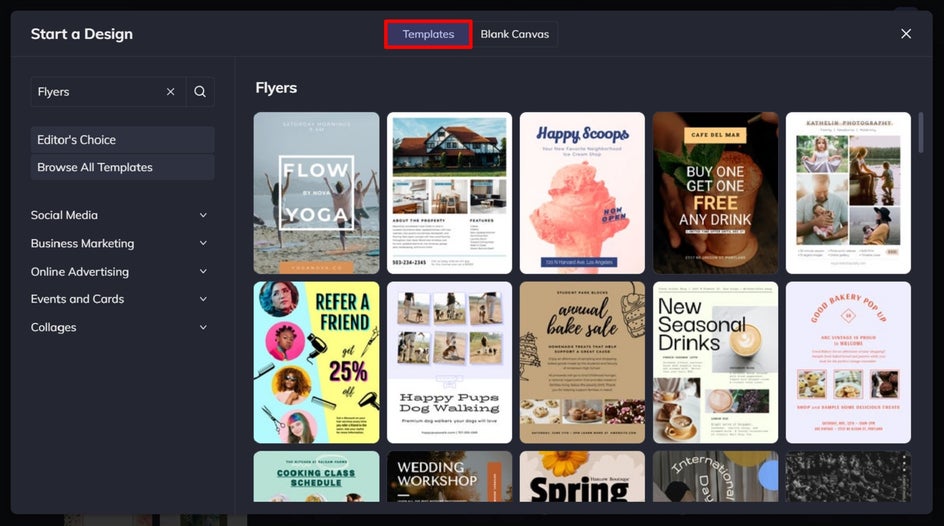
Once you’ve chosen the template you wish to add your PNG image to, click Use This Template to begin editing it.
Step 2: Upload Your PNG File to the Image Manager
To do this, navigate to Image Manager from the main menu on the left. Then, click Computer to upload your PNG image file from your files, or select the button featuring the three dots (“…”) to upload your image from another source, like your BeFunky account, Google Photos, or Google Drive.

Step 3: Add Your PNG File to Your Design
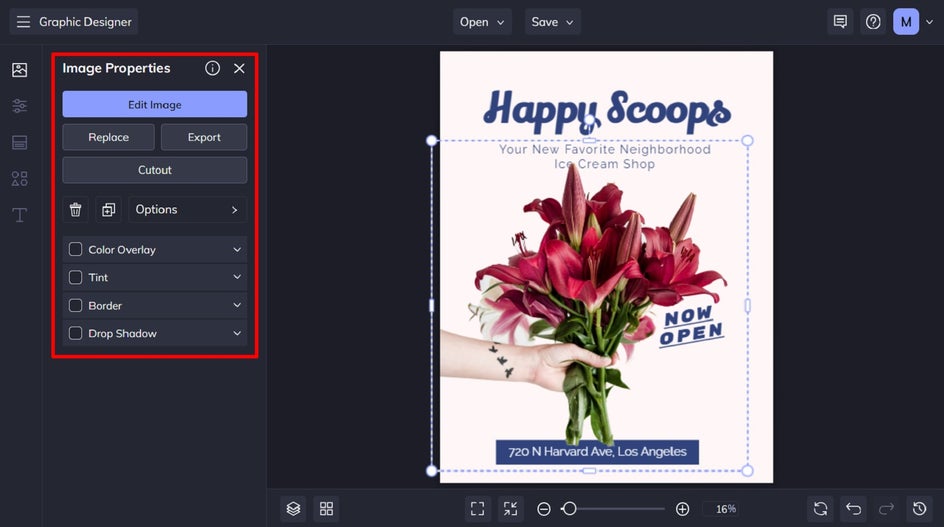
With your transparent background image uploaded to your Image Manager, you can now drag and drop it onto your marketing template. Before you do this, you may need to delete an existing graphic or photo in its place. Just select this with your cursor, then hit Delete on your keyboard.
You can also use your cursor to reposition the image on your design. Additionally, you can resize it by dragging the corners of your image inwards (to make it smaller) or outwards (to make it larger).
Want to add some eye-catching effects to your PNG file? Click on it once to access the Image Properties panel. From here, you can add a color overlay, tint, border, or drop shadow.
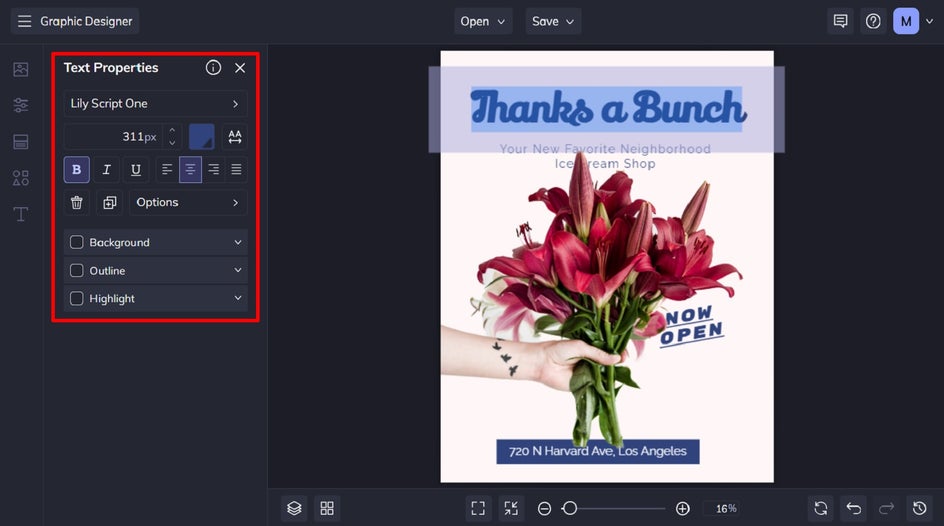
Step 4: Edit Your Template’s Existing Text
With your image in place, it’s now time to tweak your marketing template so it reflects your own brand and the message you want to convey. You can change any text by double-clicking on the text box and typing. When you click on any text box, a Text Properties panel also appears. From here, you can change elements such as the font, size, spacing, paragraph, color, and more.
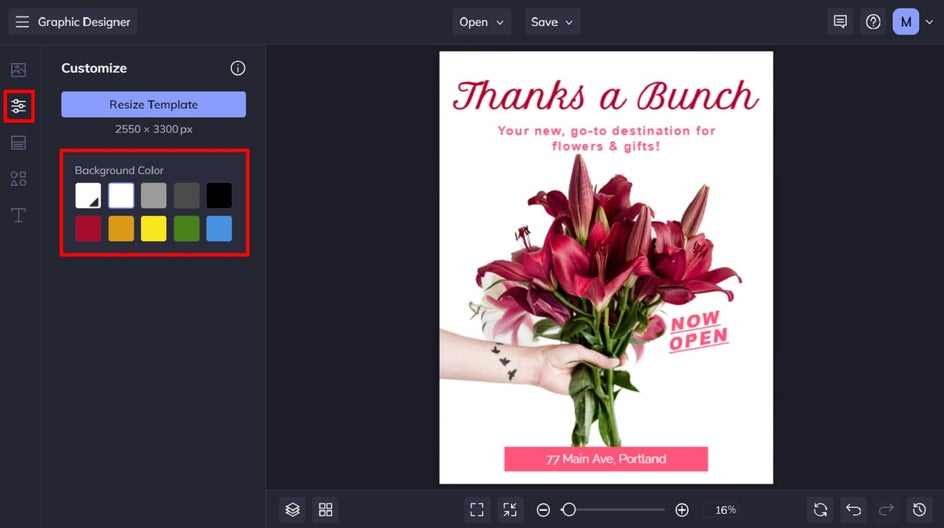
Step 5: Change the Template’s Background Color (Optional)
You can also adjust the template’s existing background color if you’d like to make it more cohesive with your branding. To do this, navigate to Customize in the main menu on the left. Then, choose a color swatch underneath Background Color. Alternatively, you can select the first color swatch to choose your own hue from the Color Picker.
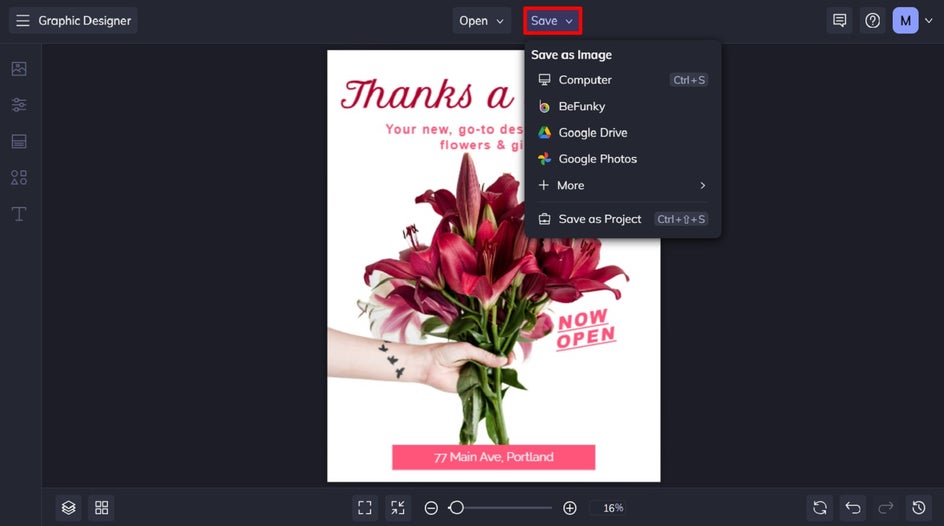
Step 6: Save Your New Marketing Material
Now all that’s left to do is to save your marketing material so it’s ready to share with your target market. Click Save at the top of the screen, then select your desired save location and file format.
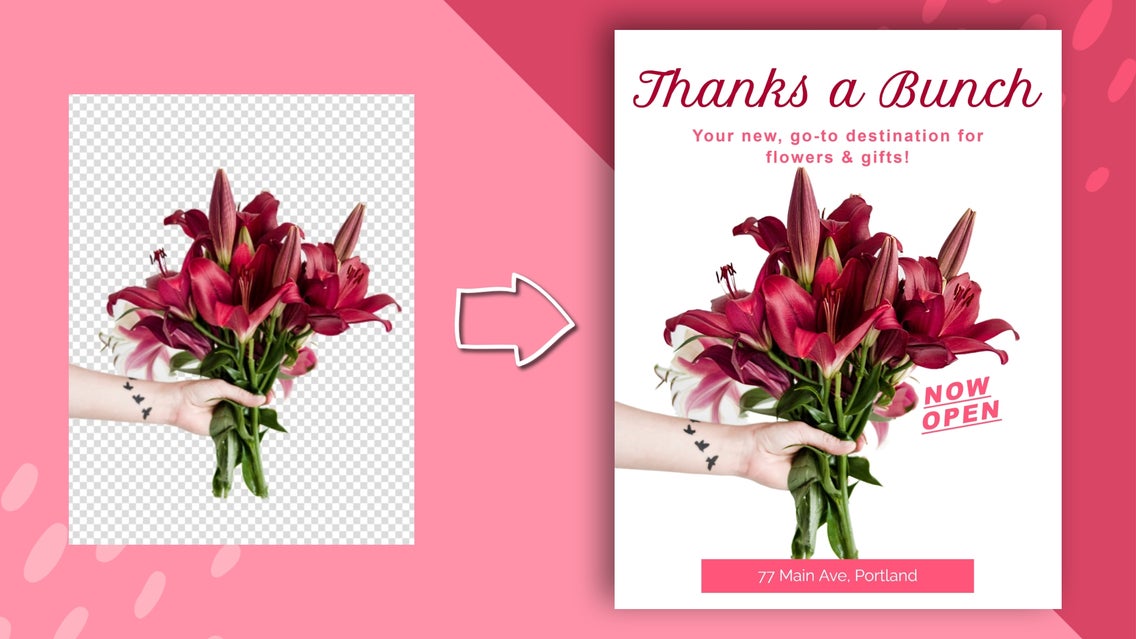
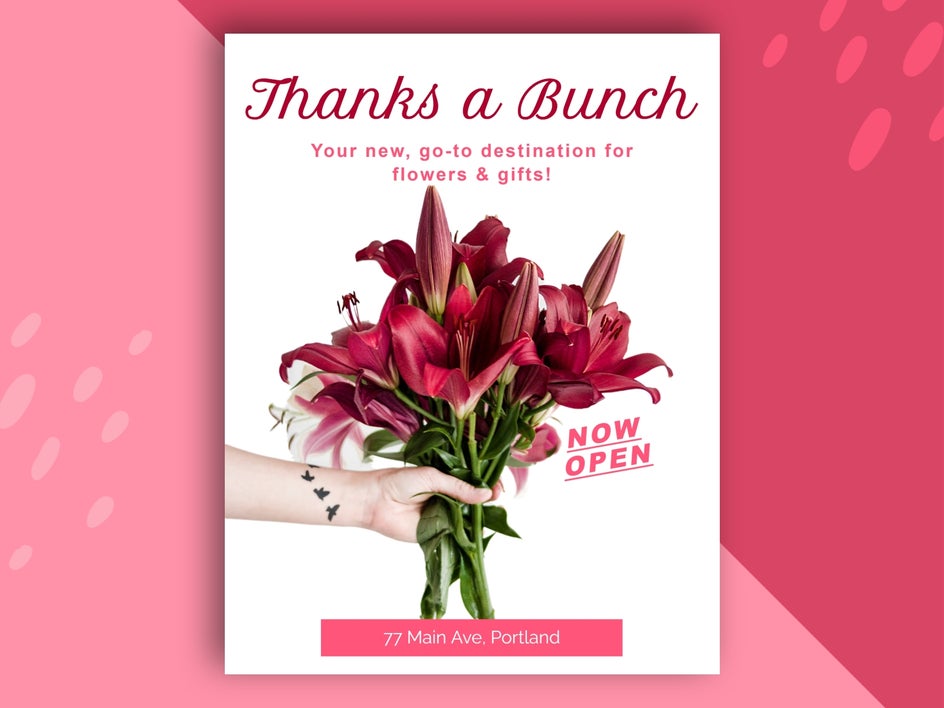
Final Results: An Eye-Catching Flyer Using Your Own Transparent Background Image
All it took was a few minutes to transform this flyer template into one that’s perfectly personalized for a floral shop.
Where Else Can You Use Your Transparent PNG File?
A flyer is just one example of a marketing template you can add your own transparent background image, but there are plenty of other options. Here are just three more designs to inspire your own small business marketing collateral.
Facebook Ads
Facebook ads feature heavily on the social media platform, so adding your own photo with a transparent background is a great way to stand out. It’s also a fantastic way to put your own products or services front and center, especially when teamed with a high-contrast backdrop. Take this Facebook ad below, for example, which uses a PNG image of a house, against a bright orange background color. It’s certainly an attention-grabbing advertisement that stands out among other real estate advertisements.

Business Cards
Even your business cards can benefit from utilizing a photo with a transparent background, just as this example below shows. Doing so gives you the versatility you need to use your own branding colors, rather than making do with the background featured within your original image. You can even arrange your PNG images to create an eye-catching pattern, as seen here.

Posters
Posters require you to go big or go home, so take yours to the next level with the perfect transparent background imagery. It’s a great way to combine multiple images together in a way that’s cohesive and seamless – as you can see in this poster example below.

Add a Transparent Background to Any Photo in Seconds
Why use stock PNG files when you can turn your own business’s photos into transparent background images? Thanks to BeFunky’s Transparent Background Maker, doing so isn’t possible, but easy too.
Want to see what all of the fuss is about? Check out the Transparent Background Remover today!