The Best App for Creating Typographic Designs From Your Phone
Typographic designs have been popular for creating art prints, social media posts, and apparel designs. They continue to be some of the most popular posts on social media and people love sporting the designs in many facets of their life. What if we told you that you can create these sorts of designs straight from your phone?
While BeFunky’s desktop Graphic Designer is amazing, sometimes you don’t have your computer right next to you and need to create something on the go! The great thing about using the BeFunky app is that anything you create on your small screen is just as high resolution as creating it on your desktop, whether it is a digital file or print!
How to Create Quick Typographic Designs With the BeFunky Mobile App
In a recent article, we talked about the benefit of posting sharable content in an Instagram Carousel post. Today, we are going to show you how easy it is to create a typographic design using the Text tool in the BeFunky app.
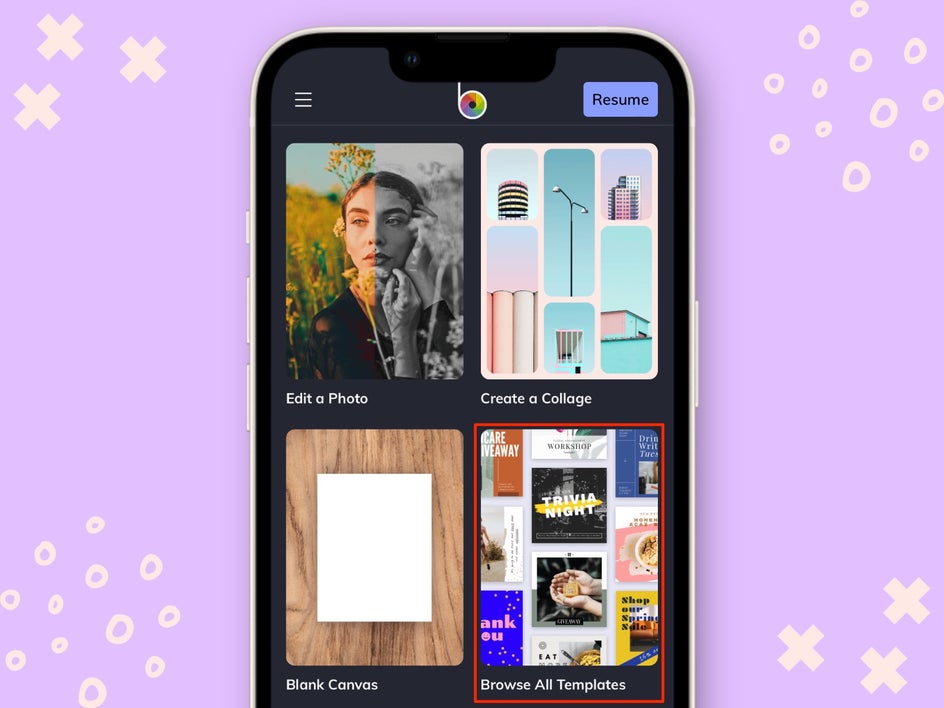
Step 1: Choose a Template
Open the BeFunky app and select Browse All Templates. If you have an idea in mind of what you want to create, you can select Blank Canvas.
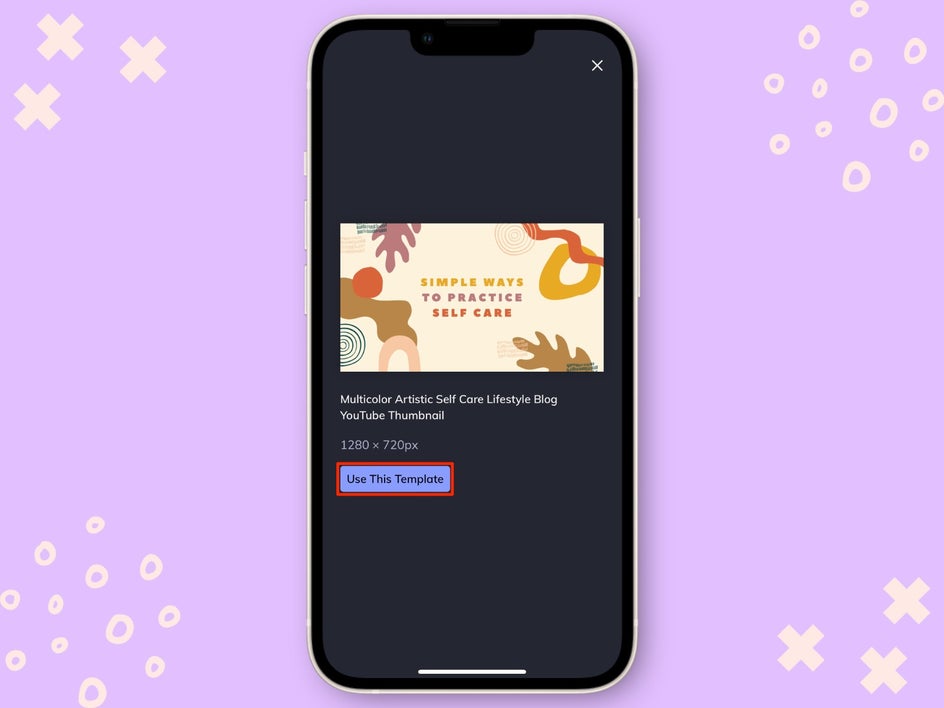
Select a design that you like and hit Use This Template. It doesn’t have to be the correct size – we will adjust that in the next steps.
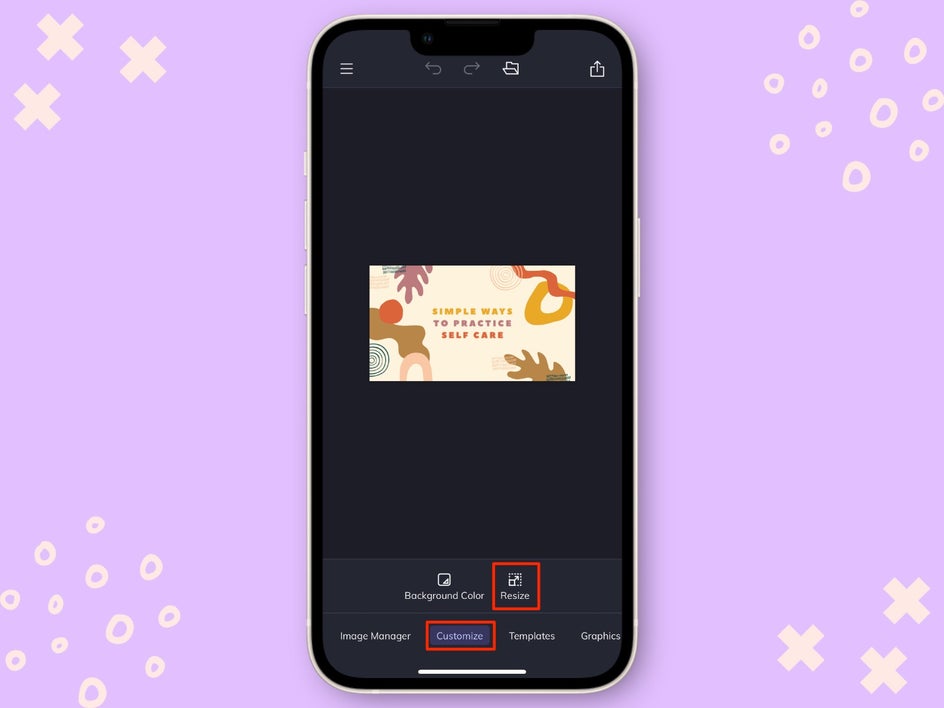
Step 2: Customize the Design
To adjust the size of your design, select Customize at the bottom of your screen and then Resize. I want to create a Square Social Post, so I am going to select that from the dropdown menu. Make sure that before you press Resize that the Smart Resize option is selected.
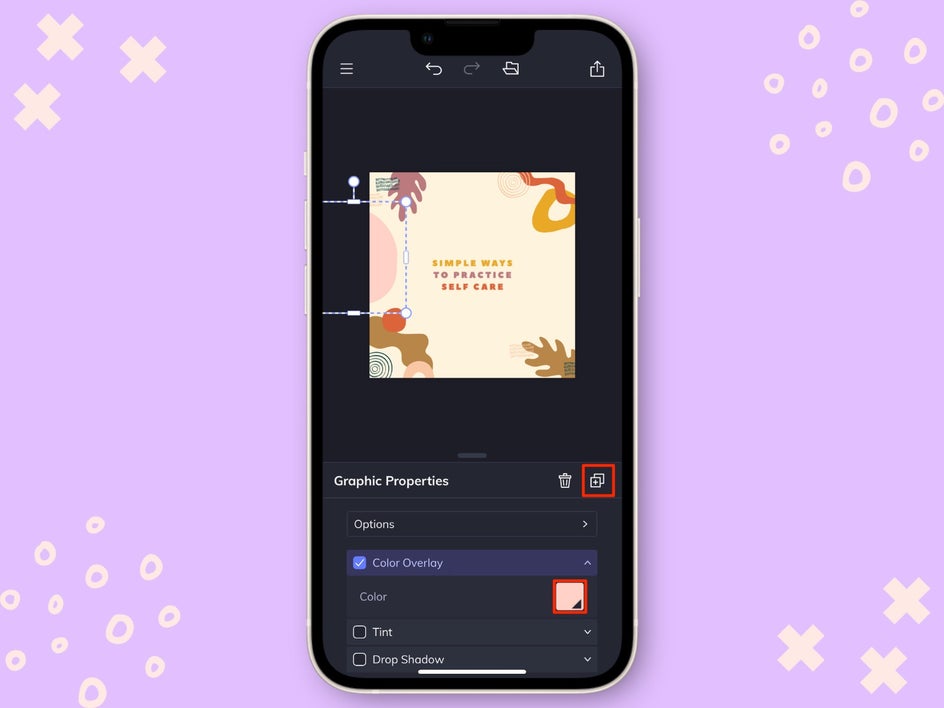
Next, we are going to adjust the graphics. You can either add in graphics by selecting the Graphics option at the bottom of your screen or if you chose a template with graphics you want to keep, you can simply click on them to move or Duplicate them and also adjust the Graphic Properties like Color Overlay, Tint, and Drop Shadow.
Once you are happy with the design, we are going to customize the text!
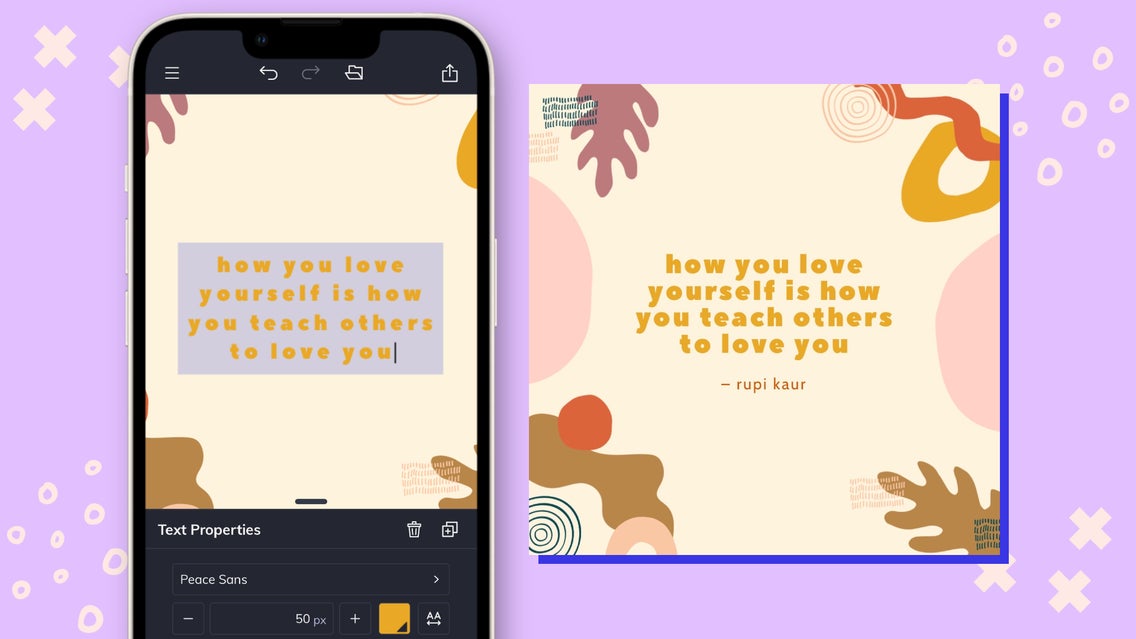
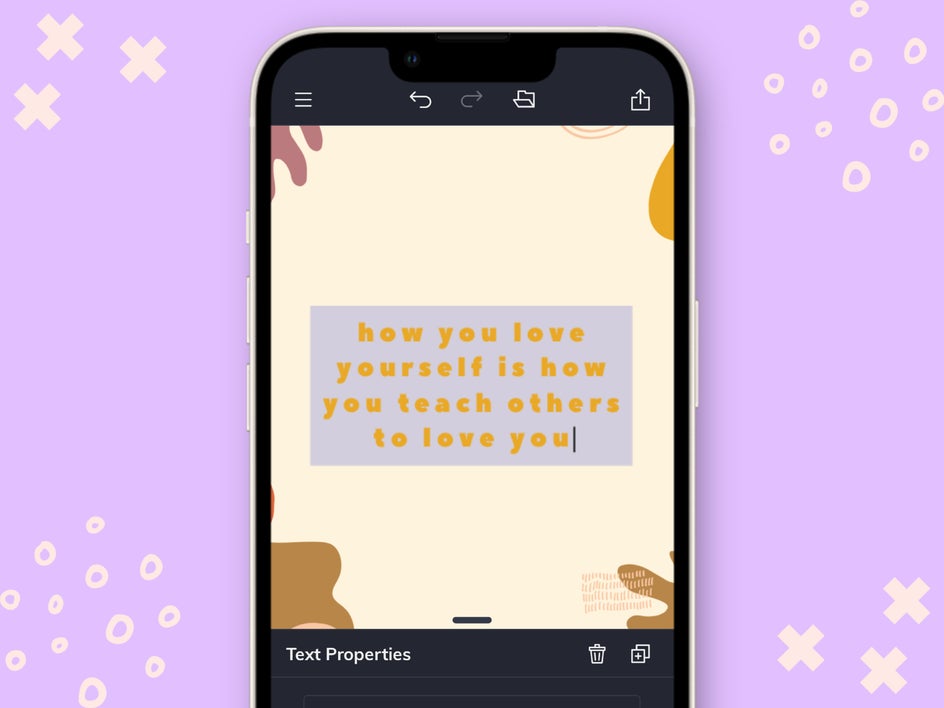
Step 3: Customize the Text
The shareable content that we want to make is a beautiful typographic inspirational quote. We are simply going to double-click on the text in the template and type in our quote. If you need to make your graphic bigger, do a reverse pinch on the screen by placing two fingers in the center of your screen and pushing them in opposite directions.
You can change the Font, Size, Color, Spacing, and more by clicking on the text box and adjusting these settings in the Text Properties menu that appears. If you want to be even more creative, try adding a Drop Shadow or selecting the Curved Text options.
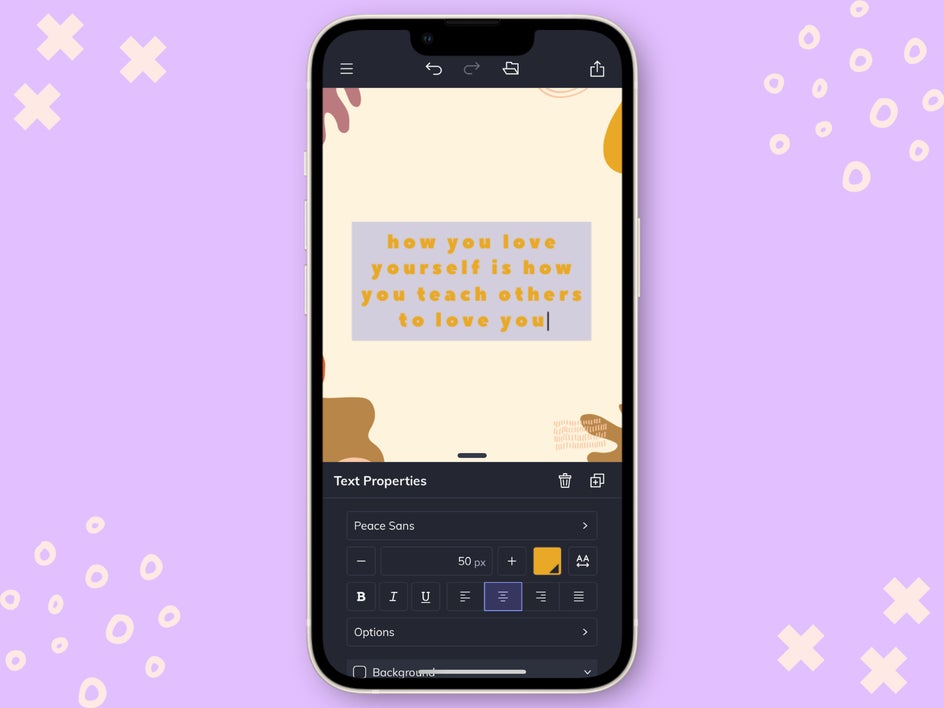
We are going to adjust the size to 65px and then select the Spacing button to change the Letter Spacing to 1 and Line Height to 92%.
After this, we are going to give credit to the author and need to add another text box.
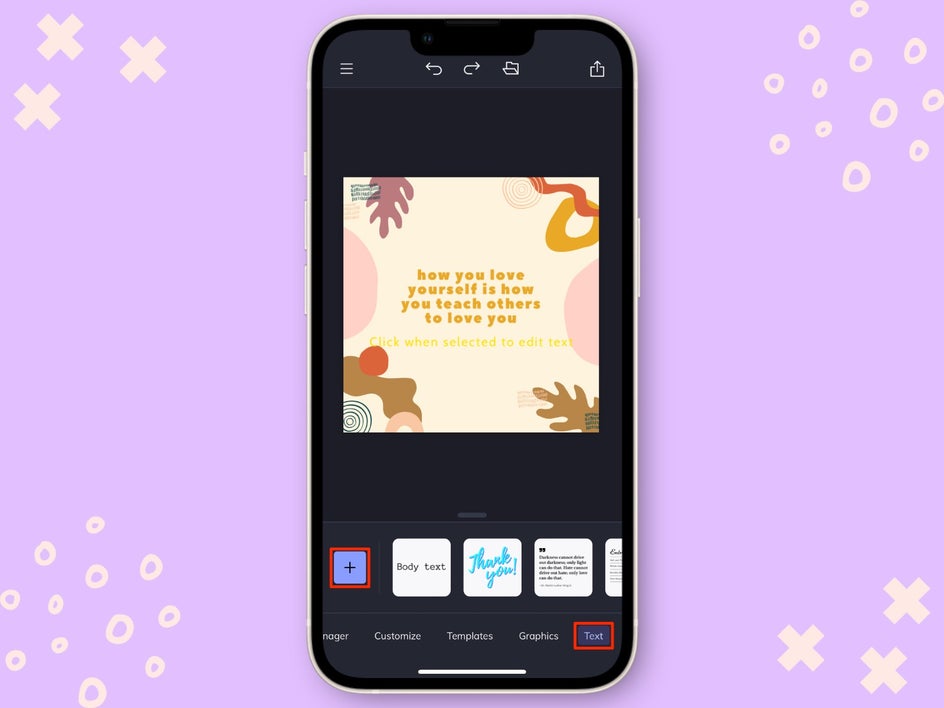
To add another text box, select Text from the bottom menu and then select the Add option or any of the pre-made text options from the carousel menu. We then adjusted the size to 40px and changed the color.
Step 4: Save Your Mobile Text Design
Once you are finished, select the Save button in the top right corner of your screen. In the menu that appears, select Camera Roll.

The great thing is that if you also select Save as Project, you can come back to it later to make any adjustments or even open the same file on your computer.
Easily Create Typographic Designs On Your Phone
Creating high-quality typographic designs on your phone is easy. Using the Graphic Designer in the BeFunky app, you no longer have to have a computer to create beautiful pieces that you can use for social media, art prints for your home, or even to create apparel graphics.