


How to Split Images for Your Instagram Grid
Curating your Instagram grid can be something that takes an eye for detail and a lot of time. There are many strategies that come into play as to what makes the perfect-looking profile, and one of those is using big grids to emphasize special photos. This design aesthetic breaks a large photo down into several smaller ones so that when they are all pulled together, it looks like one big image. With BeFunky’s Photo Editor, this can be done in a matter of minutes and is ready to click share.
How to Split a Photo for Your Insta Grid
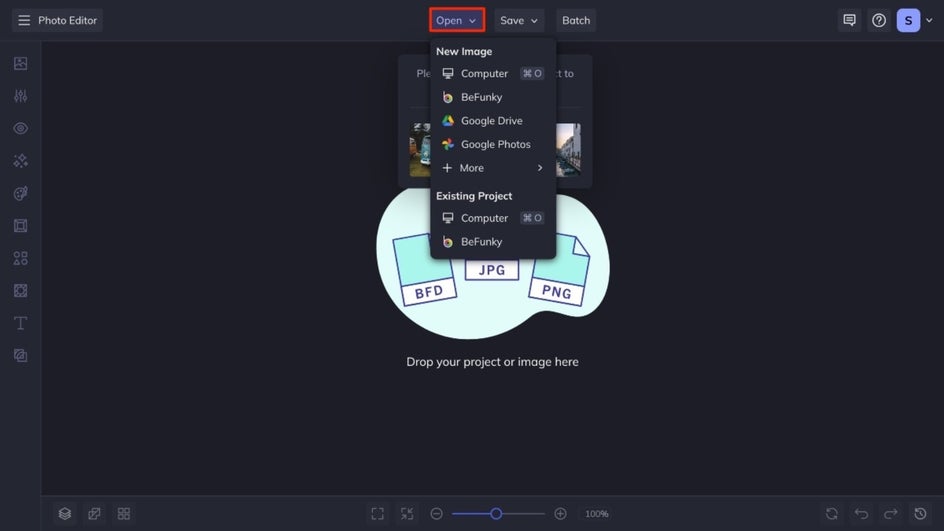
Head over to the Photo Editor where you can drag and drop your image into the canvas, or open it from your computer.
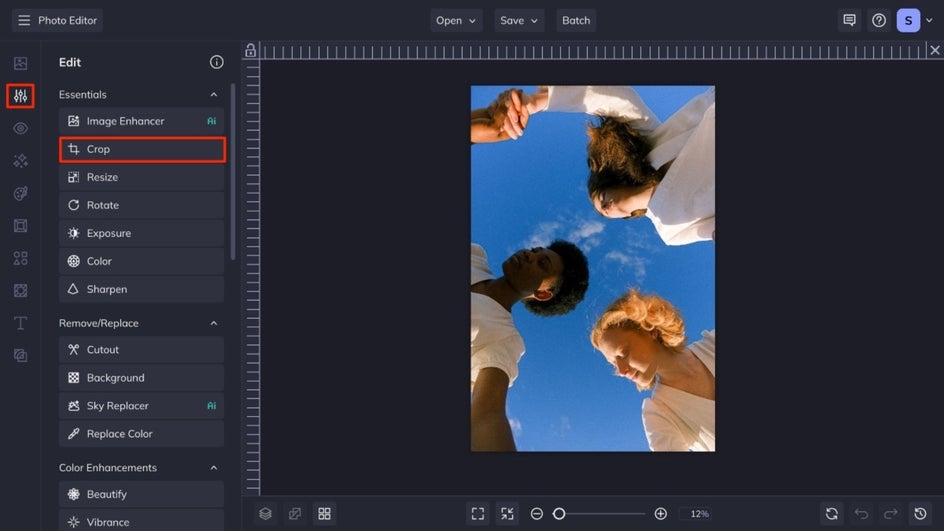
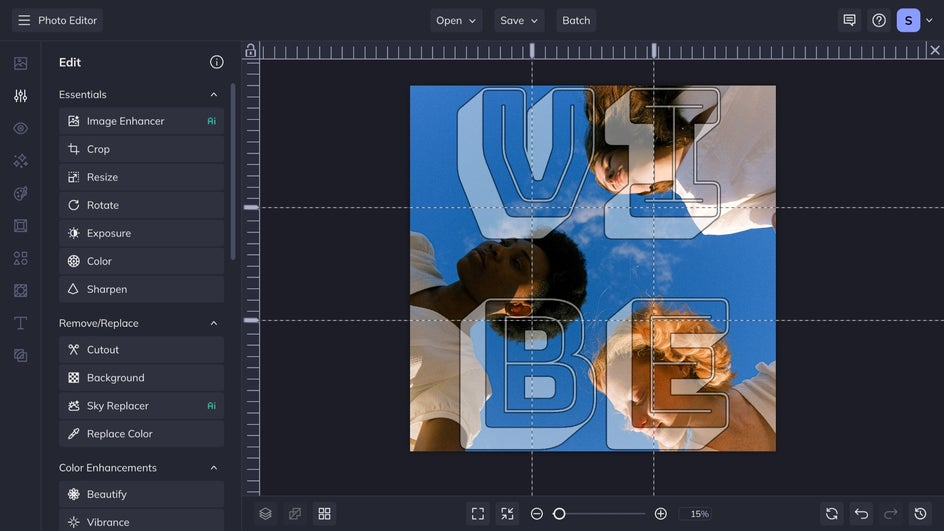
Step 1: Crop Your Image
After you have uploaded your photo, navigate to the Crop tool under the Edit tab.
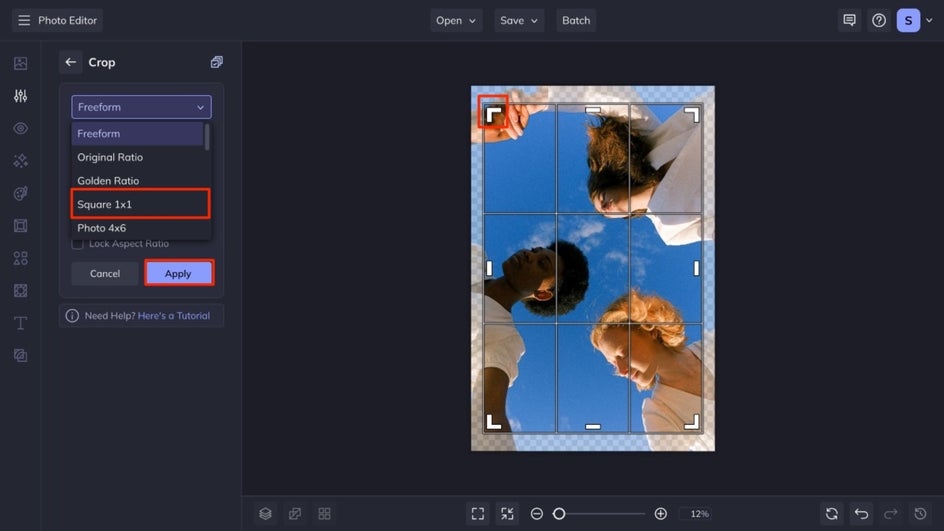
Under the drop-down menu, select the square crop option, you can position the crop box on the image where you desire. Adjust the size by dragging the corners out for larger or smaller. Then when you are satisfied, click apply.
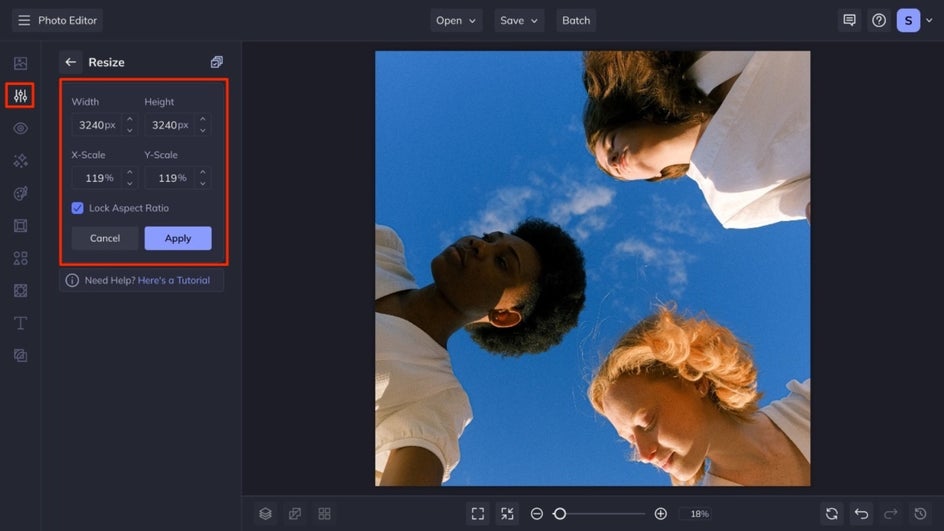
Step 2: Resize Your Image
Under the Edit tab navigate to the Resize tool. Here you will want to make sure that your image is resized to be 3240 pixels wide and 3240 pixels tall, then click apply. The optimal image size for Instagram posts is 1080X1080, so resizing will allow you to post at the quality that looks the best.
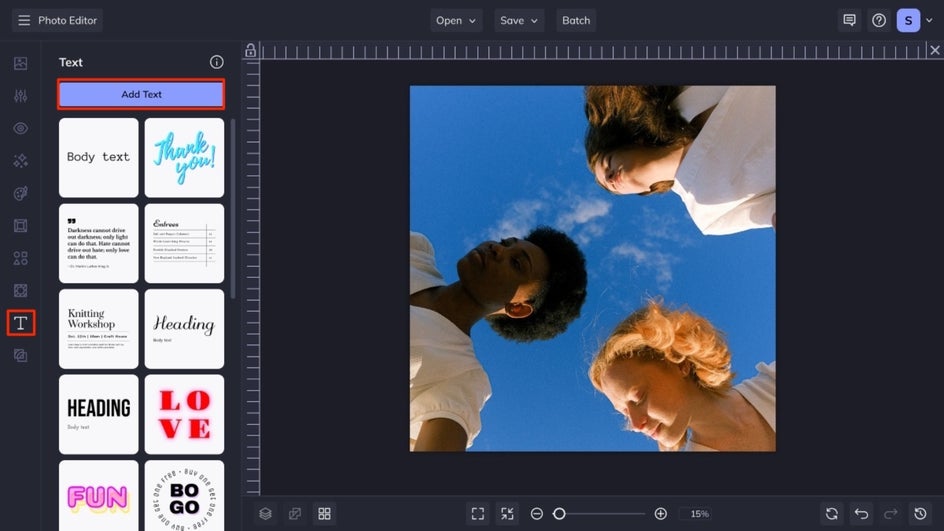
Step 3: Add Text
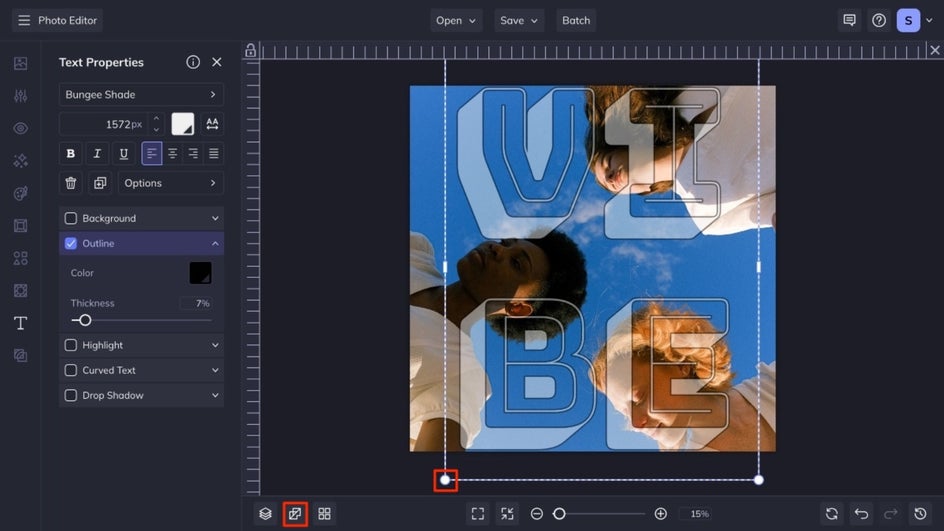
Under the Text tab, you can take inspiration from any of the text templates or choose your own with the Add Text box.
The Text Properties box will populate and you are able to make adjustments to the font, the size, the color, and many more options. You can also adjust the size and placement of your text by dragging the text around your canvas and using the guides in the corners of the text box to make it larger or smaller. Once you are happy with your image, click the Flatten button at the bottom of the interface to combine the text and the image layers into one.
Step 4: Set Your Guides
At the bottom of your interface, click the Alignment button and be sure that both Snapping and Guides are toggled on. Then return to your image.
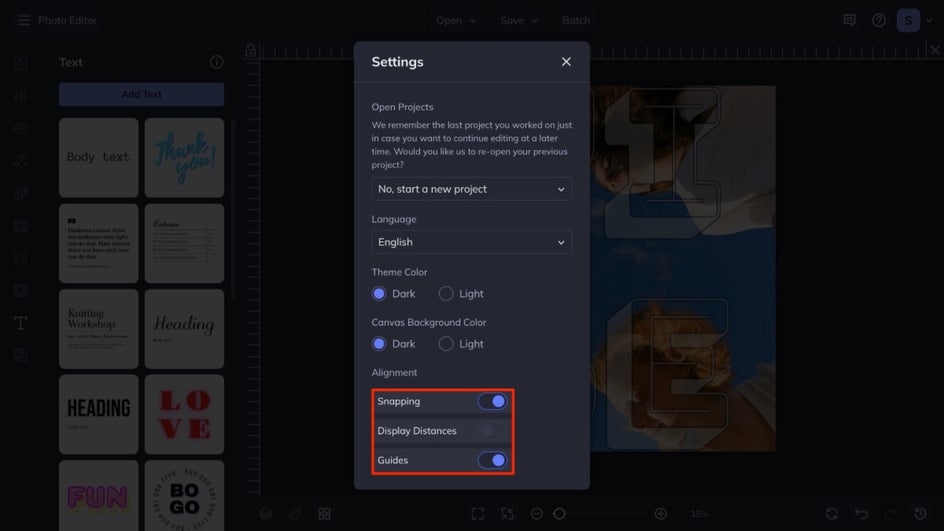
You will want to set your guides every 1080 pixels, this will allow for the perfect placement of your big grid images. Simply click on the guide bar, and drag your guide to the right pixel number. It is super important that it be exactly 1080 pixels. In the end, you will end up with 4 lines across your canvas, creating 9 separate boxes.
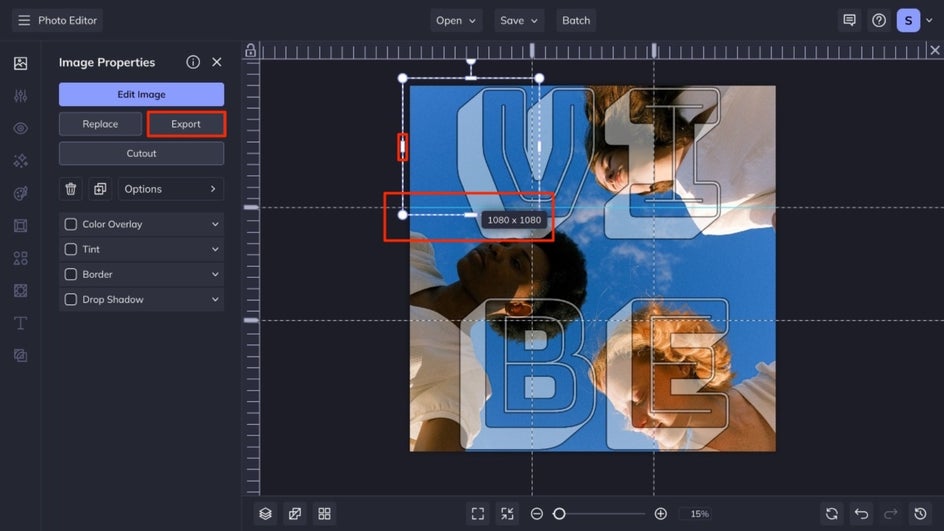
Step 5: Layer Your Image and Export Your Grid
Right-click on your image, and select Save to Image Manager, then when the image pops up in your image manager right click on that and select Add as a Layer. Once the second image is on your canvas, right-click and select Canvas then Fit to Canvas. This will make it so your second image is directly on top of your first image. Click on the image and the blue bars and dots on the corners of the image should appear. We will be using the bars on the sides of the image. Drag the bar over to your first crop line until it turns blue, then drag it up to form your first square image. Click on your first square and the Image Properties tab will open, click on the Export button and it will direct you to save this first image to your desired save location. I would recommend naming it something that allows you to remember what order the images are in. Then you will repeat this process for the rest of the 8 squares. You should finish with 9 final images.
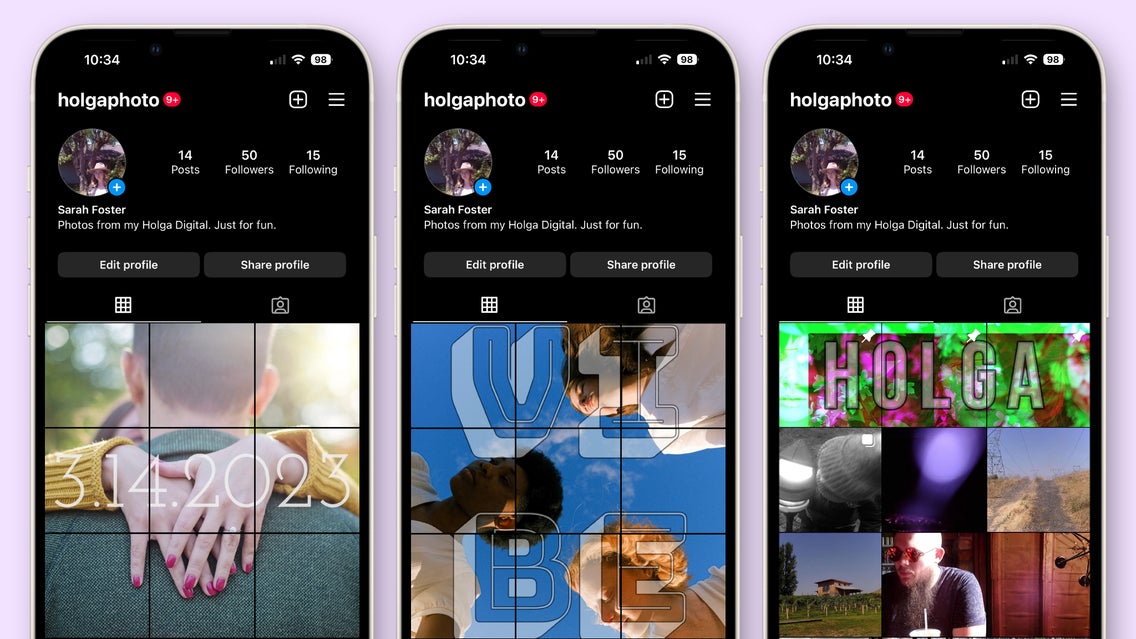
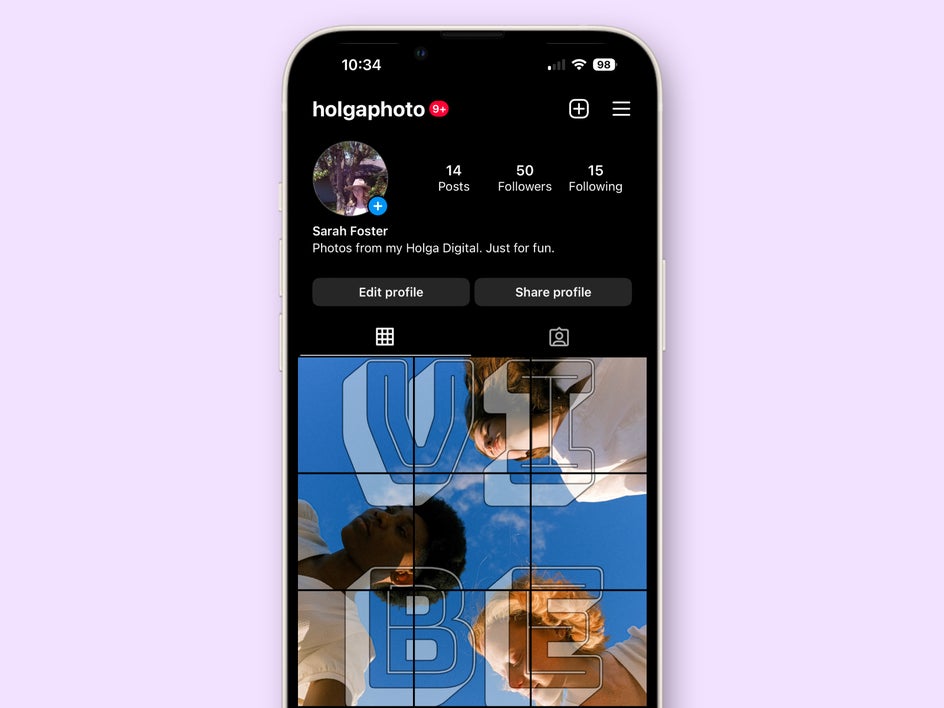
Final Results
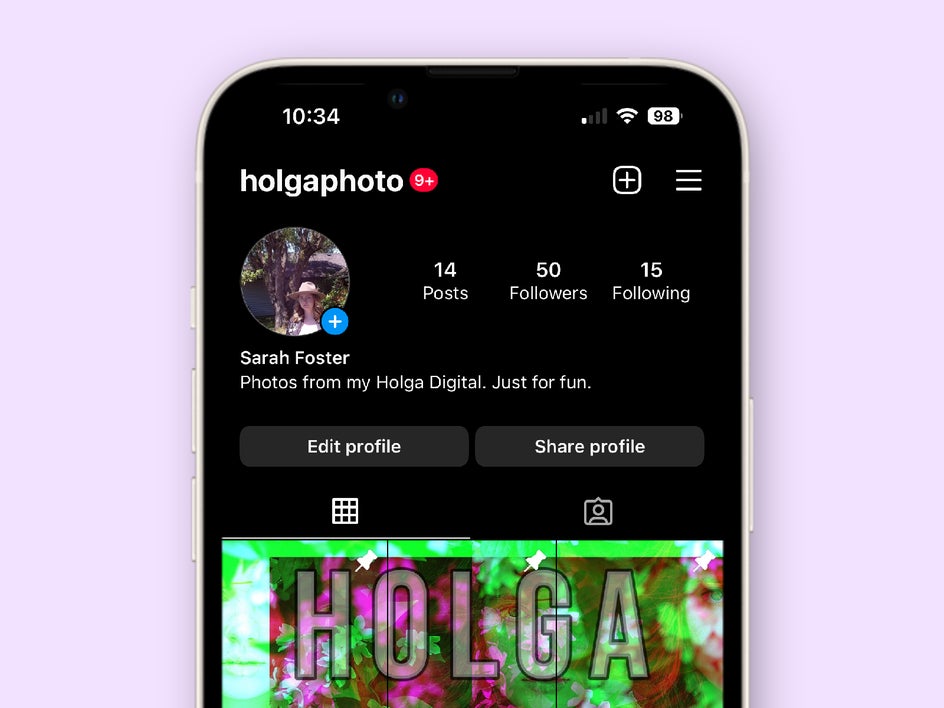
When you head over to Instagram, you want to make sure that you are posting your images in reverse order. Starting with image 9 and then working your way to image 1 to result in the big grid post. In just a few steps, you can have a big grid post to make your Instagram account super aesthetic.
Get Inspired to Create Your Own
Now that you know how to create your own big grid images for Instagram, get inspired for yours with three of our favorite ways to use big grid Instagram posts.
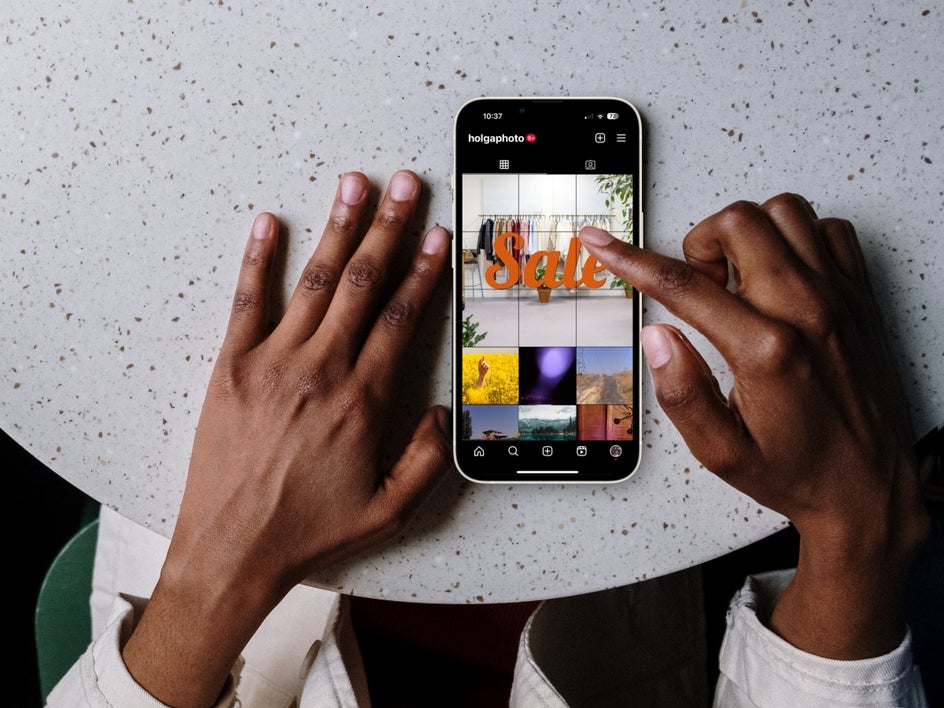
Announce a Sale
As a small business owner, using social media to promote things like sales is a perfect way to market yourself. Use text over your image to share your message, keep it simple with just the word ‘sale’ or try something like “Up to 50% off” to catch your followers' attention.
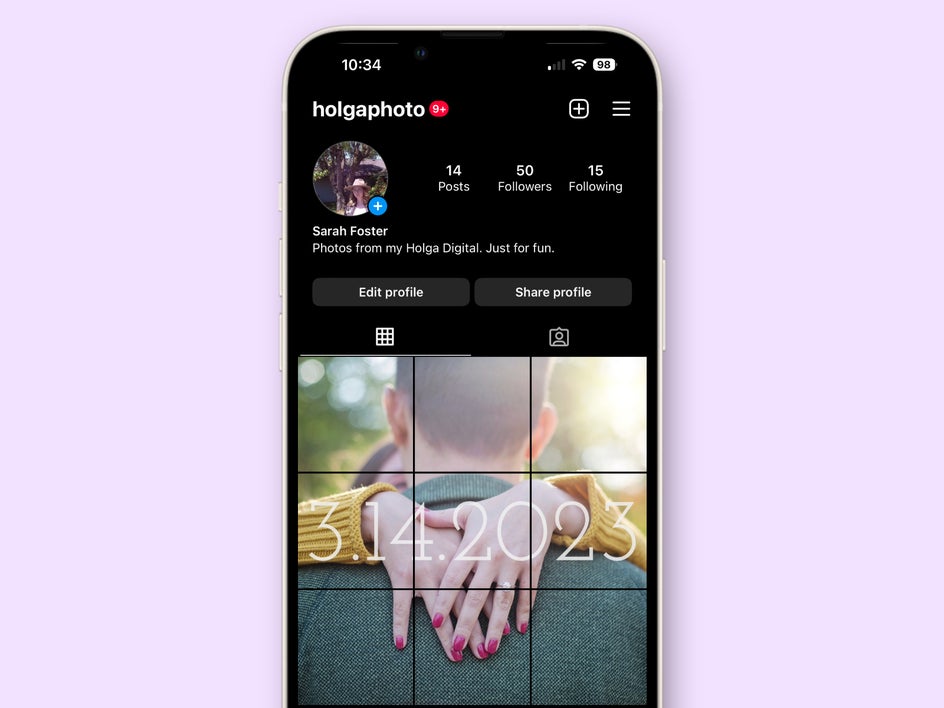
Celebrate Something Big
Did you just get engaged? Welcome a new baby? Graduate collage? Create the perfect Instagram grid to celebrate your accomplishment with your audience! Using bold words like ‘Cheers’ or ‘Hooray!’ or even a special day will undoubtedly grab likes from your followers.
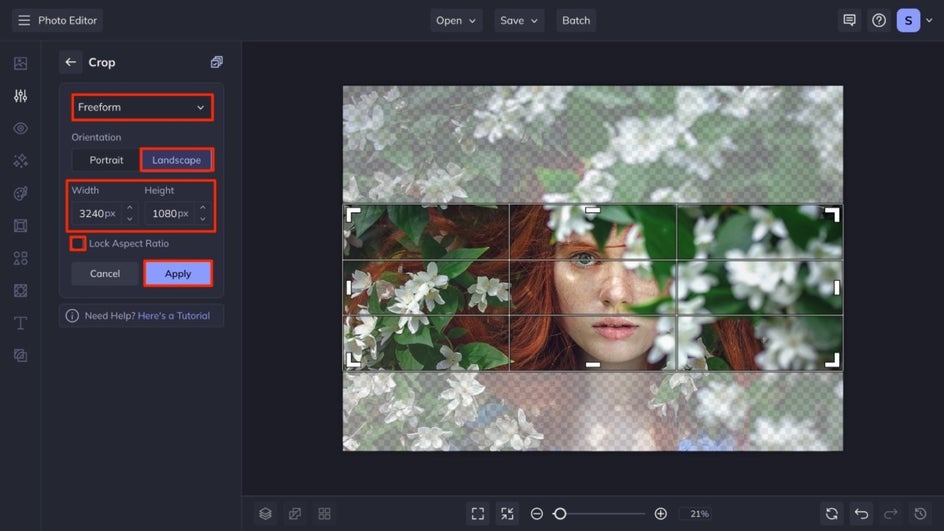
Curate Your Pinned Images
The top three images on Instagram can be pinned to your profile so that no matter what you post, those three will always stay. Instead of doing 9 photos, you can do three and pin them to the top of your page so that it is the first thing that is seen when people visit your profile. You’ll want to make sure that your photo is resized to have a width of 3240 pixels, then when you go to crop your image choose the freeform option and set the width to 3240 and the height to 1080 making sure that the Lock Aspect Ratio box is unchecked then click apply.
After that, you can choose to add whatever text or graphics you want to it, and then follow the tutorial above for just the three images to select. To pin the images to your profile, you’ll want to tap profile or your profile picture in the bottom right to go to your profile. Then tap on the first image, then tap more options in the top right. Then tap Pin to your profile. You will repeat that for the second one, and then again for the third. These images will stay set as the top three images of your profile until you opt to change what your pinned images are.
Get Creative With Your Grid
With the help of BeFunky’s Photo Editor and Guide Lines, you can create your own aesthetic big grid posts in a few minutes. Get started customizing your feed now!


