Crafting Festive Greetings: A Guide to DIY Digital Holiday Cards

The holiday season is fast approaching! It is a time of year that is filled with wrapping gifts, indulging in roast dinners, and celebrating with end-of-year cocktails. However, amidst all the holiday cheer, there's another tradition that stands out – sending heartfelt, personalized holiday cards to your family and friends.
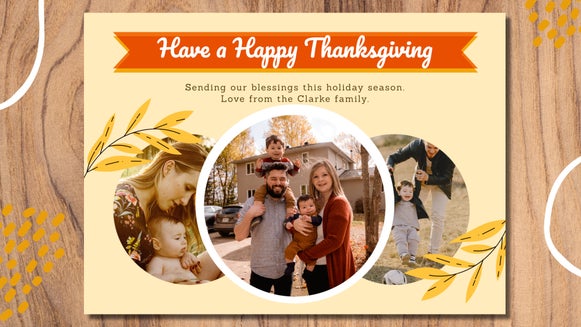
We understand that your schedule is already overflowing with tasks as the holiday season commences, and adding another thing to it can feel like a burden, but it doesn’t have to be! Completely custom holiday cards can be made in minutes with BeFunky’s Holiday Card Templates. Effortlessly replace the photo, customize it to your preferences, and then either print your holiday cards or you can send them digitally. Whether you prefer modern holiday cards, you want to customize a holiday party invitation, or you want something more traditional, BeFunky has a template to cover all your holiday greeting card needs.
How to Create Your Own Custom Holiday Cards
Embark on a festive journey to create custom holiday cards with BeFunky as your creative accomplice. The magic can happen as you infuse your personalized holiday card with what makes your holiday season bright.
Step 1: Explore Our Holiday Greeting Card Templates
Get started by heading to the Graphic Designer Holiday Card Templates and scroll until you find a template that calls to you. We've got tons of holiday card themes and festive designs to choose from!

Click on the template you like to get a closer view and if you decide that it is the one for you, click on the Use This Template button to begin customizing.

Step 2: Upload Your Image
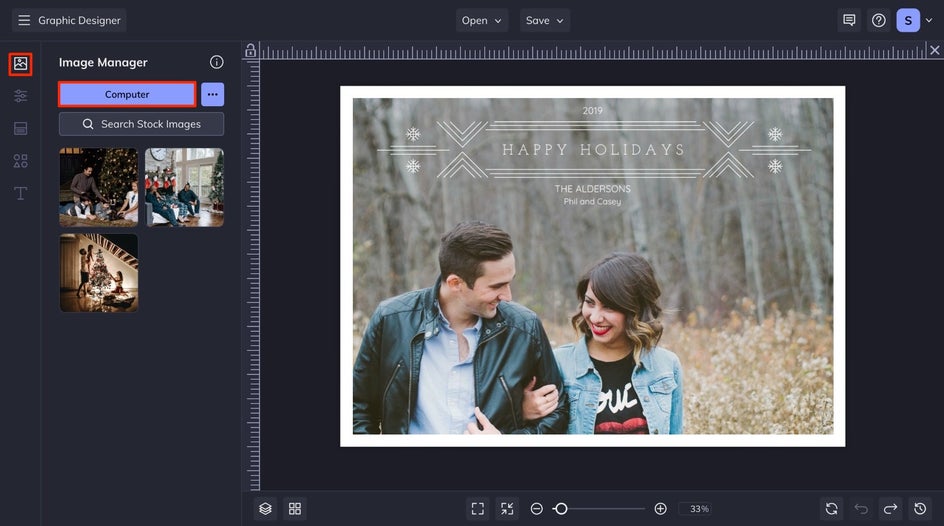
To start personalizing your holiday photo cards, click on the Image Manager, where you can drag and drop your image from your computer into the canvas, or you can click on the Computer button. If your image is in the image manager, drag and drop your image into the canvas where the existing image is.
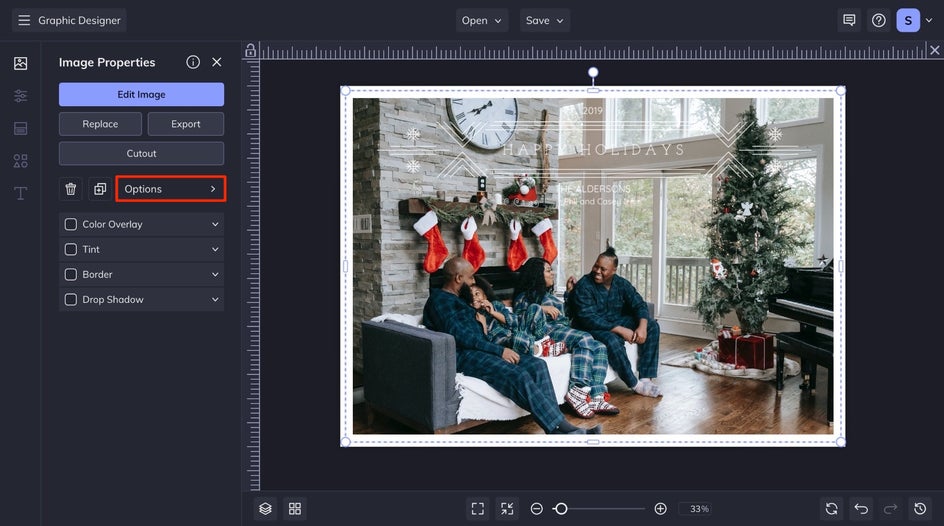
If you want to make changes to your image, click on it in the canvas and an Image Properties menu will appear. You can also use the dots on the corners of the image to make changes to the size of your image. If your image is a bit busy, you can always reduce the opacity of it under the Options drop-down so that it is a bit lighter and your text and graphics can show up better.
Step 3: Edit the Text of Your Holiday Card
When editing the text, you want to be sure that you add all the personalized information that you need for your holiday cards to represent you. Double-click on any text box on your template until the text is highlighted and type anything you want. You can also add a new text box by navigating to the Text tab in the main menu on the left and then clicking the blue Add Text button. You can adjust the Font, Size, Color, Spacing, and more. Feel free to try different fonts and colors that will best align with your design.

Step 4: Adjust Your Graphics
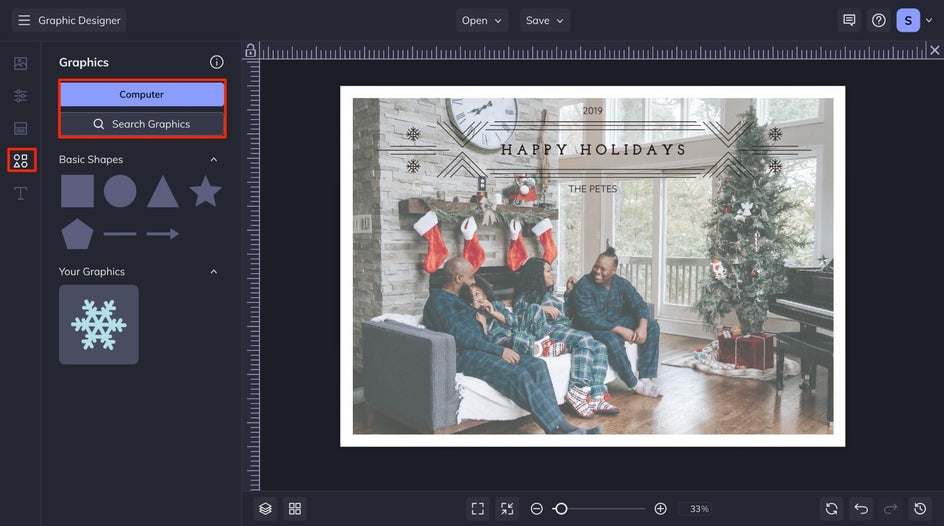
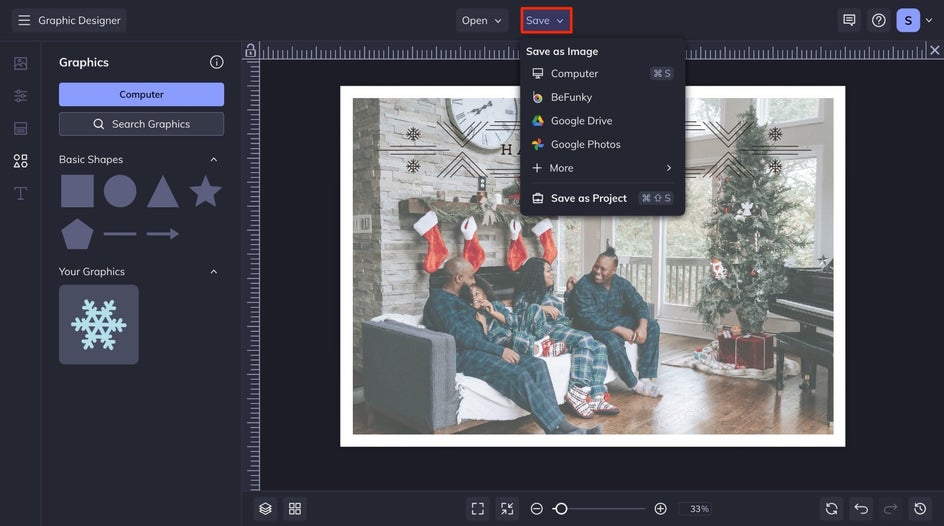
If you want to make any changes to the graphics on your custom holiday card, you can click on the graphic itself and then utilize the options that pop up in the Graphics Properties tab. If you want to add more graphics, click the Graphics icon. Once you’ve arrived in Graphics, you can upload graphics of your own by clicking the blue Computer button or you can search through BeFunky’s extensive graphics library by selecting Search Graphics. Once your graphics have been uploaded or selected, they will appear under Your Graphics within the Graphics menu. To insert them into your custom holiday card, just double-click or drag and drop them into the template. When a graphic is selected, a Graphic Properties menu will appear on the left. Use this menu to change the color, tint, and drop shadow of the graphic.
Step 5: Save Your Holiday Photo Card
After perfecting your Holiday card design, the last essential steps await. Whether you decide to send it digitally or as a printed copy sent via mail, all that is left to do is to save your creation for sharing!
Click on the Save button at the top of your canvas and save it to your desired location. For the utmost print quality, make sure to save your file directly to your computer and opt for a PDF Print file. Or, if you want to send holiday cards digitally, choose a high-quality PNG format. Your uniquely crafted holiday greeting cards are now ready to surprise and delight!
Season’s Greetings: Personalized Holiday Cards
Whipping up your own holiday card design in BeFunky is like giving your to-do list a little holiday season magic! With our extensive collection of Holiday Card templates, creating personalized holiday cards and spreading holiday cheer is a breeze. Get started by clicking here!
