Clipping Masks: the Best Way to Turn Images Into Shapes
With minimalism trumping the last decade of design, we have seen paired back imagery, flattened graphics, and plain backgrounds flooding popular designs. Nowadays, color, patterns, and design elements have brought life back to graphic design – adding depth and interest to the creative industry.
More than just being useful design elements, shapes can help add interest to design in many ways. Not only does each shape have the power to communicate different emotions, but they also have different meanings based on their symbolism. For example, a triangle with a point facing up can represent strength, power, and integrity, whereas if the point is facing down, it can represent nurturing energy. These meanings can be helpful when designing logos or branding elements.
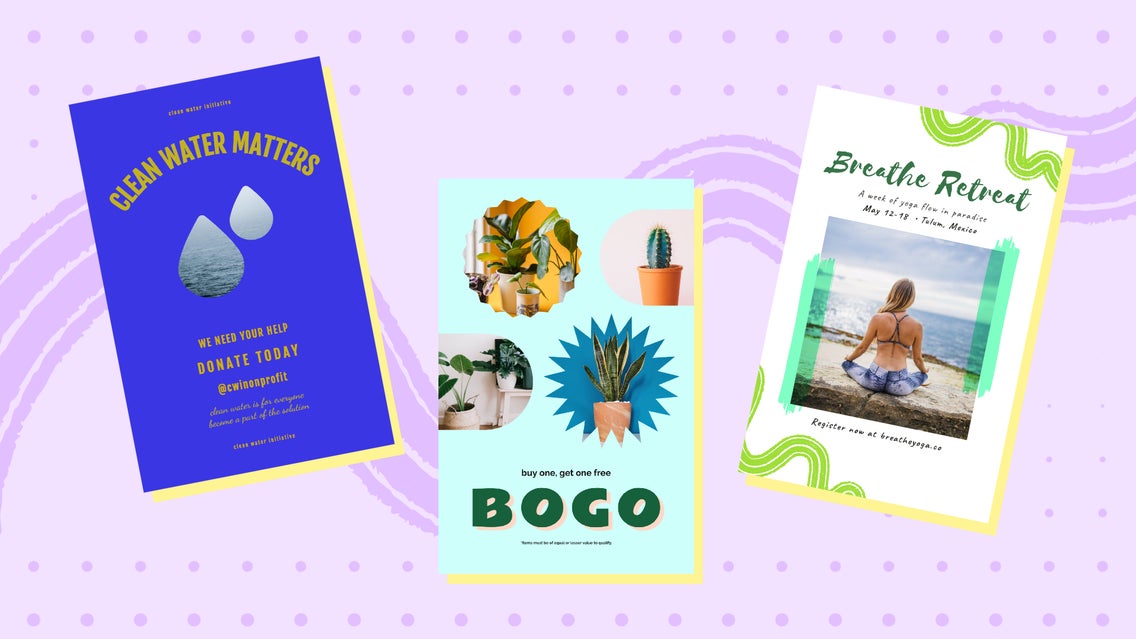
Take a look at these posters below. Using many abstract shapes with sharper edges gives the poster a fun and eclectic look while using a singular circle offers a more peaceful and calming approach to the design.

If you are wanting to start adding more interest to your designs and are coming out of minimalism and in need of some new design inspiration, we are going to talk about clipping masks and introduce you to BeFunky’s Cutout Tool in the Graphic Designer.
Clipping Masks Versus Crop Tools
You can often achieve the same outcome with different approaches to design. The goal we are wanting to achieve today is to crop an image into a specific shape. This can be done with both clipping masks and the circle crop tool in the Graphic Designer.
Turn Images Into Shapes With Clipping Masks
Clipping Masks connect multiple layers together to create a shared mask based on the shape of the bottommost layer. Simply speaking, it means that you can create a virtual stamp with any shape and rather than seeing ink as the shape, you can have any image reveal itself as the shape.
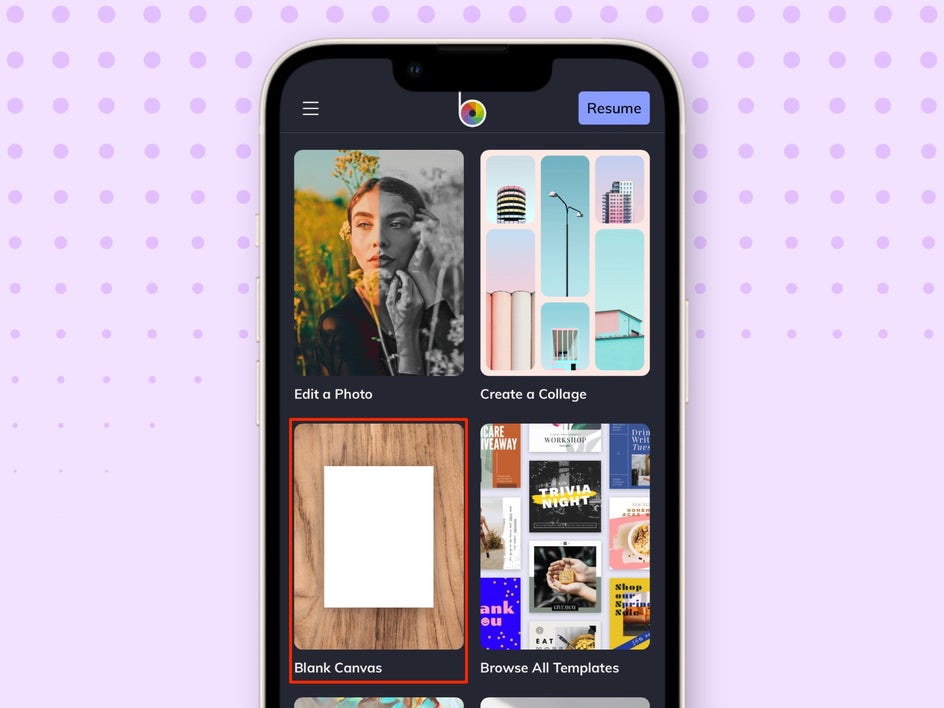
Step 1: Choose a Template or Start With a Blank Canvas
Using a clipping mask is quick and easy. We are going to show you how to do this via BeFunky’s Mobile app. Simply open the app and select Blank Canvas.
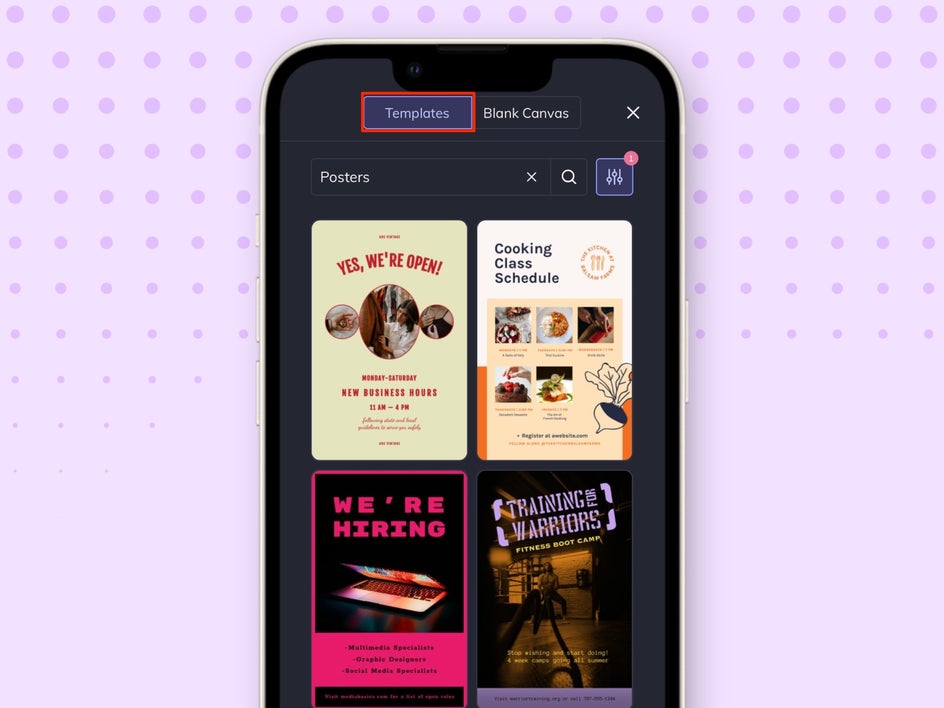
Once here, select the size of the canvas you want to use or select the Templates tab at the top of the screen in order to choose a premade template to start with. We are going to select a template by choosing the one we want and then hitting Use This Template.
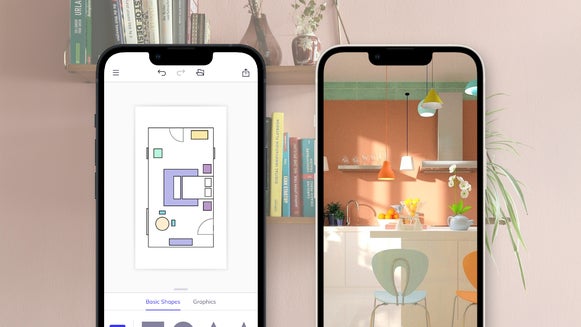
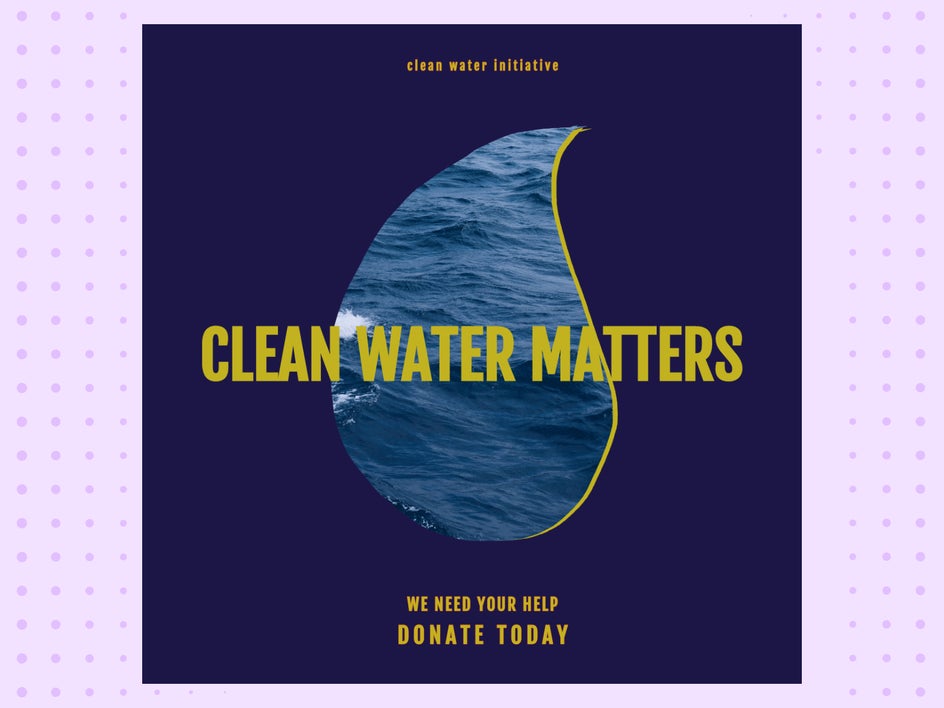
We are going to create a poster for a clean-water organization, so the clipping mask shape we want to use will be a drop. We are going to delete the images that are already on the poster and then make some other adjustments like background color, font, text color, and more. If you want to learn how to do this, check out any of our design articles via our blog.
Step 2: Add Graphics for the Clipping Mask
Okay, now that we have our background and colors how we want them, we are going to add our clipping mask shape by going to Graphics at the bottom of the screen.
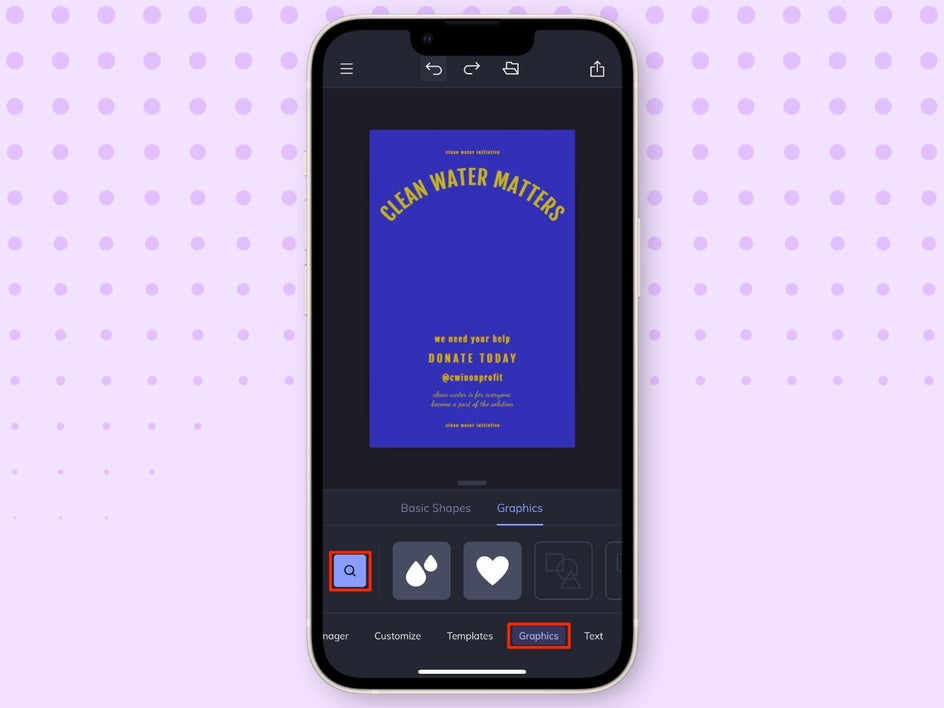
Select the magnifying glass to search for the shape you want to add to your Graphic Library – you will notice that when you select the graphic element, a blue checkmark will appear; this means that the element has been added to your Graphic Library. Once you are done, select the ‘X’ at the top right of the screen to go back to your Graphic Library.
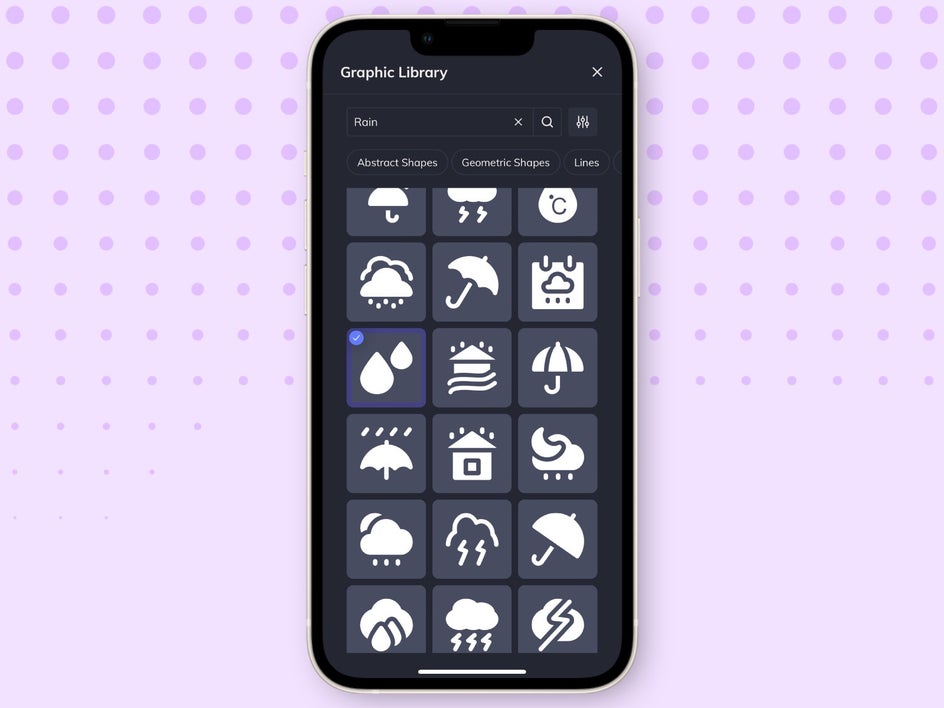
Select the shape and drag it onto your canvas and place it where you want it. When you're finished designing, you can save your final result as a project, or download it for sharing.
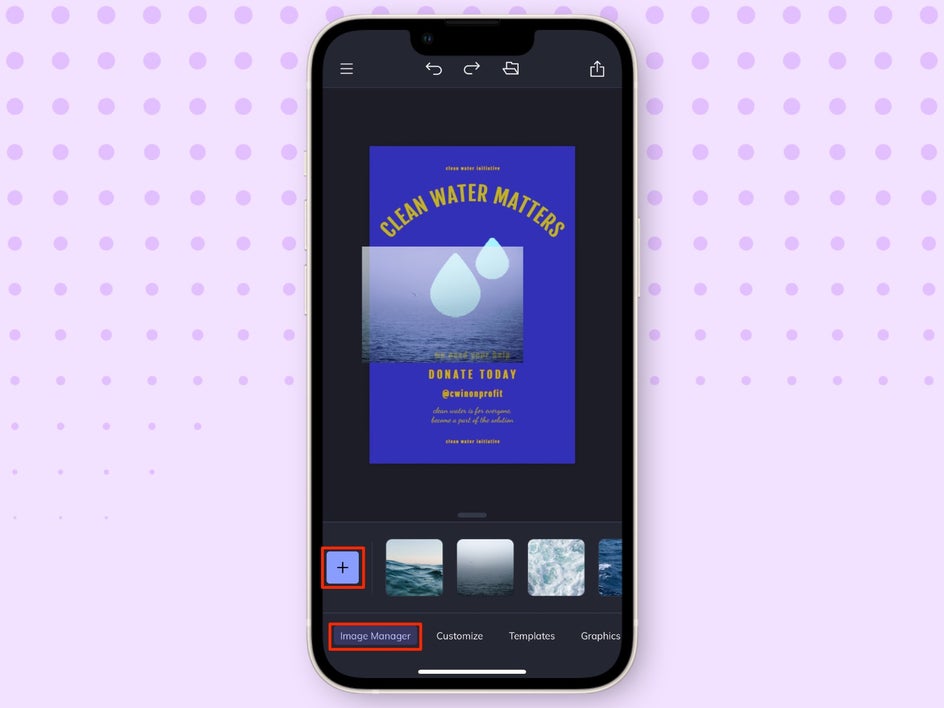
Step 3: Add a Photo to the Graphic
Head to the Image Manager and either upload your own photo or choose a stock photo from the hundreds of images BeFunky offers. From your Image Manager, simply select the image you want and drag it over your shape until your shape turns blue – once it does, release your image and you will see it populate within the shape.
You just created your own clipping mask! It is a pretty simple process if you do it this way. You can also follow these same steps if you are working on desktop.
Next, we are going to show you how to create a clipping mask with the Crop Tool. This will allow you to create more abstract shapes and designs.
Turn Images Into Shapes With the Crop Tool
For this tutorial, we are going to use Befunky’s desktop Graphic Designer. Repeat Step 1 from above in order to choose your template or canvas size. We are going to start from a template again with the same theme, but we are going to make a social media graphic.
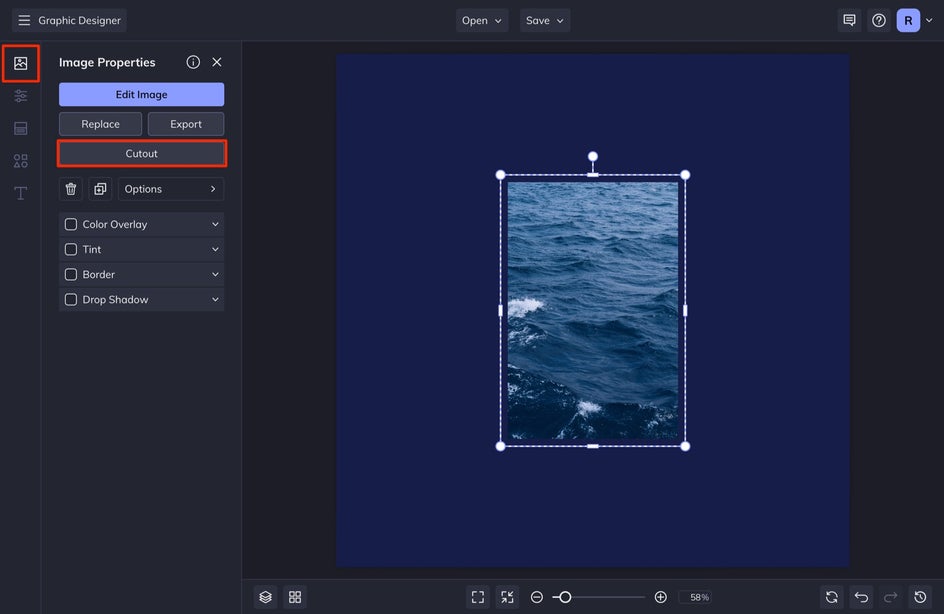
Step 1: Select an Image
Head to Image Manager and select the image you want to use by either uploading it or selecting a stock image. Once you add the image to your Image Manager, select it and Add as Layer.
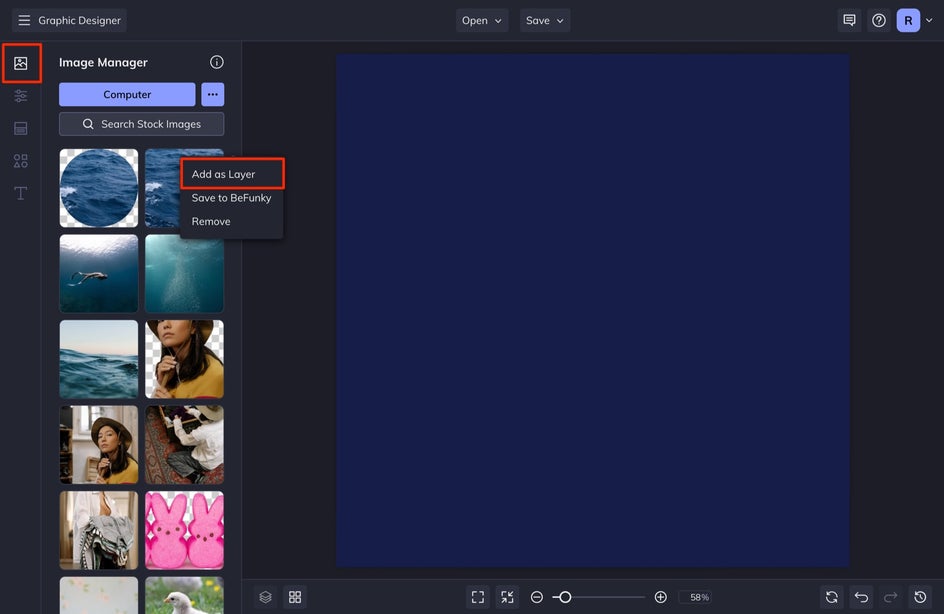
Now on your canvas, with the image selected, click Cutout in the left-hand menu.
Step 2: Use the Cutout Tool to Create Your Shape
Select the tool you want and then make sure that the Keep tab is selected. This will make sure that whatever you select will remain, while everything outside of the crop tool will be deleted.
I wouldn’t recommend using basic shapes for this since creating a clipping mask with a graphic is easier and more efficient in my opinion. I would use this tool if you want to create more abstract designs, say, if the graphics aren’t providing the shape you are looking for or you want to create a more abstract drop in this case.
You can create really abstract designs by selecting the Lasso option and freestyling your crop. All you want to do is click on your beginning point, and while your cursor is held down, trace the design you want to create until you arrive back near your beginning point. Once here, release your cursor and your shape will automatically appear.
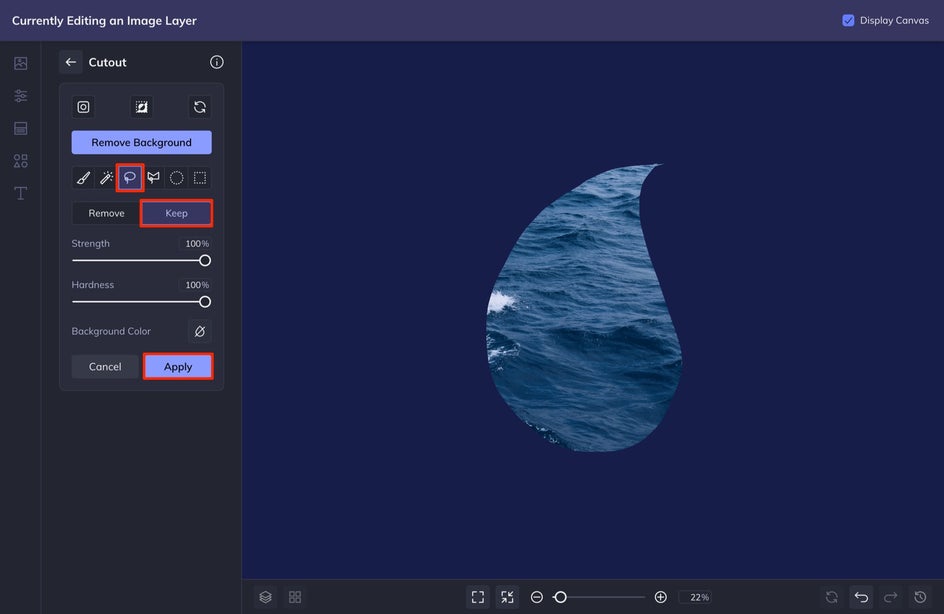
You can also clean up any edges with the Paint tool, just remember to switch your tab from Keep to Remove and also increase your Strength and Hardness to the maximum value. When you are finished with your shape, select Apply.
Which Is Better – Clipping Masks or Crop Tools?
Choosing which tool is better for you depends on what your end goal is. If you are wanting the exactness of a specific shape, using a Graphic as a clipping mask is the quickest and most efficient way to go. Not only are clipping masks quick and easy and exact, but creating a clipping mask is better because you can adjust your image composition by double-clicking into the clipping mask in order to move the image around.

If you are wanting to freestyle your shape and have the most control, the Crop Tool is beneficial. But once you release your selection, you cannot adjust your image’s composition.
Both options are great depending on what your goal is, but the ability to adjust the image within the clipping mask makes it the winner for me!