How to Restore and Recolor Photos
It’s a question that’s been asked time and time again: can you restore faded photos? Many of us have cherished vintage photographs of our ancestors that we’d love to recolor online to bring back to their former glory. Yet, the task seems close to impossible without expensive software for recolouring photos, not to mention professional editing skills to get the job done.
4 Ways to Recolor Your Old Photos
Thankfully, BeFunky’s Photo Editor is home to not one, but multiple tools to help you recolor photos in seconds. From our AI Image Enhancer and Vibrant Colors DLX effect to our all-in-one Old Photo Restorer and more; we’ll teach you everything you need to know about these tools to restore photo color online.
1. AI Image Enhancer
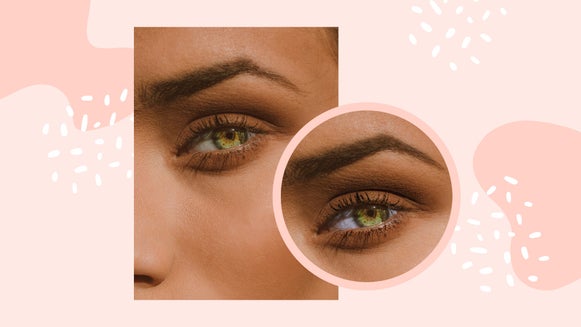
If you’ve got a photo that’s looking a little washed out or lacking in color and clarity, then a single click of our AI Image Enhancer may be all you need. It uses revolutionary AI technology to not only restore photo color, but also balance exposure and adjust contrast – all while keeping your image looking as natural as possible.


2. Fill Light
Sometimes, a photo can look dull and dreary because it’s lacking the right amount of light. When capturing their images, professional photographers are able to achieve the perfect balance of light by using two light sources: a key light and a fill light. This secondary source of light, the fill light, is responsible for illuminating dark shadows and properly balancing the overall lighting in your photo.
BeFunky’s Fill Light tool allows you to achieve this balance during the photo editing phase. It brightens the shadows in your image while bringing down the highlights and keeping the mid-tones where they are. In some cases, this tool may be just what you need to restore the color in your photo, especially when combined with other editing tools like Color or Exposure.


For images that still need an extra boost in vibrancy, however, then the next tool may be more suitable.
3. Vibrant Colors DLX
The Vibrant Colors DLX tool does exactly what its name suggests! It increases the vibrancy of your photo, giving its colors a much-needed boost. It’s a great way to recolor online, but only if there is color present in your photo to begin with. In other words, if you’re not trying to recolor a black and white or sepia photo. The Vibrant Colors DLX effect is all about photo enhancement – not so much restoration.


If you’re looking to completely recolor or restore an old photo, however, the next tool is the real MVP.
4. Old Photo Restorer
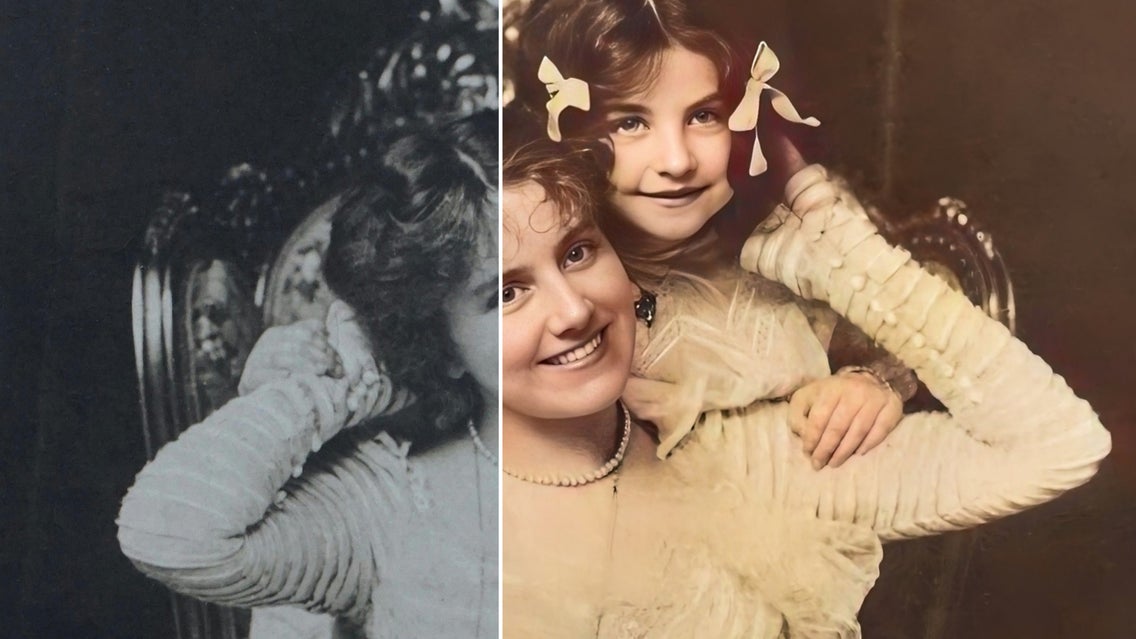
The Old Photo Restorer tool is hands-down the easiest and most intuitive way to recolor images online – especially when their color is so lacking that the previous tools mentioned can’t help. For example, if you have a vintage photo that has lost most of its saturation and vibrance, then the Old Photo Restorer will instantly restore your image to its former glory days. Alternatively, you might have an antique black and white or sepia photo that never had any color to begin with. The Old Photo Restorer is also able to recolor photos and create a realistic and vivid portrayal of the original scene.

Like many of our advanced photo editing tools, it uses AI technology to detect areas of an image that are faded, scratched, and devoid of color. It then breathes new life into these photos by clarifying and restoring details, removing scratches, and recovering faded and washed-out areas. What’s most amazing, however, is its ability to analyze grayscale and faded colors within an image. It then uses Artificial Intelligence to identify the original color profile of your photo and recolor photos in an instant.
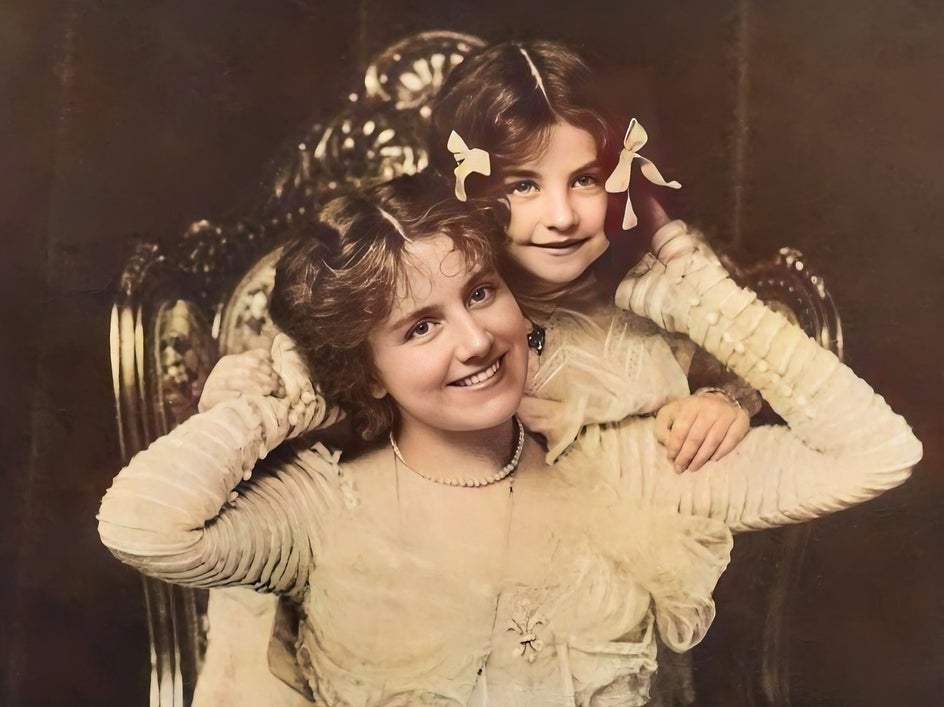
Take this old portrait below, for example. Despite being captured in black and white (due to limited photo technology at the time), the Old Photo Restorer was able to recolor this photo in a natural and realistic manner. You’ll also notice that it has added clarity and removed unsightly imperfections, such as scratches and noise.
Need to Recolor a Photo? Try BeFunky
Whether you’re looking to fix an undersaturated image, restore a time-faded photograph, or recolor an old photo entirely, BeFunky’s suite of color-enhancing tools can get the job done. For a simple boost in color, brightness, or vibrancy, try the AI Image Enhancer, Fill Light, or Vibrant Colors DLX tools. For a more complex photo recolor or restoration, give the Old Photo Restorer a try. Trust us, you won’t believe what our Photo Editor can achieve in the click of a button.
Visit the Photo Editor today to see for yourself!