


Perfect Your Clipping Masks With Expand AI

BeFunky's Graphic Designer has hundreds of templates to choose from. Building upon a template to create something new can be a blast. But what if the photo you want to include doesn't fit the design properly?
This can be the case if your template includes opportunities for clipping masks. This can lead to unflattering cropping that removes crucial details. Or, you may have to scrap the design entirely and go with a different template. I have come across this issue with many design projects and I end up having to find another photo that fits for that space or template I need it for. Now, with Expand AI, I can increase the size of the photo by reverse cropping it.
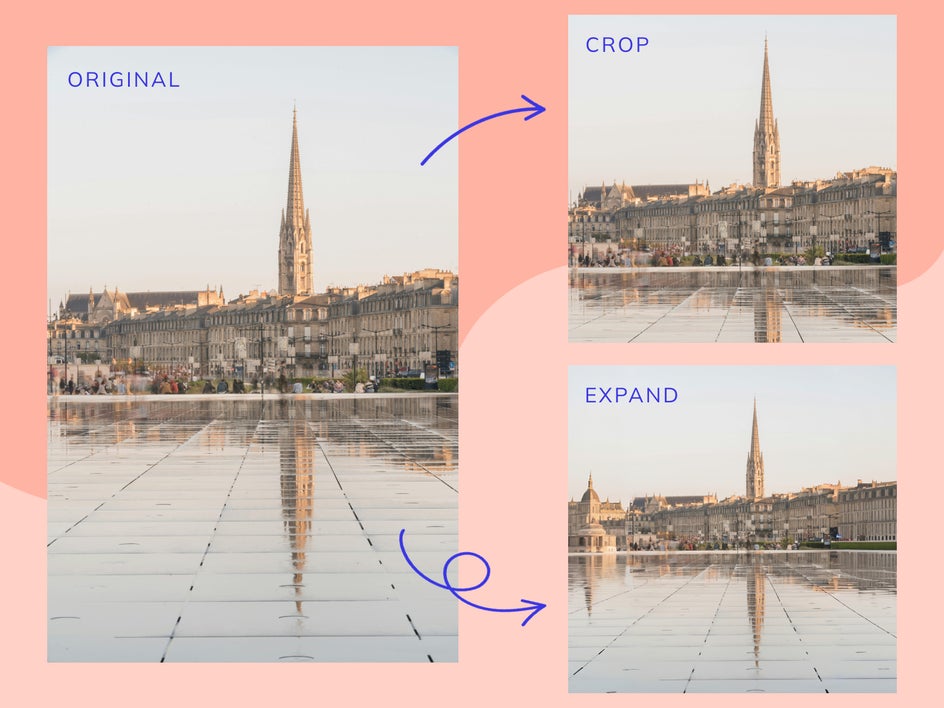
As you can see in this example, cropping this image to a 1x1 removes its main draw – the tower's reflection. By using Expand AI in BeFunky’s Photo Editor, you can keep the original photo intact, while the AI fills in the blanks of whatever aspect ratio you want to crop it to.

What Does the Expand AI Tool Do?
With BeFunky’s Expand tool, you can "reverse crop" a photo to achieve your ideal aspect ratio. The AI creates new details based on your photo to fill in the blanks of your expanded canvas.
This tool is so beneficial, especially when working with clipping masks, as clipping masks will crop your photo to fit into a specific shape, often cutting off edges of a photo that you still want to show. Let’s look at what a clipping mask is and how the Expand tool can transform your clipping mask designs.
What Is a Clipping Mask?
Clipping masks connect multiple layers together to create a shared mask based on the shape of the bottommost layer. This means that you can add an image to a shape and the image will take on the shape’s dimensions rather than its original dimension.
When using clipping masks, make sure that your photo is the correct dimension. This is so that your photo will not be cropped weirdly or it will crop out details that you want included in your image.
How to Use Expand AI to Get the Most Out of Your Clipping Masks
The goal we want to achieve today is to crop an image into a specific shape and use the Expand AI tool to make sure we can see everything we want within that clipping mask. Using a clipping mask is quick and easy. We will make a quick social media post from one of BeFunky’s templates with a clipping mask in the design. You can also start from scratch and add a clipping mask of your photo to a graphic! When you are ready to get started, head to BeFunky’s Graphic Designer.
Step 1: Choose a Design Template
In the Graphic Designer, select the Templates tab at the top of your screen to choose from hundreds of pre-made templates. We are going to select Social Media and then Instagram Posts from the left-hand menu.
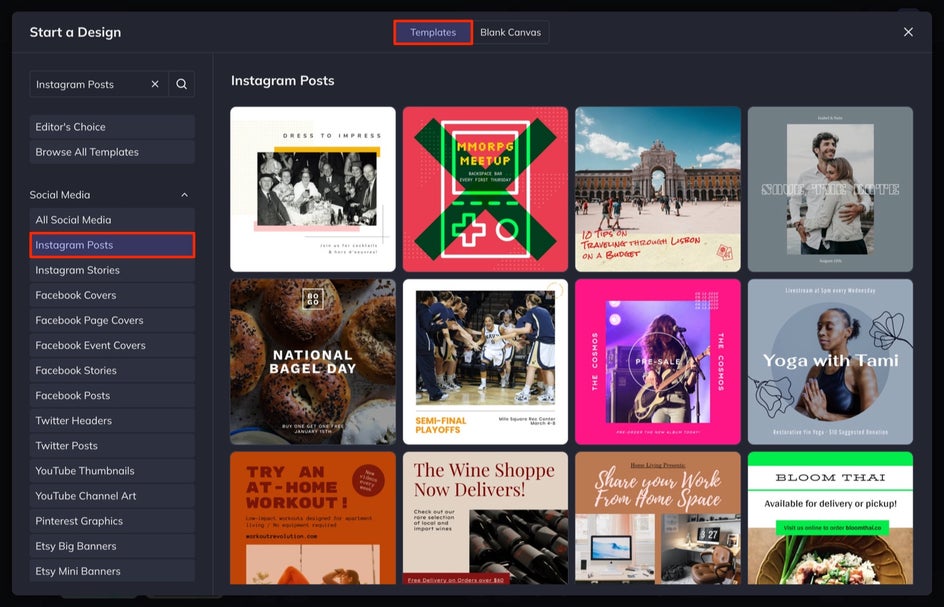
Once here, select the template you want to use and then select Use This Template.
We are going to create a social media post with a circular clipping mask. Then, we will make other adjustments like background color, font, text color, and more.
Step 2: Select Your Image
Head to Image Manager and select the image you want to use. We are using an image that fits the template best, but the clipping mask crops too much of the subject, and there isn't enough room to adjust the positioning. We're going to use the Expand tool to fix that!
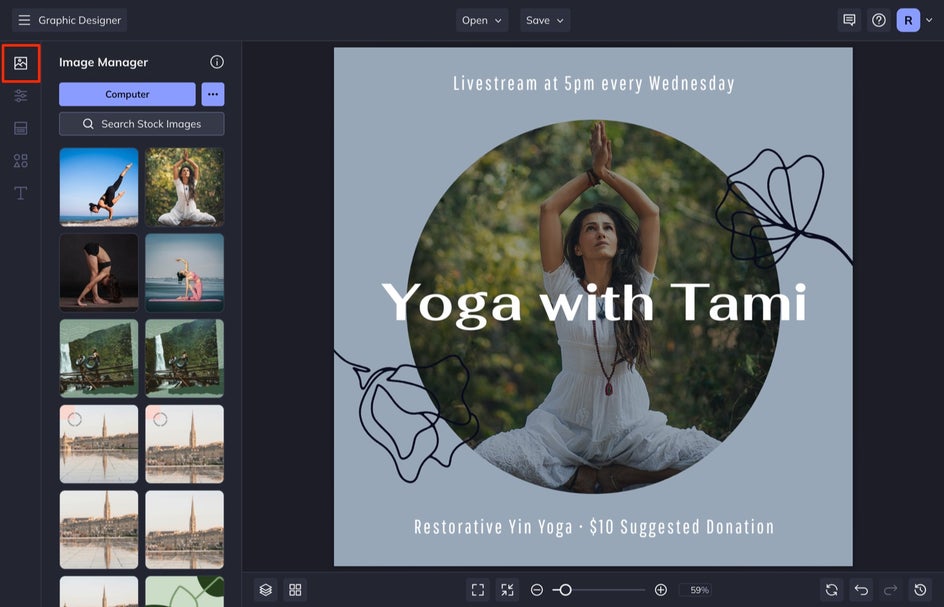
Once you add the image to your Image Manager, drag and drop it directly into the shape on your canvas. This will auto-populate the image directly into the clipping mask.
Step 3: Use Expand AI to Reverse Crop the Image
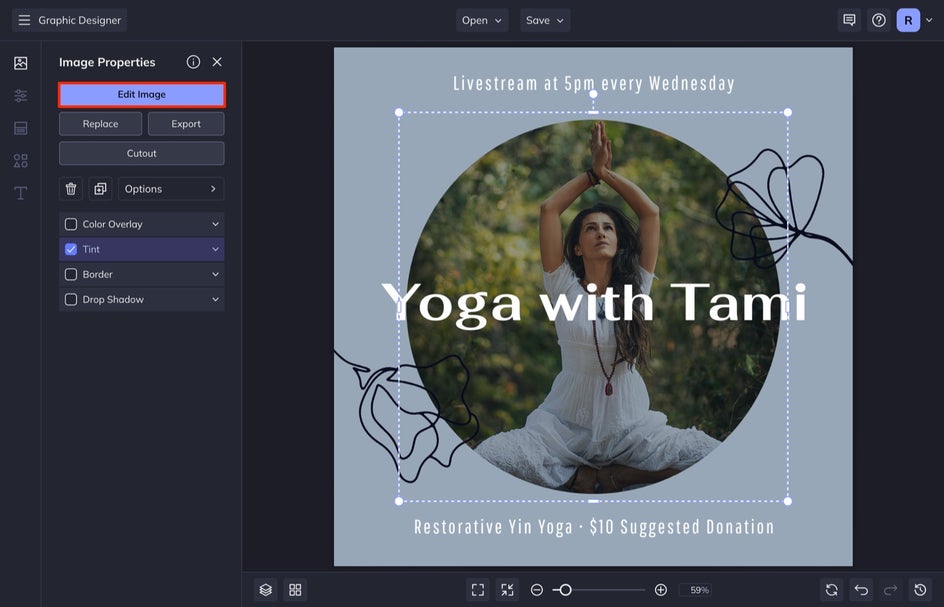
Select the photo in the clipping mask and then click Edit Image. This will open up the image within BeFunky’s Photo Editor. (Don’t worry, your design will be saved as is!) The Expand tool can be found in the Edit tab, under Essentials.
To make this photo work, I need to expand the background so our subject isn't cropped out of frame. To do this, I will set the aspect ratio to Square 1x1 in the drop-down menu and then drag the corners of the photo inward. The tool will fill in a lot of blank space by expanding the preexisting background.
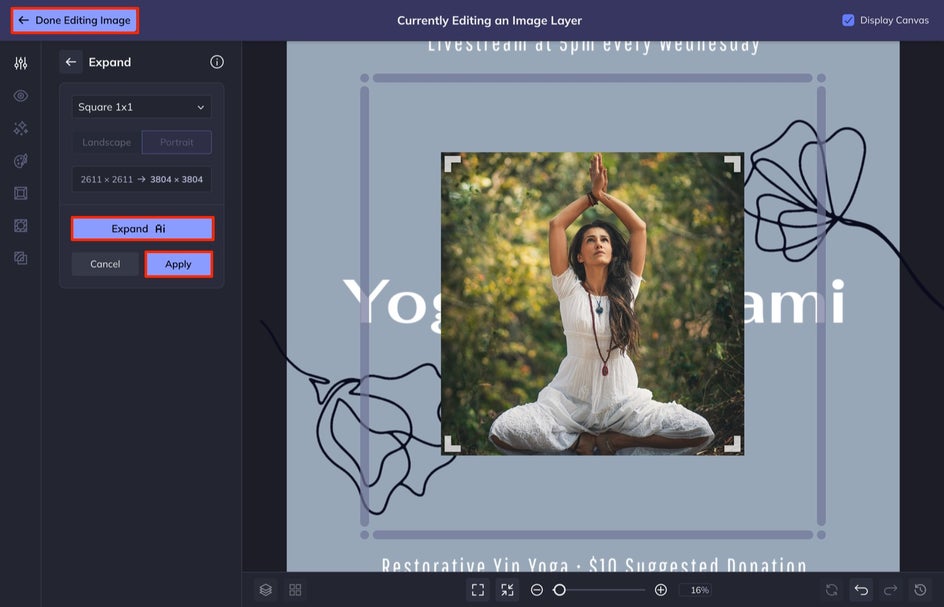
When you’ve repositioned your photo, select Expand AI. Then, click Apply and you're done! Or, you can use the Generate Again feature to regenerate the results.
After this, select Done Editing Image to head back to the Graphic Designer, where you’ll see your new image within the clipping mask. From here, you can double-click into the clipping mask to move the orientation of the image.
Step 4: Customize Your Template
Now, we're going to customize the template's other elements.
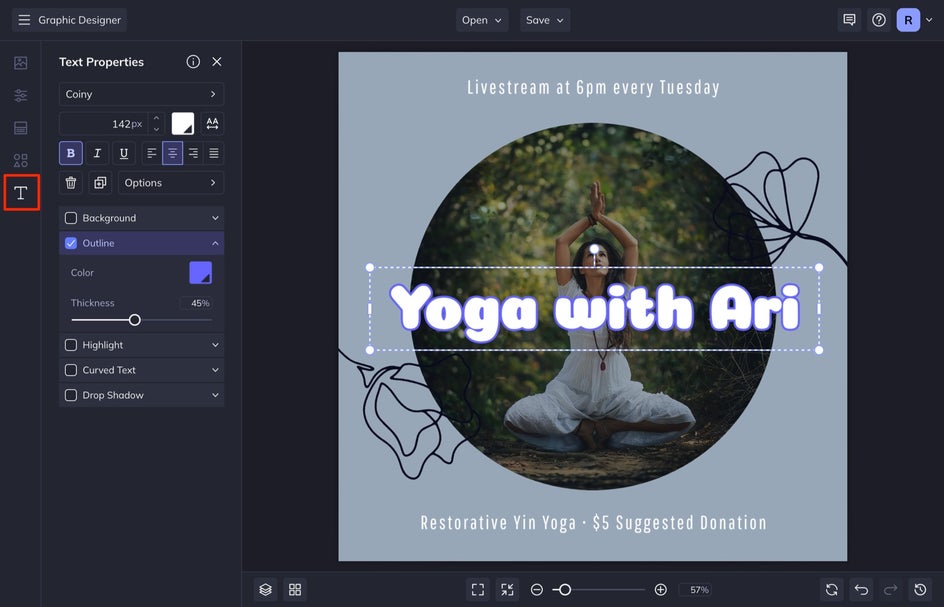
First, add your original text by selecting any of the text boxes. In the text properties menu, you can customize things like the font, color, and drop shadow. We changed the font and also added an outline to the title text.
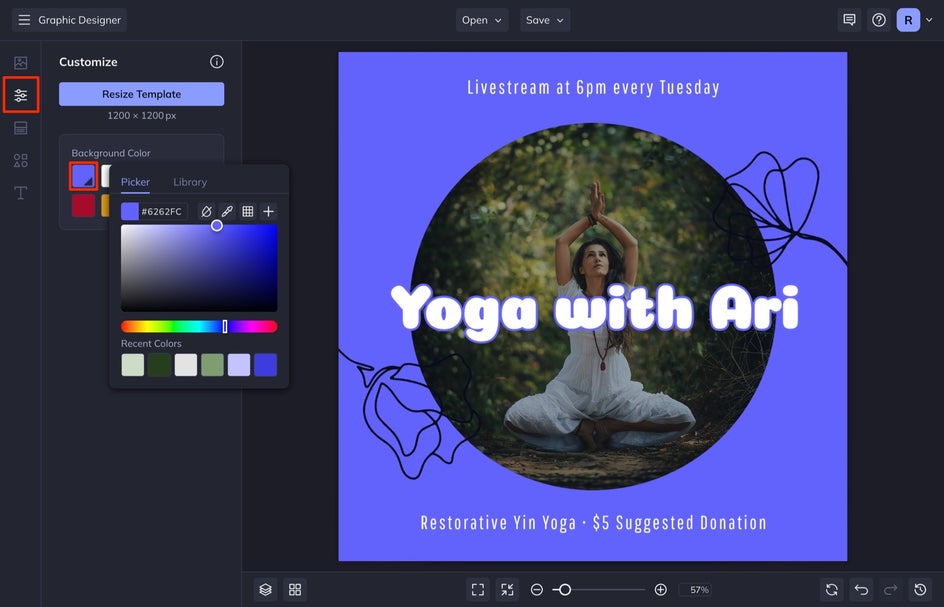
Next, customize the colors by selecting Customize from the left-hand menu. Select the first swatch to customize the background color.
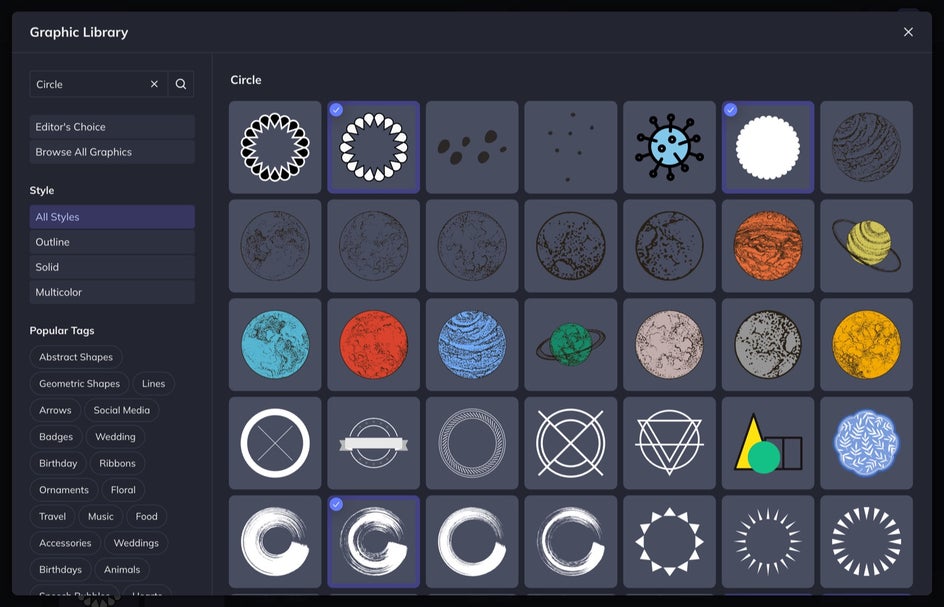
After this, we are going to replace the graphics within the template and add new ones that fit the overall theme. First, delete the unwanted graphics from your design by selecting them and hitting Delete on your keyboard. Select Graphics from the left-hand menu.
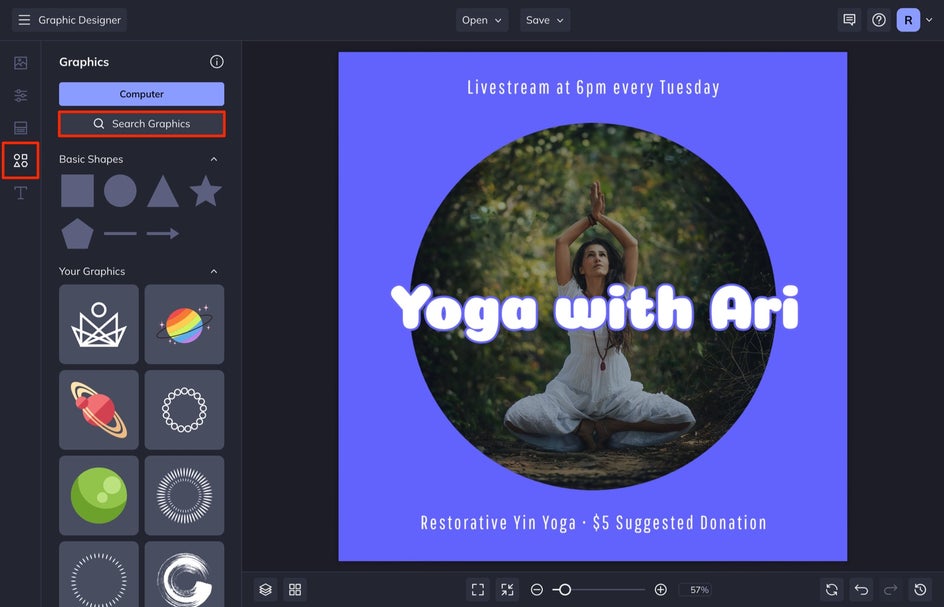
Next, select Search Graphics to search the Graphic Library. Select the graphics you want and they will be automatically added to Your Graphics.
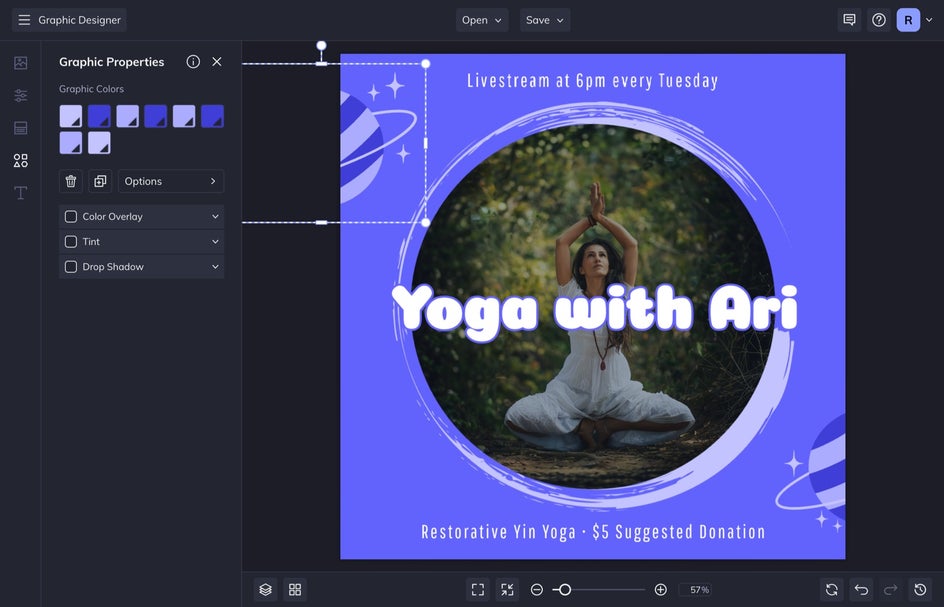
Click and drag them onto your canvas to position them where you want them. With the graphic selected, you can change the size or color, add an overlay, and more.
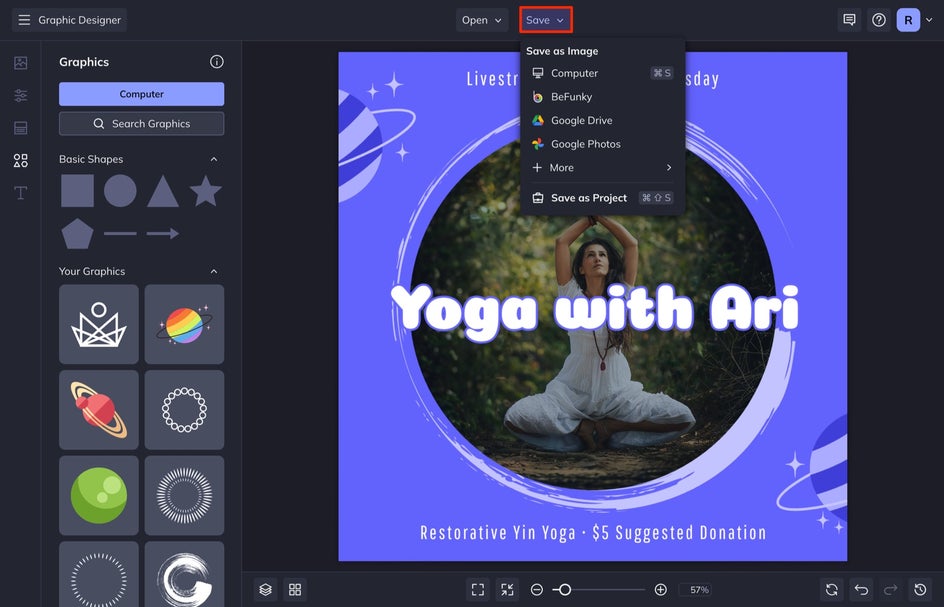
Step 5: Save Your Design
When you are finished, select Save at the top of your screen and then select Computer to save your file as a high-resolution JPEG that you can share on your social media page.
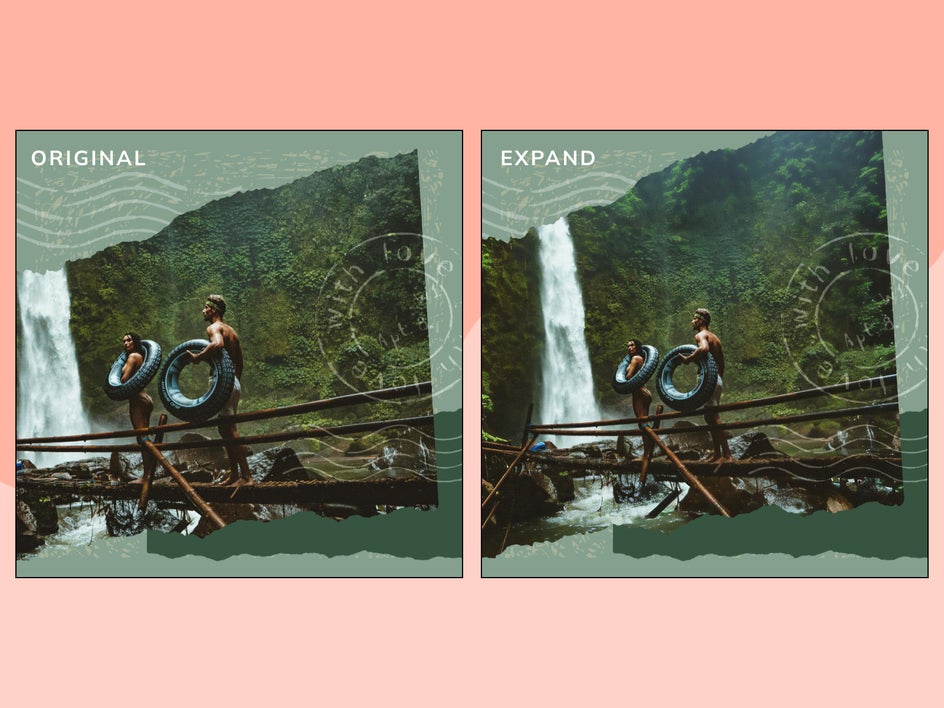
Take a look at how using Expand AI transformed this photo to better fit the template:

Reverse Crop to Create Impactful Designs
Utilizing Expand AI on a photo you are using for a clipping mask can reverse-crop your image to better fit your template. Explore the many uses of this tool and try it out on your next project in BeFunky’s Graphic Designer.


