Crop Photos Smarter With AI – No More Lost Edges
It was only last week that I wished I could crop a portrait photo into a landscape, but if I did this, it would cut off my subject's hair. Usually, cropping an image means that you make it smaller, which also means that when you crop, you'll have to sacrifice potentially important details of your photo.
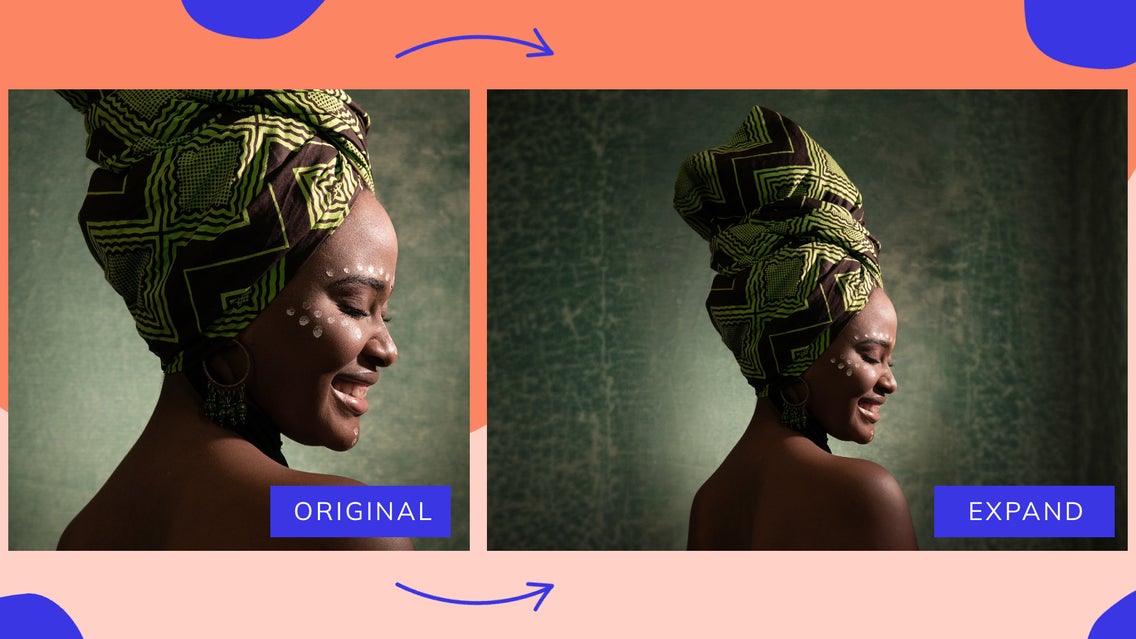
What I wanted to do was crop the image backward, so that when I changed the orientation of my photo, the crop also filled in the blanks and expanded the areas of the image that didn’t exist prior. This sounds like an impossible task, but with BeFunky's Expand AI tool, you can now crop photos without losing detail.

With BeFunky’s image extender tool, you can "reverse crop" a photo to achieve your ideal aspect ratio. It creates new details based on your photo to fill in the blanks of your expanded canvas.
3 Ways to Use the Expand Tool to Crop Images
When you need to crop a photo and wish that you could turn it from a portrait to a landscape, or a landscape to portrait, without losing important details, try this tool! Here are some good examples to showcase the power of Expand AI:
1. Make Sure Your Photo Fits Anywhere
Sometimes, you find the perfect photo that you want to use, but it isn’t the right orientation! This happens to me all of the time with projects I am working on.
Sometimes, I have a portrait-oriented photo that would be perfect as a hero image on a website, but if I put that image in there as-is, it would crop the image in an unflattering way and usually zoom in too close. I try to find other photos in the same shoot that may have been taken in the opposite orientation, but oftentimes, I have no luck. With Expand LP, this issue no longer exists. You can now adjust any photo to be a different orientation so that it can fit and still look perfect.
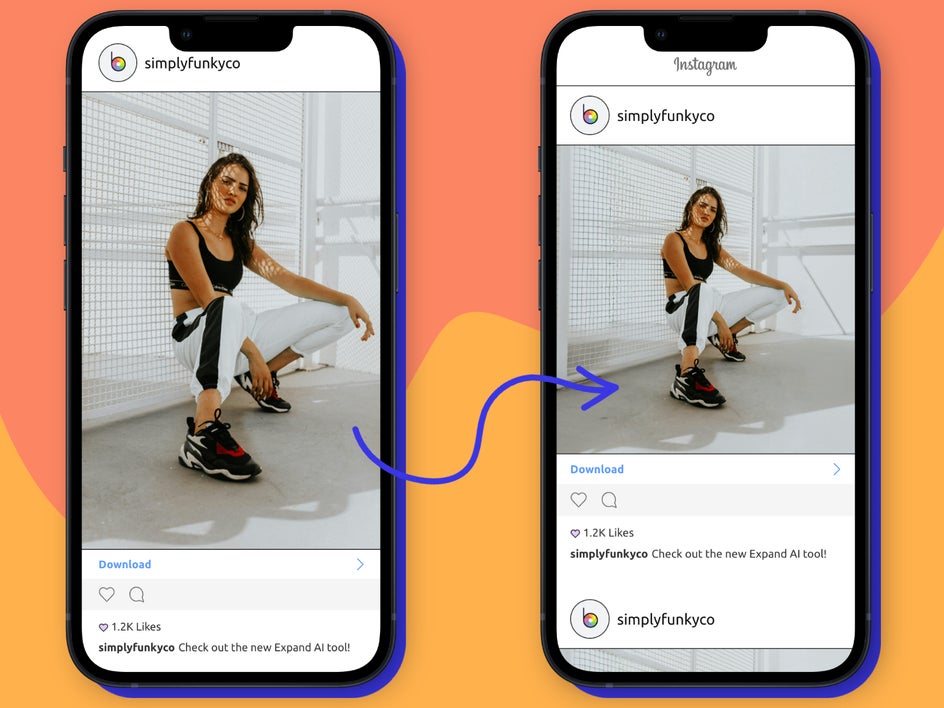
This is also a great option when you want to adjust a photo for social media.
2. Expand a Scene
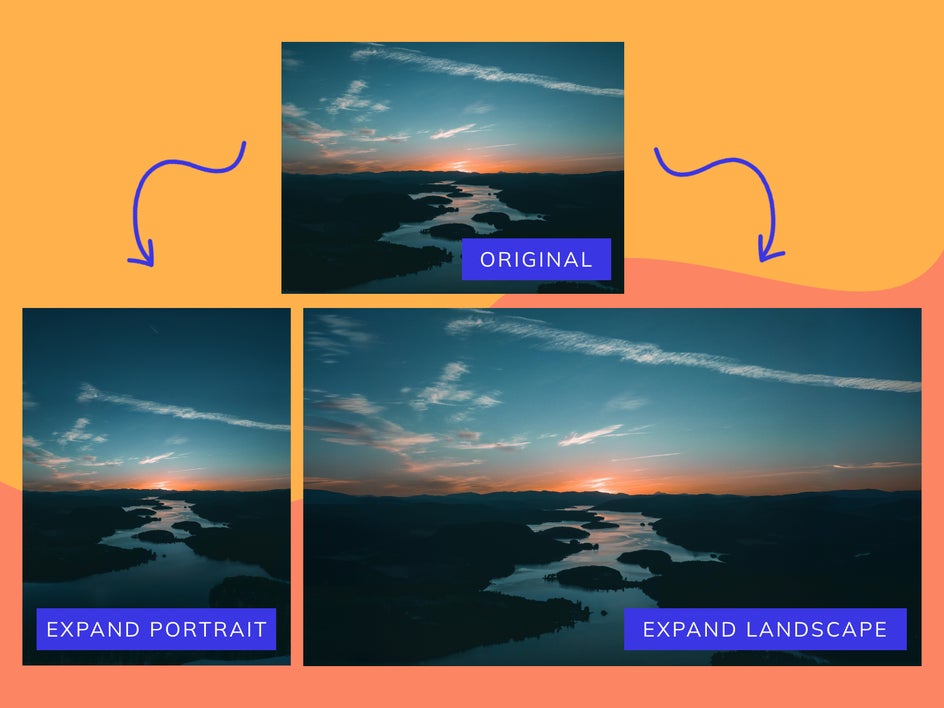
Sometimes, you might not have a wide-angle lens and you were restricted to taking a photo that cropped a scene too tightly due to your lens’s limitations. Expand LP can act as a makeshift wide-angle lens. Of course, it uses AI to fill in the space, rather than the actual lens itself taking the picture – but it’s pretty cool to know that what you lack in camera gear, you can make up for with AI. You can even go the other way, from landscape to portrait, to expand the sky or foreground of your image.
This is a great solution if you are looking for a specific wall artwork to fill a space. Once you apply the Expand tool, you can then use the Upscaler to increase the file size.
3. Reimagine the Original Background
Okay, so hear me out. Let’s say that you had an image and didn’t fully like the original background. You can crop your image closer to your subject and then apply the Expand tool to your photo to see other background options. This tool features a Generate Again option, so that you can pick other variations when extending your photo.
How to Crop Your Photo Without Losing Detail
In this tutorial, we'll teach you how to turn a portrait into a landscape to achieve our desired aspect ratio – without affecting the photo's original impact.
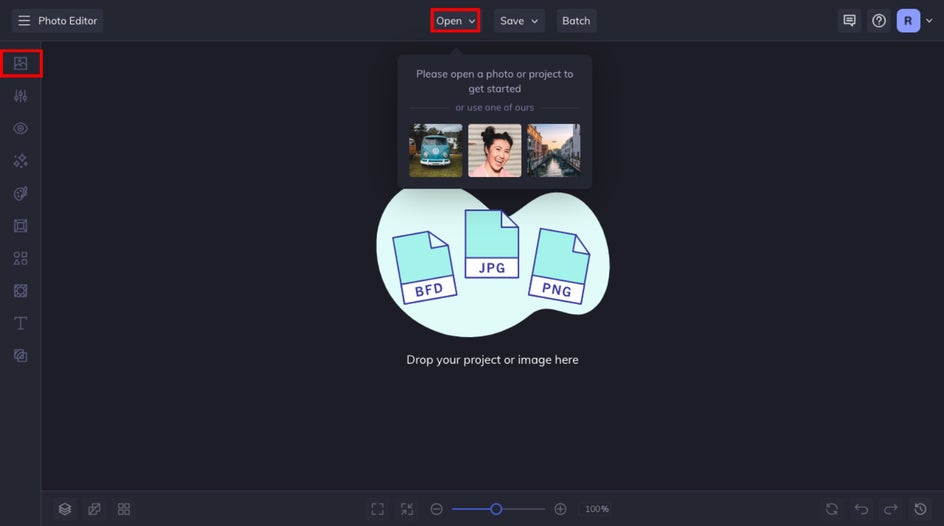
Step 1: Upload a Photo
Once you know the image you want to expand, head over to BeFunky’s Expand tool here. You can upload your image by clicking on the Open tab, dragging and dropping it straight onto the canvas, or by heading to the Image Manager tab.
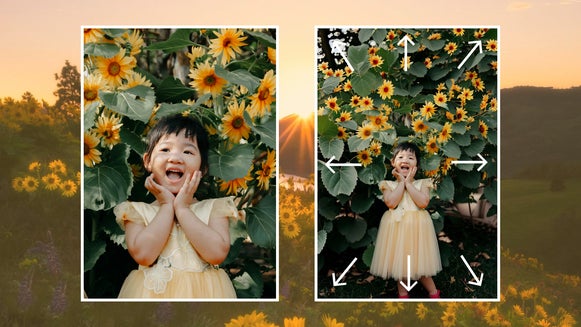
Step 2: Choose the New Aspect Ratio of Your Photo
Choose the new aspect ratio of your photo. You can use one of our preset options from the drop-down selections or create your own by clicking and dragging the corner dots outward on the outside of the image directly in the canvas.
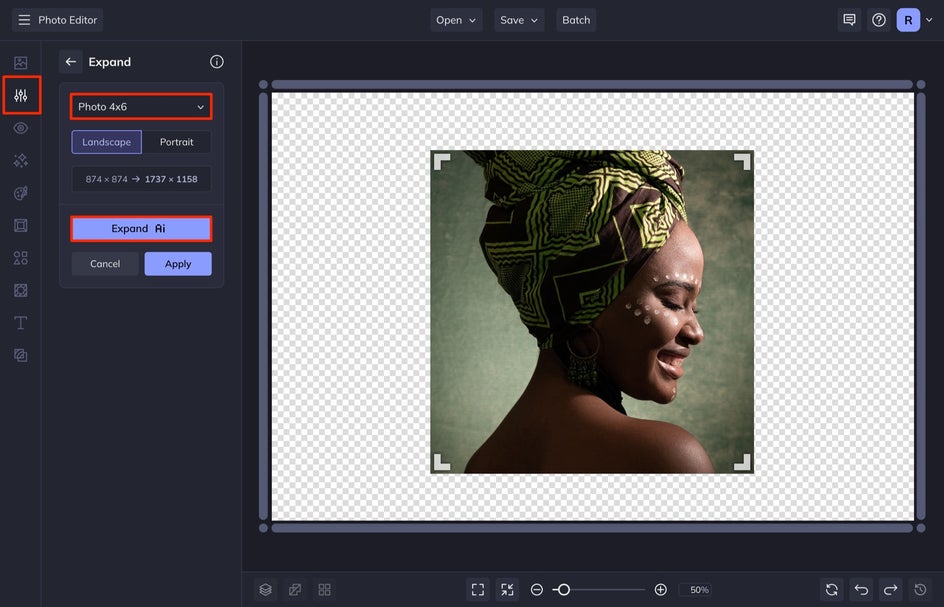
Next, position your image, noting that the tool will generate new details in the blank space surrounding it. You can shrink or expand your original image using the arrows in all four corners.
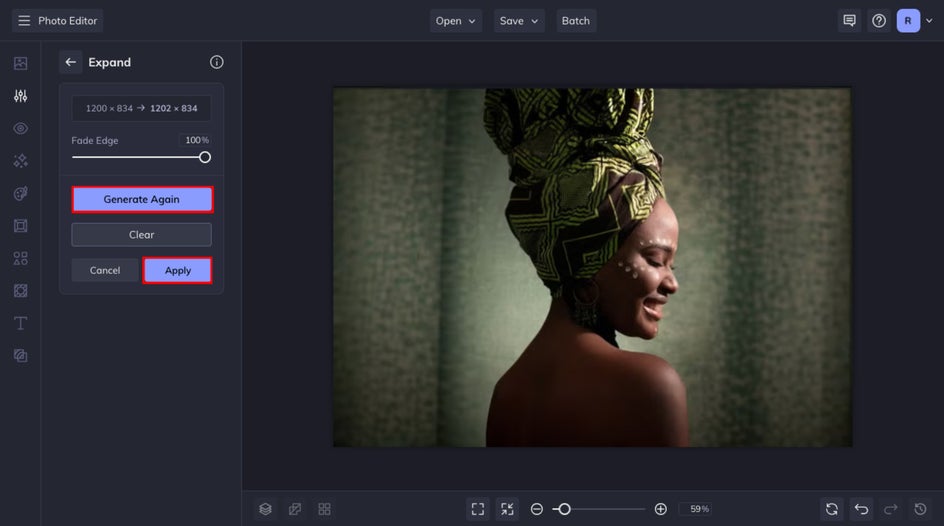
Step 3: Apply the Expand Tool
Select the Expand button. You’ll notice the “Ai” icon next to the Expand tool – this means that it utilizes the power of AI to “fill in the blanks” and create an expanded version of your image. Once clicked, the tool will get to work.
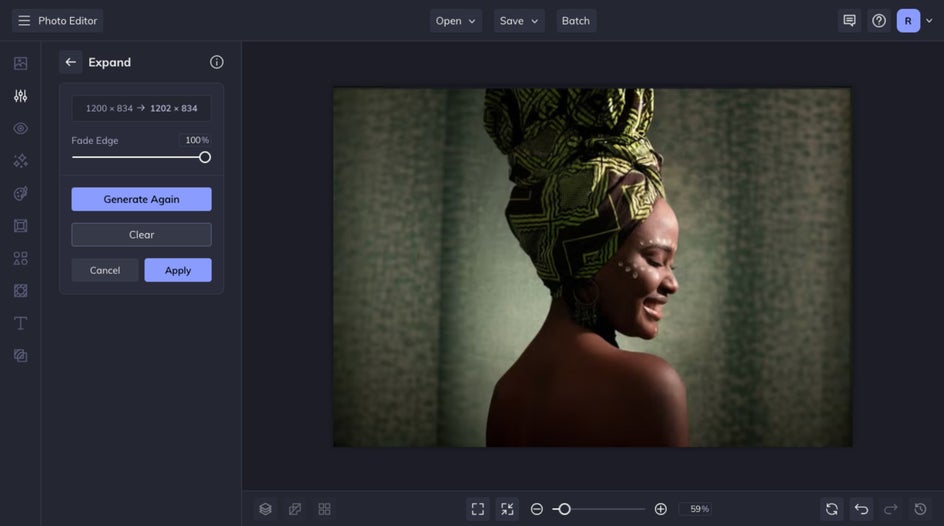
Step 4: Generate Again to Discover Other Options
If you want to generate another AI result, select Generate Again. BeFunky will present a different option to you that you can choose from. You can select this as many times as you’d like to get a new result. You can also use the Fade Edge slider to help blend the edges of the newly generated content, if necessary.
When you are happy with the results, select Apply.
Step 4: Save Your Reverse Cropped Photo
When you've finished editing, click the Save button at the top of the screen and then select Computer. Save your image as a high-quality JPG.

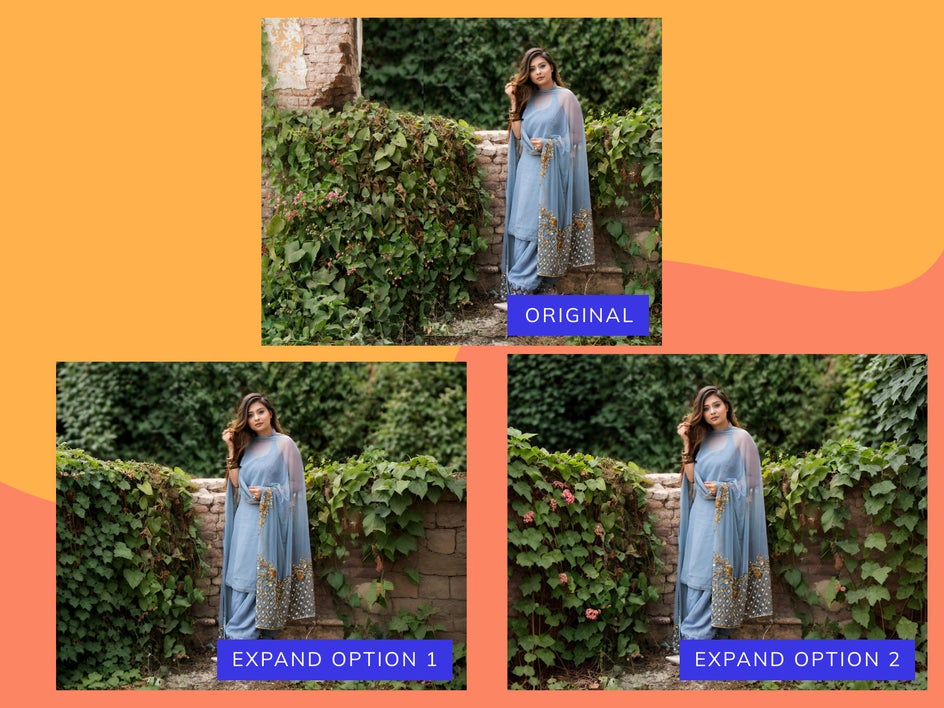
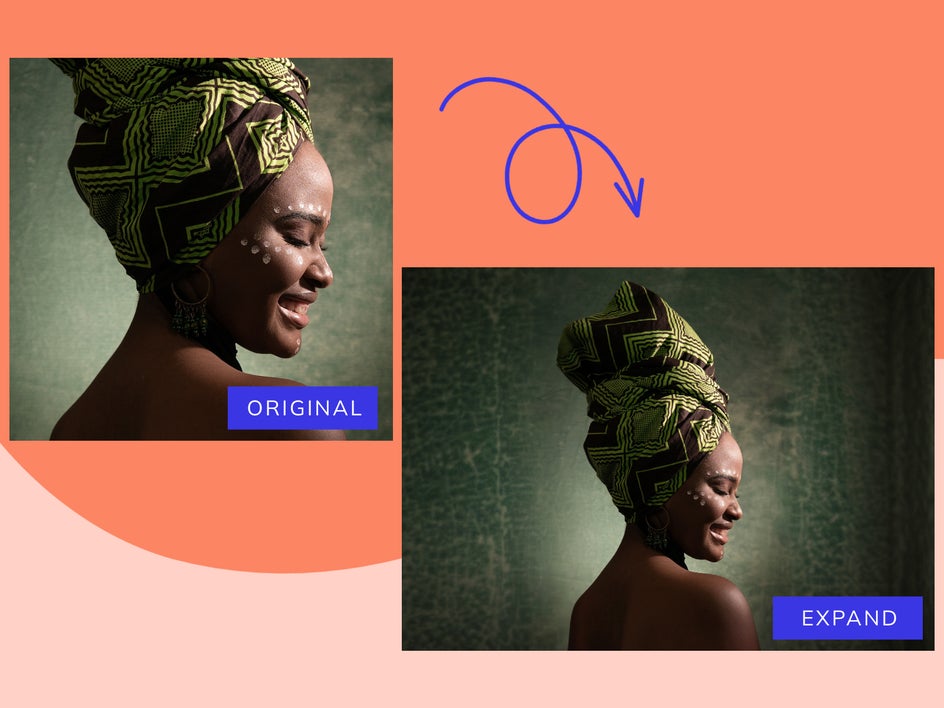
Take a look at how we went from portrait to landscape without losing any details – in fact, we have even more detail than before!
Use Expand AI to Intuitively Crop Photos
With BeFunky’s Expand tool, you can crop photos without losing any details in the image. The AI uses advanced technology to construct a new image from the original one so that you can crop to any aspect ratio.