


How to Make Your Own Cookbook Online
Do you have a large collection of go-to recipes? Have you already formatted them into printable versions with introductions, ingredient lists, and easy-to-follow directions? If so, you're ready to make a cookbook that you can use at home, give as a gift, or even self-publish! It may sound like a big endeavor, but with the right tools at your fingertips, it's easier than you think to create a book cover, design your content, and format a cookbook for printing or online publishing. BeFunky's Graphic Designer has everything you need to get started!
How to Design a Cookbook Cover
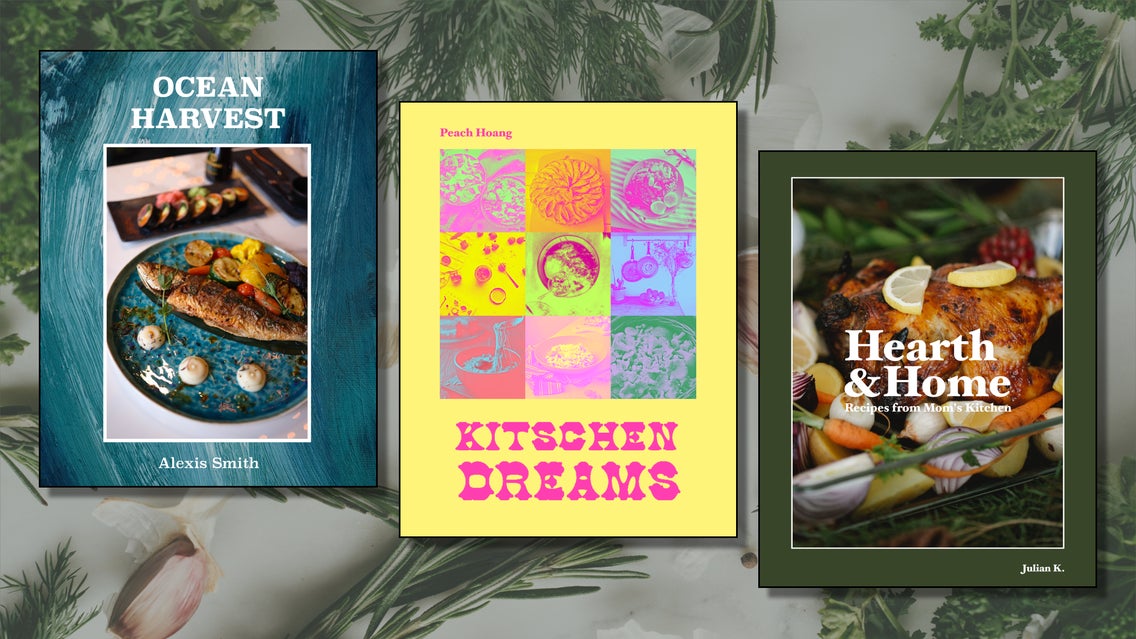
One of the most exciting parts of designing any book, even if it's just going to be a PDF or personal copy, is making the front cover. Don't have any design experience? Don't worry. The Graphic Designer gives you a whole host of professional design tools like templates, fonts, vector graphics, and stock images in one easy-to-use interface. As long as you have some knowledge of design principles and color theory, you can use the Designer to create the book cover of your dreams.
The general process for making a book cover is to add your main image or images, then text, tweak colors, and add final embellishments. The main visual element may be a photo of your kitchen, the finished dish, or a hand-drawn graphic from our Graphic Library. A single central image is often very effective, but you can also add multiple photos – click here for our best tips on taking mouthwatering food photos! Following this simple process, you can create an unlimited number of designs.
If you want to get illustrative, the Graphic Library allows you to pick and choose from thousands of graphics and arrange your design however you’d like. You can also use a combination of photos and graphics in your cookbook cover, but when in doubt, keep it simple by choosing either one or the other.
How to Organize a Cookbook
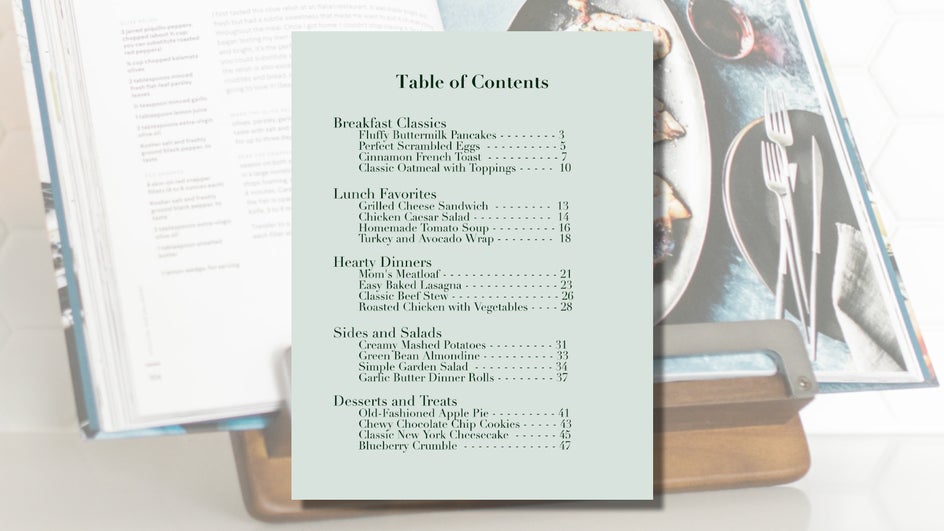
How you want to organize your cookbook depends on what recipes you’re including. (If you haven’t formatted your recipes for printing yet, follow this tutorial here!) For instance, a common way to lay out a cookbook and the accompanying table of contents is to organize it based on the meal: Breakfast, Lunch, Dinner, Appetizers, and Dessert, in that order. But if you’re putting together recipes that don’t quite fall into these sections, there are alternative formatting options.
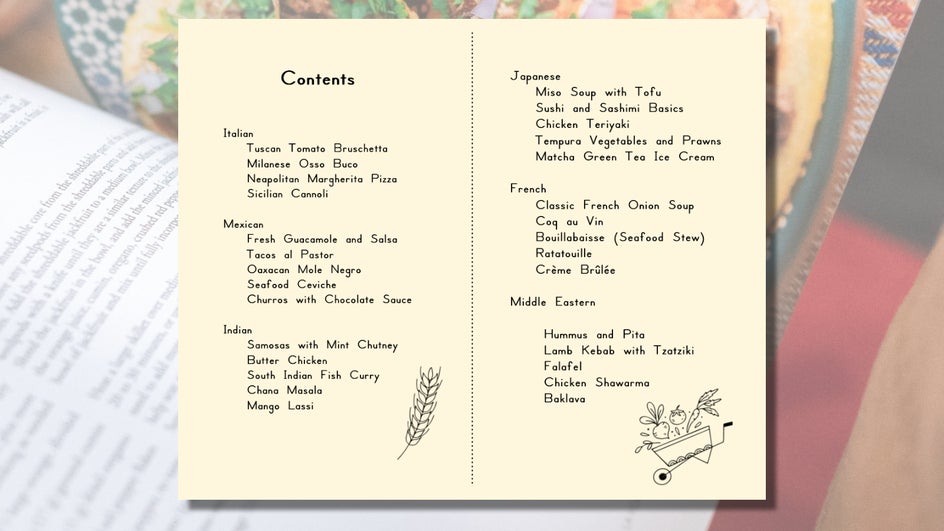
One way is to organize by the cooking method of each recipe: One-pan meals, no-cook recipes, slow-cooked dishes, etc. Another common layout is by region of cuisine, as in the example below. You can also organize based on the type of protein being used, like chicken, beef, seafood, tofu, and vegetarian. Another way to organize your cookbook is alphabetically by recipe title—ultimately, it’s up to you and what you find most intuitive! If you’d like to know some other cookbook organizational methods, as well as the pros and cons of each, check out this helpful article.
No matter how you choose to lay out your cookbook, make sure to include a table of contents for easy reference. You can create this in the Graphic Designer with some simple text and page numbers.
Another thing you may want to think about including is an alphabetically organized index at the back of the cookbook, if it isn’t organized alphabetically already.
How to Format and Print a Cookbook
Once you’ve designed your recipes, your front cover, and table of contents, you’re ready to format your cookbook. Formatting your cookbook will depend on how you want to distribute it: Will it be printed or stay in PDF format? Are you printing at home or using an online bookmaking and binding service? If using the latter, just check the formatting requirements of the publishing service you’re using. If you’re printing at home, then printing on 8.5” x 11” paper and stapling it together is easiest. You can print the cover on heavier card stock (65-80 lbs) for a more professional feeling.
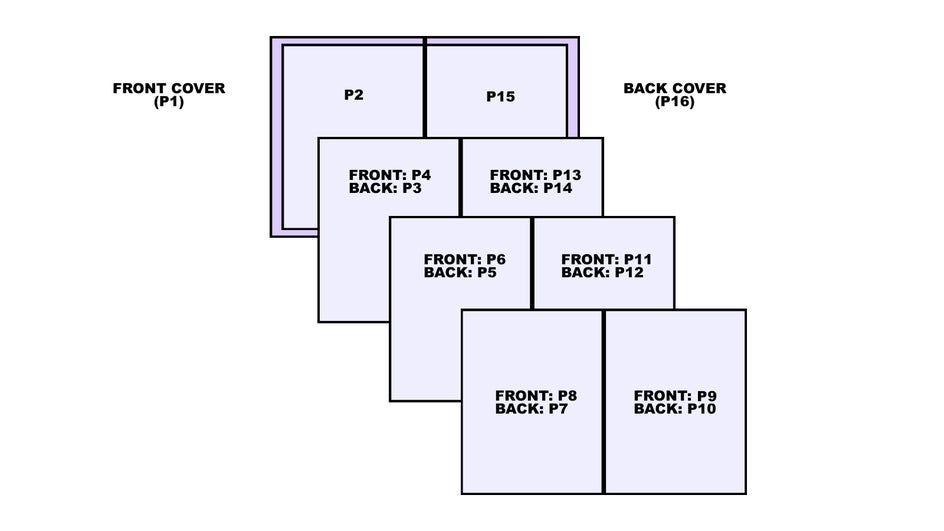
The Graphic Designer allows you to save your recipes, table of contents, and covers as PDFs. You can then stitch them together on your computer and print them. When organizing, just alternate the first and last page, then the second and second-to-last page, the third and third-to-last page, etc. Here’s an example from our article on chapbook printing:
If you need more help with formatting, check out this article. If you’re planning to keep your cookbook in PDF format and just open it on your computer, then you can choose any size you’d like, and you won’t have to worry about roomy margins or alternating formatting.
Create Your Own Cookbook Today!
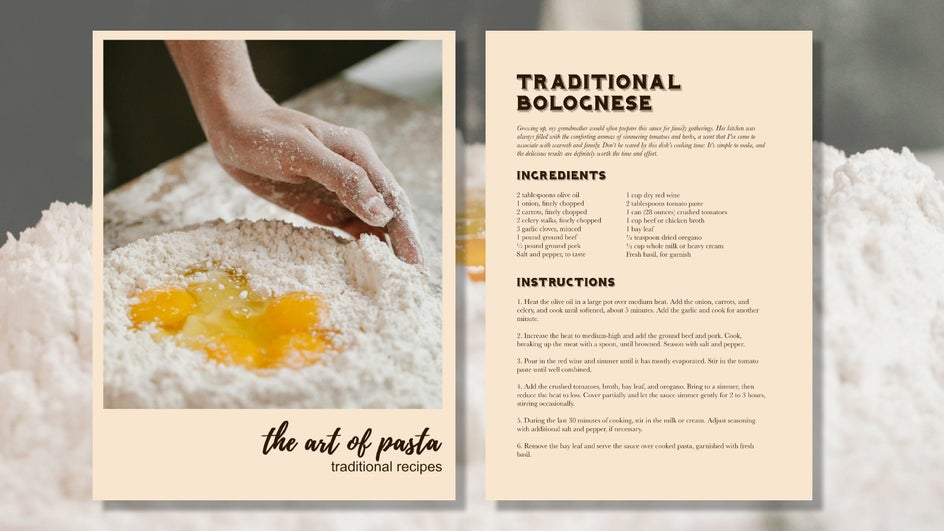
A cookbook of your favorite recipes is great to keep on hand in the kitchen, but it also makes a perfect gift for family and friends. Here’s an example of what the front cover and inside recipes might look like:
Once you’ve created the final PDF, you can share it over email or print a new one whenever you’d like. And by organizing everything in one place, you’ll have something to browse when you’re not sure what to make for dinner. Start creating your own personal cookbook in the Graphic Designer today!


