Foodie Photo Tips to Make Your Instagram Feed Pop

Instagram is still one of the best platforms for sharing food content. Its highly visual nature gives you a place to show off your brand personality, not to mention your latest recipes or foodie finds. Whether you're trying to grow your following, connect with local food lovers, or build your culinary business, having high-quality visuals helps you stand out and stay consistent.
With BeFunky’s Photo Editor tools and Instagram templates, you’ve got everything you need to make your food photos look clean, creative, and on-brand – no expensive camera equipment or software required! From quick image enhancements to beautifully designed layouts, it’s the perfect combo for food bloggers, creators, and small businesses who want to share scroll-stopping content that looks professional.
Love posting recipes, behind-the-scenes kitchen moments, or your latest café finds? Here's our top tips on how to make your food pics look better!

How to Prep Your Food Photo Setup
Before you start snapping, a little prep can go a long way in making your food photos look more professional. Here are five fast tips to level up your setup:
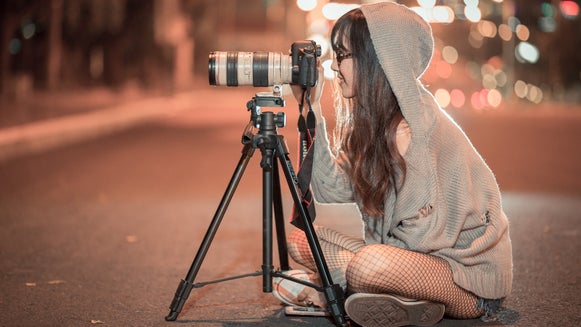
- Use a tripod: It helps keep your shots sharp and steady, especially for overhead or styled flat lays.
- Turn on grid lines: These help you center your plate, straighten your frame, and follow the rule of thirds for better composition.
- Adjust your camera settings: You don’t need an expensive DSLR to capture great food photos. When using your mobile, tap to focus, slide to control exposure, and lock it in so your lighting stays consistent throughout the shoot.
- Style with intention: Stack, layer, or fan out objects in your photo to highlight texture and make your plate look more dynamic.
- Clean your lens: It’s simple but easy to forget: a quick wipe can remove fingerprints or smudges that dull image quality, especially when using your phone.
5 Tips for Taking & Editing Perfect Food Photography
Want your food photos to look as good as they taste? These simple tips will help you capture and edit mouthwatering shots that shine on Instagram and beyond.
1. Start With the Perfect Lighting
Great lighting is key to capturing food that looks as mouth watering as it tastes. The goal is to make your dish pop with natural color, texture, and detail – and lighting can make or break that effect. Soft, indirect light from a nearby window usually works best. If you're indoors or shooting at night, try using a diffuser or bounce board to soften harsh shadows and avoid glare.

You can also experiment with different angles for the perfect lighting. Side lighting, for example, tends to highlight textures like flaky pastries or glistening sauces. Backlighting, on the other hand, can add depth and drama to drinks, soups, or other translucent ingredients.
Even with the best setup, lighting doesn’t always go your way. Luckily, our A.I. Image Enhancer can fix shadows, brighten colors, and add contrast – all with one click.
2. Frame the Perfect Tabletop Story From Above
Shooting your food from directly above is a great way to capture the full spread in one clean, cohesive frame. It’s especially effective when you want to highlight details like texture, ingredient variety, or your overall table styling – making it ideal for showcasing everything from intricate charcuterie boards to coordinated table settings.

Overhead angles also help minimize distractions in busy environments by keeping the focus on the food and table setup, rather than the background. Just make sure everything is neatly arranged and evenly spaced before you snap!
3. Crop and Resize for a Flawless Display
When it comes to food photography on Instagram, size really does matter. Using the correct dimensions ensures your photos display clearly and professionally on your feed, without unexpected cropping or a drop in quality. Whether you're posting to your grid or sharing behind-the-scenes content in Stories, BeFunky has all the tools you need to get your image Instagram-ready in seconds.

In the Crop tool, you’ll find preset aspect ratios that make it easy to format your image. For standard Instagram posts, a 1:1 square (1080 x 1080 pixels) is ideal for consistency across your grid, while the 4:5 vertical format (1080 x 1350 pixels) takes up more space in your followers’ feeds, which can help your image stand out. If you're creating content for Instagram Stories, use the Crop tool or Resize tool to adjust your image to 1080 x 1920 pixels for a full-screen, vertical look.
4. Frame Your Food With Thoughtful Styling
Great food photography isn’t just about the food – your layout and styling matter too. Therefore, add visual interest through backgrounds, props, and more. Neutral surfaces like wooden tables, linen napkins, or matte boards help your dish stand out, while minimal plates in solid colors (especially white) let your food be the focus. Also, try to think in layers. For example, adding napkins, utensils, or ingredients around the dish builds dimension.
And if you snap the perfect photo but notice a distracting object in the background? Use the Object Eraser to clean things up in seconds. Simply brush over the item you want to remove (like a crumb or spilled sauce) and the tool will fill in the space naturally. It’s perfect for removing anything that takes attention away from your dish.


5. Keep Your Grid Cohesive With Batch Editing
When you’re working with a whole batch of food photos – like from a recipe shoot or a restaurant visit – editing each image one by one can be time-consuming. That’s where our Batch Photo Editor comes in handy. It lets you apply the same edits to multiple photos at once, helping you maintain a cohesive look across your entire Instagram grid without the repetitive work.
With just a few clicks, you can give a full set of images the same lighting, color, size, and aesthetic, making your grid feel more consistent and saving you loads of editing time. It's especially handy for food bloggers and creators who post regularly and want their feed to feel more polished.


Turn Your Food Photos Into Instagram-Worthy Content
Taking better food photos for Instagram doesn’t have to be complicated. With just a few simple creative touches and photo editing tools, your dishes can look as delicious on screen as they do in real life. From lighting enhancements to layout fixes and batch editing, BeFunky’s Photo Editor and pre-designed Instagram templates make it easy to get professional-quality results – all from your browser or phone.
Ready to edit your next round of food photos? Head to the Photo Editor today!