Edit Wedding Photos Faster With the Batch Photo Editor
Editing wedding photos is no small feat. After a successful wedding, whether you’re a professional photographer or a budget-savvy bride, you now have hundreds of photos to sort through and edit. Photographers can take anywhere from 1000-2000 photos on the big day, and around a quarter of these will make it through to post-processing. It may seem like there’s no possible way to edit so many images efficiently while still maintaining high-quality results – but that’s exactly where the Batch Photo Editor comes in.
The Batch Photo Editor allows you to edit hundreds of photos at once with a comprehensive set of tools, filters, and even AI-powered enhancements. Crop photos, adjust exposures, change colors, apply Effects, and more. Apply the same changes to multiple photos with a single click. Spend less time on tedious edits and more time on building your photography business or designing your wedding thank you cards. The Batch Photo Editor saves you hours of time (and gives your poor wrist a break)!
How Long Does It Take to Edit Wedding Photos?
For a seasoned professional, culling wedding photos – that is, cutting down the number of raw images from a few thousand to a few hundred – takes anywhere from 1-3 hours. Editing the photos could take anywhere from 4-8 hours depending on experience and the number of tools at their disposal. That’s an average of 8-10 hours for a professional photographer. If you have less experience with photo editing, this time frame could be much longer.
With the Batch Photo Editor, as long as your photos were taken in a similar location with similar lighting, you could shave the editing process down to just 1-2 hours, or even less! That’s hours of time saved with just a few clicks to upload, edit, and save your images.
Can I Batch Edit Photos Online?
Bulk photo editing has often been confined to the realm of heavy, expensive photo editing software. The Batch Photo Editor, however, is an entirely online tool that doesn’t require you to download a thing. Use the Batch Photo Editor online from the browser of your choice and save your edited wedding photos directly to your computer once you’re done!
How to Edit Wedding Photos With the Batch Photo Editor
Editing wedding photos with the Batch Photo Editor is a simple process: Just upload, edit, and save. The adjustments you make in the Batch Photo Editor will apply to every photo you’ve uploaded, whether that’s a few or a few hundred.
Step 1: Upload Your Wedding Photos
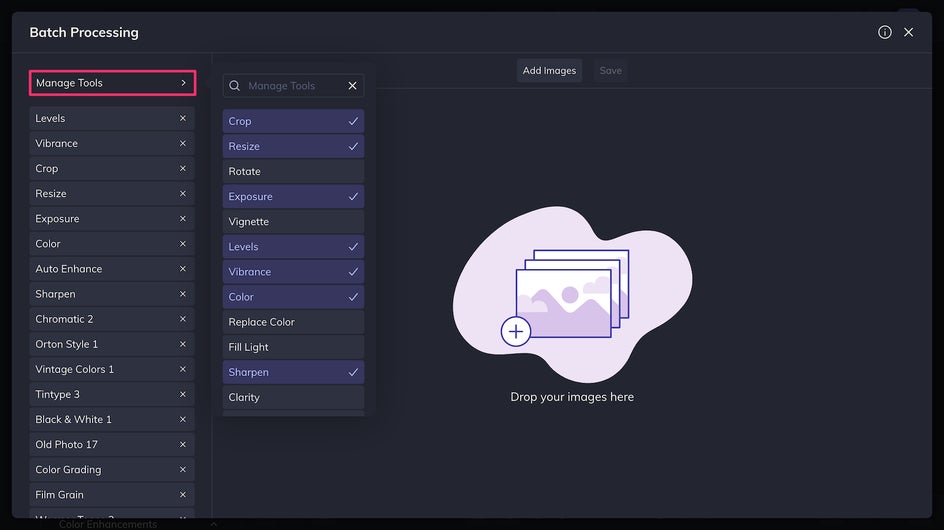
To begin, open up the Batch Photo Editor. Here, you’ll be able to Add Images directly from your computer.
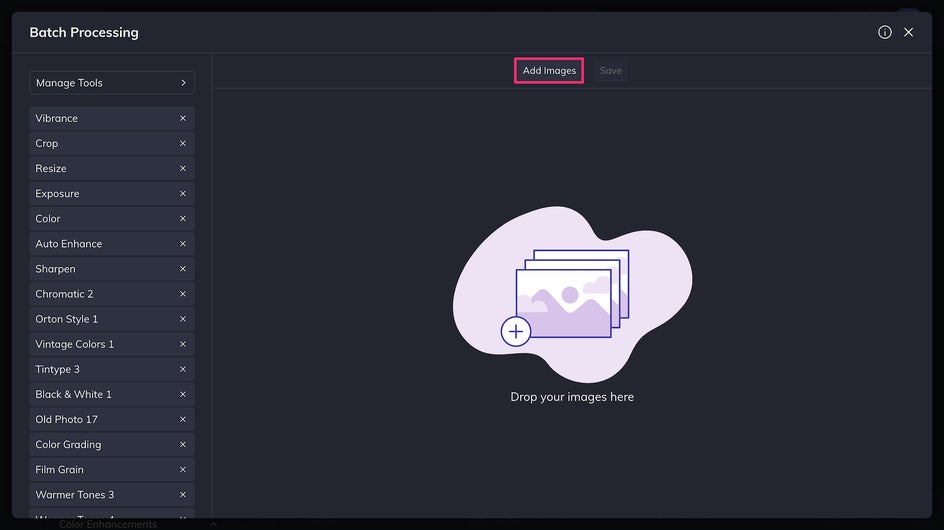
Many of the editing tools you need will already be available in the sidebar, such as the Crop and Exposure tools, but if you want to add even more, just click Manage Tools and select the ones you’d like. If you can’t seem to find a certain tool, just use the search bar!
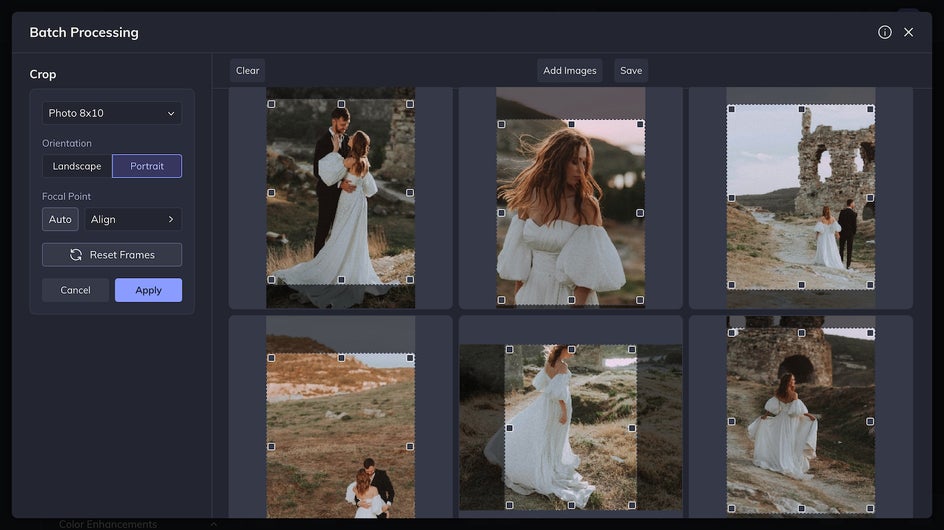
Step 2: Adjust the Crop
The Batch Photo Editor’s Crop tool is easy to use. Just pick the size you want – in this case, we’re doing 8x10” which is the size of a typical printed photo – and adjust the cropped area for each image as needed. This way, you can make sure to maintain the right focal point and not awkwardly crop off any limbs or heads.
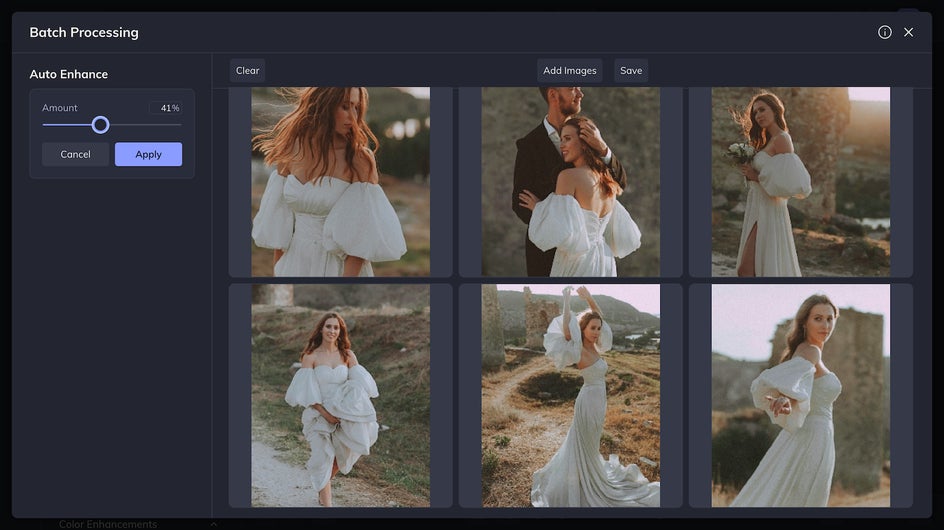
Step 3: Edit / Apply Effects
The Batch Photo Editor provides all the same tools as the regular Photo Editor, from Color and Exposure tools to AI enhancements. The tools you use will depend on the level of control you want. For instance, you can use Auto Enhance to add clarity and brightness:
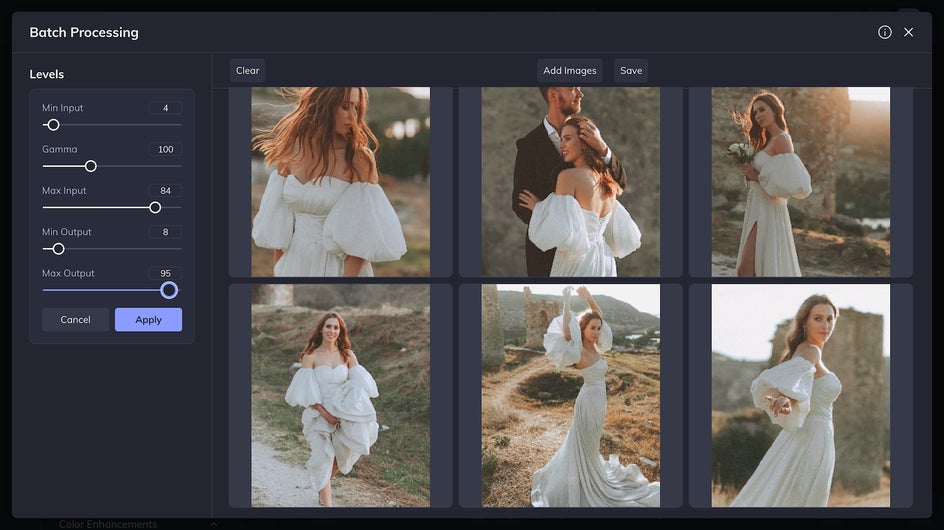
Or you can use the Levels tool to adjust the black and white levels of the photos yourself.
You can also use Effects that create a specific mood in your photos. Options include Black and White, Warm Tones, Vintage Colors, and more, Here we’ve used Analog Tones 5:
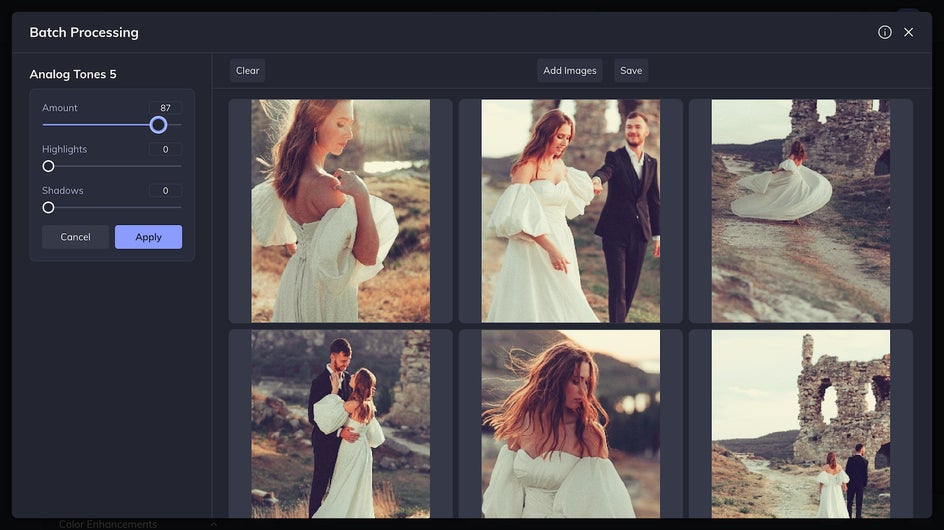
Choose an Effect that harmonizes with the wedding’s color palette for the best results!
Step 4: Save ZIP File
Once you’ve made the final adjustments to your wedding photo batch, it’s time to save! Just click the Save button at the top of the page.
You’ll be able to save your photos as either JPGs or PNGs. PNGs tend to retain the highest quality so that’s what we’re using here. Whichever you choose, make sure to adjust the files to the highest possible quality! You’ll also be asked to add an extension to your file name. We’ve used “Batch 1” but other good options are the wedding date or the couple’s names.
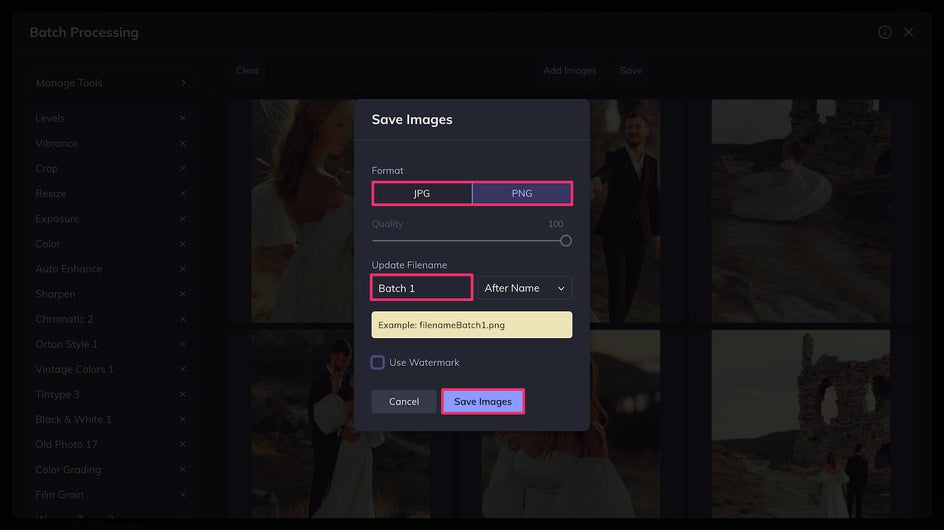
The files will be saved to your computer as a ZIP file that you can open or share in their compressed format. And that’s it! Just a few clicks and we’re done bulk editing all these wedding photos.
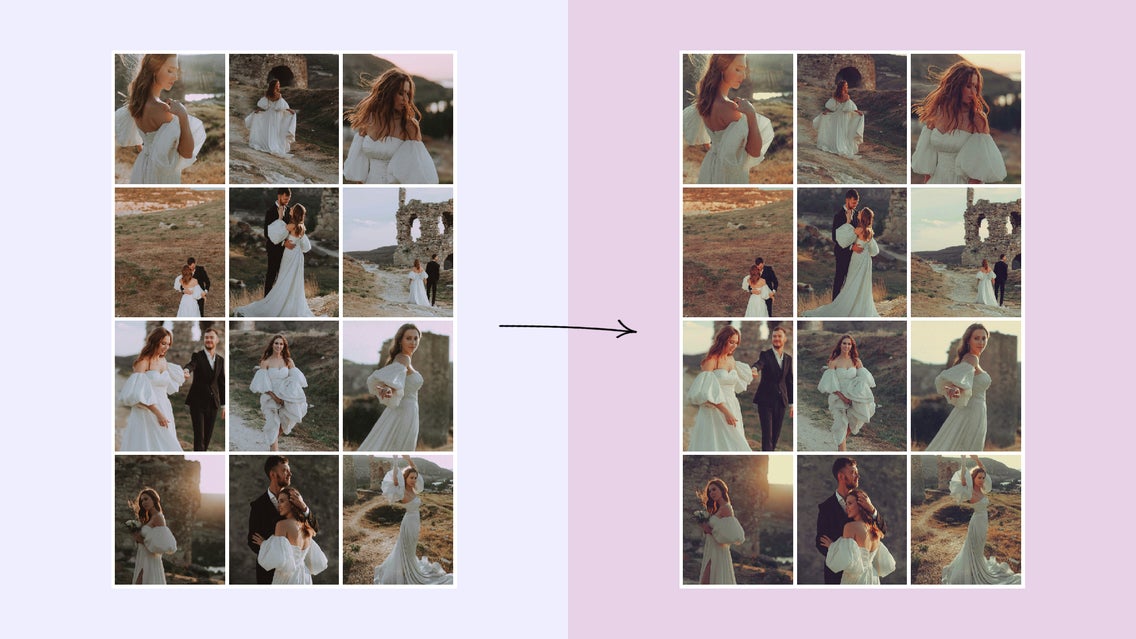
Save Time Processing Your Wedding Photos With Batch Editing
Editing these wedding photos took just a few minutes, but take a look at the results:
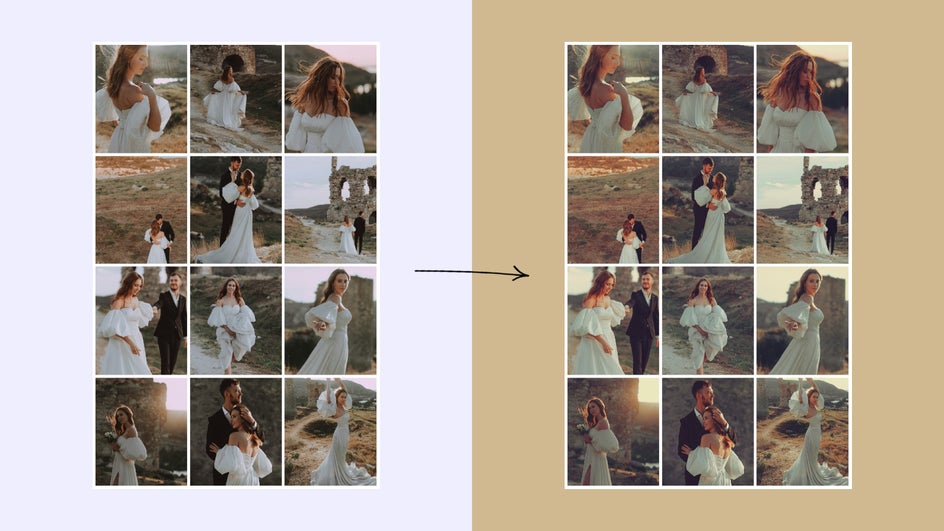
Here we’ve edited fifteen photos. Even if editing each photo on its own took just five minutes, it would have taken one hour to complete! Using the Batch Photo Editor saved us 55 minutes – and that number increases drastically the more photos you have. If you’re editing four hundred photos, that could be the difference between one day and one hour. Save time and start batch editing your wedding photos today!