How to Batch Resize Images for Real Estate Photography
Effective real estate photography goes beyond mere documentation; it's an art form that communicates the unique charm and functionality of each property. Every angle, every lighting choice, and every composition decision work together to create a visual narrative that invites viewers to envision themselves living in that space. In today's competitive real estate market, where first impressions are often made online, the importance of captivating photography cannot be overstated. A well-executed photo can make a listing stand out amidst a sea of options, drawing in potential buyers or renters and setting the stage for successful property transactions.
Resizing real estate photography is a crucial step in the post-production process, which can greatly impact how your images are presented online or in print, it can make or break your image quality and your professional representation. Whether you're preparing images for a property listing website, social media, or promotional materials, getting the dimensions right is key to maintaining quality and visual appeal.
What Is the Best Aspect Ratio for Real Estate Photography?
The 4:3 aspect ratio is favored in real estate photography for several reasons. Firstly, it offers a balanced composition that allows viewers to take in the full scope of a room or property without feeling cramped or distorted. This aspect ratio is particularly effective in capturing interior spaces, as it provides ample room to showcase architectural details, furniture arrangements, and the flow of the space. This aspect ratio is compatible with a wide range of display mediums, both digital and print. Many real estate listing websites like Zillow, social media platforms, and printed marketing materials are optimized for this aspect ratio, ensuring that your images appear correctly and are presented in the best possible light.
However, it's essential to note that while the 4:3 aspect ratio is widely recommended, it's not a one-size-fits-all solution. Depending on the specific property, its architectural features, and the intended use of the photos, other aspect ratios such as 16:9 or even panoramic ratios may be more suitable. Ultimately, the goal is to choose an aspect ratio that complements the property's unique characteristics and enhances its visual appeal to potential buyers or tenants.
What Is the Best Pixel Size for Real Estate Images?
For MLS (Multiple Listing Service), the standard pixel size for images is typically around 1024px x 768px. This resolution strikes a balance between clarity and file size, meeting the requirements of most MLS platforms while ensuring that photos appear crisp and detailed.
On the other hand, for real estate sites like Zillow and Trulia, the recommended pixel size is slightly larger at 2048 pixels wide by 1536 pixels tall. These dimensions provide a higher level of detail and clarity, enhancing the visual appeal of property photos on these platforms. It's worth noting that both Zillow and Trulia can accept larger images, but they will be automatically resized to fit within their recommended dimensions to maintain display quality.
How to Batch Resize Your Real Estate Photos
Begin by navigating directly to the Batch Photo Editor. From there, proceed with these simple steps to get started.
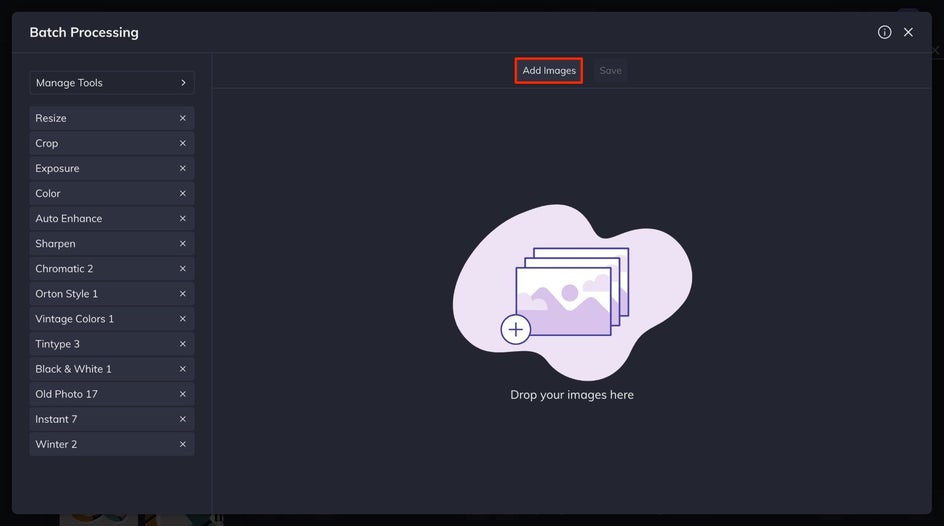
Step 1: Upload Your Real Estate Images
You can either click the Add Images button or drag and drop the images from your desktop. There's no restriction on the number of images you can resize simultaneously – that's the beauty of batch photo editing!
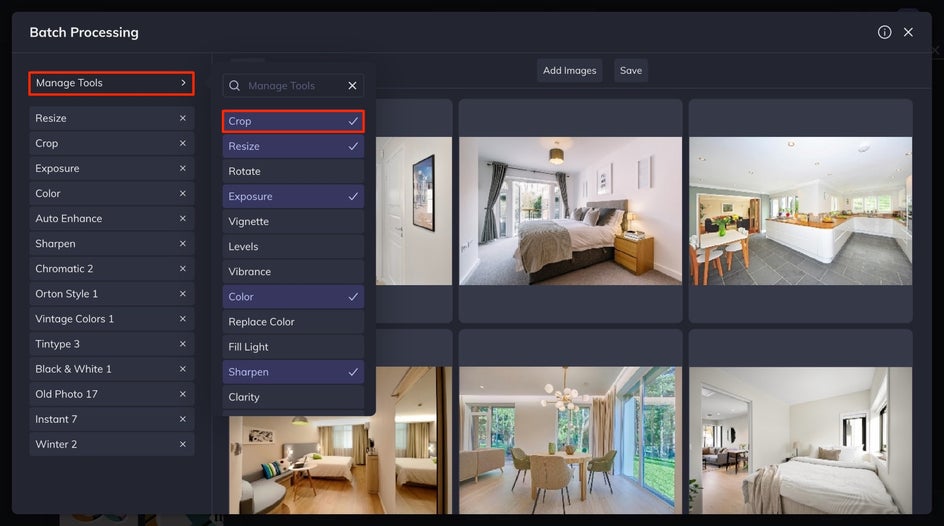
Step 2: Choose the Correct Crop
Before resizing, you'll probably need to crop your images to the correct aspect ratio. If the Crop tool does not appear automatically under the Manage Tools tab, click on the drop-down to add to your tools.
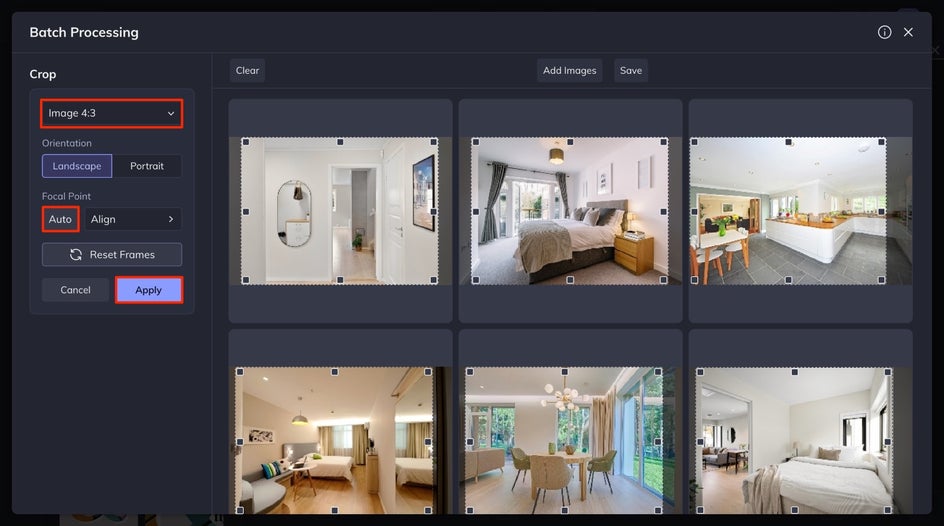
Select Crop and select your desired aspect ratio from the dropdown menu provided. For this tutorial, we will use the Image 4:3 ratio, the preferred ratio for real estate photos. Once you select your aspect ratio, you will want to adjust the focal point of your images. You can do this by moving the crop box with your cursor on each image, or you can select the Auto Align button for AI to do all the work for you. After you are satisfied with the placement of the cropping of the batch of images click the Apply button.
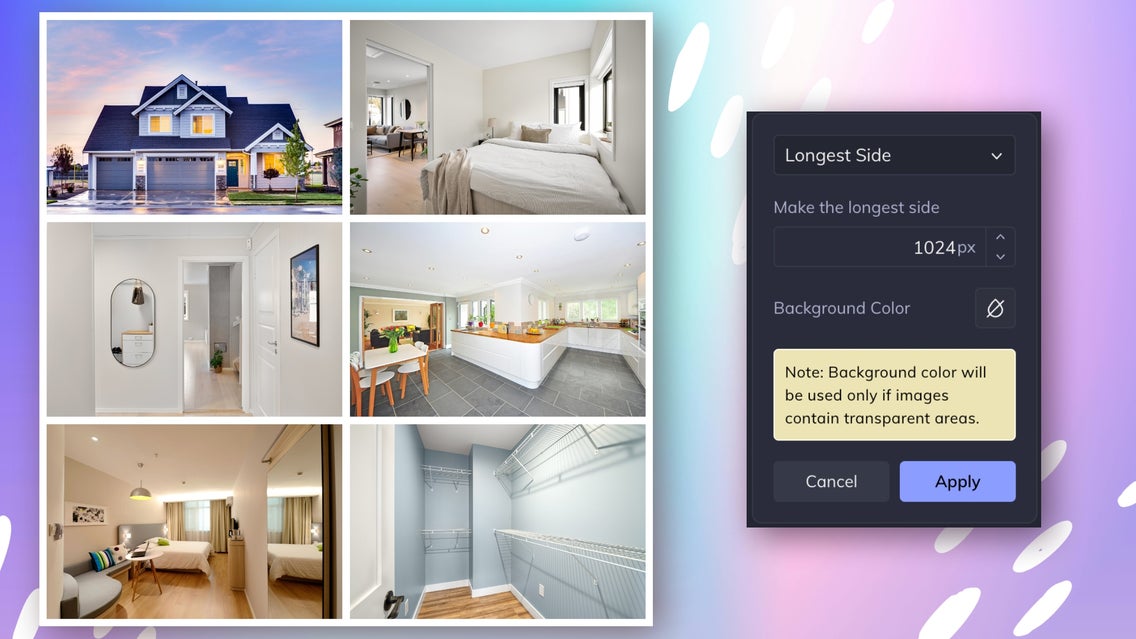
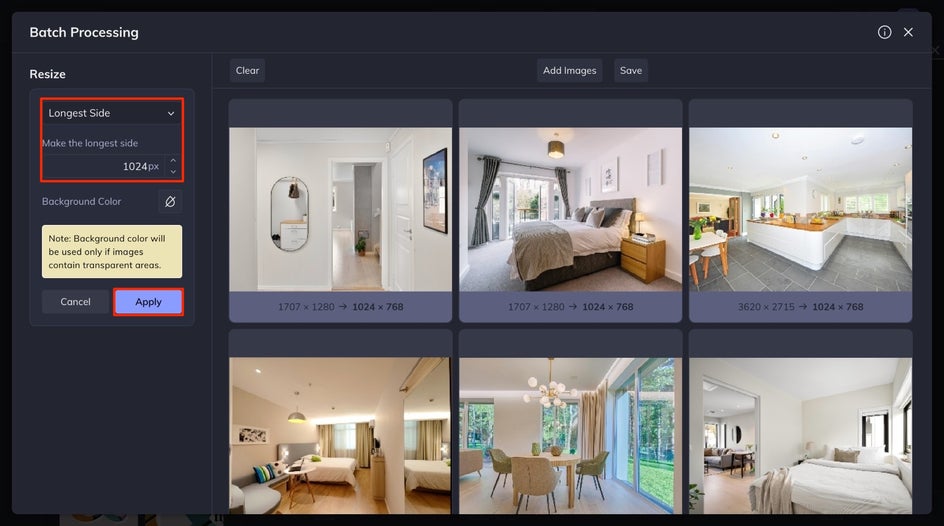
Step 3: Batch Resize!
Once you have cropped your images to the perfect aspect ratio, now it is time to resize all your images at one time. Under the Manage Tools tab, select Resize. From the Resize menu, select Longest Side from the drop down, and you’ll enter 1024 into the box and click apply.
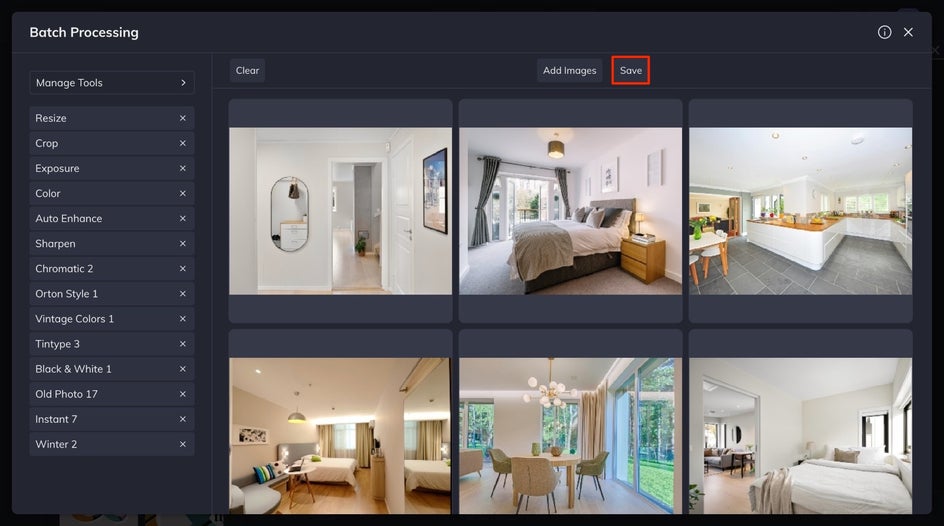
Step 4: Save Your Batch of Real Estate Photos
After completing your batch edits, simply click the Save button at the top of your interface to finish the process.
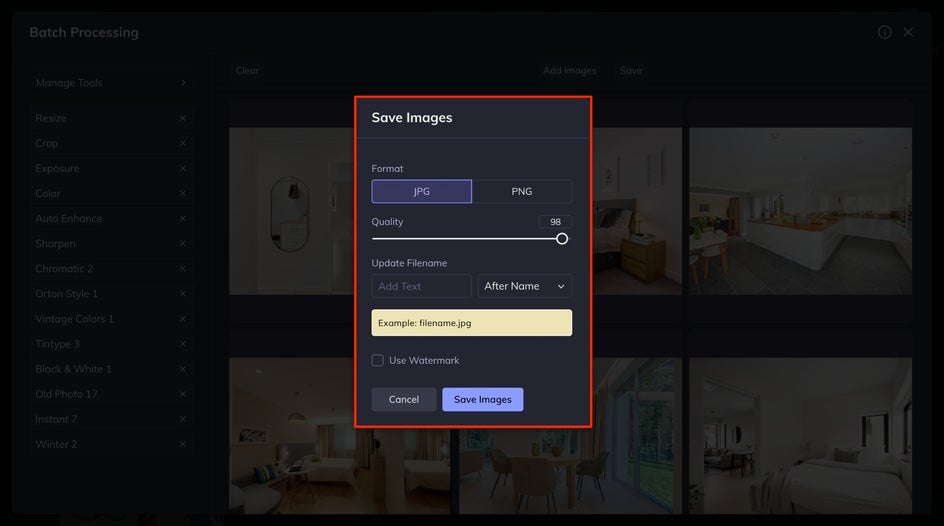
Choose your preferred format, adjust the quality settings, and specify the filename. You also have the choice to add a watermark to your set of real estate images. Click Save Images, then on the next page click on the file from the Download Images screen that appears.
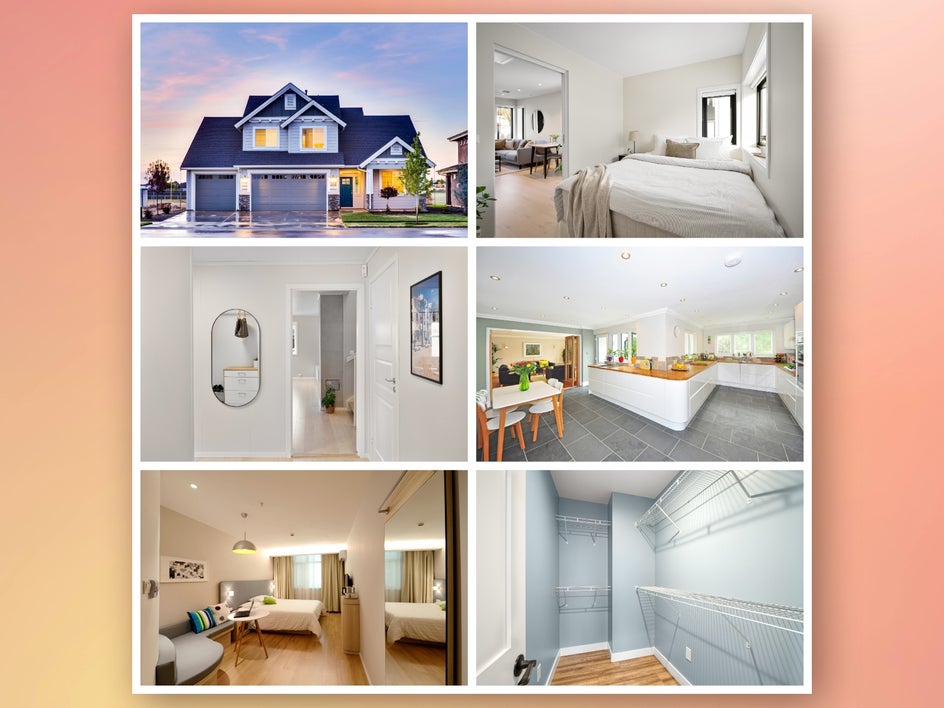
Batch Resize Your Real Estate Photos in Seconds
Batch resizing real estate images is like giving your property photos a tailored suit – it's all about making them look their best for every occasion. Whether you're uploading to a website, sharing on social media, or printing flyers, getting that aspect ratio and pixel size just right and maintaining quality is key. By taking the time to choose the perfect aspect ratio and pixel size, ensuring top-notch image quality, and you could even add a subtle watermark for that extra touch of professionalism and to keep your images out of the hands of scammers, you're setting yourself up for success.
Plus, the beauty of batch resizing is that it's not just about looks; it's also about efficiency. With a few clicks, you can resize a whole batch of images, saving you time and effort while keeping everything looking cohesive and polished. So, next time you're prepping your property photos, remember to batch resize like a pro with our Batch Image Resizer. It's the little details that make a big difference in capturing attention and making a lasting impression on potential buyers or renters.