3 Ways to Blur the Background of Your Photos
If there’s one thing the work of professional photographers has in
If there’s one thing the work of professional photographers has in common, it’s those beautifully blurred backgrounds that instantly transform a photo into a work of art. Aside from looking great, blurred backgrounds work wonders at creating depth of field, placing the emphasis on the subject, or creating that dreamy bokeh effect we just can’t get enough of. By now, you might be wondering: “How do you blur backgrounds in photos?” Thankfully BeFunky’s Photo Editor has everything you could need to blur backgrounds online for free.
Why Should You Auto Blur Backgrounds With BeFunky?
In the past, blurring backgrounds in the photo editing process was a tedious task that required painting the blur effect around your subject. Depending on the shape of your subject and your painting skills, the results could vary widely.
To give you more precision than ever and save you a tremendous amount of time, our team at BeFunky developed A.I.-powered technology to do the hard work for you! Just choose your favorite Blur tool (there are five to choose from with this tech), click the Isolate Subject button, and watch the background blur while your subject stays crisp and clear.
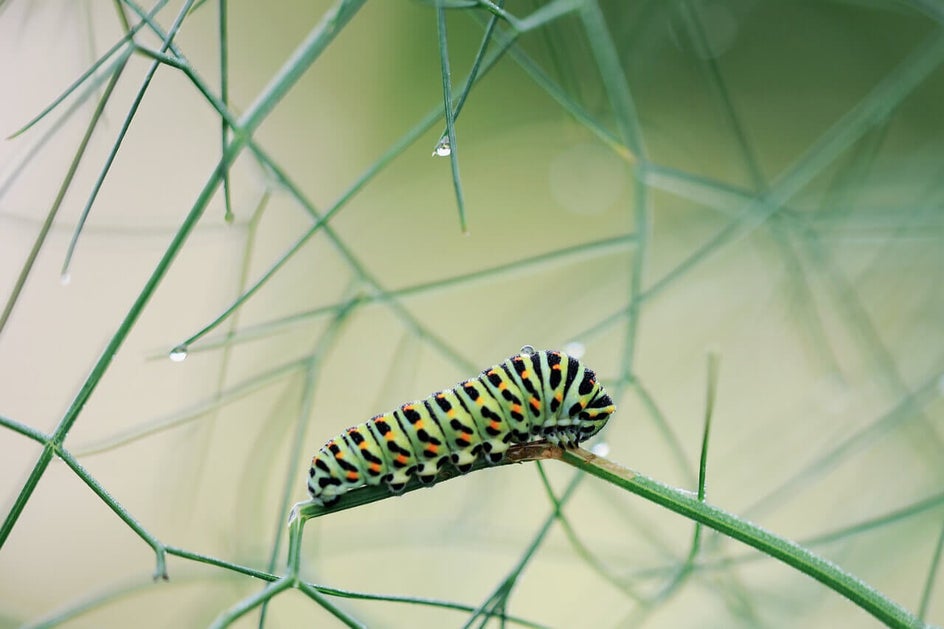
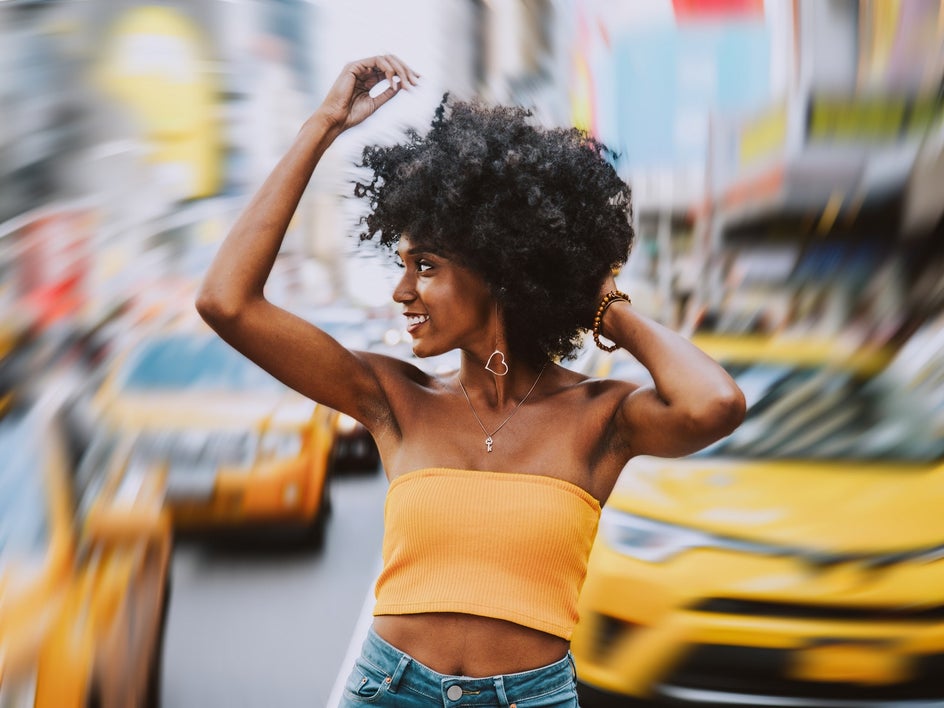
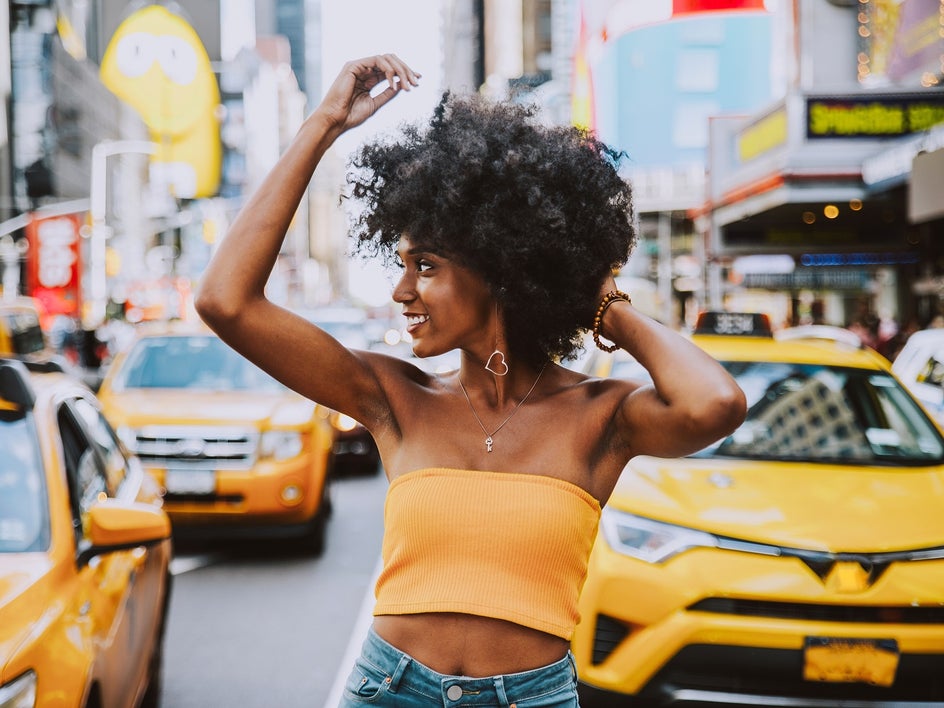
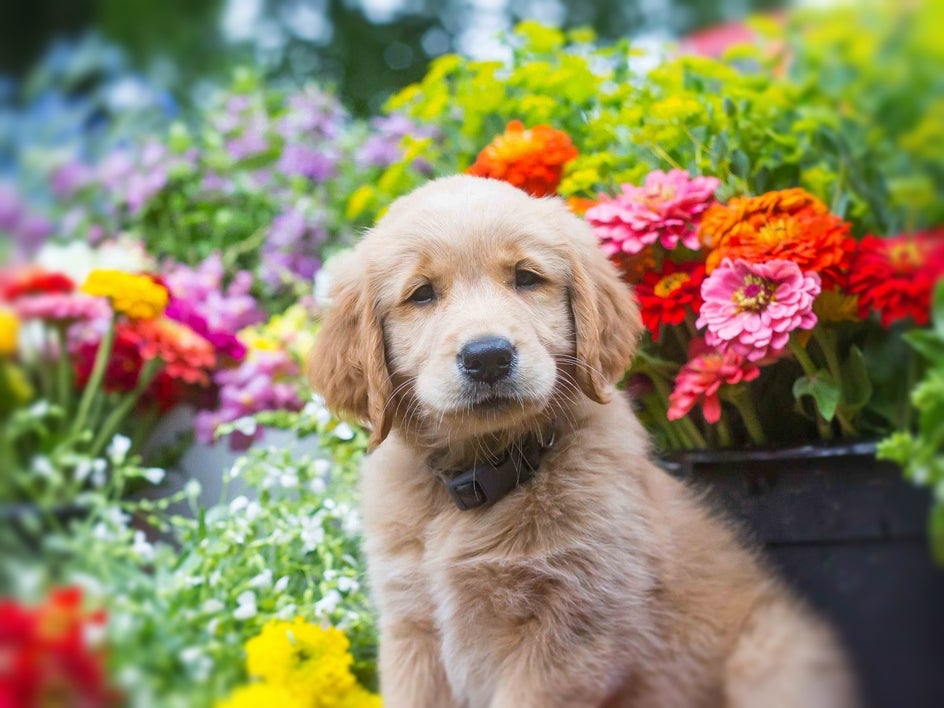
Keep in mind that in order to automatically detect the subject in your image, there needs to be a strong main subject to detect. This technology works amazing with portraits, products, pet photography, and any image where there is a main subject to be emphasized.
Here are some of our favorite reasons for using BeFunky’s auto-blur background tools:
Create Depth of Field
Depth of field is simply a photography term that refers to the illusion of distance between the background and the foreground. This is achieved when the background of a photo is blurred and the subject in the foreground is sharp and in focus.
You too can easily achieve this look by using the Blur tool with the Isolate Subject feature to create a realistic-looking depth of field. Alternatively, you can use the Funky Focus tool to achieve a similar effect.

Emphasize Your Subject
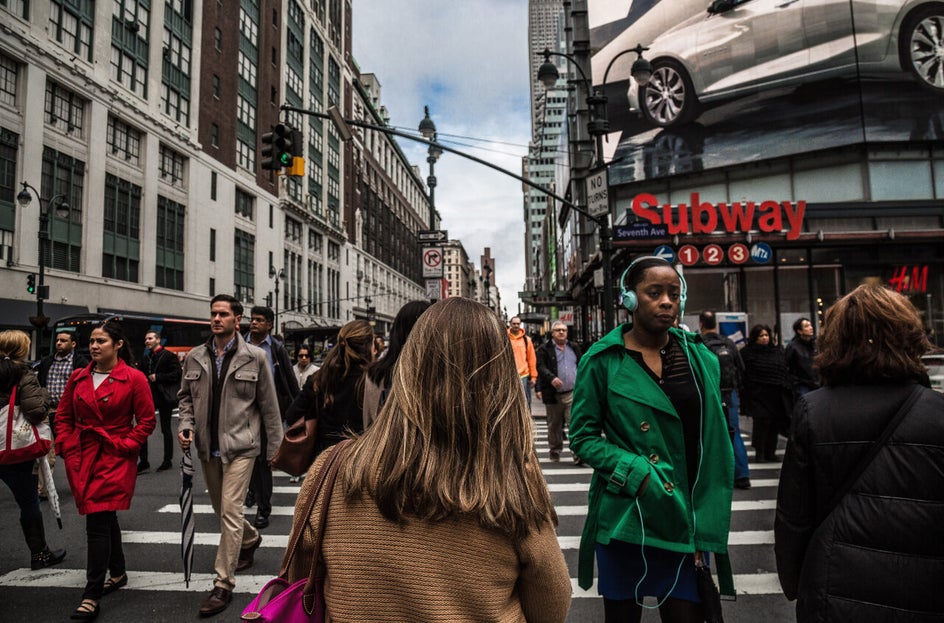
Whether you’ve captured a portrait, a product, or something else, blurring backgrounds can quickly and easily get rid of distractions lingering in the background.
With a combination of the Blur tools and Isolate Subject feature, you can keep your subject crisp and clear, while letting any other distractions blur into oblivion.

Add Drama
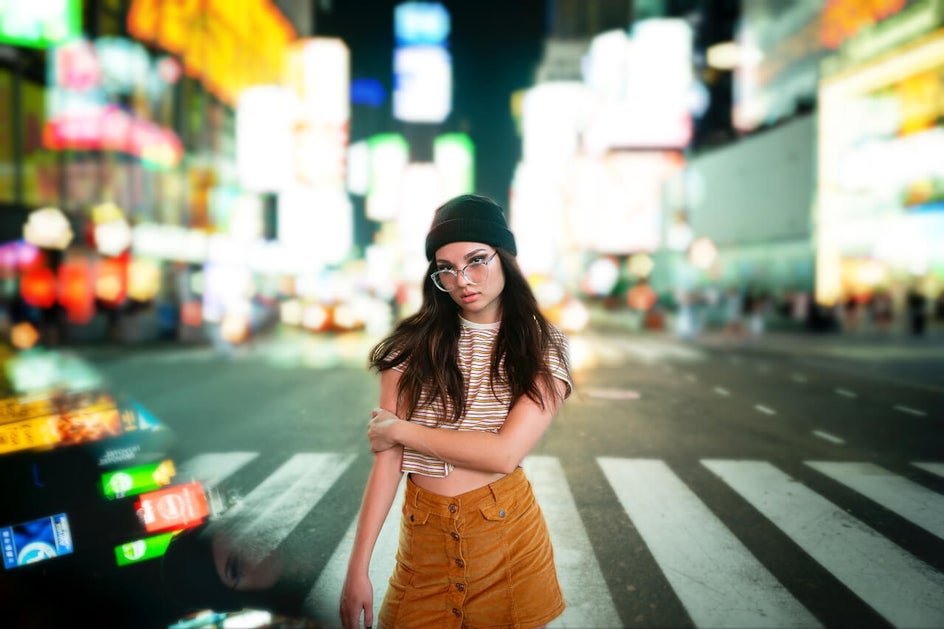
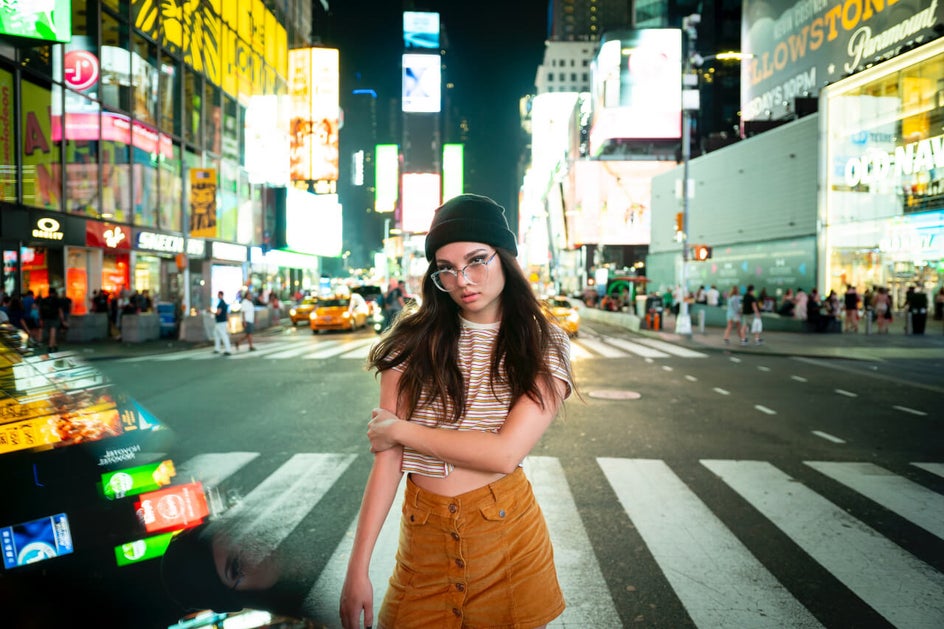
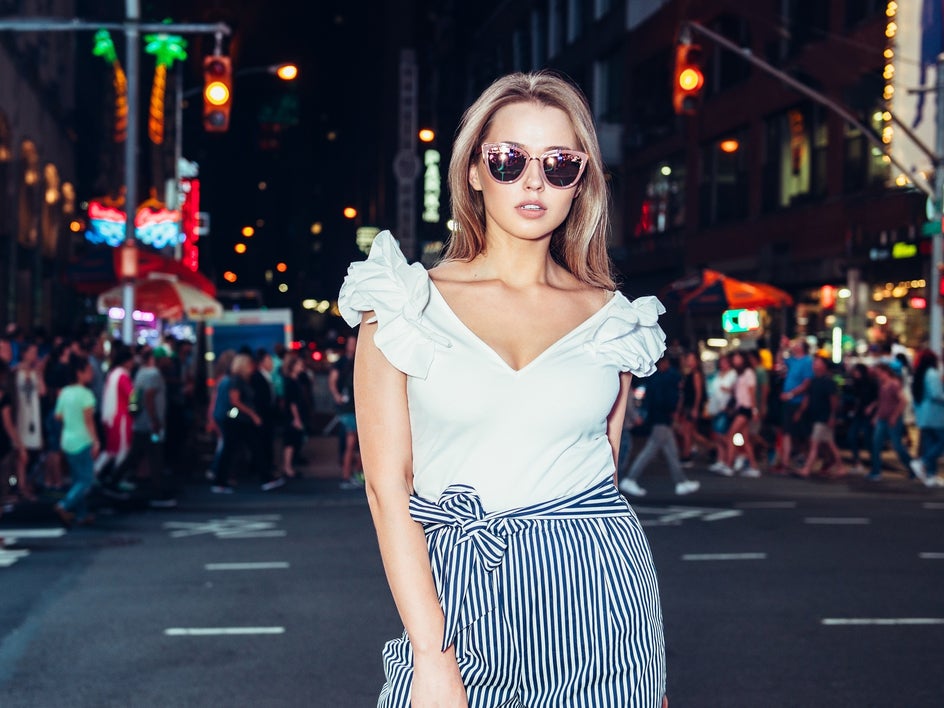
Nothing is quite as dramatic as a colorful, light-filled cityscape captured at night, but if you want to turn up the drama even more, the Lens Blur tool can be used to transform light sources into intriguing bokeh.
A bokeh background is perfect for portraits, pet photography, and any kind of image where you want to emphasize the subject on the dreamy background.
Tilt-Shift Effect vs. Background Blurring: What’s the Difference?
There are a lot of reasons why you'd want to use a blur effect on your photos. We’re going to introduce you to the two most common uses: tilt-shift and background blur.
A "tilt-shift" effect is achieved when photographers use a large aperture lens, creating a shallow depth of field (a.k.a., the perceived distance between a scene’s foreground and background). This effect sharply focuses on a certain element in the foreground, while blurring everything in the middle ground and background to make them appear further away.
Blur plays an important role in achieving the tilt-shift effect (remember how areas of the image must be blurred to create depth of field, a vital element in the tilt-shift effect?), but here’s the thing: being overzealous with the Blur tool will create an entirely different effect.
Sure, there are times when you will need to blur your entire image. For example, when you want to overlay an image with a quote or business logo for social media, but want to remove hard lines and distracting detail to truly make these elements pop. However, if it’s the tilt-shift effect you’re after, the trick is to choose a focal point in your image. Subtle blurring around this point then adds dimension and creates the illusion of everything else fading into the distance.
3 Ways to Blur Backgrounds With BeFunky
Powered by our very own A.I. technology, our collection of blurring tools can instantly isolate the subject in your photos and blur the background behind it! Aside from the basic Blur tool, we have a couple of other options for you to achieve that blurry perfection. Read on to find out how!
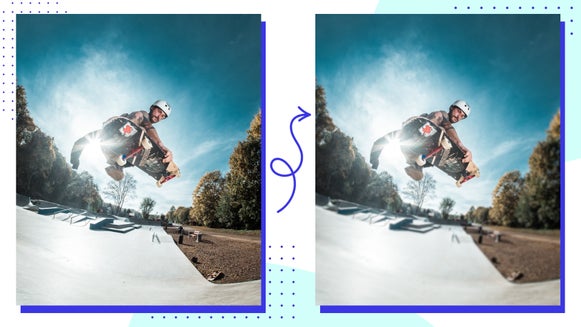
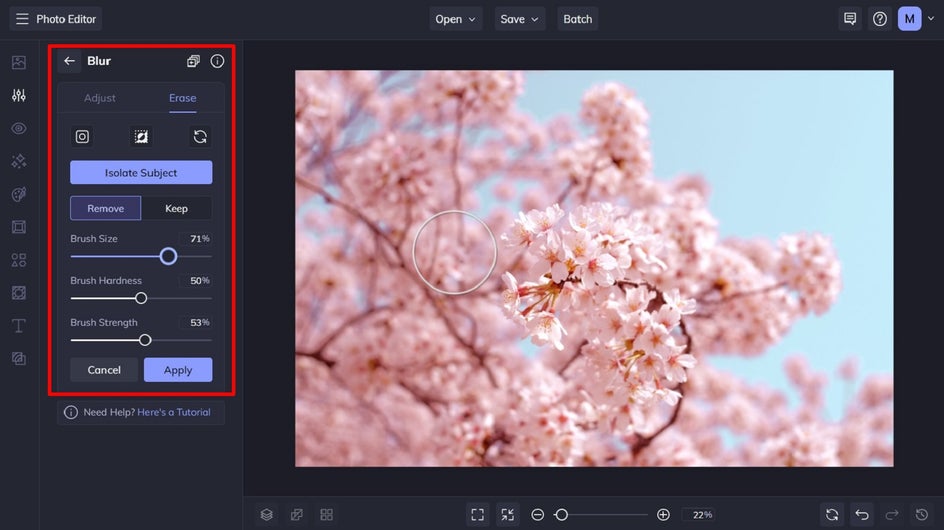
1. Blur Photo Backgrounds With the Blur Tool
You can also blur backgrounds using BeFunky’s advanced Blur tool. If you’re wondering “is Blur Background free?”, the answer is yes! To get started, simply head to the Photo Editor and upload a photo of your choice.
Step 1: Select the Blur Tool
From the Edit tab, scroll down to select the Blur tool (located in the Blur & Smooth section). When you click on the Blur tool, you'll notice that the entire photo becomes blurred. Fear not, however, as we'll show you how to add the blur effect to the background only and keep the subject sharp.
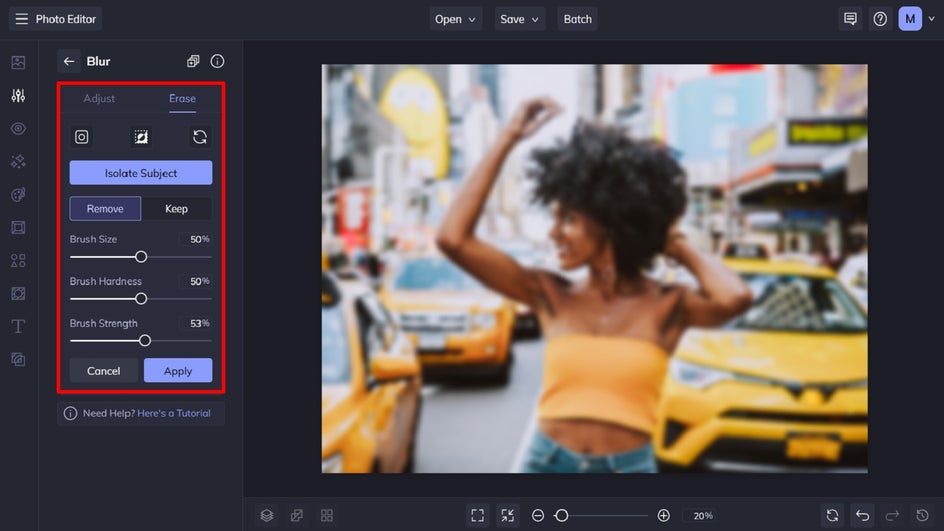
Step 2: Isolate Your Subject
Click on the Erase tab in the Blur tool menu, followed by Isolate Subject. Instantly, our A.I. will detect the subject in your photo and only blur the background of your image.
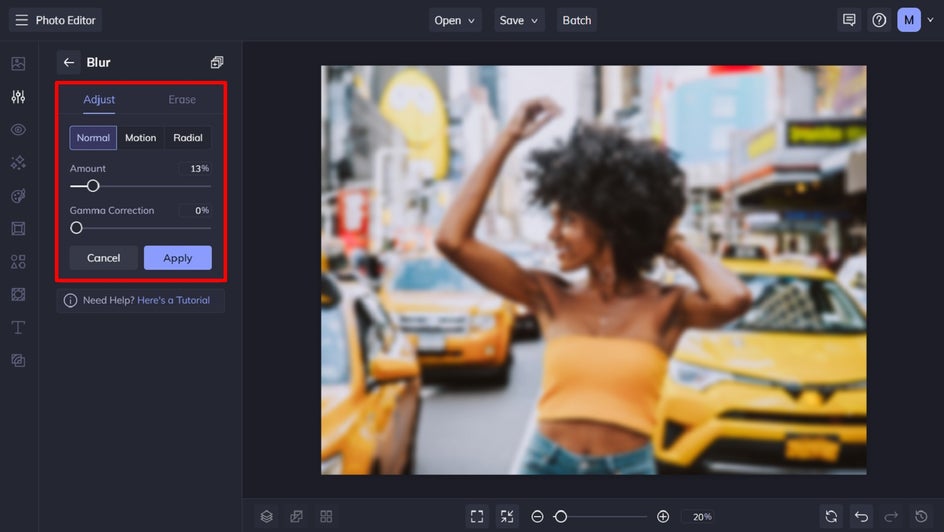
Step 3: Adjust Your Blur and Apply
With the subject in your image isolated, the background should now be blurred and the subject should remain sharp. You can navigate back to the Adjust tab and use the Amount slider to either increase or decrease your desired blur effect. Additionally, you can adjust the Gamma Correction slider to alter the brightness of your image.
Above these sliders, you’ll also notice that you have three different blur options: Normal, Motion, and Radial.

Normal applies a flat blur to the overall image, while Motion applies a linear directional blur to the image. In this setting, you can move the Direction slider to the direction you want your blur to go.
Radial, on the other hand, creates a swirled circular blur. Move the Direction slider to control the direction of the swirl. Additionally, the Horizontal Focal Point and Vertical Focal Point sliders adjust the positioning of the blur focus.
Once you’re done, simply click Apply to apply your Blur effect, and then save your photo.
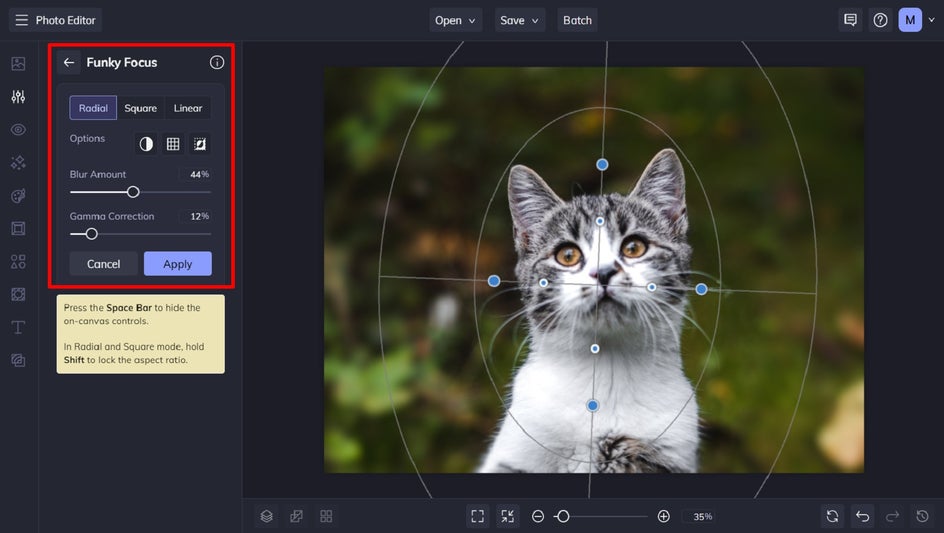
2. Add a Tilt-Shift Blur Effect to Any Background With Funky Focus
For those wanting to create depth of field or a tilt-shift effect in a jiffy, the Funky Focus tool is just the thing! It offers handy guides to help you take your focal point to a whole new level, as well as unique photo editing options to make your images look like they were taken with an expensive camera lens.
Here’s how to create a tilt-shift effect using Funky Focus in the Photo Editor.
Step 1: Click on Funky Focus
You’ll find Funky Focus in the Edit menu, under the Blur & Smooth section. Alternatively, press [Ctrl/⌘ + P] on your keyboard to open the feature search bar and type in Funky Focus.

Step 2: Choose Your Blur Mode and Focal Point
Funky Focus gives you the option to blur images using Radial mode (for a circular-shaped blur), Square mode (for a square-shaped blur), or Linear mode (perfect for when you want to blur the background or other panes such as middle ground or foreground).
You can adjust the target’s size by clicking on the blue circles and dragging them with your mouse inwards (to make it smaller) or outwards (to make it larger). You can also reposition the target so the area you want to remain completely in focus is in the center of this shape. Your photo will then gradually fade out of focus from the point you selected.

Pro Tip: For shallow depth of field, select a narrow point of focus in your target. For deeper depth, simply widen your focal point.
Step 3: Adjust Your Funky Focus and Apply
You can further customize your Funky Focus effect with options such as Blur Amount and Gamma Correction (which adjusts the overall brightness of an image). Simply alter them by sliding the toggle left and right until you achieve your desired look.
You can also flip which parts of your image remain in focus or blurred by clicking on the Reverse icon (it looks like two overlapping squares).
Additional options such as Mosaic give your blur a pixelated look, while Black & White makes the blurred portion of your image black and white.
Once you’re happy with how your tilt-shift effect looks, click Apply. Then, you'll want to click the Save button, found at the top of your canvas, to choose your favorite save location. This will be the same for all of our

3. Blur Backgrounds With the Lens Blur Tool
Alternatively, you can blur your photo’s background using the Lens Blur tool. While this tool works on any kind of photo, it particularly shines on photos taken at night featuring lights, as it has amazing bokeh-producing powers.
To access this tool, head to the Photo Editor and upload a photo of your choice.
Step 1: Select Lens Blur
In the Edit tab, navigate to Lens Blur. The entire image will blur into beautiful bokeh, but we'll show you how to add the effect to only the background.
Step 2: Isolate Your Subject
Click on the Erase tab, followed by Isolate Subject. The subject of your photo should now be in-focus, while the remaining parts of the image retain the Lens Blur effect.
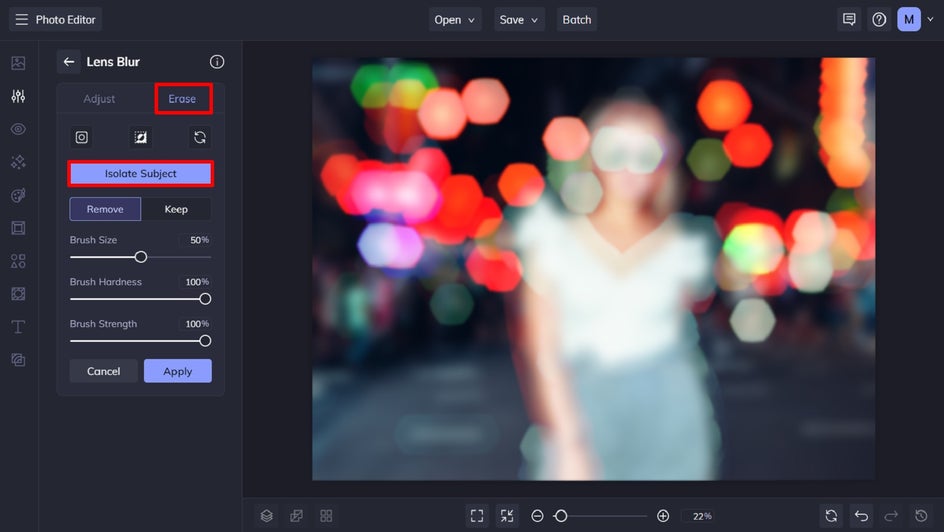
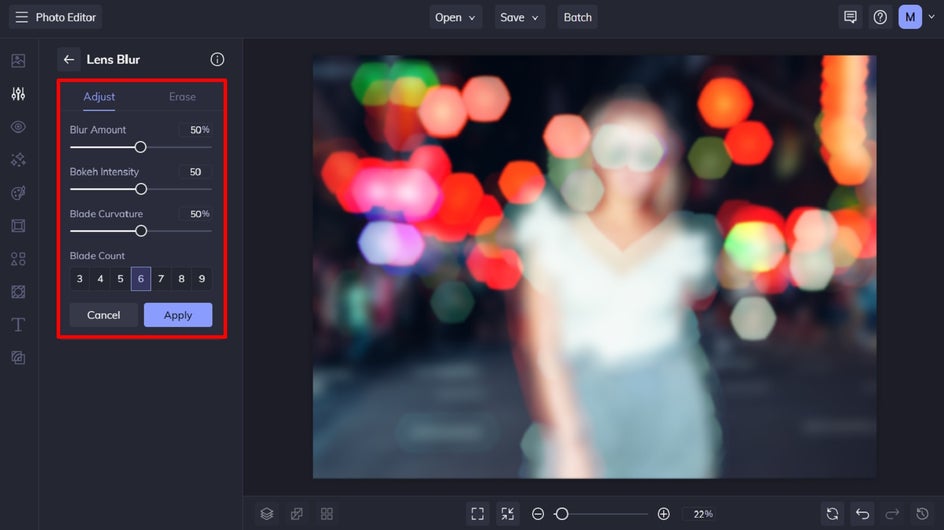
Step 3: Adjust Your Lens Blur and Apply
You’ll notice you have more options in the Adjust tab for this effect, giving you greater control over your blur. You can modify options such as Blur Amount, Bokeh Intensity, Blade Curvature, and Blade Count in the Adjust tab.
The Blur Amount slider will help you increase or decrease the amount of blur. Increasing the Bokeh Intensity will create more intense light orbs, while decreasing will create less intense orbs. The Blade Curvature controls the shape of the bokeh – adjusting the slider to the left gives your bokeh sharper edges, and to the right gives you circular edges. And finally, the Blade Count refers to the number of blades you would find on a camera lens that controls the aperture. The higher the blade count, the softer the bokeh will appear.

Experiment with each of these settings to create a stunning blurred background effect that’s perfect for your photo. Finally, click Apply.

Blur Photo Backgrounds in Seconds
Thanks to BeFunky’s Isolate Subject tool, along with our wide range of Blur effects, creating beautifully blurred backgrounds has never been easier.
Forget carrying around bulky camera lenses or expensive equipment. You can now achieve this look in as little as a few clicks of your mouse. With BeFunky’s mobile app, you can also blur the background of a picture on your phone, then upload it directly to your social media!
Go on, visit our Photo Editor to try it for yourself!