How to Manipulate Depth of Field in Seconds
If there’s one thing that can bring a whole new perspective to your photography in one simple technique, it’s depth of field. By focusing on one area or subject in the shot, a photographer can essentially control what the viewer sees in an image and how they see it. In other words, depth of field is like a superpower. Mixed with good photo composition, it can take your photography to a whole new level!
A photography technique that can bring a whole new perspective to your images is playing with depth of field. If this is something that you have never heard of before, BeFunky has some tips on how to capture it on your own camera, and how to manipulate it within the BeFunky Photo Editor. In just a few clicks you can change the perspective of your images and share them with the world.
What Is Depth of Field?
In the most basic sense of the term, depth of field is based on the distance between objects in the foreground and background, and how much or how little your image is in focus. With a shallower depth of field more of your image is blurry, whereas if there is a longer depth of field, then more of your image will be in focus.

How Do You Manipulate Depth of Field?
You are able to manipulate this with different types of lenses and where you choose to focus within the image. If you place your subject closer to your camera and focus on it, the background will end up blurry with a sharp subject. Basically, as a photographer, you can control what your viewer sees and how they see it. However, if it doesn’t turn out how you want it to just from shooting, this is also something that you are able to edit after with BeFunky’s Photo Editor.
Manipulate Depth of Field With a DSLR Camera
If you are new to shooting on a DSLR camera, here are our recommendations for photography equipment to get started! Attempting good depth of field starts with the f-stop on your camera. Setting your f-stop to a lower number will make the aperture wider and allow you to achieve a shallower depth of field by making the areas not in focus more blurry. Setting your f-stop to a higher number will do the opposite, allowing more of your image to be in focus. Depending on how large your focal point subject is, you’ll need to set the f-stop accordingly. After you set your f-stop, play around with the ISO and shutter speed on your camera till you find the perfect combination for your desired depth of field end result. Then, start capturing images, test out different angles and positions to create an intriguing final image, and get creative!
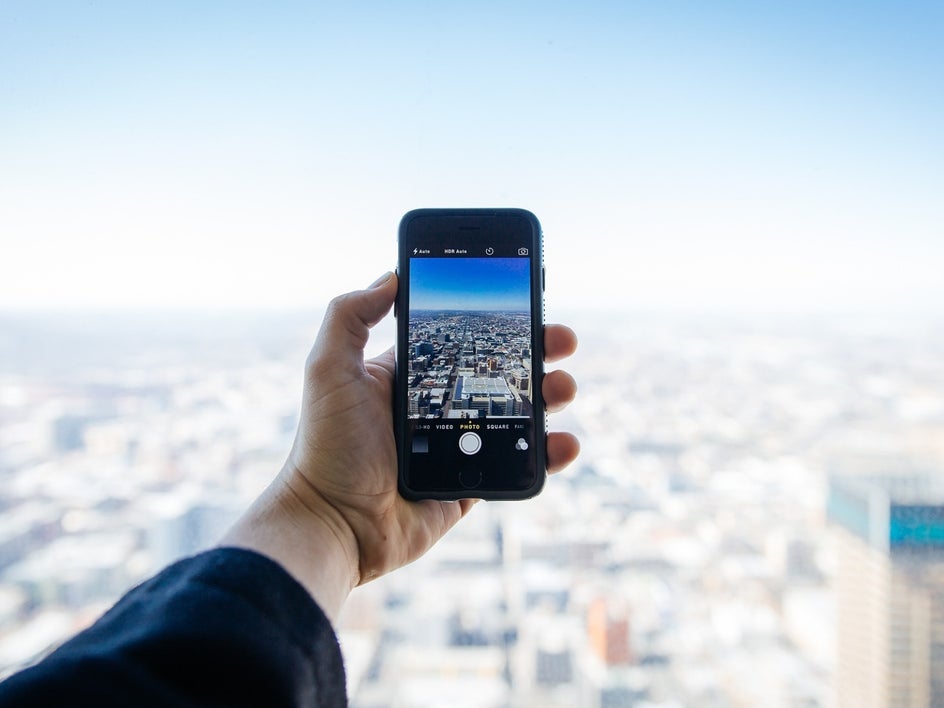
Manipulate Depth of Field With a Smartphone Camera
Depth of field is easy to achieve on all kinds of smartphone cameras by tapping the area on your screen that you want to use as the main focal point of your image. This will keep your subject sharp and in focus and will create a more blurred background. Another way that you can achieve a strong depth of field on your phone is to use portrait mode for capturing. This will create a blurred background automatically when you focus on a subject.
Two Ways to Add Depth of Field With BeFunky
Sometimes finding the perfect combo of settings is hard to do in a camera, when that happens BeFunky has a perfect solution with a range of tools Photo Editor. But our top two suggestions for adding depth of field to your images are the Funky Focus and Blur tools. When you are ready, open your image in BeFunky’s Photo Editor and get started adding depth of field. These two suggestions are located under the Edit tab and found under the Blur and Smooth section. This can also be found under the same section of the mobile app.
1. The Funky Focus Tool
The Funky Focus tool is great to use when you have an area of your image that you want to specifically highlight. When you select Funky Focus, a round target will appear on your screen, this circular-shaped icon over your image is called Radial mode. You are able to adjust the size of the highlighted subject by clicking on the edges of the circle and dragging. Place the circle over the part of your photo you want to remain in focus and adjust the Blur Amount and Opacity. Your image will gradually fade out from the focus point of the main subject to the edges of the image. Once you are satisfied with how your image looks, be sure to click Apply.
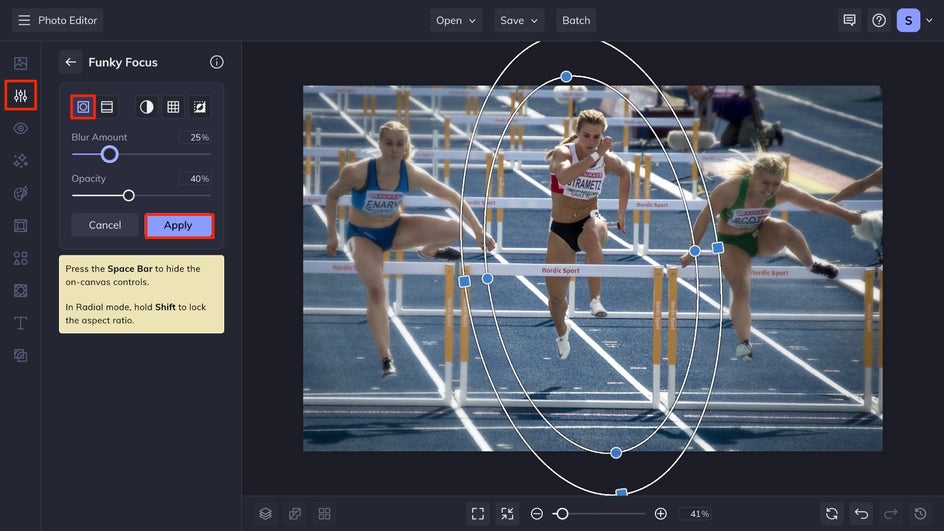
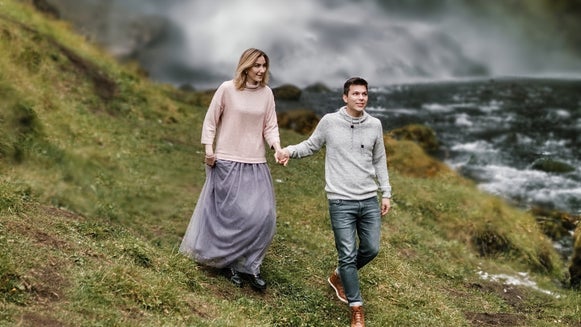
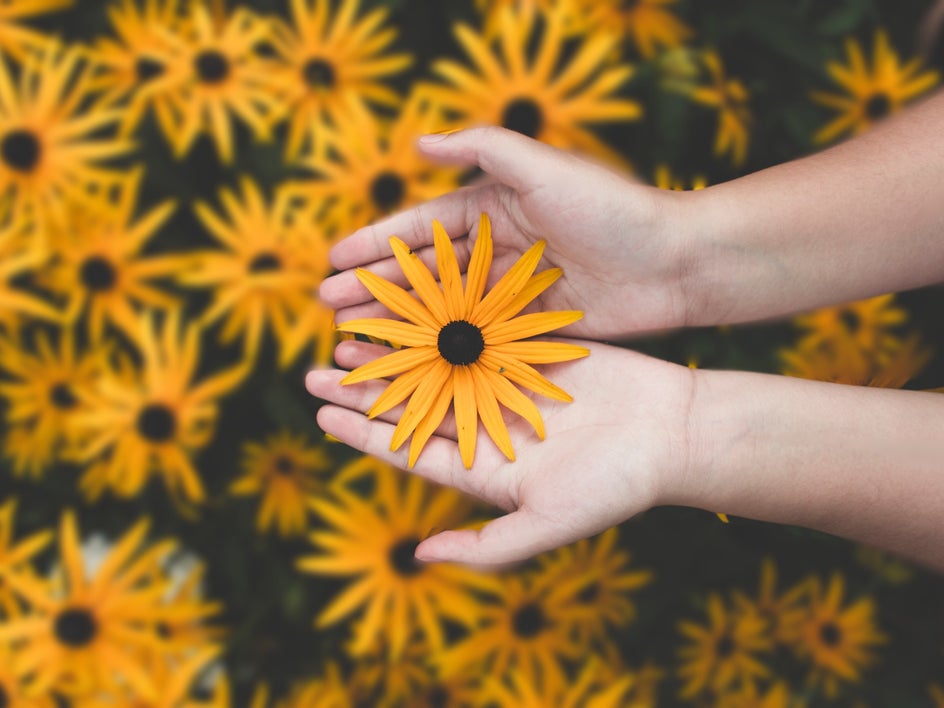
See how Funky Focus allows the depth of field to be focused on your subject within this image and blur everything else out?

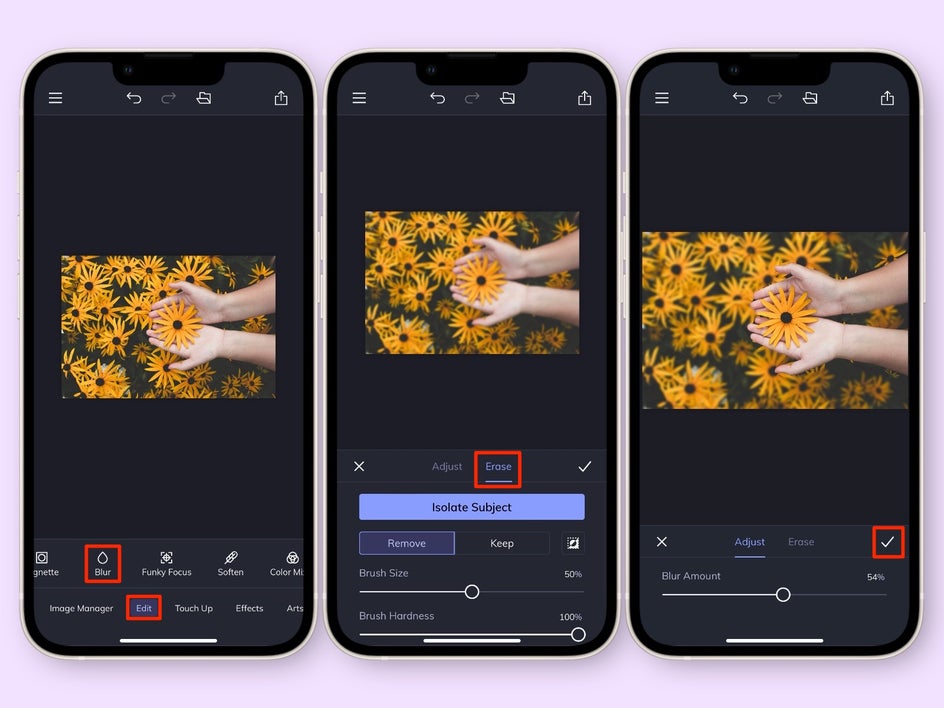
2. The Blur Tool
The Blur tool is a great way to be more selective about what areas are blurred and which are not, giving you total control over your depth of field. When you select Blur it will automatically have the entire canvas covered in the blur. To remove the blur from some regions of the image, switch to Erase mode and you will be able to make adjustments to the brush size, and the hardness and strength of the brush. Within the mobile app, you simply swipe your finger over the areas that you want the blur removed from. You could even use the Isolate Subject button to have BeFunky’s A.I. technology locate your subject within the image and remove the blur. You can toggle back over to the Adjust section, and use the slider to adjust how intense the blur is on the background of your image; this creates your depth of field. After you are satisfied with your results, click the Apply button on desktop, or the checkmark on the mobile app.
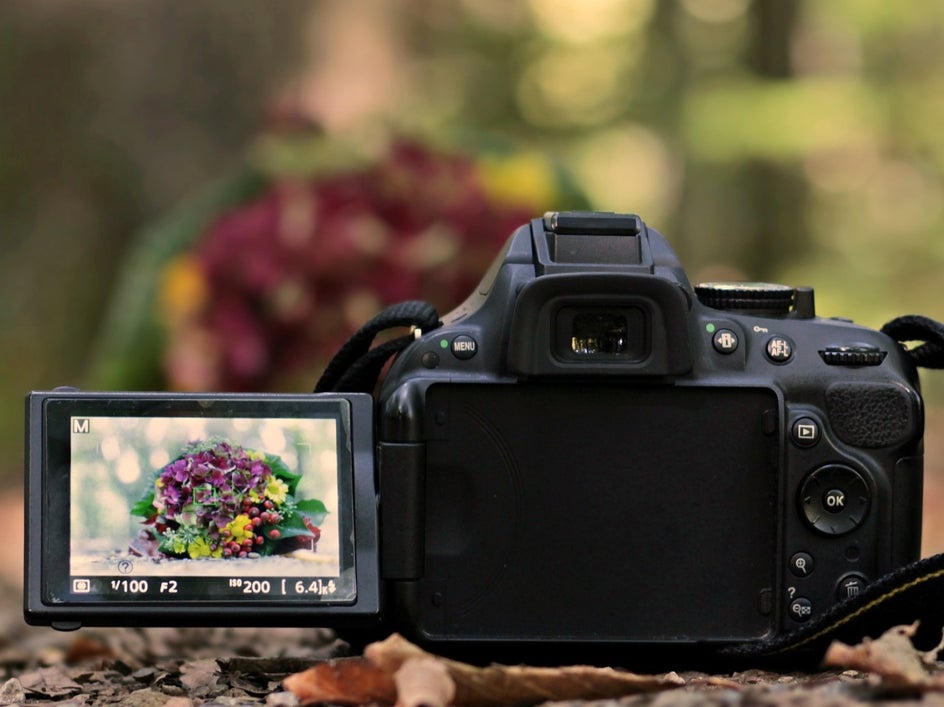
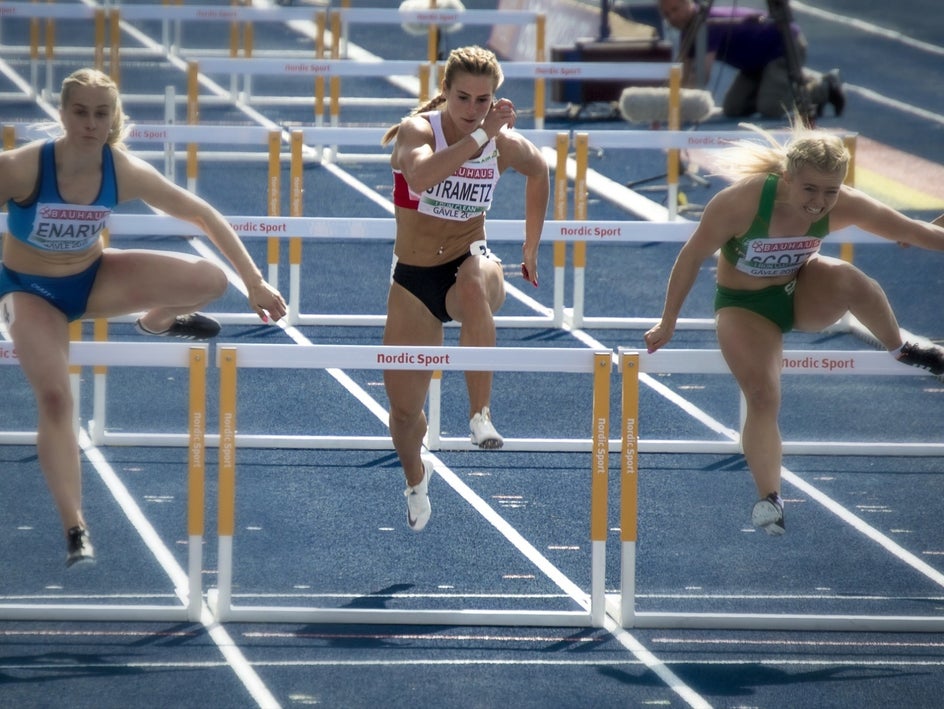
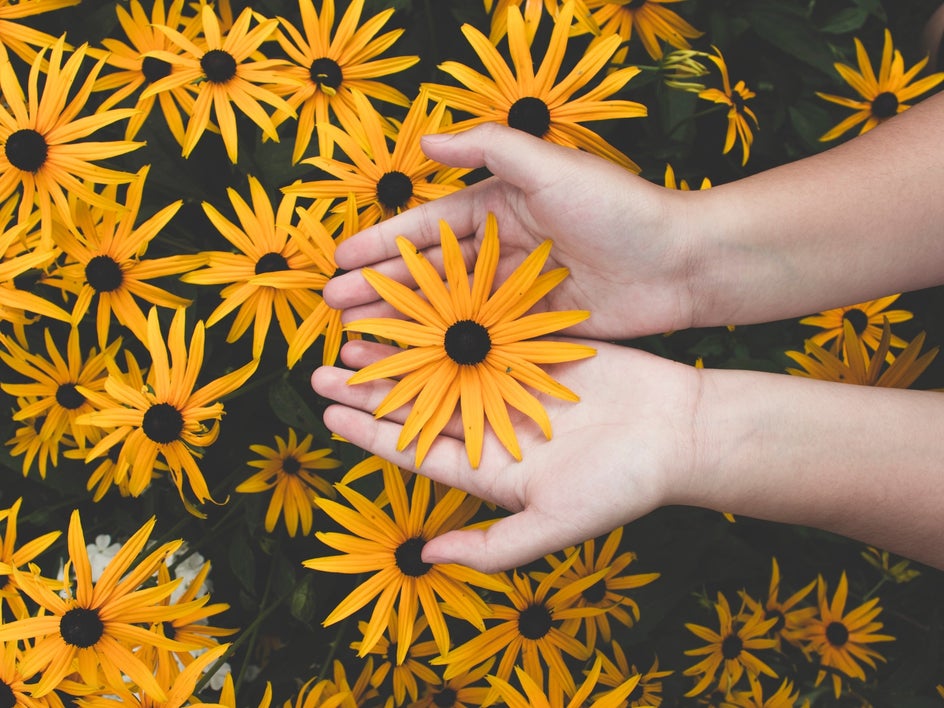
Take a look at how this image was transformed to have an incredible depth of field in just a few clicks!
Master Depth of Field With BeFunky
Now that you know all about capturing the depth of field in your images, you can start experimenting. And if they don’t turn out how you envisioned them, you can turn to BeFunky’s Photo Editor for making all your depth-of-field dreams come true in an instant. Shoot from your smartphone's camera and upload them into the BeFunky mobile app for images with depth of field in an instant!