Change the Color of Any Sky in Seconds

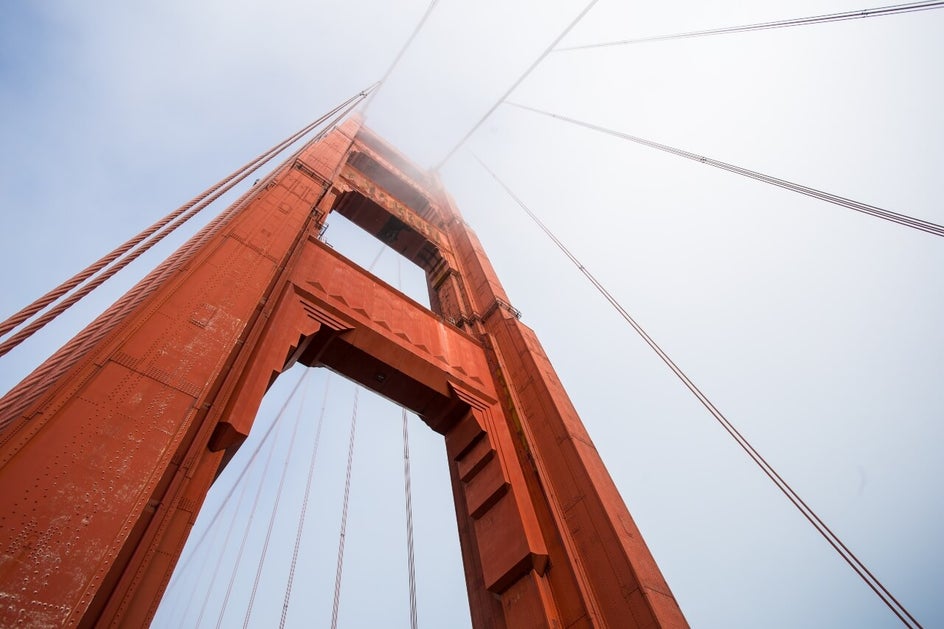
Capturing landscape photos is a great way to highlight the beauty of the sky. It allows nature to speak while highlighting a subject, however, sometimes the sky is not so picture-perfect. There are many ways to adjust colors in an image, but if you want to change one part of a photo the Replace Color tool is our go-to option.
Sometimes the sky isn’t quite as blue as you remember in your photo, or perhaps you want to do away with mother nature’s choices and change the sky to be a fun new color, BeFunky’s Replace Color tool in the Photo Editor has the answers. Replace colors seamlessly, and create a photo with a sky that is share-worthy in just a few clicks!
How to Change the Color of Your Sky Photo
Start changing the color of your sky by heading to the Replace Color tool and uploading your photo. Drag and drop or click on the Open tab to choose a different method.
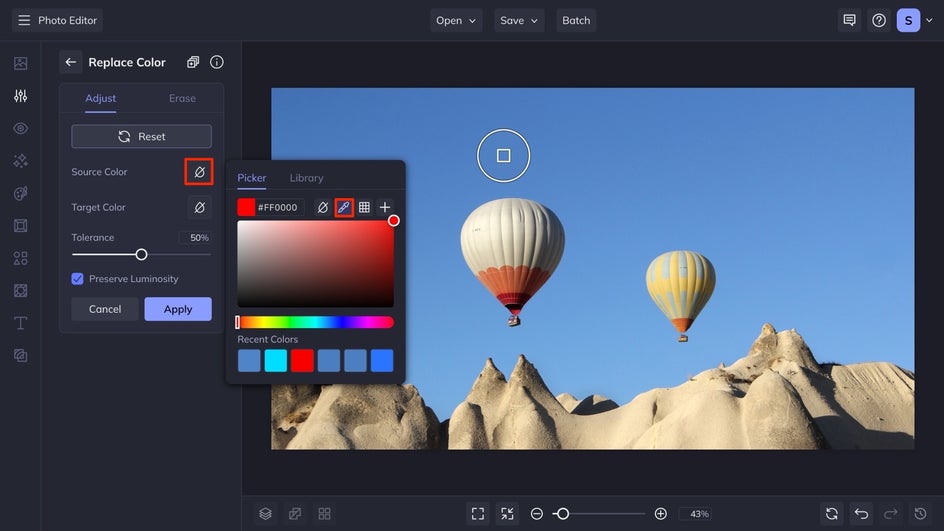
Step 1: Select Your Source Color
First, you will need to select your source color. Click on the Source Color swatch, followed by the Eye Dropper tool icon. This will allow you to select the general color of your sky to be swapped out. The tool will automatically default the target color as transparent so you are able to see the section that the source color covers. To adjust the sensitivity of the color you are selecting you can use the Tolerance slider to find your sweet spot.
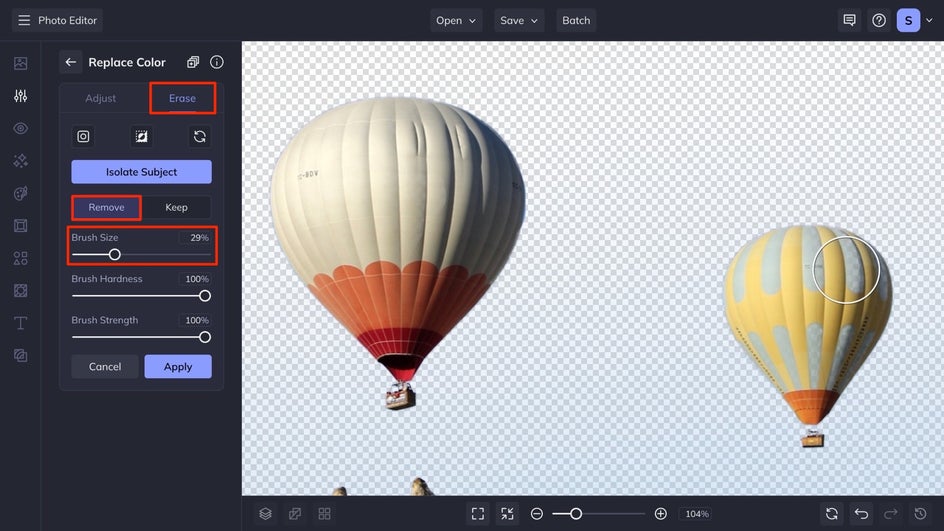
Step 2: Switch to Erase Mode
After you have selected your source color, some of the elements that you prefer to keep in color may have lost some due to the color being close enough to the source color. The simplest solution is to switch to Erase Mode so you are able to remove the replaced color from your subject. Select the brush size that fits your subject, and click over the areas that have had the color pulled from them. Use the zoom feature at the bottom of your canvas to get a closer look at your subject and make your adjustments.
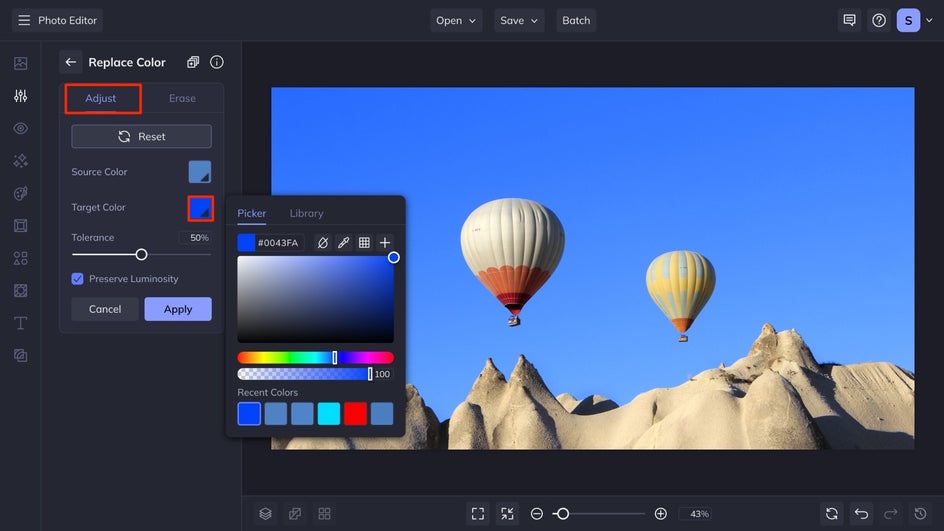
Step 3: Set Your Target Color
Return to Adjust Mode to select your Target Color. To select your target color, click on the box and choose a color on the palette. If you want your image to have a more intense blue sky, select a color blue that fits your desired outcome. You can also make the sky any color you desire, play around with the palette, and discover your favorite results. Selecting the Preserve Luminosity option will ensure that the color of your sky looks more realistic by keeping the highlights of the image the same by not replacing all of the color.
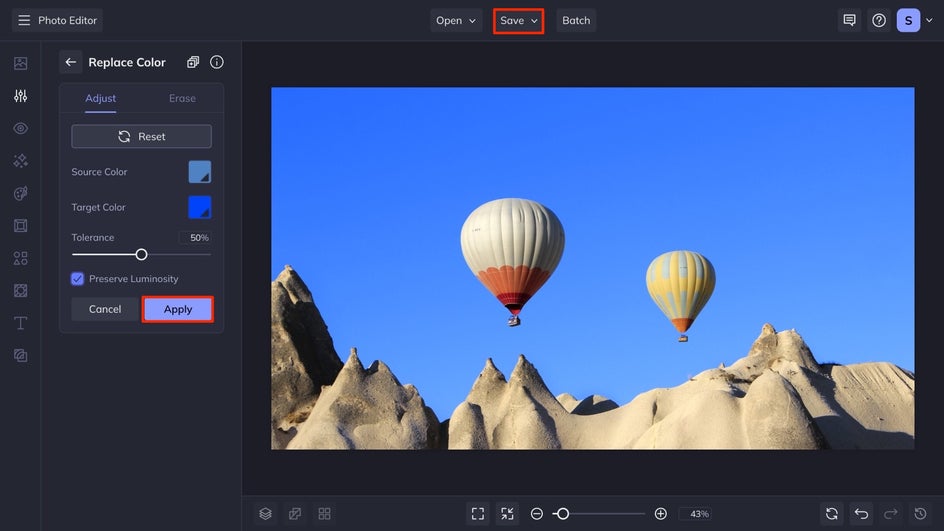
Step 4: Apply Your Changes and Save
Once you are satisfied with your image and its new sky color, select the apply button to finalize the changes. Then select the save button at the top of the interface, and save your new image to your desired location.
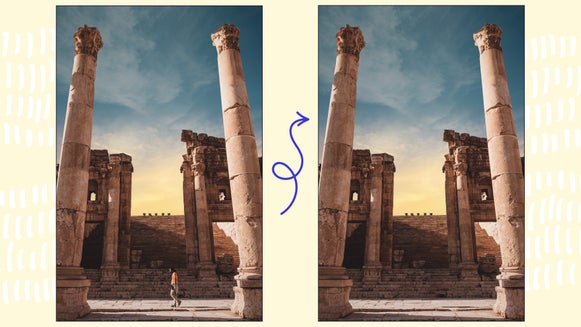
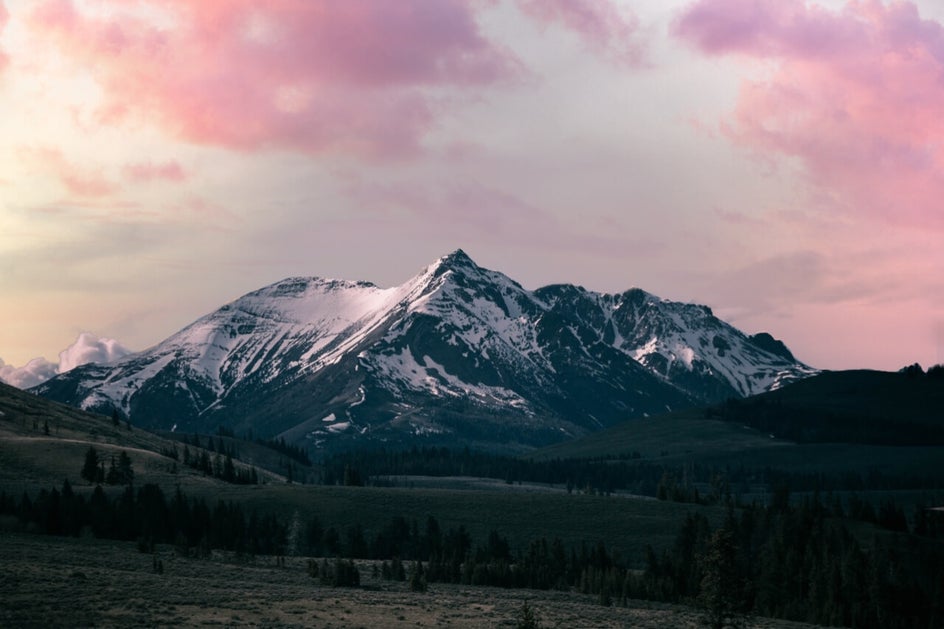
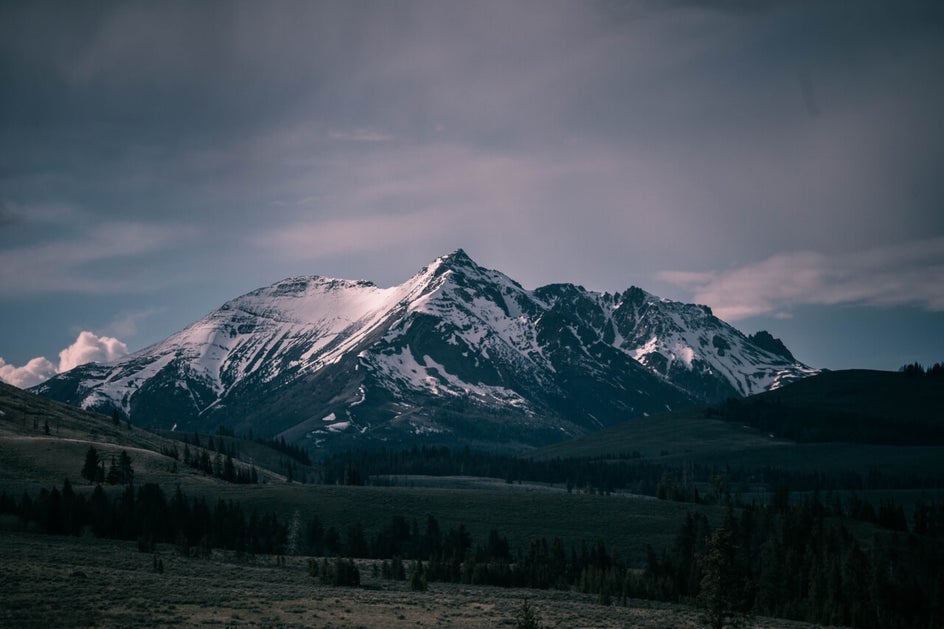
Change the Color of Your Sky: Final Result
In just a few clicks, we were able to make this sky appear bluer in the final image. Take a look at the final outcome of using the Replace Color tool.


Get Inspired to Aim Sky High
If you need to get inspired, here are three of our favorite ways to change the color of the sky in your photos.
A Subtle Sky Change
A subtle change as we did in the tutorial is a great way to use the Replace Color tool. It allows you to slightly enhance the color of your image while maintaining the intention of the original photo. Simply replace the color of the sky with a brighter hue so that it is brighter but still realistic.


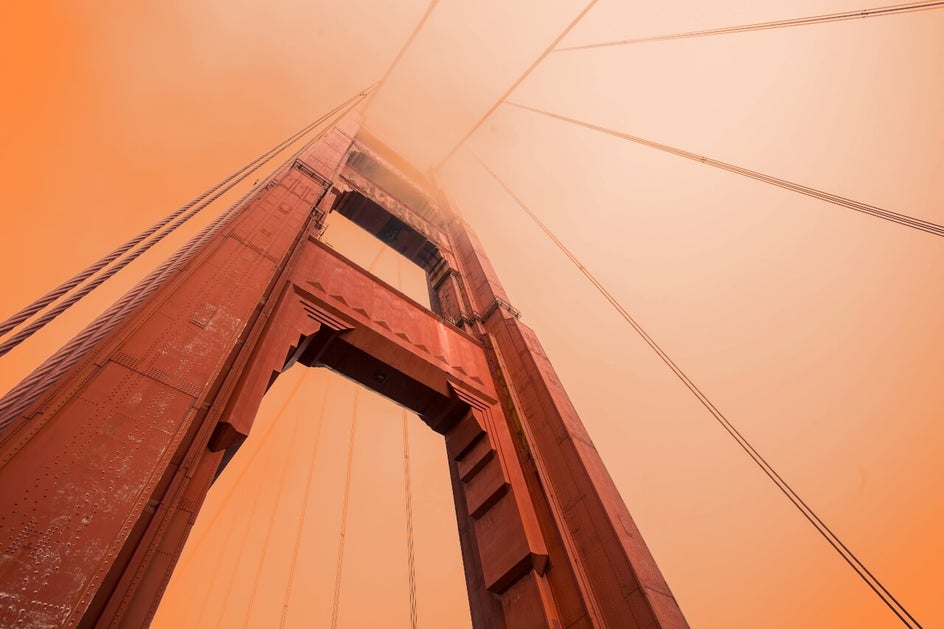
A Dynamic Sky Change
If you are looking for something a bit bold, replace the color of the sky with something that looks like it could be out of a science fiction movie! Opt for something dynamic and completely change the feel of the image by changing the color of the sky.
A Complete Sky Change
If the color within the sky in your photo still seems too plain, you can replace the sky completely by working with layers within your photo project. You can select a photo showcasing a sky you like and then add it as a layer over your photo that you don’t like the sky in. You are able to adjust the sizing, replace whatever colors you desire, and tweak the two images so they look seamless. When you’re finished be sure to flatten the layers together and save your photo. The result should look natural, yet completely different. For a more in-depth tutorial on how to do this, click here.
Swap Your Sky in Seconds
You can replace the color of your sky in just a few clicks with the help of BeFunky’s Photo Editor and the Replace Color tool! Take your photo from a drab sky to something bold and shining. Make the sky pop off your screen like your favorite SciFi movie, or subtly change it to make it slightly bluer. Start making your sky shine here.