Add a Matte Photo Effect With the Levels Tool
There are so many trends that have come and gone, but matte photography is different in that it creates a timeless effect that has remained beautiful throughout the years. The reason for this is that it gives an image a cinematic look that mimics real film in a way that rivals only film grain.
The matte effect is simple to achieve with BeFunky’s Levels tool. Once you get the technique down, you’ll be hooked on how easy it is to achieve this aesthetic – you can even get the matte photo effect on your phone by editing your photos in the BeFunky app, which you can download via Google Play or the App Store. First, we’ll show you our favorite matte looks and then show you how to master the technique below.
What Is a Matte Effect in Photography?
First, let’s get into the technicalities. The matte effect in photography is when a photo is edited with a lower contrast, ridding the image of any full blacks. This makes the image more tonally flat, or muted, and can give the image a cinematic look.
How to Create a Matte Photo Effect
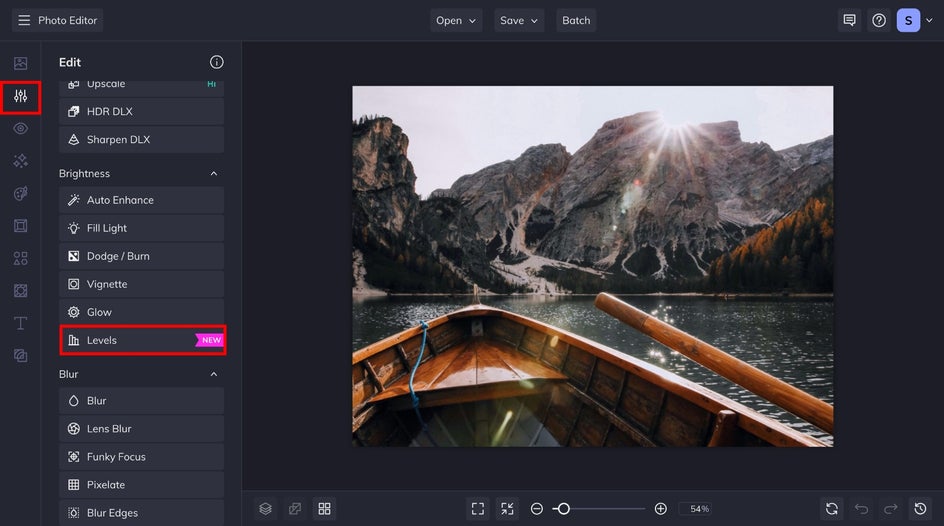
To add a matte photo effect, head to BeFunky’s Photo Editor and upload an image. From the Edit tab in the left-hand menu, scroll to the Brightness category to find the Levels tool.
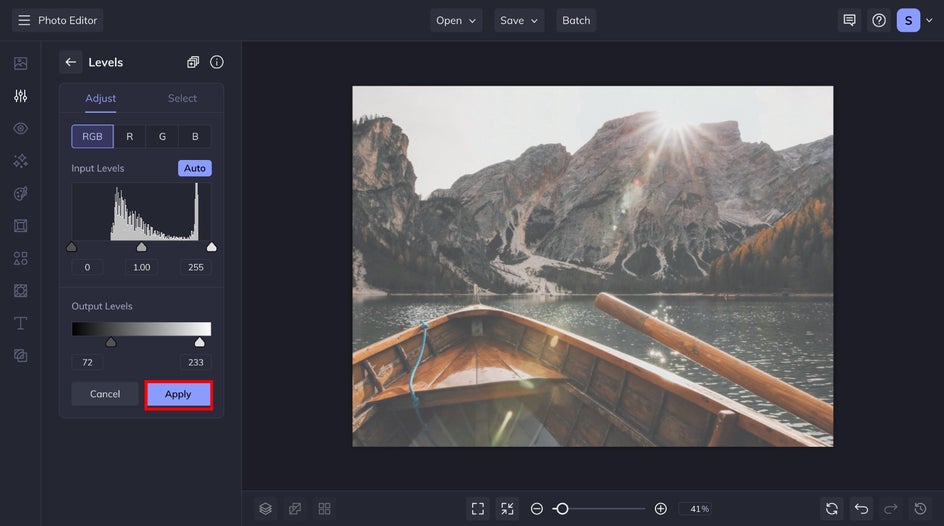
Step 1: Adjust the Levels Tool
You can check out the anatomy of the Levels tool in our handy guide. The Levels tool is composed of Input Levels sliders and Output Levels sliders – as well as the ability to change the RGB. For applying a matte effect, you’ll want to focus on the Output Levels sliders.
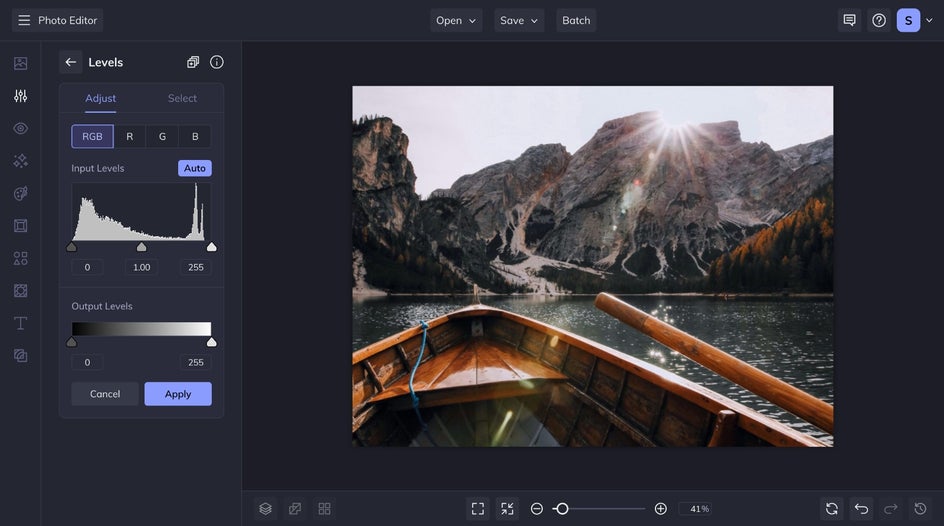
These sliders will adjust the overall tonal range of your entire image, reducing the contrast of your shadows and highlights. Increase the Min Output slider to limit the intensity of shadows in your photo – almost like adding a white overlay. Decrease the Max Output slider to lower the intensity of highlights in your image – almost like adding a black overlay. I increased the Min Output to 72 and the Max Output to 233.
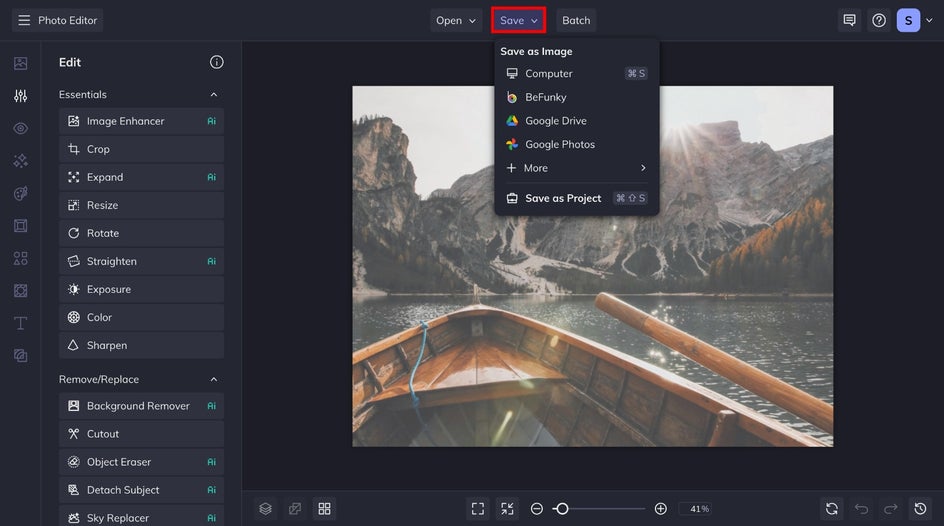
Step 2: Save Your Matte Image
You can save your image by clicking the Save button at the top of the page and choosing the best destination for your matte image.
Apply a Matte Effect to any Image With the Levels Tool
Matte photo effects are a great way to add a cinematic and romantic feel to a photo. Whether you are editing portraits, landscapes, food, or lifestyle photos, BeFunky’s Photo Editor can let you achieve the matte effect you’ve been wanting.
Matte Photo Effect Inspiration
You can add a matte effect to all types of photography. The matte effect can transform an image in many ways. It can give an image a cinematic or romantic look and even provide an emotional depth that otherwise wouldn’t be there without it. Whether it is a light, soft, romantic aesthetic or a dark, moody, intense one. Here are some of our favorite matte looks that you can use for inspiration:
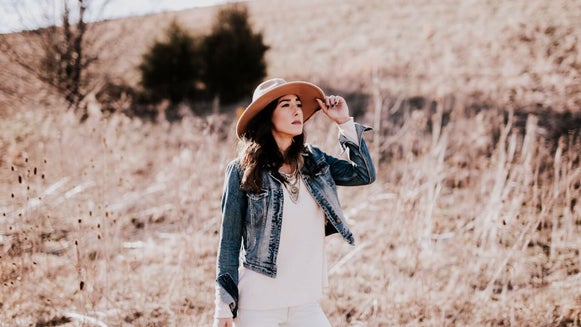
Portrait Photography
The matte effect is beautiful for portrait photography. By neutralizing the shadows, you can create a smoothing effect that looks great with different skin tones and presets.
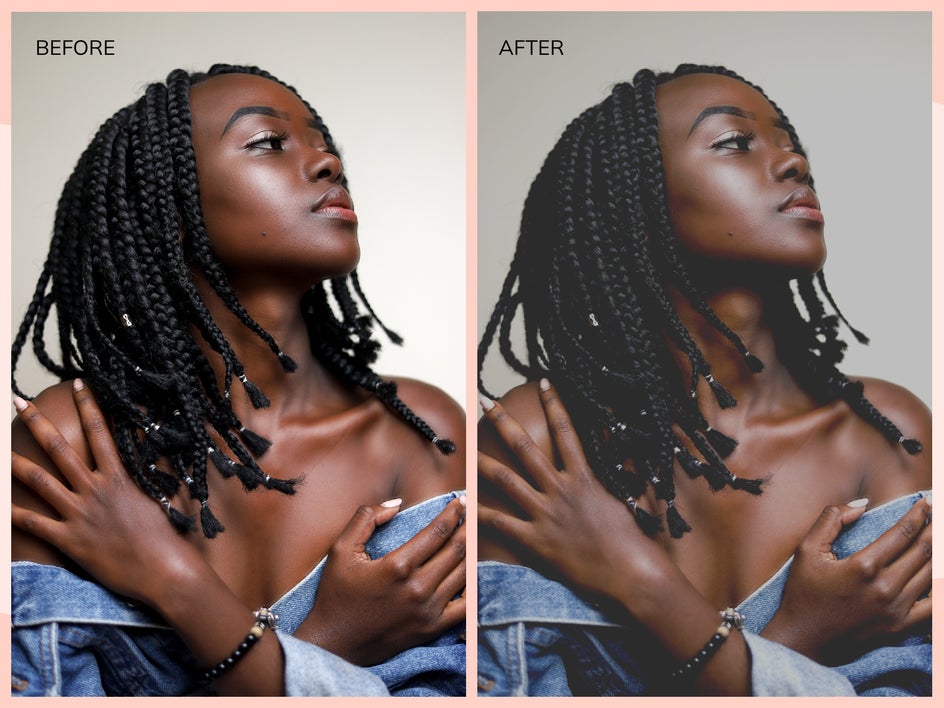
Just make sure that when using the matte effect, you pay close attention to how the adjustments affect skin tone. Sometimes by applying the matte effect, you can make someone's skin tone lighter or darker. Reference the original image when making your adjustments so that you can apply the effect while also representing the truest nature of their natural skin tone. Take a look at this article for how to edit different skin tones.
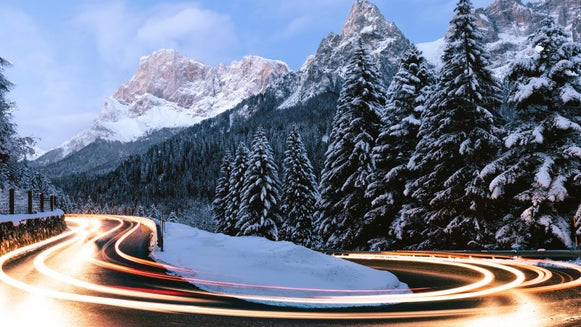
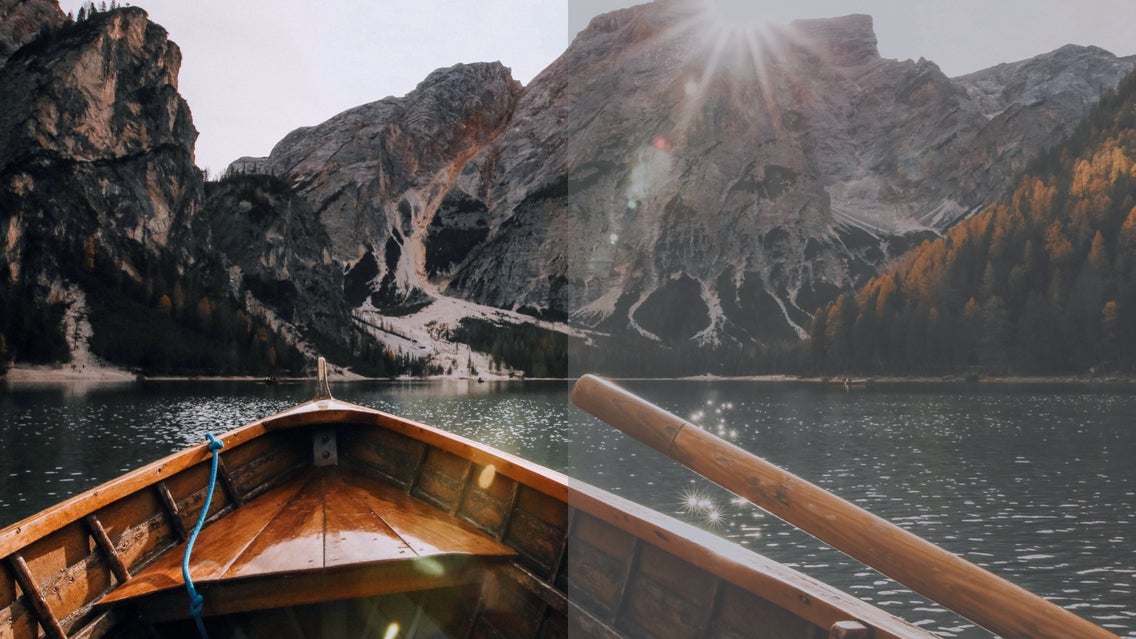
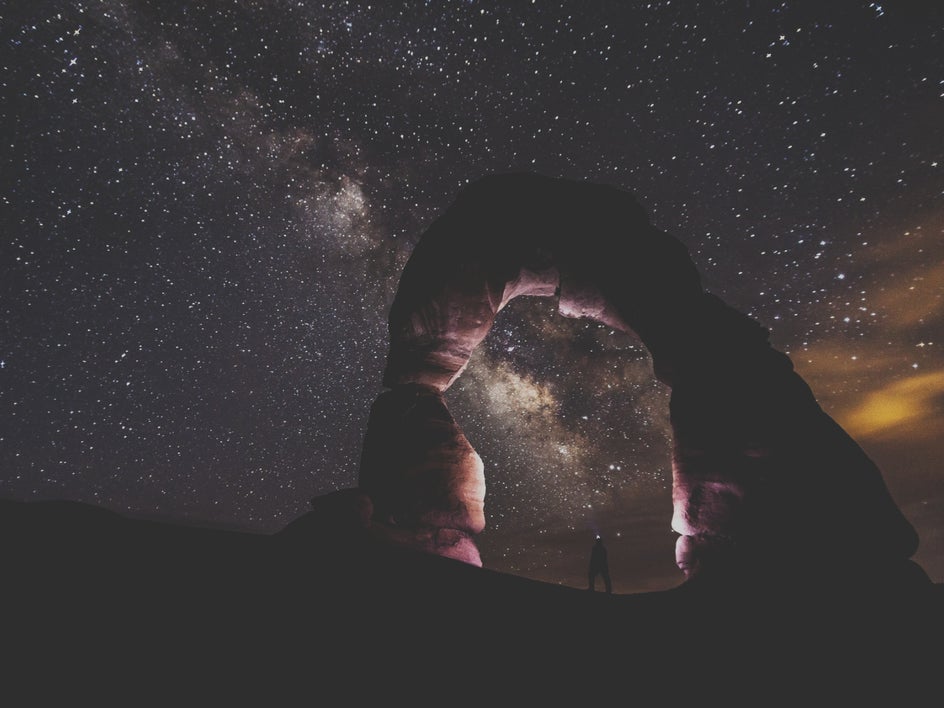
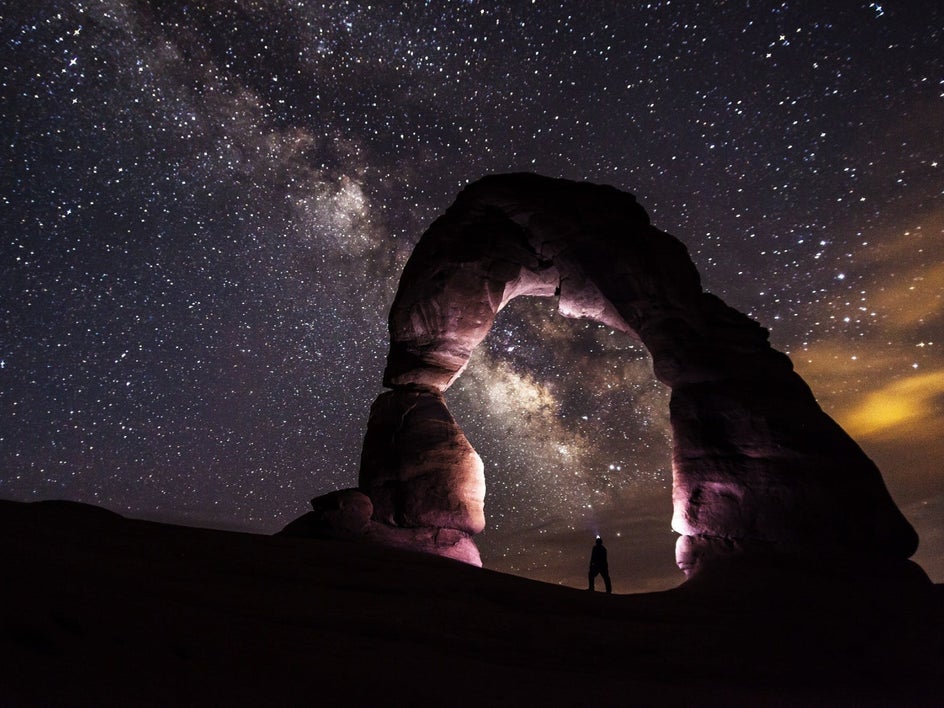
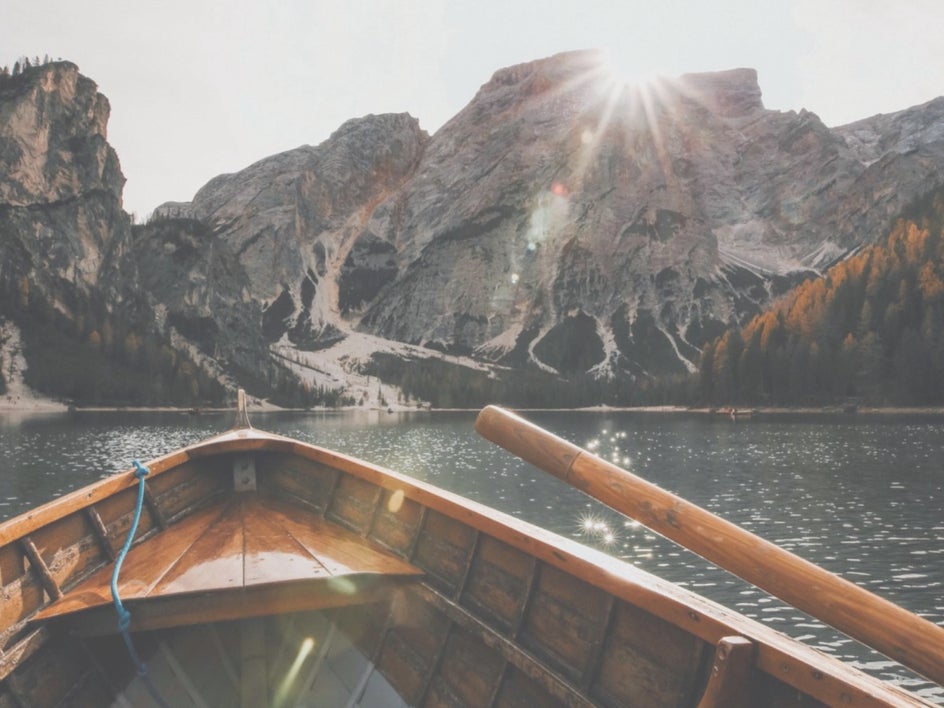
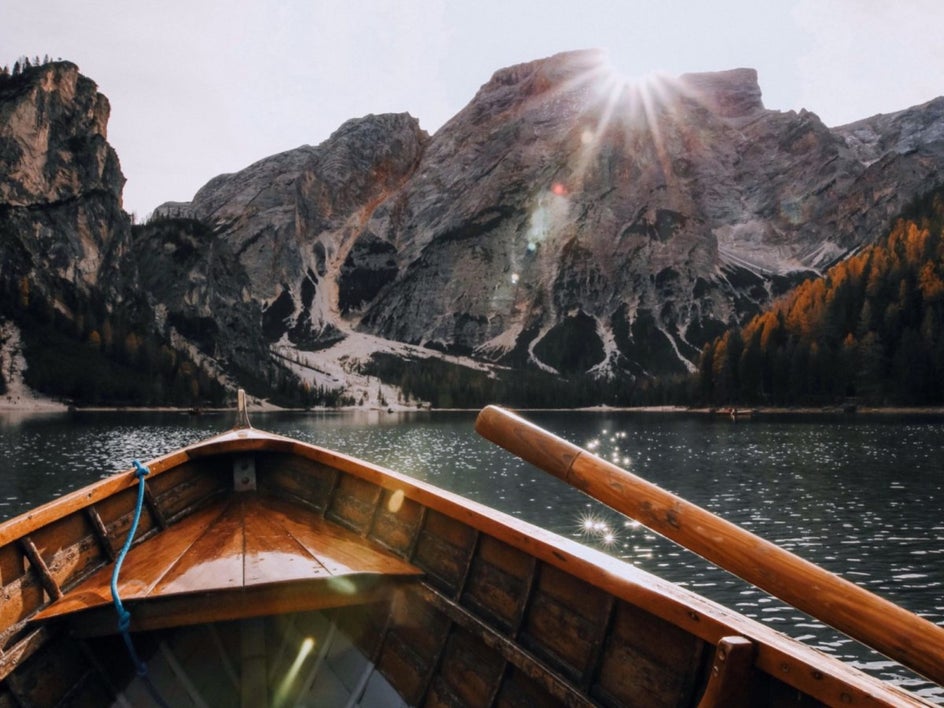
Landscape Photography
Using a matte effect on landscape photography shifts the aesthetic to be more cinematic. It has a way of enhancing the tone differentiation by level. As you can see in this before photo in the mountain, the farther mountains naturally look lighter than the ones closer in the image. By applying the matte effect, we can enhance this natural effect.

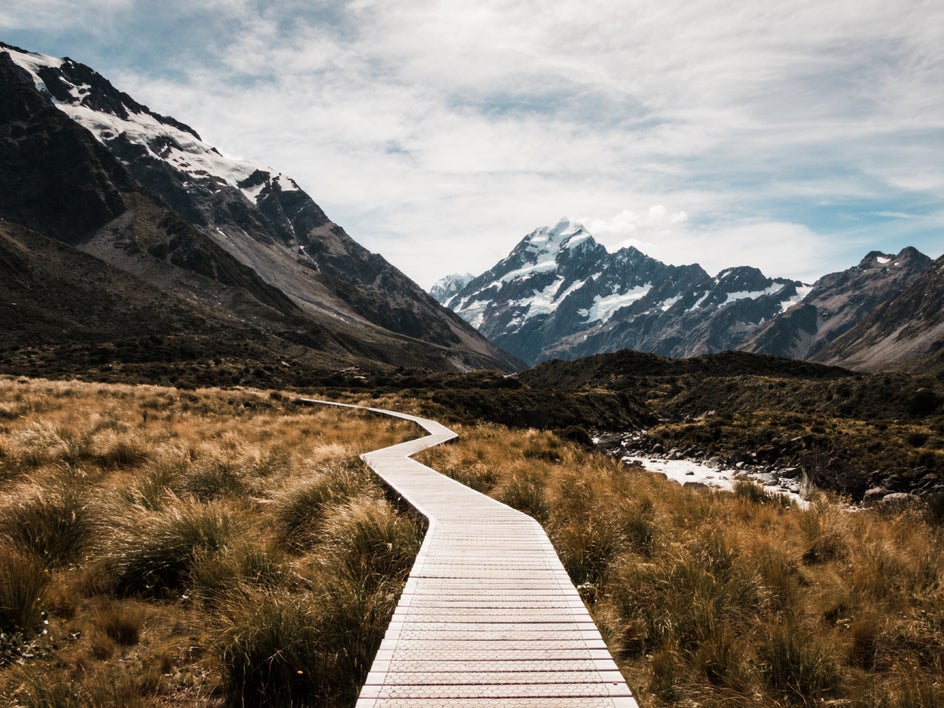
I also like to neutralize the highlights as well, which gives this image a softer and more romantic kind of aesthetic.
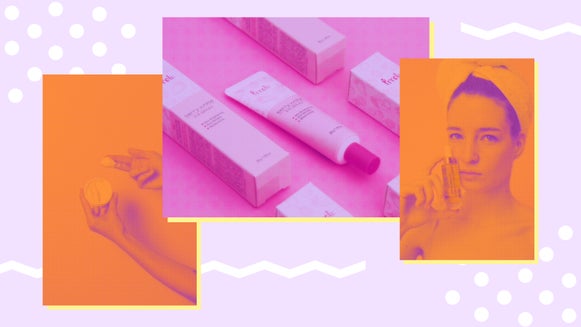
Food Photography
There are so many aesthetics used for food photography editing. By pairing down the highlights and shadows, you enhance certain textures in your images. I like this technique for food photography because It can also add a rustic effect to your image, depending on the food you choose to shoot. I also like that editing food photography with a matte effect makes the image look more editorial. Just make sure that when editing your food photography with a matte effect, you don’t take away from the colors and flavor of your dish. Editing should always enhance the story of your image, not disguise it.
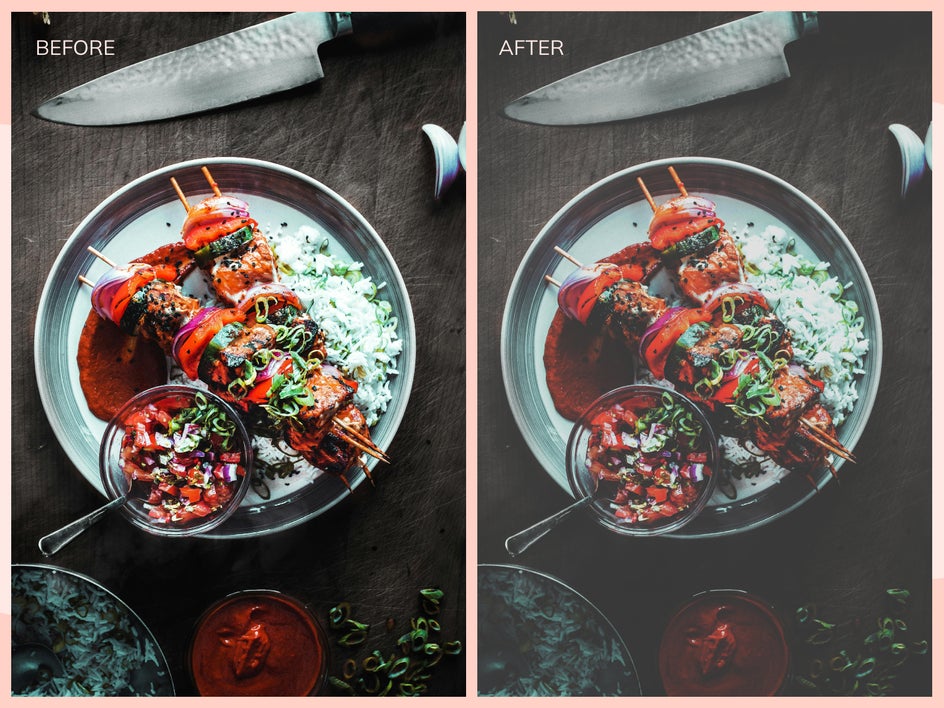
You can even set up your food photography sets with matte props like Lenka’s Lens does and then soften the shadows slightly during your editing process.
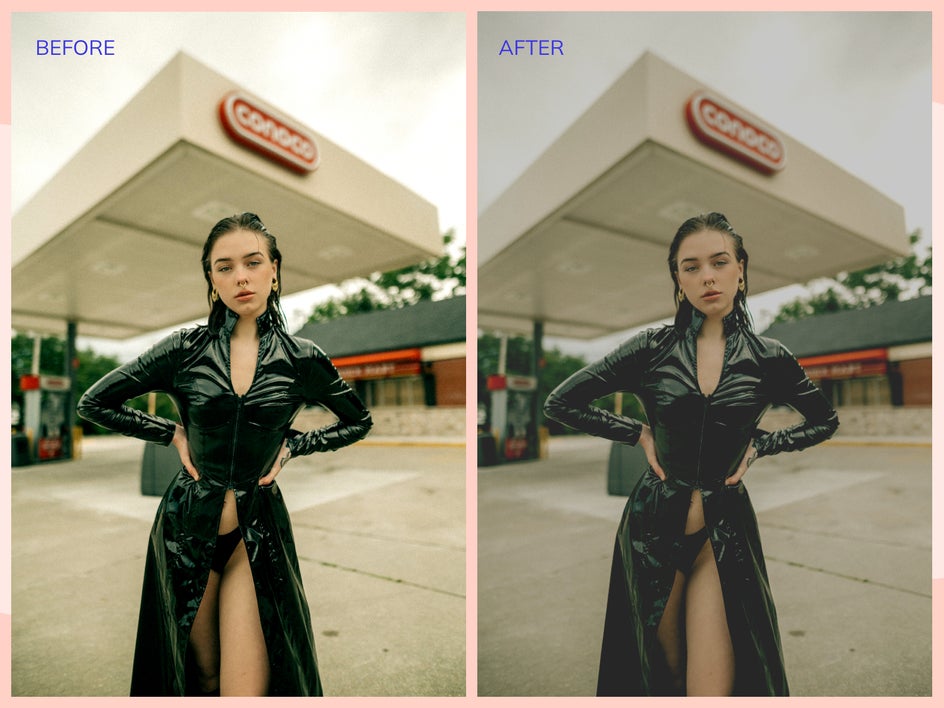
Lifestyle Photography
Lifestyle photography can often use bright whites with little areas of contrast. Because you can mattify highlights as well as shadows, these photos often produce ones that feel very cinematic in nature.
As we mentioned before, a matte effect looks great on any type of photo. It’s perfect for adding emotion to your photography and giving it that shot-on-film look. If you’re ready to give it a try, just pick your favorite photo and follow along below.