The Secret to Photo Editing for Various Skin Tones
For those of you who are portrait photographers, have you noticed that your filters do not work when universally applied to the varying skin tones of your subjects? It took me a long time to realize this, but once I figured out that I should be editing photos like an MUA applies makeup, my photo editing completely shifted.
Makeup artists know about a little thing called an undertone. While skin tone refers to your skin color, undertone refers to the shade within that color. There are three kinds of undertones: warm, cold, and neutral. Something to note is that two people with the same skin tone can have two different undertones. Editing a photo or applying a filter on someone with light skin and a warm undertone will look very different than on someone with deep skin and a cool undertone.
We are going to edit various skin tones with BeFunky’s Photo Editor so that you can understand the relationship between undertones and skin tones. This will help you edit better portraits.
How to Edit Skin Tones in Portrait Photography
Most of the photo editing presets that I have seen within portrait photography tend to be for people with a lighter skin tone, utilizing oranges and canceling out yellows to get a more natural look. This will not work for those with deeper skin tones, as the oranges are overbearing for deeper skin tones. When editing deeper skin tones, you need to focus on enhancing the reds in order to bring out the richness in this undertone.
To get started, open the Photo Editor and upload your photo by selecting Open and then Computer or dragging and dropping your photo directly onto the canvas.
For each of the options below, I select the tool that I want to use such as the Color Mixer, Exposure, and Color tools. Once I select an option, I press the Erase tab and then press the Isolate Subject button. I make sure that the only thing selected is my subject’s skin before I head back to the Adjust tab and edit the color selections. When I am finished, I press Apply and then move on to the next tool and repeat the process above.
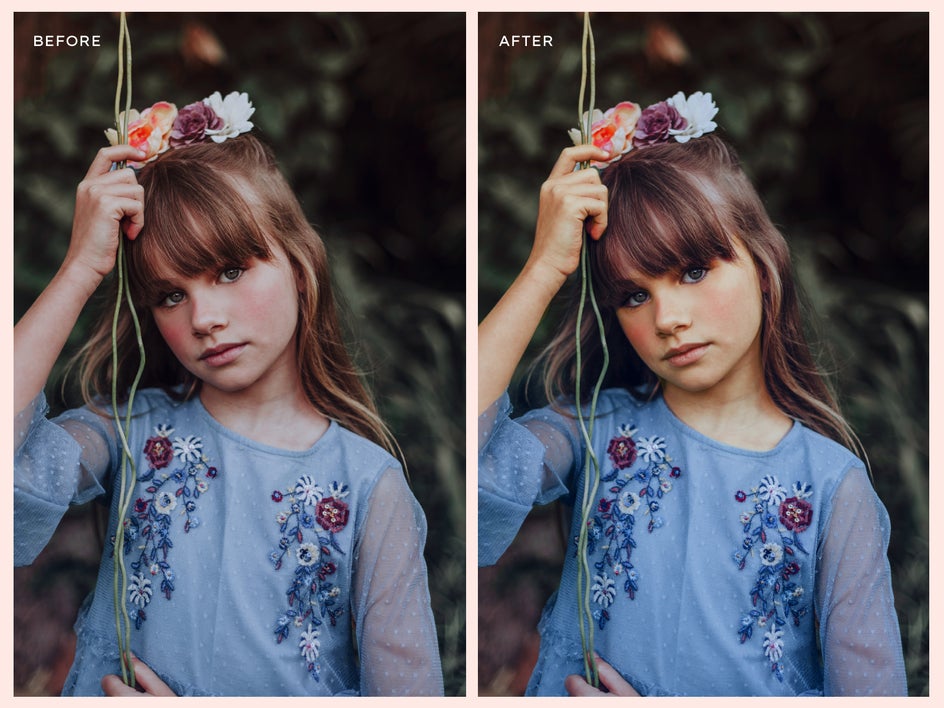
Editing Light Skin Tone Portraits
To edit lighter skin tones, you are going to want to increase the Reds and Greens and decrease the Blues in the Color Mixer tool.
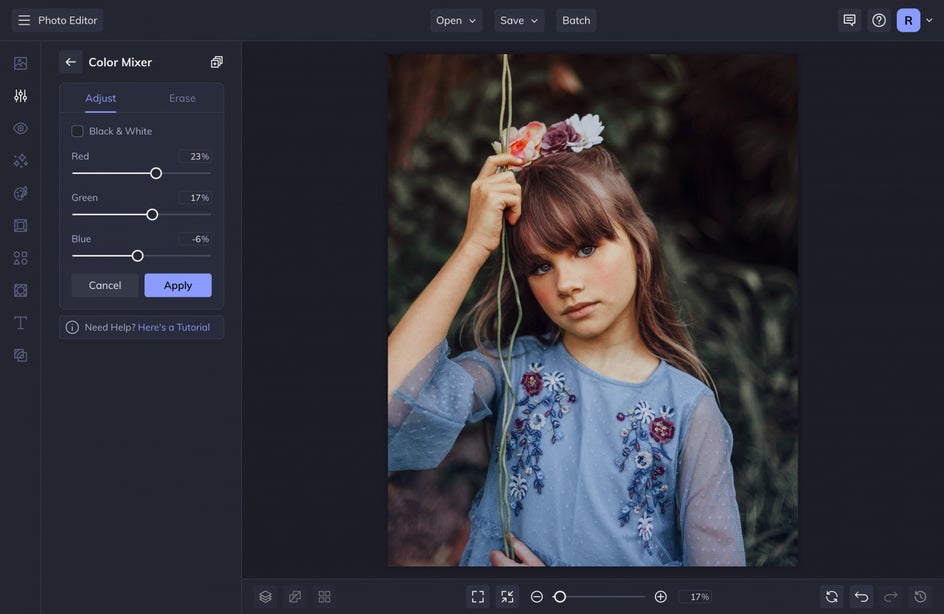
This will give the skin tone more of a warm orange hue and cancel any harsh reds or yellows.
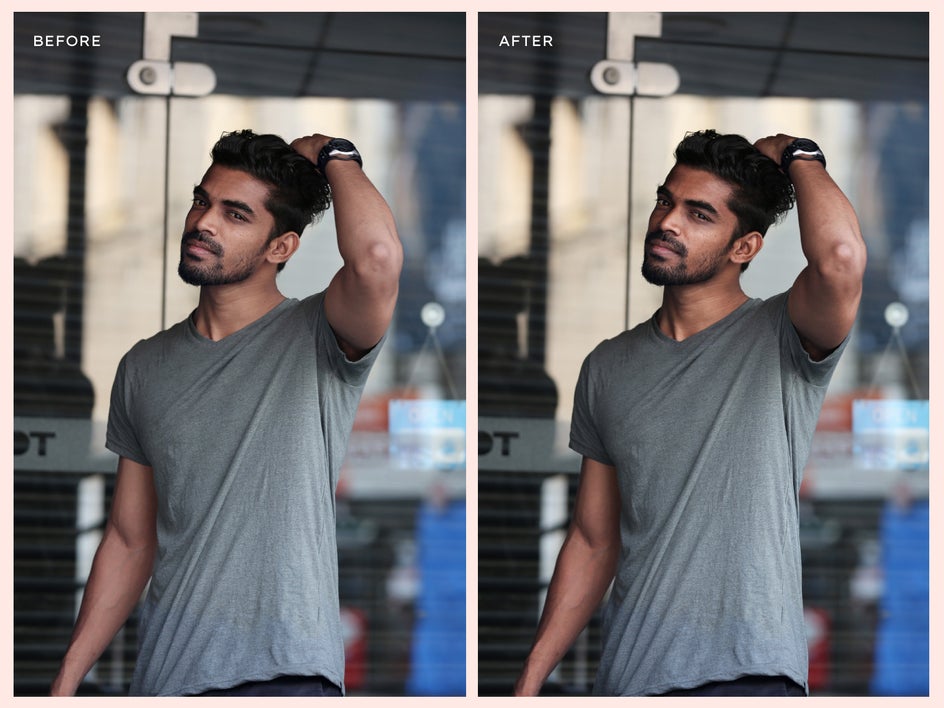
Editing Medium Skin Tone Portraits
To edit medium skin tones, you are going to want to decrease the Reds and Greens and increase the Blues in the Color Mixer tool.
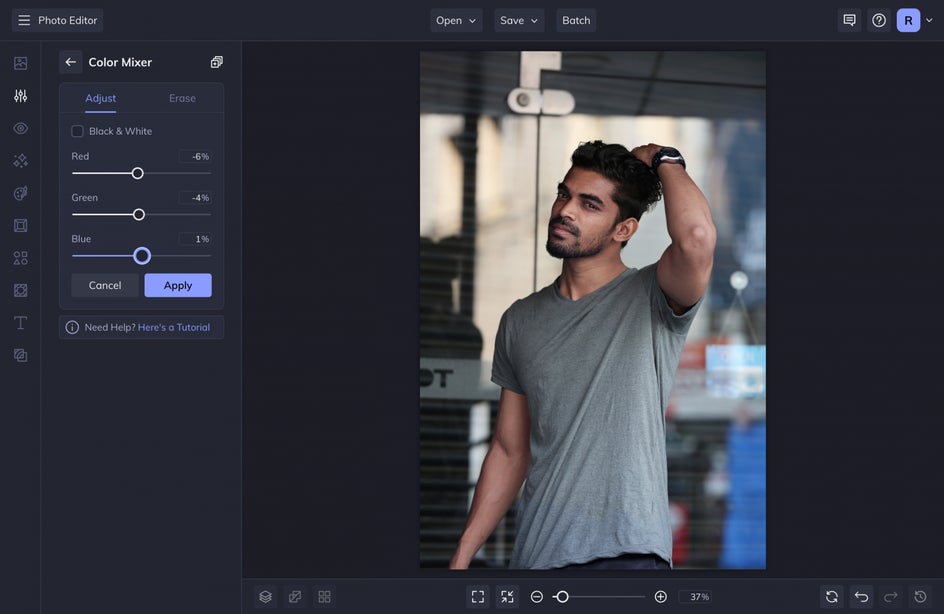
This will give the skin tone more of a cool-toned hue and cancel out any oranges.
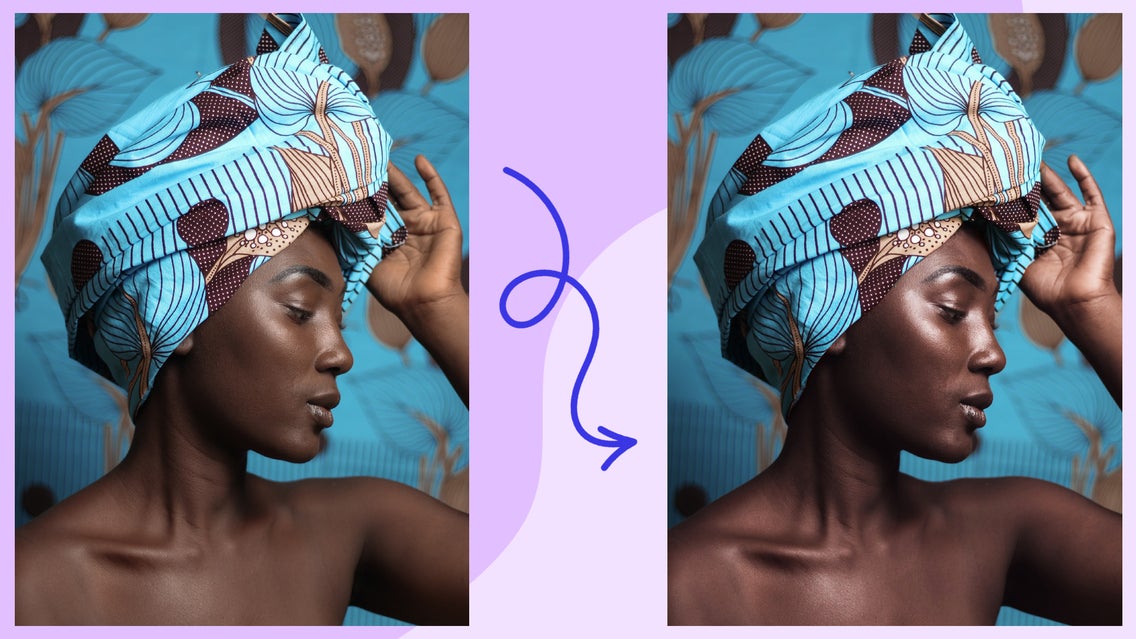
Editing Deep Skin Tone Portraits
To edit deeper skin tones, you are going to want to increase the Reds and Blues in the Color Mixer tool.
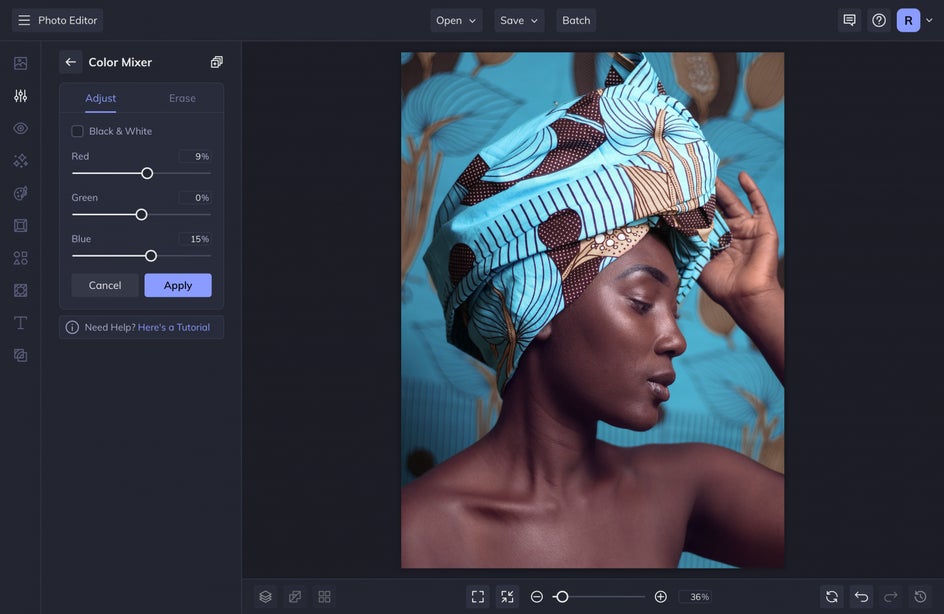
This will give the skin tone more of a cool, red undertone.

Editing Various Skin Tones in Portrait Photography is Crucial
As you can see, you must edit portraits based on the undertone of each skin tone. If you follow these steps, your portraits will look more natural and richer. If you don’t, the skin tone will look unnatural. The goal with editing is to get as close to the original as possible and simply enhance what is already there! When you are ready to give this a try, upload your photo into Photo Editor to get started.