Light Leaks: Taking Vintage a Step Further
Light leaks were common in decades gone by when analog cameras and rolls of film were the norm. While the effect was often captured by mistake, it has become a much-loved aesthetic that transforms even the most mundane photos into vintage-inspired masterpieces.
These days, recreating light leaks in digital cameras is extremely difficult to do, so photographers have had to rely on adding the effect using expensive photo editing software.
Thanks to the Light Leaks available in BeFunky’s Photo Editor, you no longer need a retro camera or pricey software to achieve an authentic light leak aesthetic in your photos. Keep reading, because we’ll show you how you can take your vintage photography to the next level using our light leak overlays.
What Are Light Leaks?
Before we show you how to transform your vintage photography using light leaks, you’re probably wondering what a light leak is, as well as what causes light leaks.
Light leaks are simply areas of light which have leaked into your camera or roll of film, thus affecting your photograph. This can occur if the seals on the lens or in the space between the lens and the camera body aren't closed properly. Additionally, when a roll of film is exposed to light (such as when the rear of your camera is opened), it can result in this light leaking into your photos.
What Does a Light Leak Look Like?
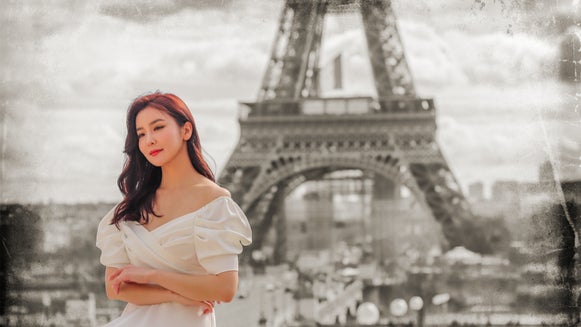
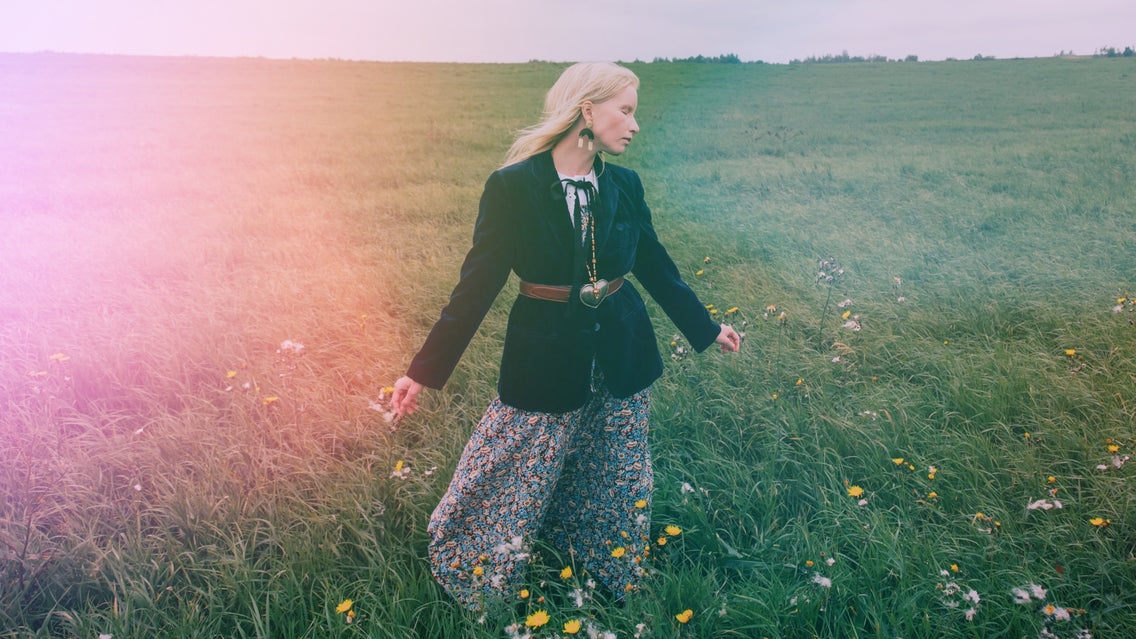
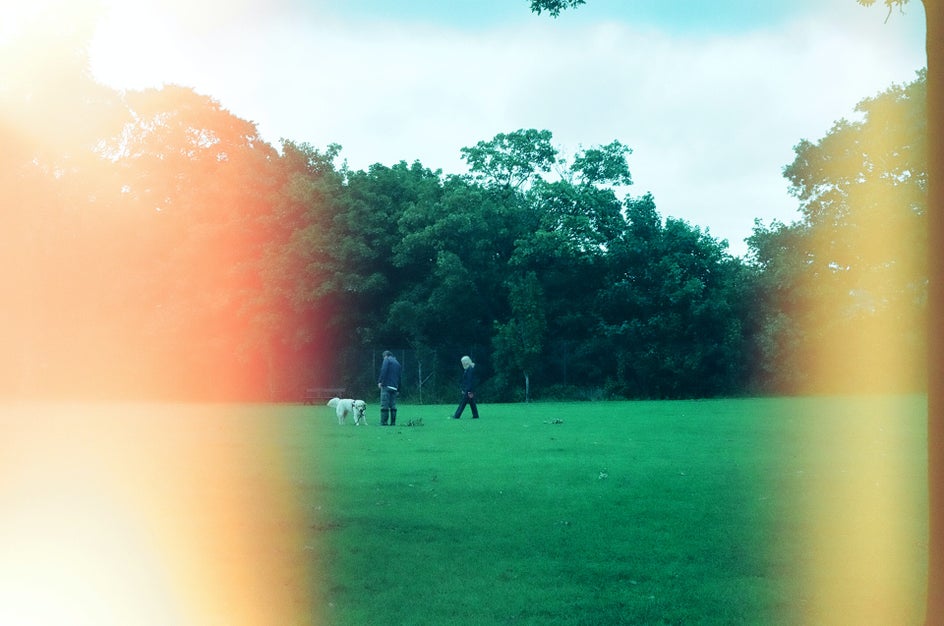
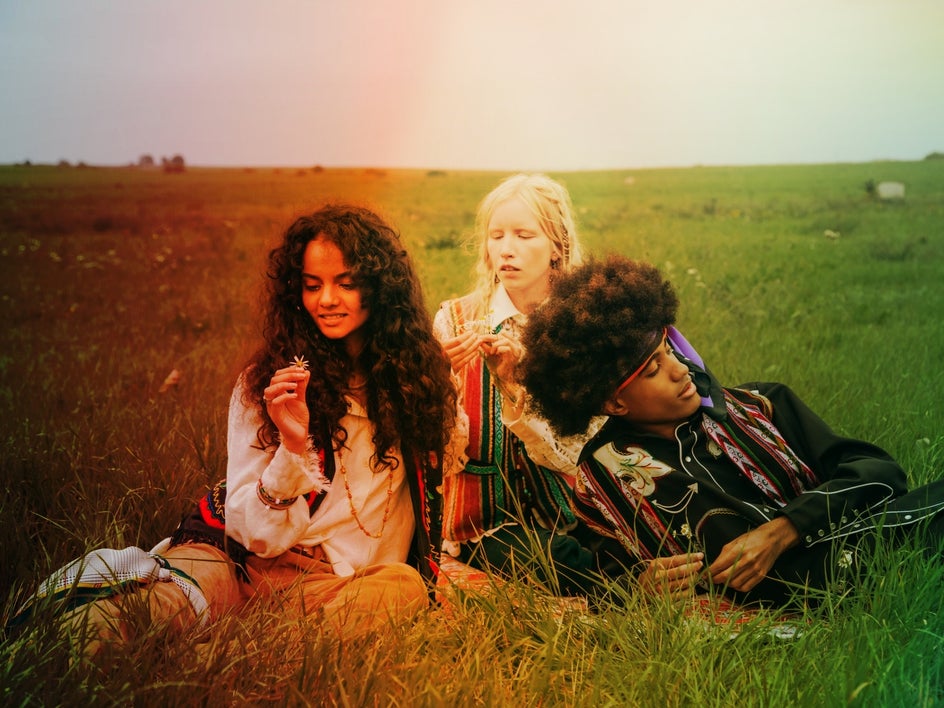
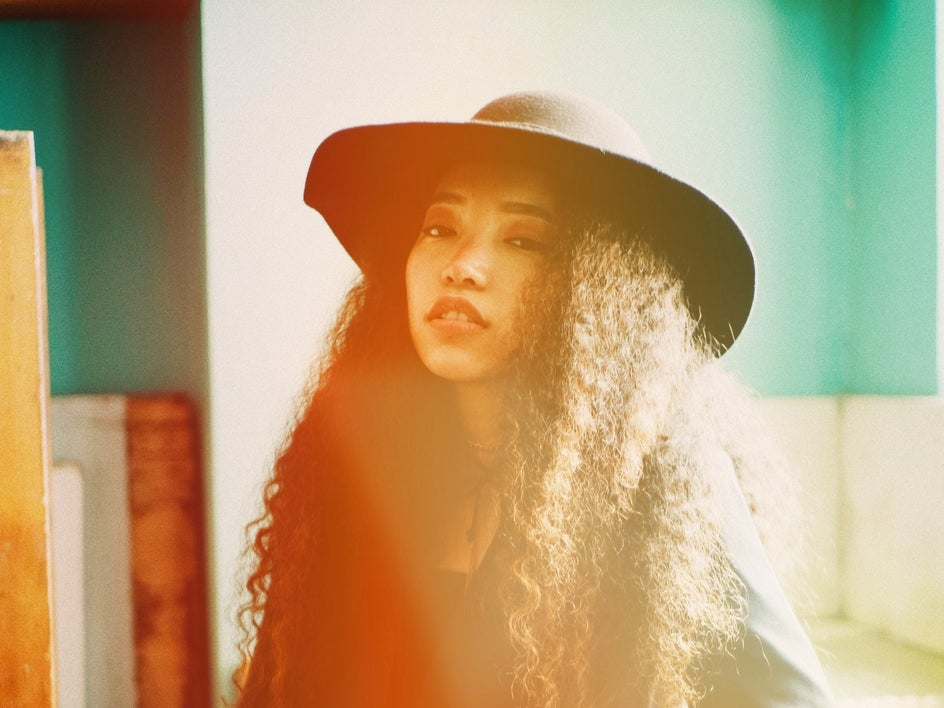
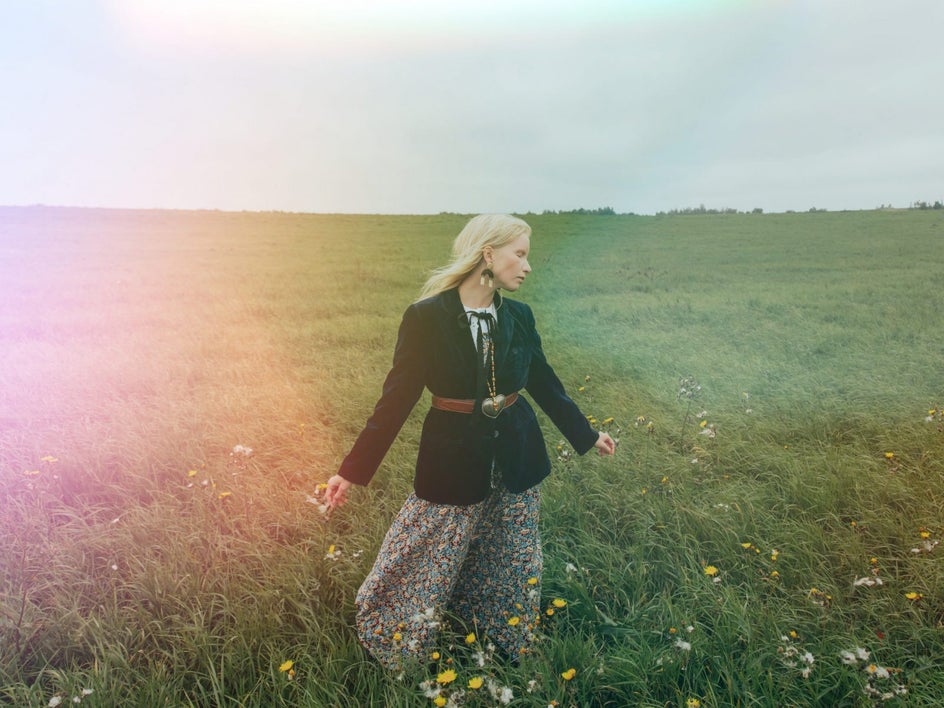
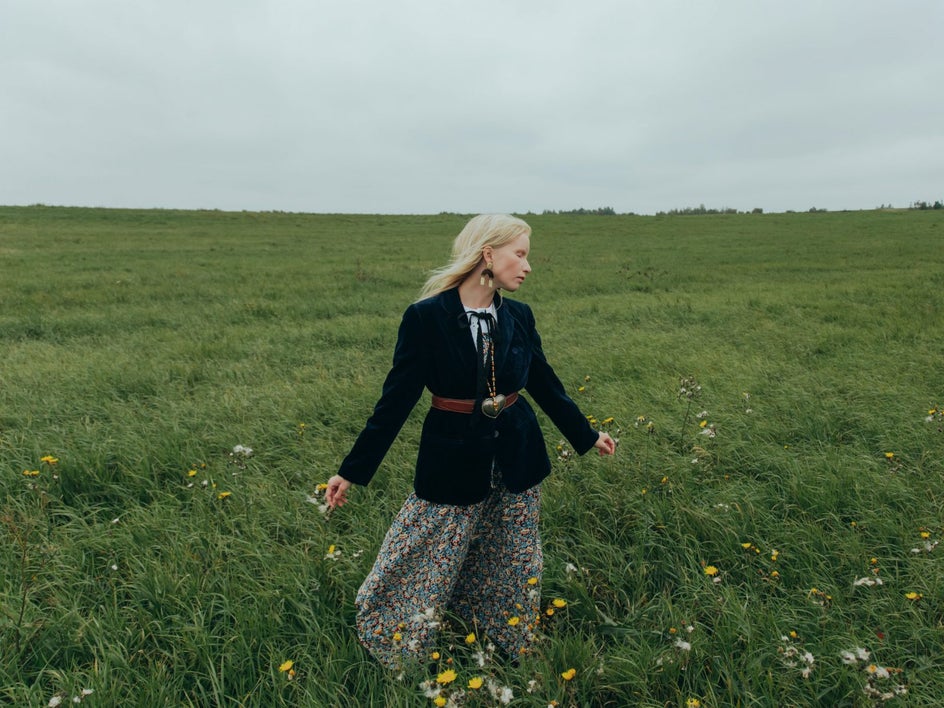
Light leaks usually appear as a streak of bright or diffused light down your image. Because of the exposure to light, light leaks typically have an orange, yellow, or red tint. Here’s a great example of one we created below using a combination of Light Leaks 7 and the photo effect Analog Tones 7.

As you can see, light leaks create a dreamy, summer-drenched aesthetic within your photo and transport them back into the era of analog photography.
Are Light Leaks Normal?
Long-exposure photography is more likely to cause light leaks. When using standard shutter speeds, however, it’s less likely that you’ll see them within your photos. If you begin to notice light leaks in all of your pictures, then your camera or lens may be faulty or cracked.
How to Add Light Leak Overlays to Your Photos Using BeFunky
Ready to take your vintage photography up a notch using light leaks? To get started, head over to the Photo Editor and open the image you wish to edit.
Step 1: Choose Your Desired Light Leak
Navigate to Textures in the main menu on the left, then click Light Leaks. BeFunky currently has one free light leak that you can use in any photo you desire. However, to access our full light leak packs, you’ll need to upgrade to a Plus account.
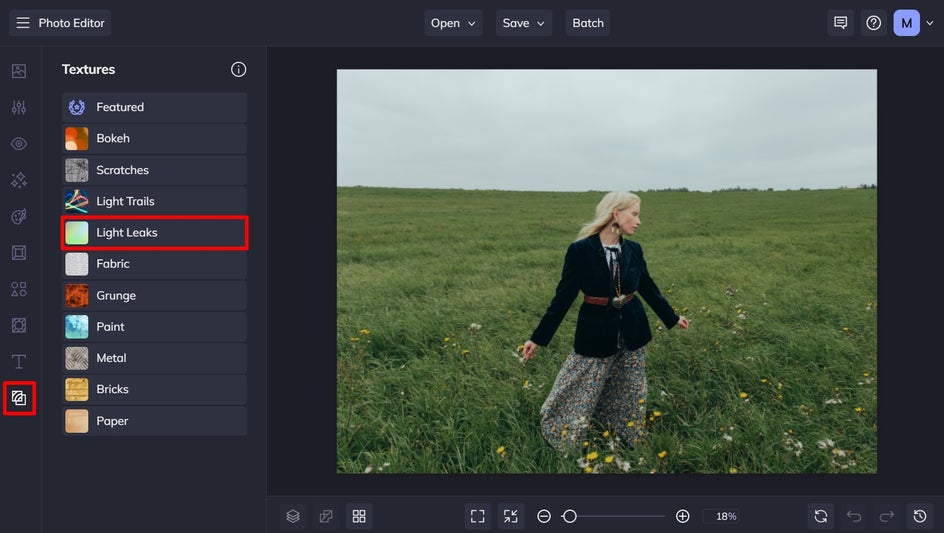
Simply click on any light leak to preview how it will look on your image. As with all of BeFunky’s effects, you can also adjust the strength of your light leak texture. For a subtle yet stunning colored glow, adjust the slider to the left. For a beautiful, supercharged colored light effect, simply move the slider to the right.
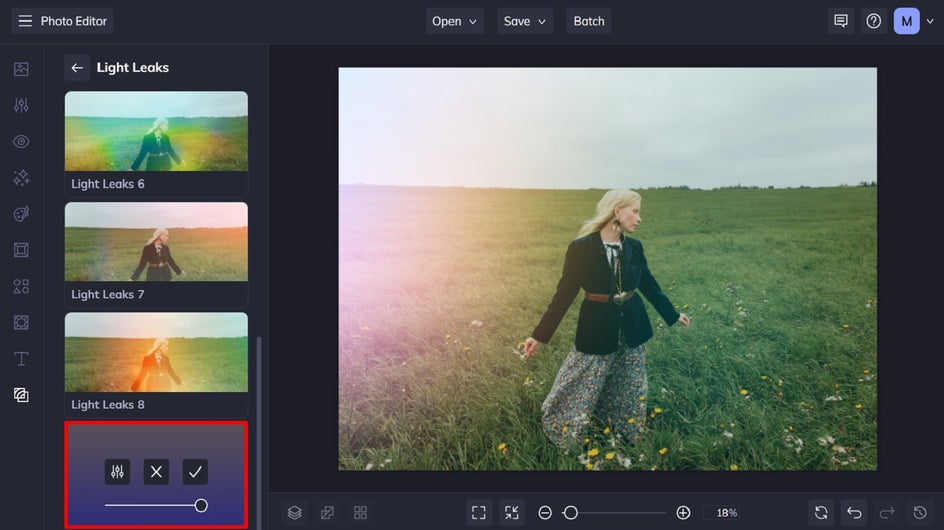
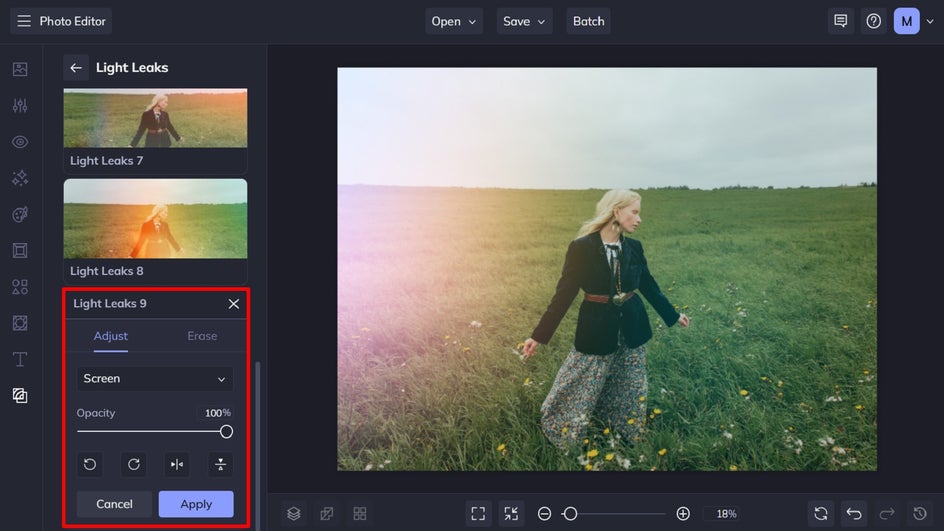
Step 2: Make Adjustments, If Necessary
By clicking on the Settings button within your chosen texture, you’ll be given a wider array of options to customize your light leak. In the Adjust toolbar, you can choose between different Blend Modes, as well as the Opacity levels. You can even rearrange the position of your light leak by clicking on the left or right arrows, or flip them vertically or horizontally.
The Erase tab also lets you paint your texture onto selected parts of your image whilst giving you control over the brush size, hardness, and strength.
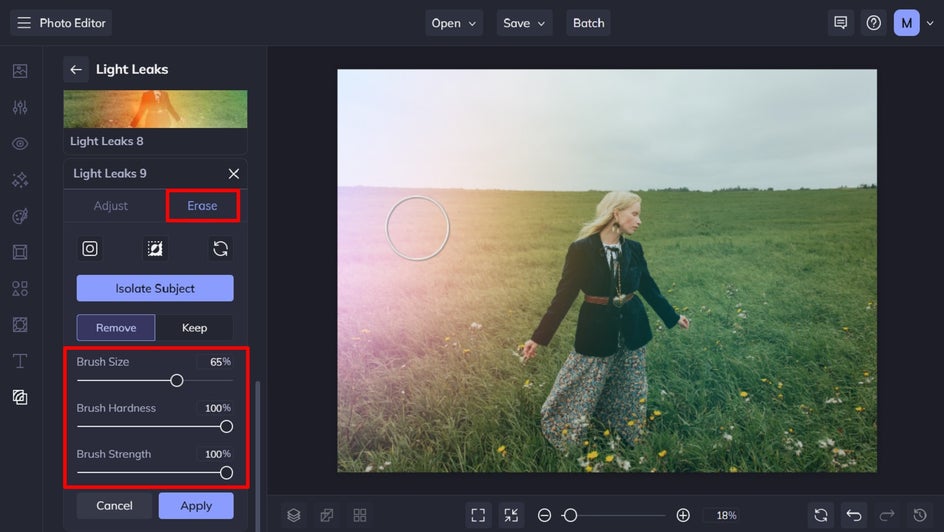
Pro Tip: While there are no specific rules, light leaks tend to look more realistic when placed around the outer edges of an image. This positioning mimics where a natural light leak would occur.
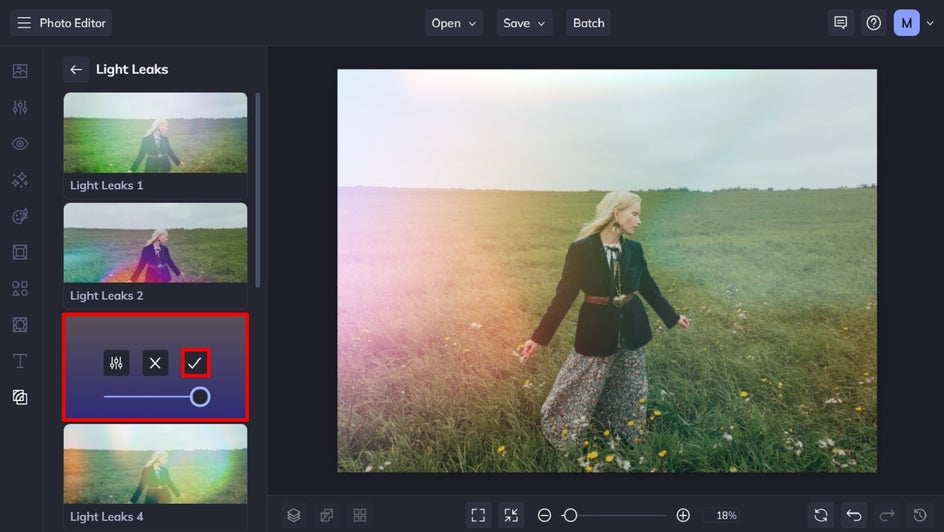
Step 3: Layer Your Light Leak Effect for a Unique Look
This step is completely optional, but before saving your image you might wish to add extra light leaks to your photo to really turn up this retro look.
To do this, apply your first light leak by clicking Apply. Then, choose your next Light Leak texture, adjust it if necessary, and apply it. Continue to do this until you’re happy with your layered light effect.
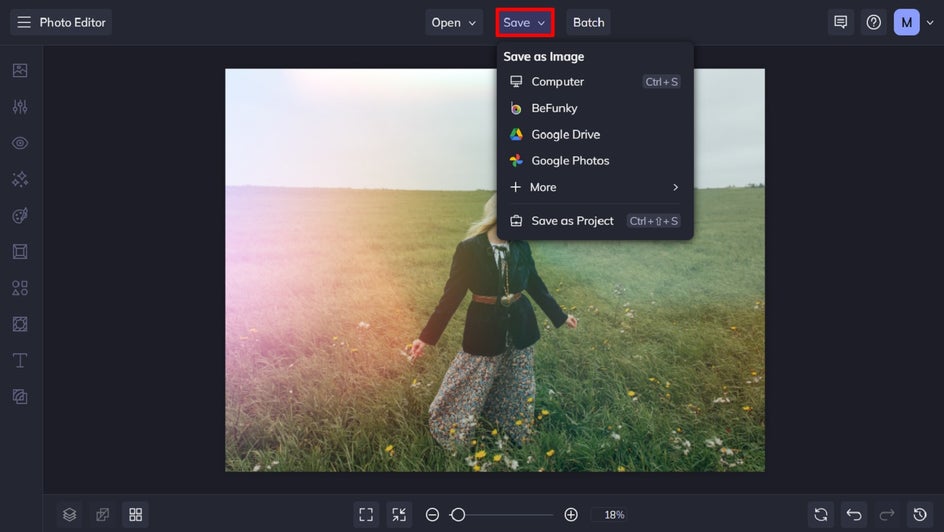
Step 4: Save Your Results
When you’re ready to save your image, simply click Save at the top of the screen. Then, choose your desired save location.
Transform Your Vintage Photos With Light Leaks
For adding a fun, vintage vibe to your photography, you just can’t go past BeFunky’s wide range of light leaks!
How to Combine Light Leaks With Vintage Effects
BeFunky’s range of vintage effects go hand-in-hand with light leaks, giving you multiple options for creating a retro-inspired image reminiscent of eras gone by. Here’s how to combine the two within the Photo Editor.
Step 1: Navigate to Effects
To access our wide range of vintage-inspired photo effects, click on Effects in the main menu on the left. There are plenty of categories to choose from which will boost the vintage aesthetic of your photo. Analog Tones, Chromatic, Instant, Old Photo, and Viewfinder are just some of our favorites!
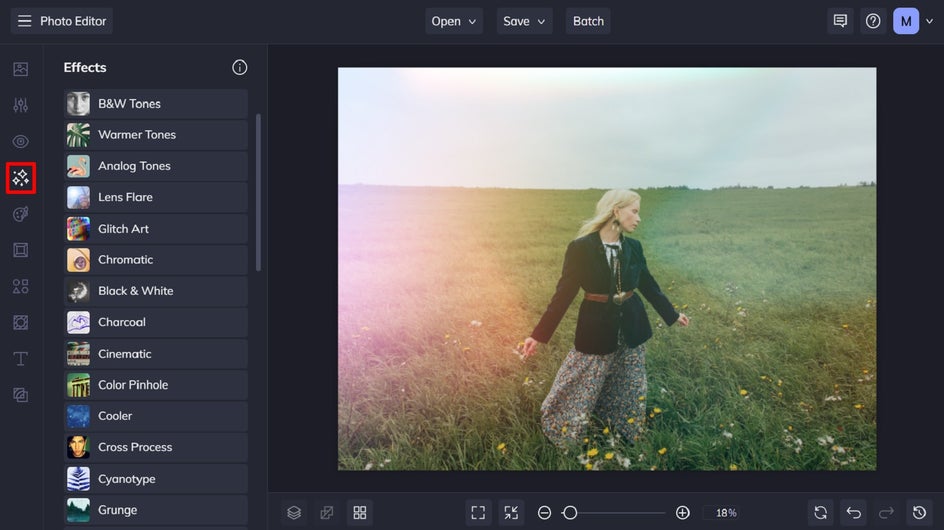
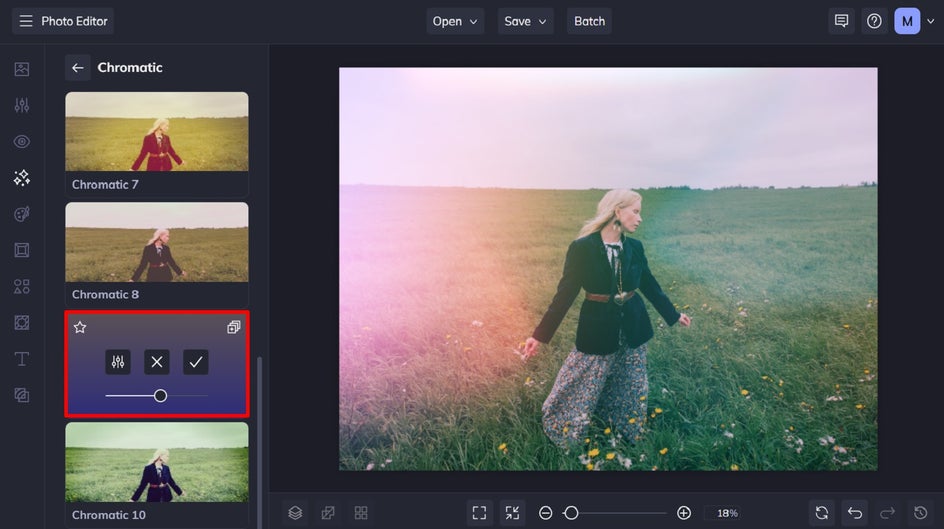
Step 2: Apply Your Desired Vintage Effect
No matter what Photo Effect category you choose, you’ll be able to sample each of the effects on your image. Apply the one that takes your fancy, then simply save your final image.
Turning Up the Vintage Photography Aesthetic
As you can see below, even adding the subtlest of vintage photography effects can take your light leak photo to a whole new level!
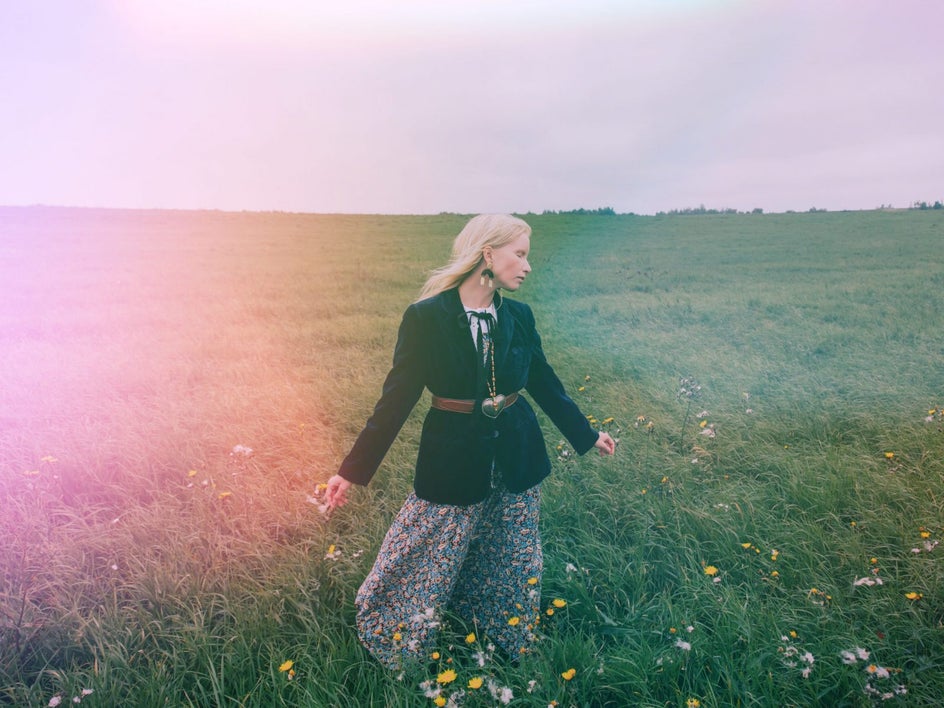

Light leaks can infuse any photo with a retro vibe, yet in order to take that image to vintage heights, try adding a vintage photo effect too. Both blend together seamlessly to create your dreamiest and most intriguing images yet.
Ready to try out these effects for yourself? Visit the Photo Editor today to see just how amazing it is!