Curate and Captivate: Your Ultimate Guide to Tailored Instagram Highlight Covers
Instagram has established itself as a platform where visual storytelling takes center stage. Every fleeting moment can be captured and shared in the temporary nature that is Instagram stories. But what if you could extend the lifespan of these stories, turning them into lasting highlights that define your profile? Welcome to the world of custom Instagram highlight covers for your stories—a realm where creativity knows no bounds.
Whether you're an influencer, a business, or simply an individual with a story to tell, understanding how to curate and customize your Instagram highlight covers with BeFunky’s Graphic Designer can elevate your online presence to new heights.
Get Inspired to Create Your Own Custom Highlight Covers
Get ready to dive into the exciting realm of crafting your very own custom Instagram highlight covers. Whether you're all about sharing your travel escapades or showcasing your culinary expertise, there's inspiration all around you and highlights are a great way to make those memories last a lifetime. For any kind of highlight cover you're aiming for, remember this golden rule: ensure your color story blends seamlessly. These covers will be a permanent part of your Instagram profile, so crafting them to stand the test of time is key.
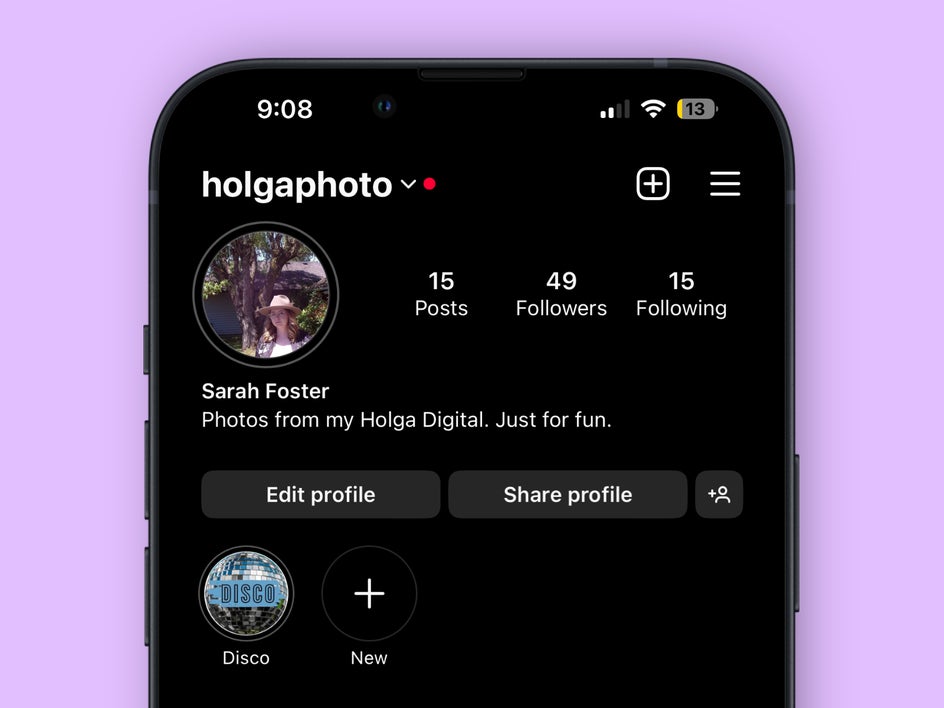
Utilize Graphics
BeFunky’s graphics library is enormous and full of anything you can imagine to use. Picking bold graphics can be a great way to draw the eye, and make sure your followers know what each highlight will be about. If you are a clothing company, you can choose different items of clothing to highlight. As a gym, different types of workout machines!

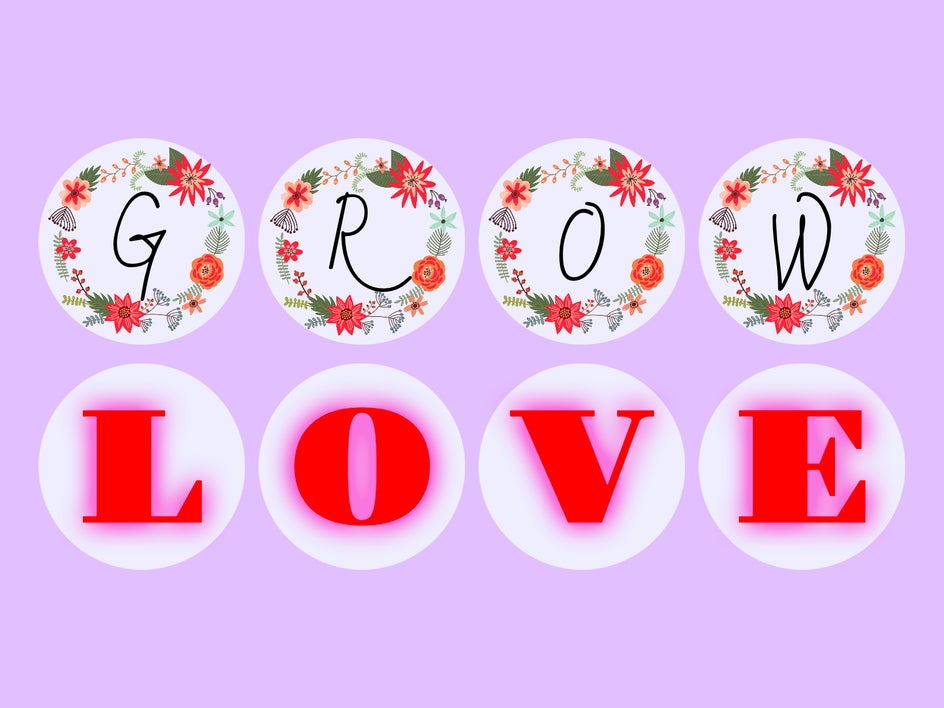
Spell Out a Word
Using highlights to spell out a word can be a terrific way to extend your profile, especially as a business account. Pick a 3-4 letter word and make each bubble a single letter. You have to think about when you use highlights this way to add content to them in order so that the letters stay in the same order on your profile. You don’t want to be accidentally spelling words when you put things on your highlights in an order you don’t intend them to be! Don’t be afraid to combine graphics and text to create a unique design for your highlight cover!
Use Text to Stay Organized
If you choose to use text for your highlights to keep your stories organized, choose words that are short and bold for visibility. Long words can get too small and hard to see on a mobile device, make sure to max the size out on your bubble so that it has the best readability. When you opt to use text, make sure that the font is the same on all of the designs. This will make your profile feel cohesive. You can use these to keep track of stories that have to do with each kid in your family, or stories that have to do with your business that are easy to find on your profile.

How to Create Your Own Story Highlight Covers
Now that you are inspired to create your own highlight cover, it’s time to learn how to do it! Head over the the Graphic Designer and click on the Blank Canvas tab at the top of your interface. Select the Social Media Square canvas size to get started designing your own highlight cover.

Step 1: Add a Circle Graphic Guide
The end result of the highlight cover appears as a circle, so you want to set yourself up with a circle guide to design for your canvas. Click on the Graphics tab and select the circle vector image. Next, stretch the circle as large as your canvas so you have a generous amount of space to design.

When you click on the circle graphic, an Ellipse Properties menu will pop up where you are able to change the fill color of your circle graphic. This will end up being the background of your design. You are also able to drag and drop an image from the Image tab into the circle if you would like to design on top of an image. This is called a clipping mask.

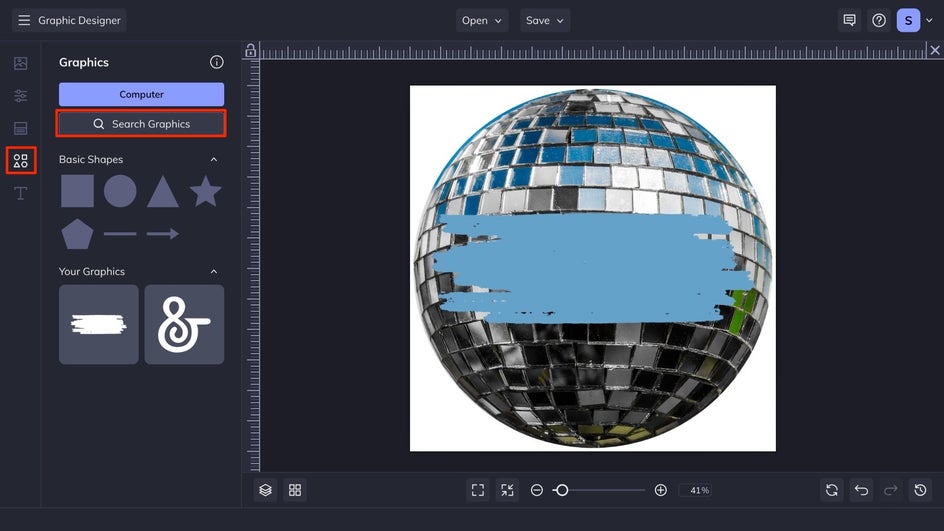
Step 2: Add Graphics to Your Highlight Cover Design
Under the graphics tab, you can search BeFunky’s expansive graphics library for the graphics that fit the vibe you are going for. You can add as many or as few graphics as you want, but keep in mind how small the end result will be on a phone screen. Keeping it simple and bold is a great rule of thumb. When you have found some that you like, drag and drop them into the canvas from Your Graphics. You can change the color in the Graphics Properties menu.
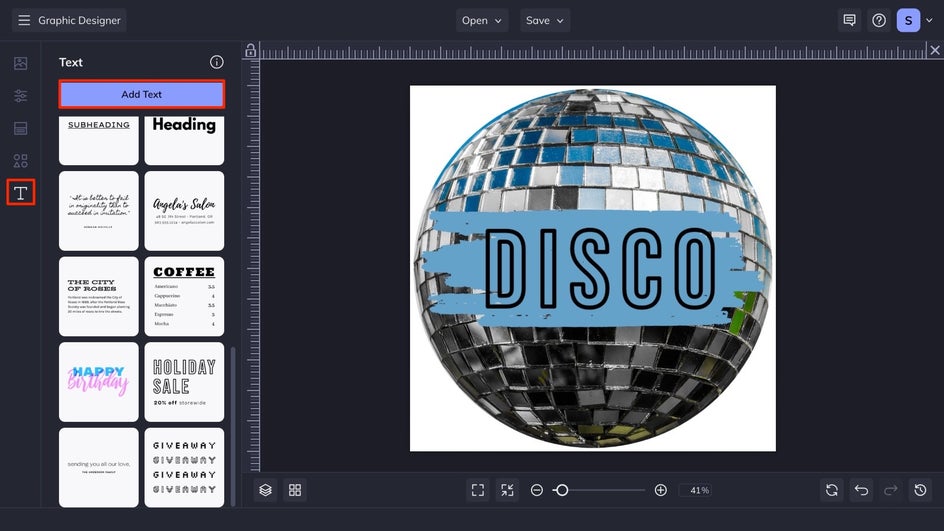
Step 3: Add Descriptive Text
Under the Text tab, you can select one of the preset text combinations or opt to select your own with the Add Text box. Remember to keep your text option bold and big so that it can easily be read when it is reduced to the Instagram story highlight bubble on your profile.
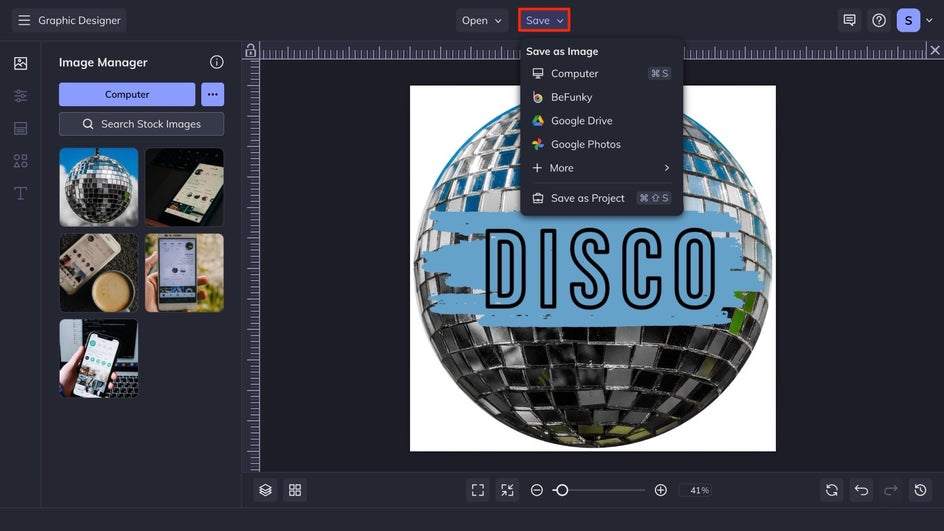
Step 4: Save Your Story Highlight Cover
When you are satisfied with your design, click Save at the top of your interface and choose your desired save location. We suggest saving it as a jpg at the highest quality for the best final outcome. To upload your custom design to your Instagram highlight, you can head to your Instagram story highlights and click edit cover to choose a cover photo then tap add.
Start Customizing Your Own Instagram Highlights
With the inspiration and the how-to, it's now time for you to create your own Instagram story highlight covers! Get creative, and make your profile uniquely you! In just a few simple steps you can take your Instagram page from disorganized and boring, to chic and simple with BeFunky’s Graphic Designer.