How to Create Seamless Carousel Instagram Posts
Have you ever scrolled through Instagram and noticed a super cool collection of photos in a carousel where there is a photo split between one image and another? Generally, you are unable to share more than 10 images in an Instagram post, but you can creatively and seamlessly share as many as you want using BeFunky’s Graphic Designer and Instagram’s carousel feature.
The goal of these carousel posts is not for everything to be perfectly aligned within the boxes. You want there to be images that you view between the scroll for the effect to be fully realized. You can creatively place photos so that they are overlapping and sharing the moments that you want to be the primary focus to be larger and with less layered on top of them.
How to Create Your Own Seamless Carousel Post
Once you have your images ready, it is time to open the Graphic Designer and create your own custom canvas size. Click on Blank Canvas, and on the left-hand side, you can input a custom pixel size to create the canvas.
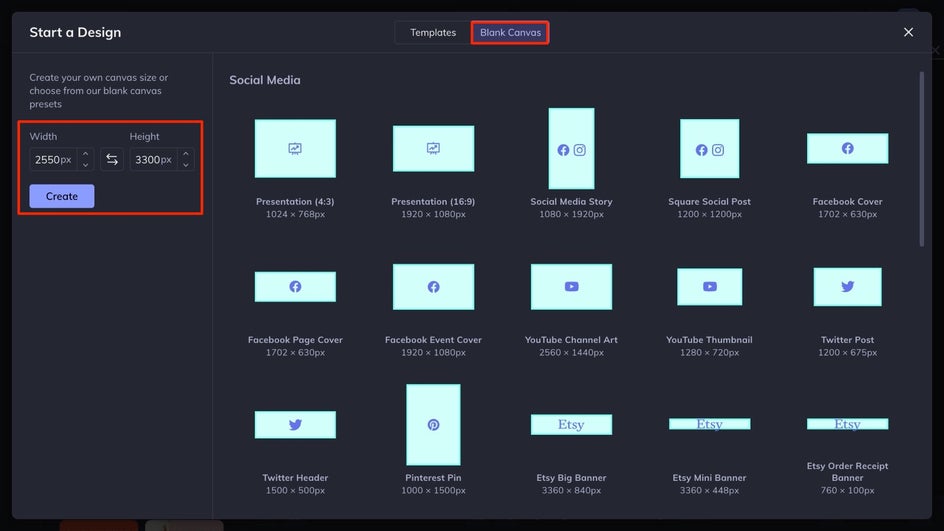
Step 1: Determine the Size Of Your Canvas
We will be creating your seamless posts on one canvas, even though the end result will be multiple images. The two image sizes that work best for this in Instagram are:
- Square image: 1080 x 1080 pixels, or a 1X1 aspect ratio.
- Vertical image: 1080 x 1350 pixels, or a 4X5 aspect ratio.
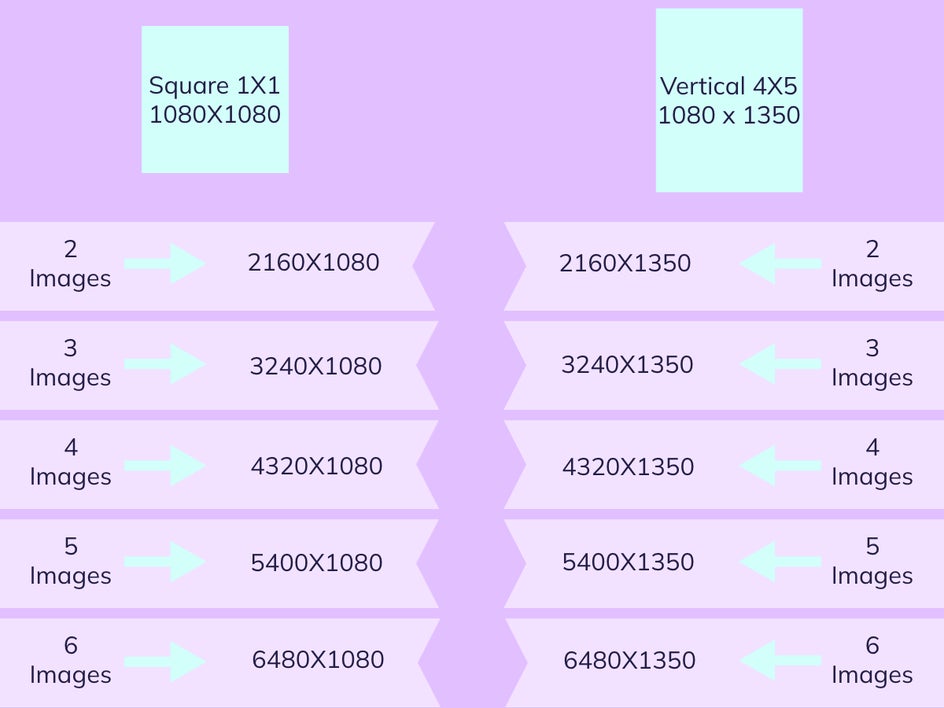
In order to create your canvas to be the right size, you will need to determine the number of final images you would like to end up with, then you will multiply that number by the width of your desired image. So if I wanted to have a vertical final result, that was three images long I would multiply 1080 by 3 to result with 3240 pixels in length and a height of 1350. For this tutorial, we will be using square final results, so we will use a height of 1080 and since we are doing 3 images, we will have a length of 3240. Below is a chart that you can reference when creating your own seamless carousel Instagram posts and the right pixel sizes.
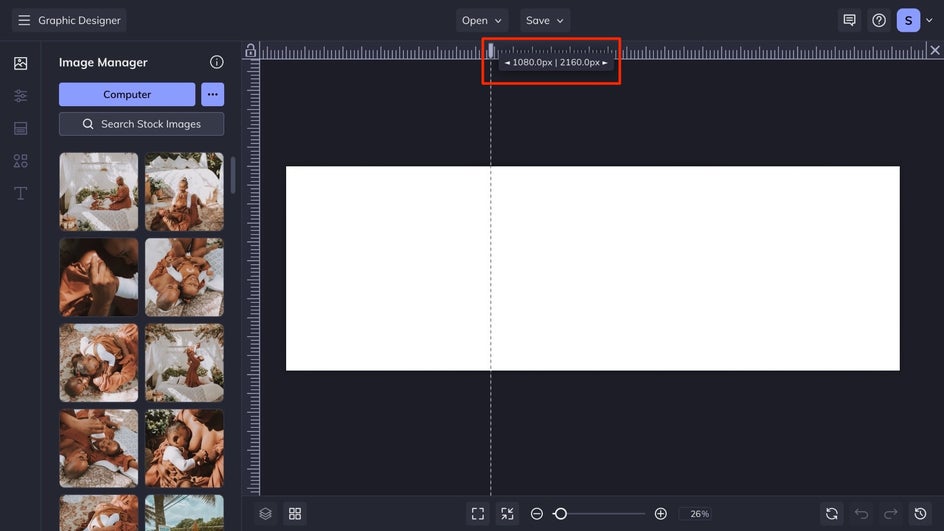
Step 2: Add Guides to the Canvas
Adding guides will help you visualize where your image breaks happen, this will allow you to make sure that the cut-offs happen in places that make sense when you are looking at one photo individually and will help you know where to crop your canvas in the end. Click on the Alignment box on the bottom right of your canvas.
A settings menu will pop up and you want to make sure that the Guides toggle and the Snapping toggle are turned on. Then you can click the X at the top of the settings box to close it.
Next, divide your canvas every 1080 pixels as that is the width of one Instagram image. You can click at the top of the guide bar at the top, then drag your guide line into the right spots.
Step 3: Arrange Your Photos on the Canvas
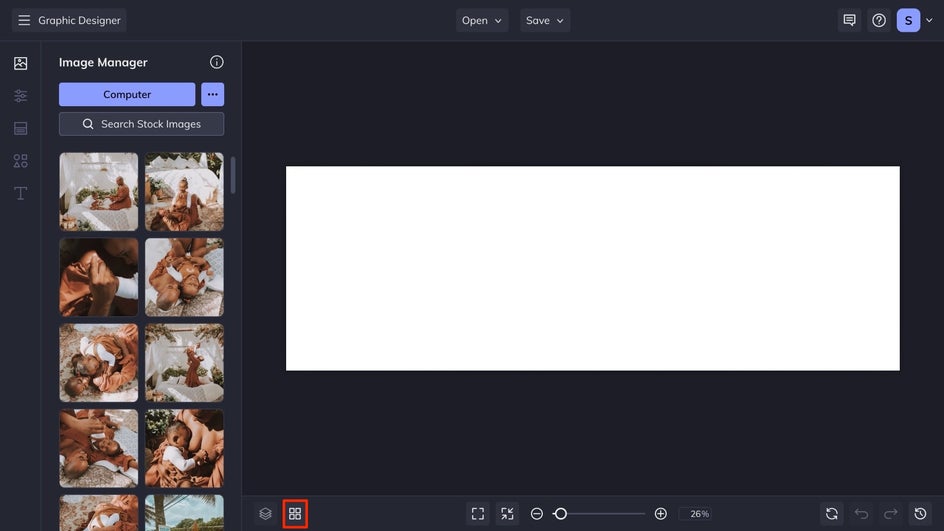
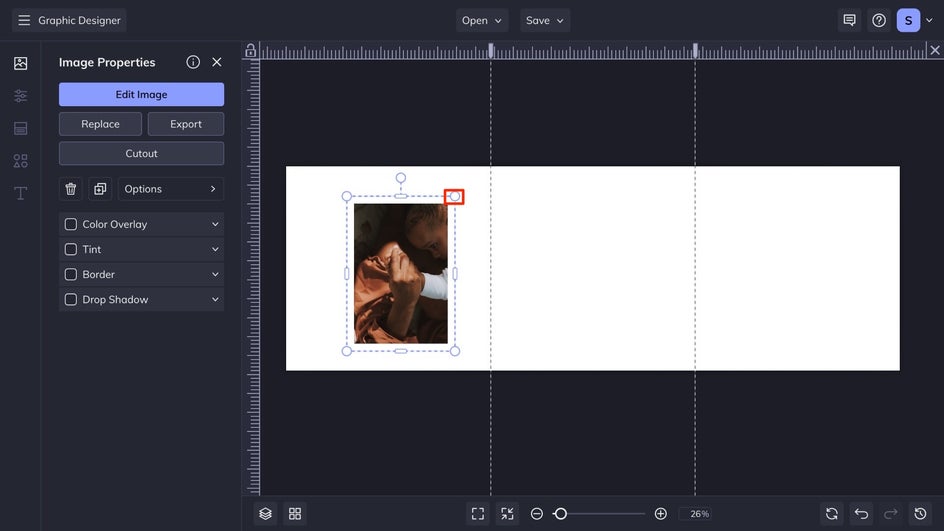
Adding your photos to the canvas is a great way to play around with your creativity. Play with larger, more landscape photos in the background and layer on top of them. Don’t be afraid to stack photos of different sizes on top of one another. Add your photos to your canvas, once you click on them you can use the blue dots on the corners to adjust the size of the photos, and drag them to the places that you want them to be.
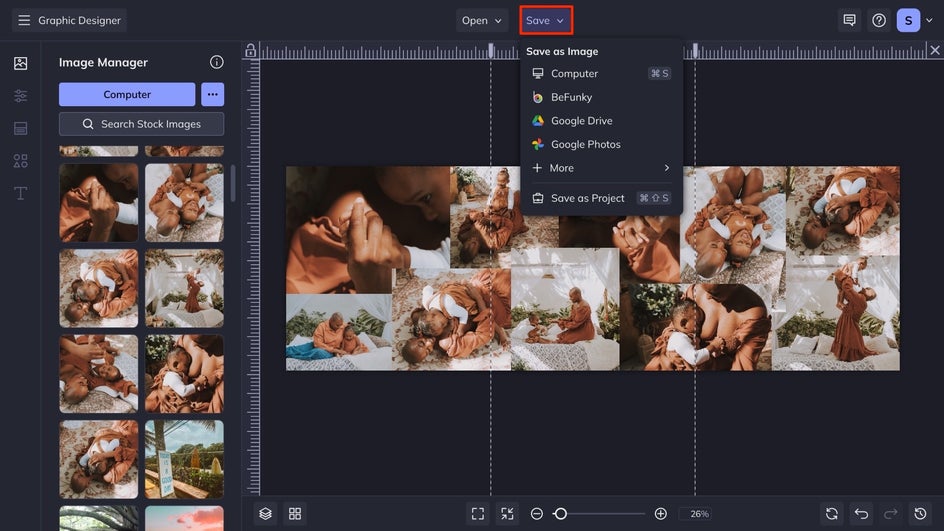
Step 4: Save Your Image and Open it in the Photo Editor
Once you are happy with the layout of your canvas, click save at the top of the interface. You’ll want to save this as a jpg in the highest quality to your computer.
Next, navigate to BeFunky’s Photo Editor and open your image. You can do this by dragging and dropping your image into the image manager, or you can open it from your computer using the Open button at the top of the canvas. Once your image is uploaded, don’t forget to place your guides back on top of your image just like we did in step 2!

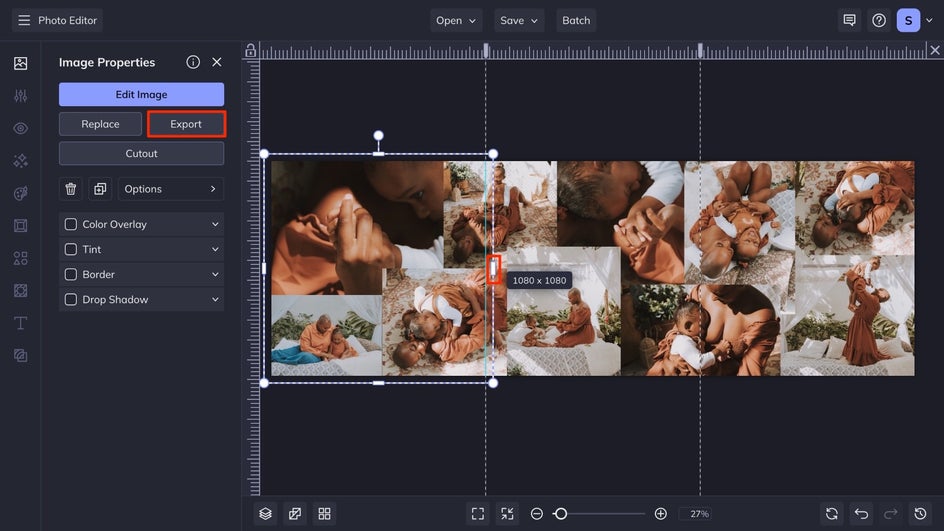
Step 5: Use the Crop Tool to Divide Your Carousel Image
After you have set the image as your canvas, now you need to add the same image as another layer to your canvas. You can drag and drop it onto the canvas, or right-click and add it as a layer and enlarge it so that it fits perfectly over the first image. Take the far right bounding box and drag it over to your first guide until the guide turns blue, this will Snap your crop to that guide. Next, you will click Export and save this first cropped image in your sequence and save it to your desired location. Continue with the moving of the blue bounding boxes until you have completed your entire graphic.
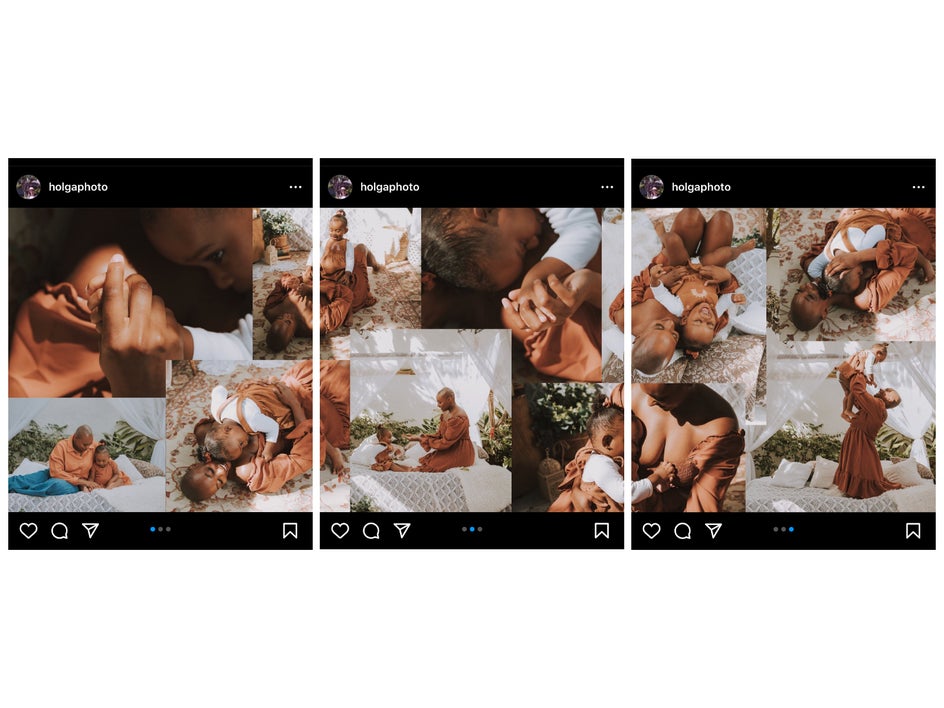
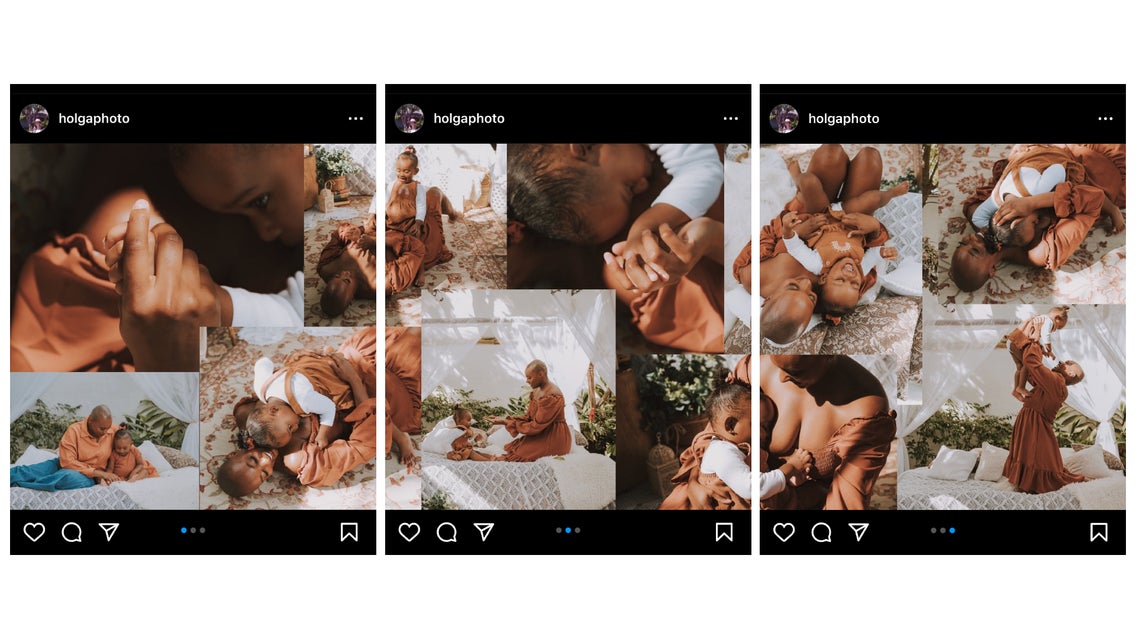
Our Carousel Instagram Post
While it may look like three choppy images when you export them all, once you upload them in order and click share you will have one seamless post to scroll through. With the help of the guides and snapping your Instagram feed never looked better. Get started making your own seamless carousel post today with the help of the Graphic Designer and the Photo Editor.