It’s Time to Update Your Shopify Product Photography
Photography plays a crucial role in branding. As we said in 5 Product Photography Tips for Beginners, product photography is one of the main ways to attract customers and drive sales online. eCommerce sites like Shopify depend on product photography to sell to their customers.
We are going to go over the benefits of investing your time and money into taking good product photos, and tips for taking the best product shots, and then we are going to show you how you can batch edit these photos in BeFunky’s Batch Photo Editor for quick editing.
Why Good Product Photography Is Worth the Effort
The aim of product photography is to capture images that effectively showcase your product and compel customers to purchase it. One of the secrets to success on any eCommerce site is updating your photography with expert-level photos. This is because customers are unable to physically touch or see your products, so they must rely on images to make purchase decisions.

You don’t have to take photos with a huge setup, you can always opt to start with your smartphone camera and enhance the photos in BeFunky’s Photo Editor during the editing process. What’s cool is you can even edit them directly on your phone with the BeFunky mobile app.
What Is Shopify?
According to Shopify, it is a commerce platform that lets anyone start, manage, and grow a business. You can use Shopify to build an online store and manage sales.
What Are the Photo Requirements for Shopify?
With any platform, there are size requirements for the product photos you use. Shopify product images can be any size up to 4472 x 4472 px, with the optimal size being 2048 x 2048 px – just make sure to keep the file size below 20MP. One of the coolest features of the Batch Photo Editor is the ability to use Batch Resize. Batch Resize allows you to export your images under a certain file size so that you can keep the best resolution without giving your site any lag because of large product photo sizes.
Tips for Taking the Best Shopify Product Photos
Here is what we recommend for taking the best Shopify product photos:
1. Pick a Camera (Nothing Fancy)
Pick a camera to use. This can be a high-quality camera or your smartphone. You don’t need fancy equipment to take good product shots.

While taking your product photos, you should take a wide variety of shots from different angles so you have plenty of images to work with when editing.
2. Use a Tripod for Clear Product Photos
Use a tripod for the sharpest photos. I love using a tripod paired with a timer to make sure there is no camera shake and my photos come out extra clear.
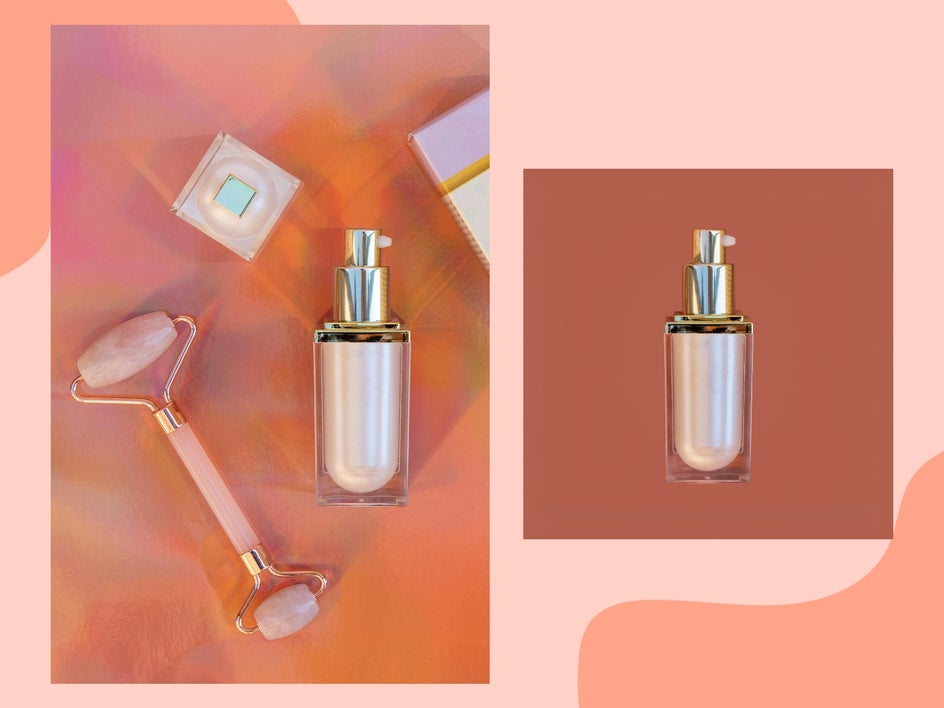
3. Set up a White Background for Cleaner Product Shots
The white background can be a large piece of paper or a sheet – it just needs to be plain white. This highlights the product sitting on top of it and makes editing easier if you’re doing cutouts in the editing process.
4. Good Lighting Is Key to the Best Product Photos
Set up your equipment somewhere that is well-lit by either natural or artificial photography lights. The better the lighting, the better your product photography. Make sure that you use a diffuser of some kind because soft light is the best for product photography. Make sure that the lighting you use does not alter the original color of your product, as you want to capture the most authentic photo of your product that you can.

The best part about using BeFunky’s Photo Editor during the editing process is that it can clean up any mistakes you make during the shooting process. Let’s take a look at the top tools you can use for the best product photography. You can edit these photos directly from the app or use the desktop version.
How to Edit Your Photos for Shopify
BeFunky’s Photo Editor offers a range of photo editing features that help you edit your Shopify photos. Not only can you adjust lighting, contrast, and clarity, but we are going to cover the best photo editing tools you can use to clean up your product photography to perfection. These are the best methods for using BeFunky’s Photo Editor to enhance your Shopify store.
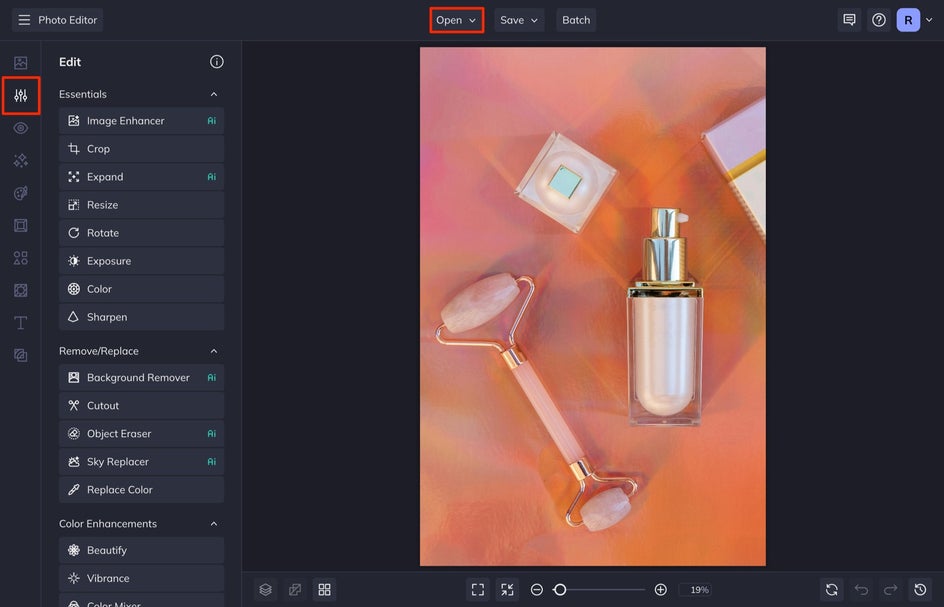
Step 1: Upload Your Photo
From the Open menu at the top of the editor, select Computer to upload your photo, You can also drag and drop your photo directly into the editor.
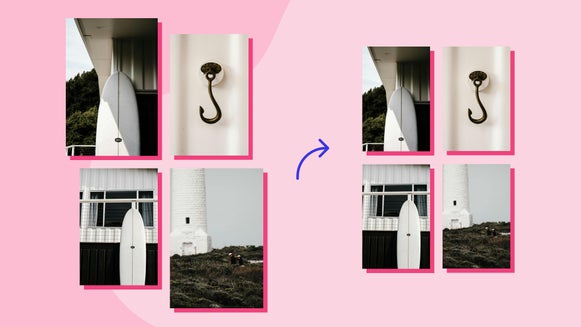
Step 2: Crop It
Next, select the crop tool from the Edit menu. Select the Square 1x1 option from the drop-down and then drag the cropped section over the product so it is in the center.
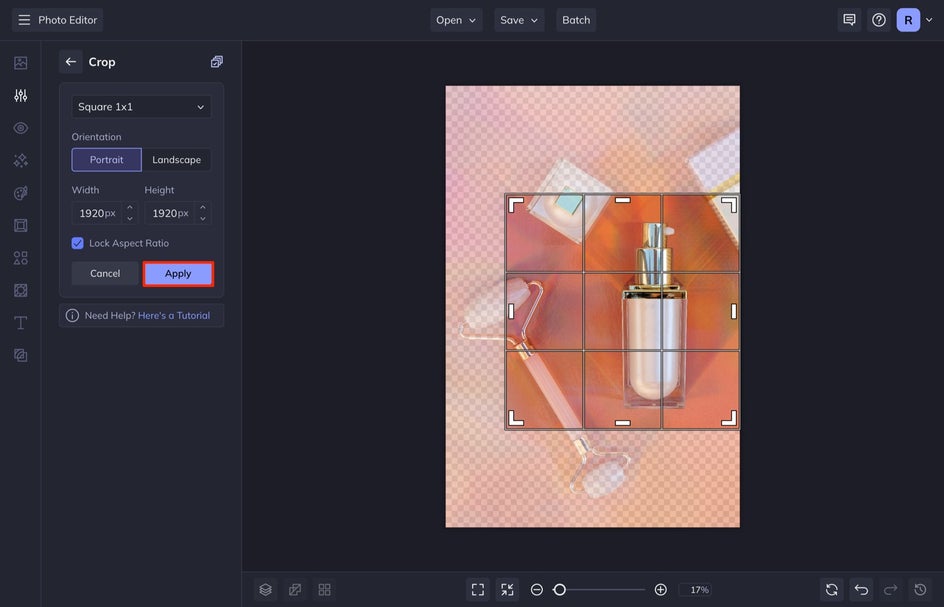
When you're finished, select Apply.
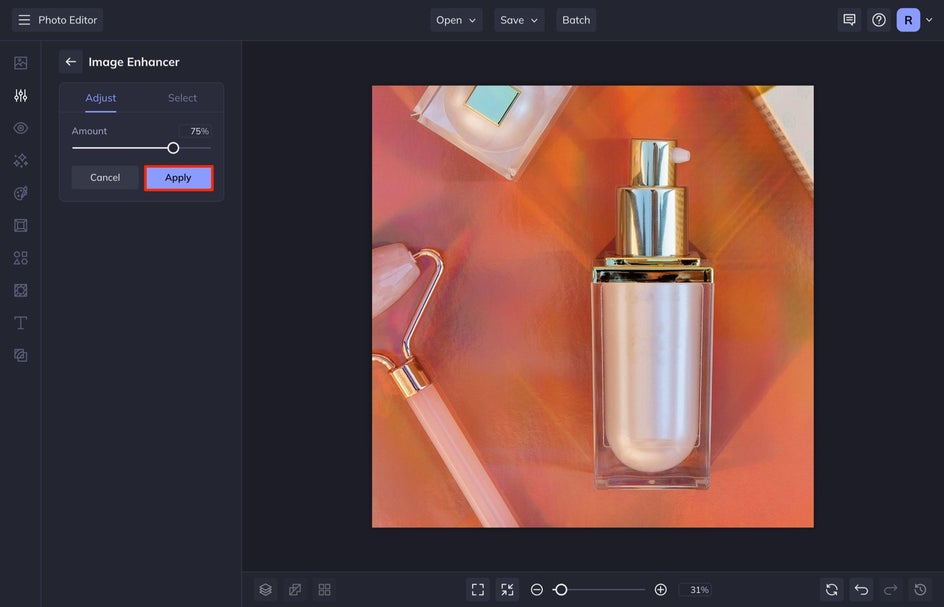
Step 3: Use the AI Image Enhancer
Select Image Enhancer from the Edit menu. This is an AI tool that quickly balances image exposure, adjusts highlights and shadows, and enhances the colors in your image. This tool is great for product photography cause it combines multiple tools into one – cutting your editing time in half.
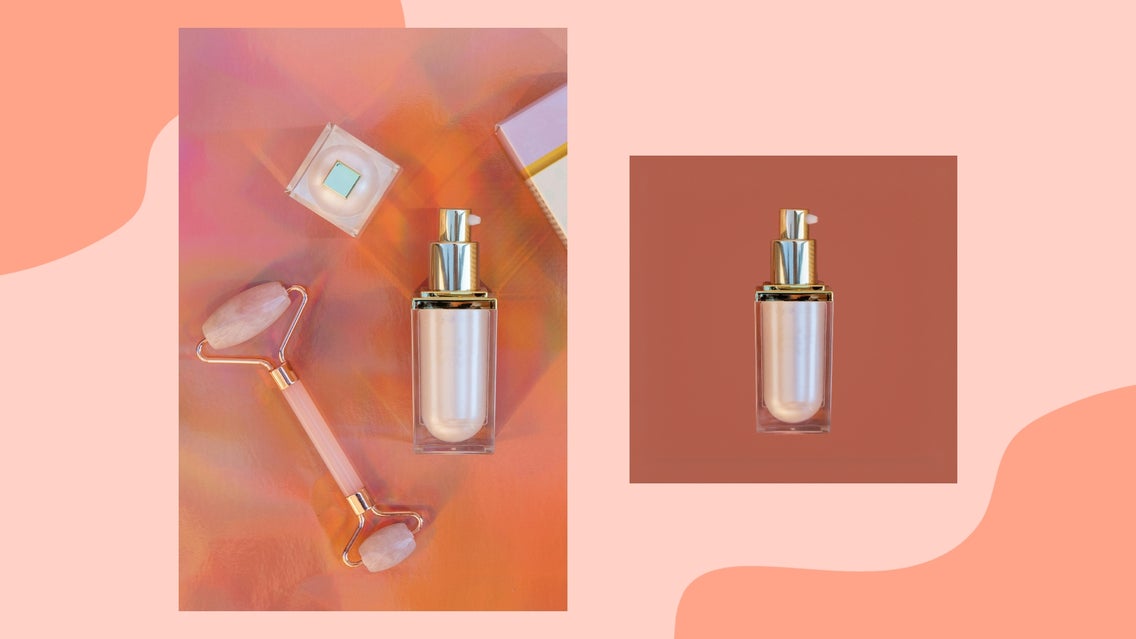
Step 4: Use the Background Remover
We are going to use the Background Remover to clean up the background of this image. In the same Edit tab, select Background Remover.
If you need to clean up or sharpen what the AI selected, click Adjust Selection. If you shoot the product on a white background, the AI should isolate your subject pretty perfectly. If you shoot it on a colored background, you might need to clean it up a bit. Once the selection is perfect, choose Change Background, then select any of the three options.
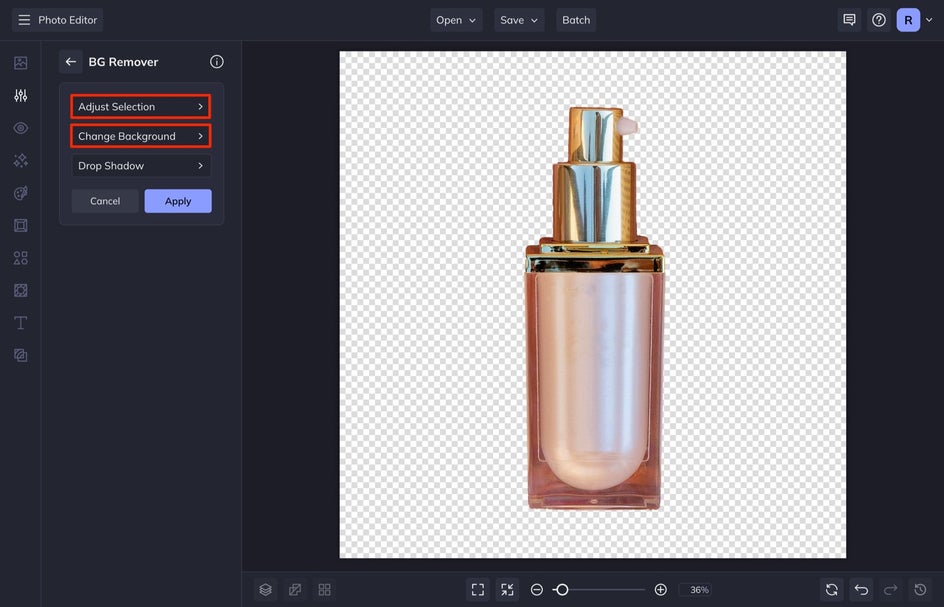
We are going to select Color and change the background to an orange color.

I would recommend that whatever you do, you are consistent with that same selection in all of your product photos. Click the back arrow to get to the first BG Remover menu and then hit Apply.
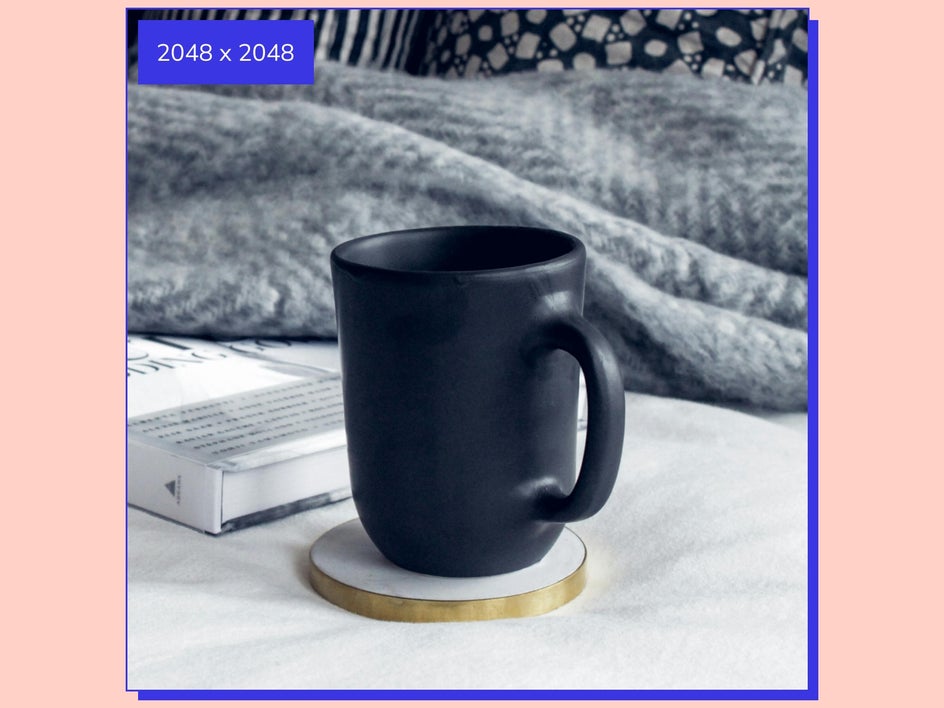
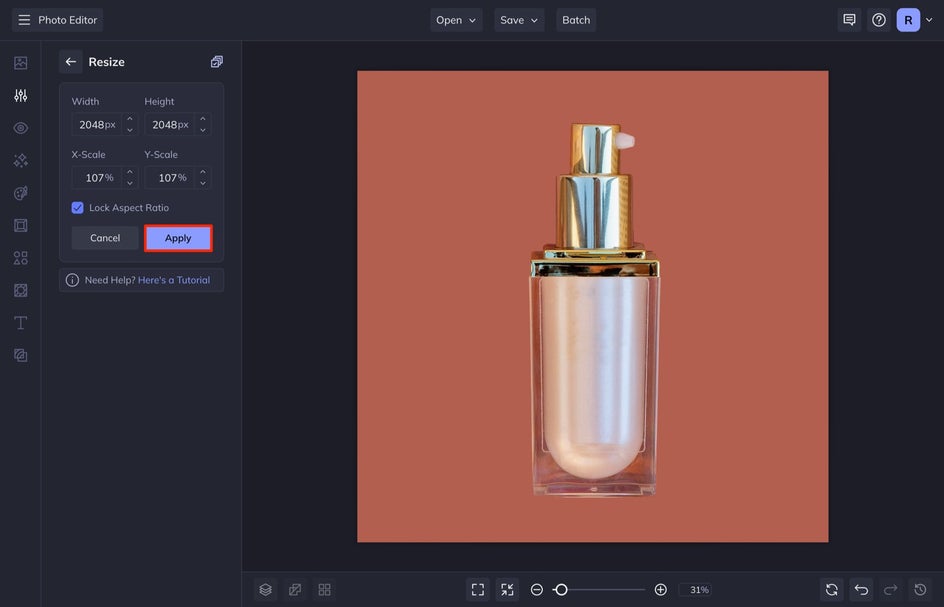
Step 5: Resize for Optimal Quality and Uploading
Shopify’s optimum size for photos is 2048 x 2048 pixels, so we want to make sure we resize our photo to this dimension. To do this, select Resize from the Edit menu. Type in 2048 in both the width and height sections, then click Apply.
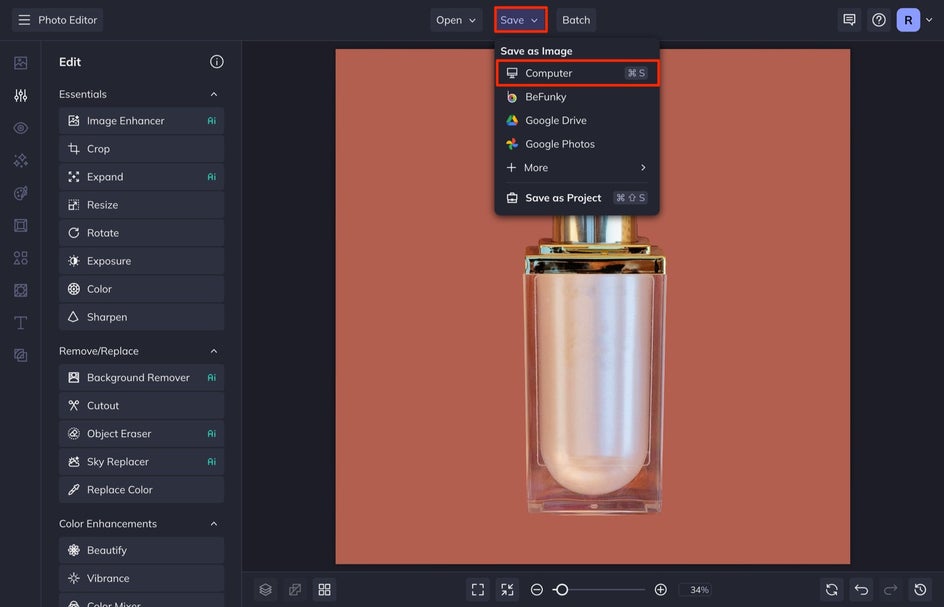
Step 6: Save Your Shopify Product Photo
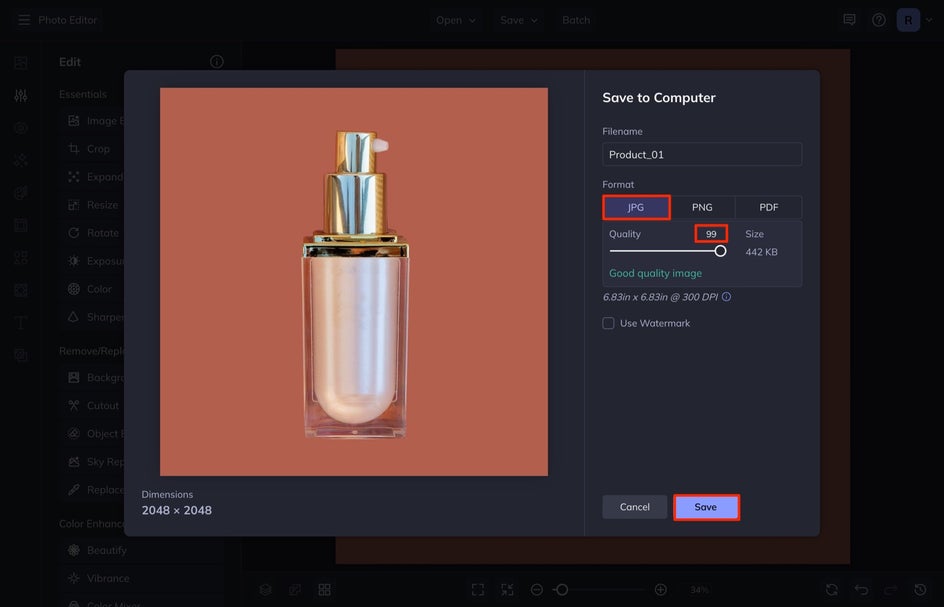
Select Save at the top of the screen. Select Computer and then save your image as a JPG.
Depending on the size of the photo, I like to set the Quality to 99 so that the photo loads faster on my website. This makes sure that it is good quality, without being too large.
Get Started With eCommerce Product Photography
By following these Shopify product photography tips for beginners, you’ll be able to take high-quality product shots that will significantly boost your sales. Once you’ve shot your product photos, you’ll want to edit them before uploading them to your website. BeFunky’s Photo Editor has everything you need to polish a product photo in just a few clicks.