Resize Your Design Templates in Seconds
Looking for an easy way to resize your designs without needing to rearrange everything? BeFunky’s Smart Resize feature keeps the formatting of your template intact while resizing, and places each layer in your design according to the new dimensions you select. Gone are the days of discouragement when trying to resize your images correctly. With the help of BeFunky and Smart Resize, it is simple and effortless to keep your content looking great. Read on to learn all about this handy tool and how to utilize it!

When to Use Smart Resize
Nowadays, each social media platform has specific size requirements for images. When it comes to using design templates, it can be frustrating to try reorganizing your content on different-sized canvases for different platforms. It is also a great tool to use for print media – whether you need to create marketing materials in different sizes or specifically-sized invitations for your events.
How to Resize Design Templates
BeFunky has made it easy to maintain the formatting of your content while changing the size of your template in just a few clicks. When you are ready to start resizing a design template, open the Graphic Designer.
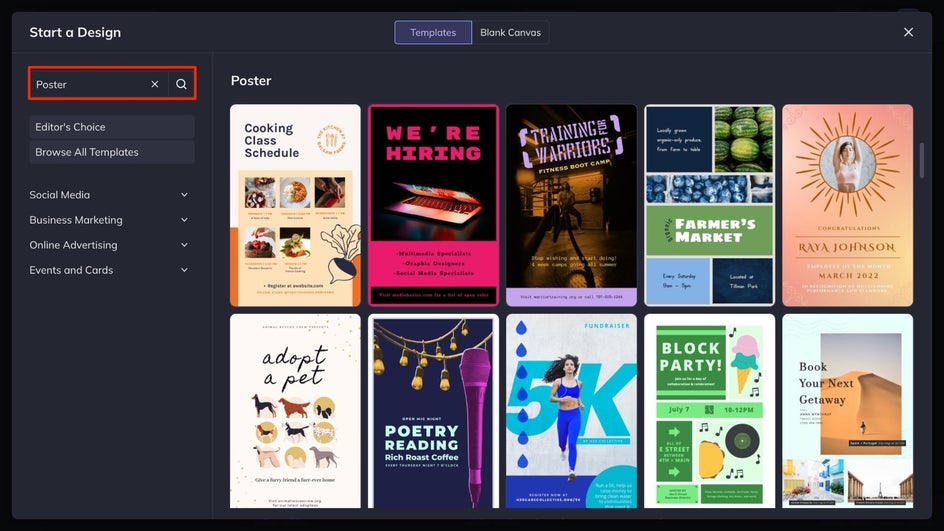
Step 1: Select a Template
From here, click on the Templates tab, followed by Search Templates. You can search by any descriptor or browse our template categories. For this project, we will be using a Poster template. Select anything that catches your eye by clicking on the thumbnail, and then press the Use This Template button.
Step 2: Resize Your Template
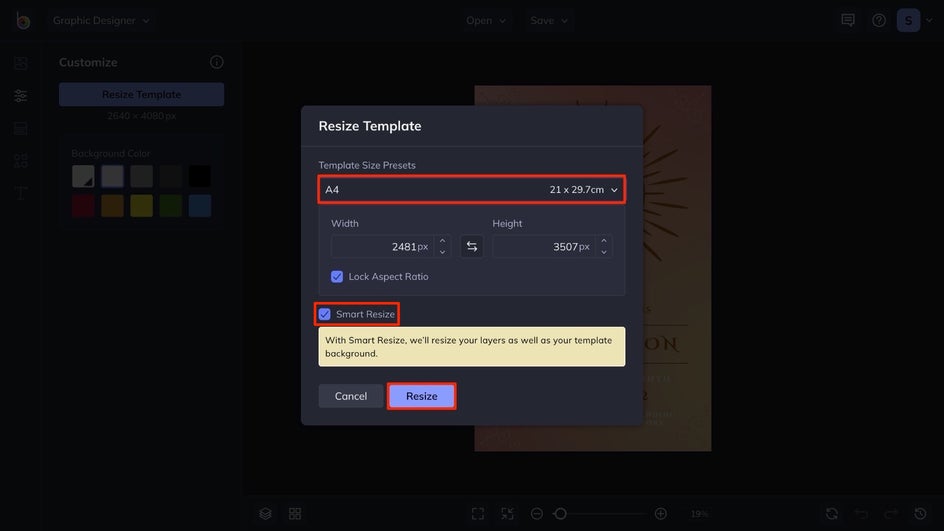
After the template has loaded, select the Customize tab on the left-hand side menu. Under the Resize Template button, you will see the current dimensions of your template. Select Resize Template to pull up a menu of options.
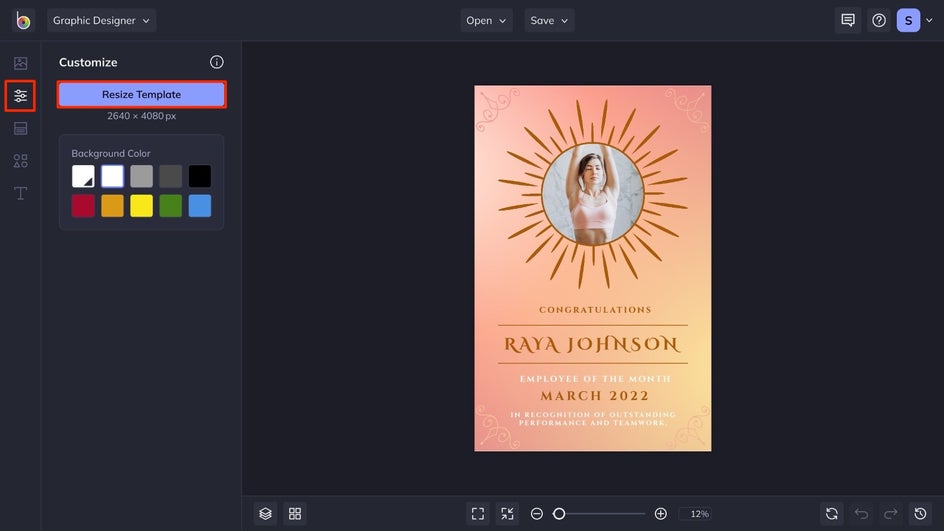
For this tutorial, we will resize to an A4 and use Smart Resize to keep our elements intact. You can use any template size preset, or select Freeform and enter your own. If you keep the Lock Aspect Ratio box checked, it will keep the same aspect ratio when you type into either the width or height box. If you want an entirely new aspect ratio with your custom dimensions, simply uncheck that box. Once you decide on the perfect size, select the Resize button.
Step 3: Adjust Design Elements as Needed
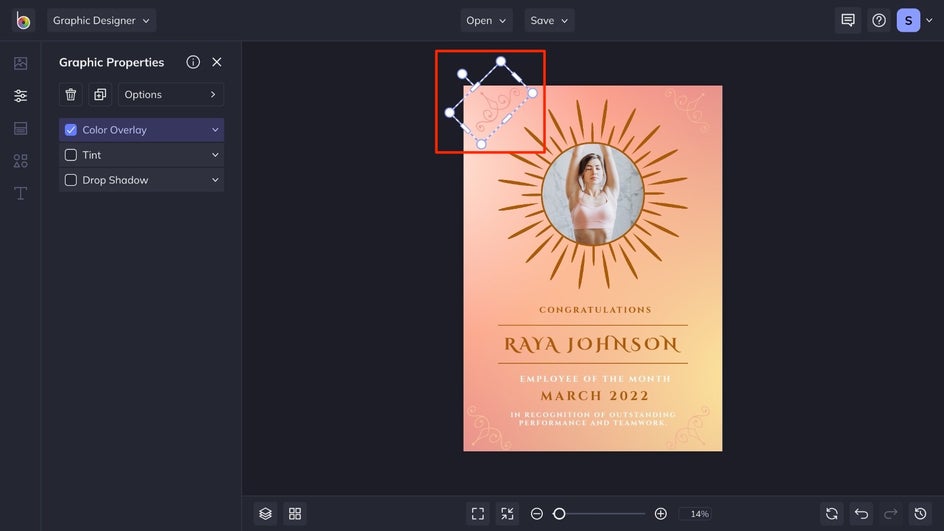
Even if you choose the Smart Resize option, you may need to manually rearrange your design elements, depending on the size you choose. You will have the perfectly sized template to create your design on, no matter which part of the process you find yourself in need of a resize!
Step 4: Save Your Design
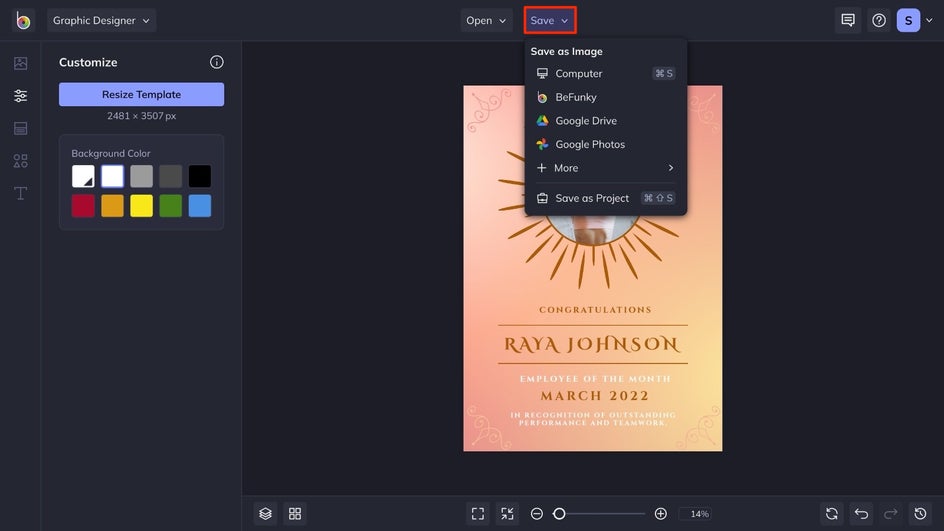
Once you are satisfied with the size of your design, and where the elements are placed click on the Save button at the top of the interface. Choose your desired location, and you're done! And don't forget that you can save it as a BFD to continue editing later.
Resize Your Design in Just a Few Clicks
It is easier than ever to resize your designs for use on multiple platforms. With just a few simple steps you can maintain your design, and resize it without losing any of your content! Go with a template design for Instagram and resize it for all your other social media platforms in seconds with BeFunky’s Graphic Designer, click here to get started.