The Best Tools for Editing Product Photography
eCommerce is more popular than ever before. Online shoppers cannot hold the product in person, feel the materials, or determine the quality of your product in a tangible way. Since online shoppers can only rely on product descriptions and images when deciding on their purchase, it is vital that your business’ product photography showcases your product with its best features in mind. No matter, if you are selling on Etsy, Depop, or your own online store, photographing and editing your product photography, is crucial to increasing your sales.
BeFunky’s Photo Editor has everything you need to edit those product shots easier than ever. In fact, our AI-powered tools are so intuitive, that they can automatically detect the product in your image and let you edit it independently of the background itself. There are certain features and tools that BeFunky has that I wish all editing platforms had. Whether you’re just starting out in the eCommerce world or you’re looking for an easier way to edit your product photos, we are going to highlight BeFunky’s editing capabilities so that you can edit the best product photos for your shop.
Selectively Edit Your Product Photos With AI
We made our intuitive AI technology available in most of these tools, which means that in a single click, you’ll be able to automatically detect the product in your image and apply the editing tools independently to either the product itself or the background. Need to balance the exposure of your product and keep the background as-is? Or color correct the background only? Any of the tools in our Edit menu that have an Erase mode come with an Isolate Subject button. Select it to mask the product (or the background) and edit your selection.

These intuitive tools make it easier than ever to edit your product photography without having to learn or pay for complicated and expensive software – aka, most of these features are free. If you're looking to get creative with your product photography for ads and otherwise, you can even use this masking technology with most of our Photo Effects, Textures, and Artsy Effects! Here are some of our favorite ways to selectively edit our product photography:
Edit Exposure and Contrast
If your product looks dark or dull, you can selectively edit its exposure, temperature, saturation, contrast, and more. In fact, you can use any of the Essentials tools in the Edit tab selectively.
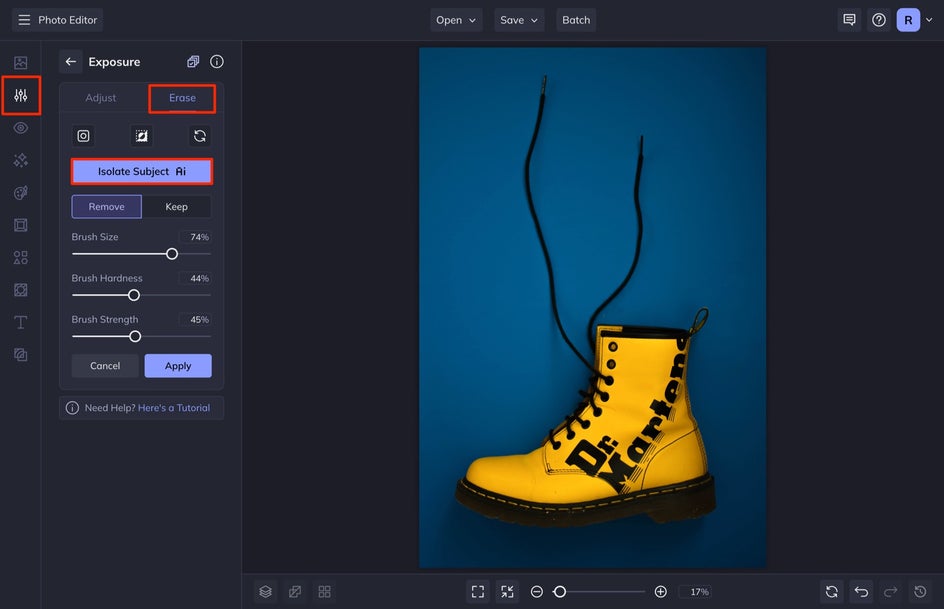
In any of these tools, select the Erase tab and then select Isolate Subject. You can then go back to the Adjust tab and make any adjustments to the brightness, contrast, shadows, etc. These should all be subtle changes, but the effects can look pretty drastic. The goal is to represent your photo accurately, but make it pop and give it the personality it deserves in order to correctly convey the product itself.
Remove and Replace Backgrounds
If your product itself looks great in your product photo, but you want to change the background maybe to enhance the product or change the overall vibe itself, the Background Remover tool is the right fit for you. If you want an in-depth tutorial for this tool, check out our article "AI Online Background Remover: Edit & Remove Backgrounds In One Click."
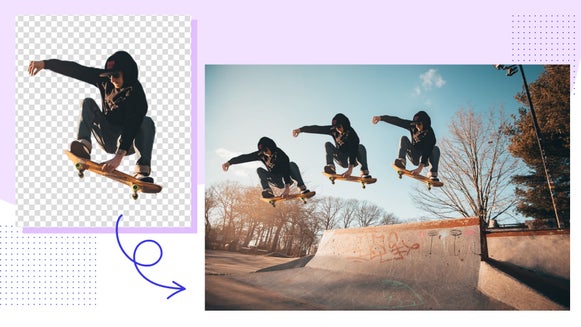
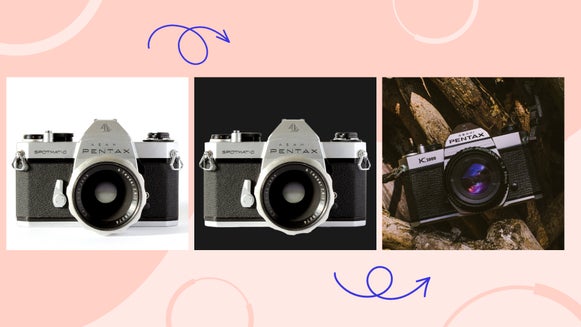
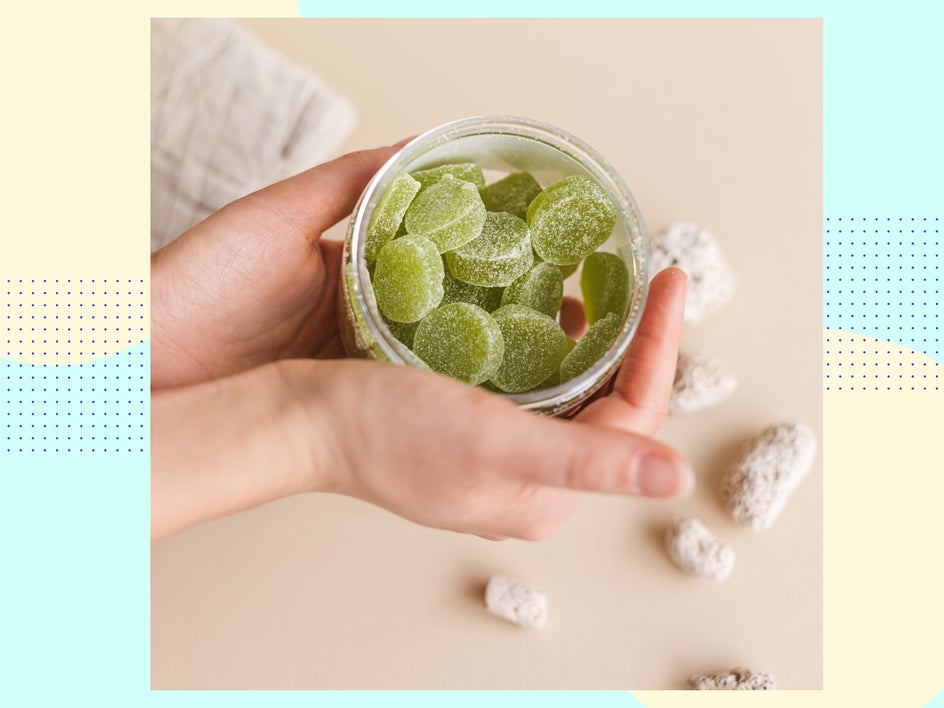
Our automatic Background Remover uses AI to detect the background around your product and replace it with a transparent background, any solid color, or a completely new image. This is a great option if you want to showcase your product in a lifestyle photo or use a former product shot to market a holiday sale with a relative background. You can truly do anything you're envisioning for your product shots, all in a few clicks! Take a look at how this simple product shot was turned into a potential marketing asset simply by changing the image background.


Some eCommerce sites, like Amazon, require pure white or transparent backgrounds to keep everything looking cohesive. Make sure you check the requirements of the platform you are using and use the Background Remover to ensure you meet those requirements.
Remove Distractions
With BeFunky's Object Eraser, it only takes a few seconds to remove any background distractions from your product photography. Whether it's an unwanted person, logo, or cluttered item stealing focus, this AI-powered tool makes it easy to clean up your shots with precision. Simply brush over the object you want to erase, and the tool will intelligently blend the surrounding background for a seamless result. It's perfect for creating clean, professional-looking product photos that keep all eyes on what you're selling.

Achieve Color Accuracy
Portraying a product’s color accurately in your online shop can actually be pretty tricky, especially if you do not have a studio with great lighting when shooting your products. Sometimes the color can look accurate on your camera’s screen, but then not translate well to your computer. It is important to edit these colors accurately to represent the color closest to how the product will look in person. Trust me, it will save you a lot of customer service emails in the future.
These might be slight adjustments you are making to the colors in your photo, but they will make a difference when online shoppers are deciding if your product will work for them.
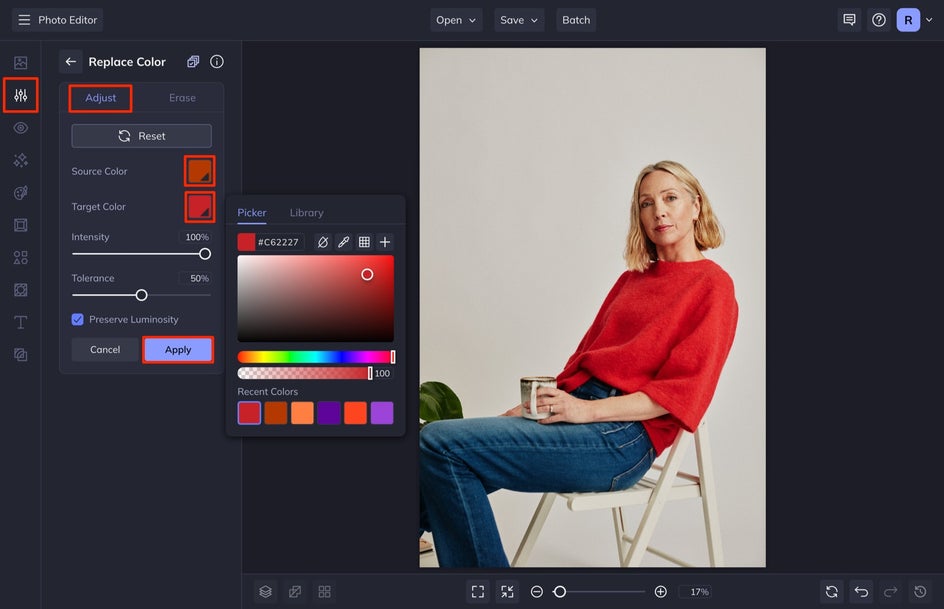
To do this, select the Replace Color tool from the Edit menu. Select the Source Color that you want to change and then select the Target Color, which is the color variation you want to showcase. When using this tool for color accuracy, you are going to choose a target color that is the closest to your product in real life in good lighting.
If you need to clean up any areas, enter the Erase tab and then select Isolate Subject. You can then switch between the Remove and Keep tabs to paint over the section of your image you want the new color to be applied to, or remove the color from sections you need to clean up. I make sure to keep my Brush Hardness at or below 50% and Brush Strength between 50-70%. This way it will slightly paint the target color onto your product and it will look more natural.
With the ability to isolate the product in your image in just one click, every color adjustment you make will only be applied to the product without affecting the rest of the photo. If you want an in-depth tutorial on this tool, check out this article: "Replace Colors In Seconds With the Replace Color Tool."
How to Selectively Edit a Product Image
If you are wondering how to selectively edit certain parts of your image without editing the other parts, we are going to go over a quick Photo Editor tutorial to show you how. In the Edit tab, you’ll find all the tools you need to make your product pop in your product photography. From here, you can adjust the exposure, colors, sharpness, and more.
To get started, head to BeFunky’s Photo Editor and upload your photo by selecting Open and then Computer at the top of the screen. You can also drag and drop an image file directly onto the canvas, which is my preferred method.
Step 1: Edit the Background
There are many ways to do this process, but for this photo, we are going to start by adjusting the background of our image.

To do this, select Edit and then Background Remover from the Remove/Replace tab. This AI tool will automatically get to work to detect the subject in your image.
Once it does, you can select Change Background from the BG Remover menu. You can then replace the background with an Image or a Color. We are going to choose a gradient image that will make this product pop. To do this, select Image.
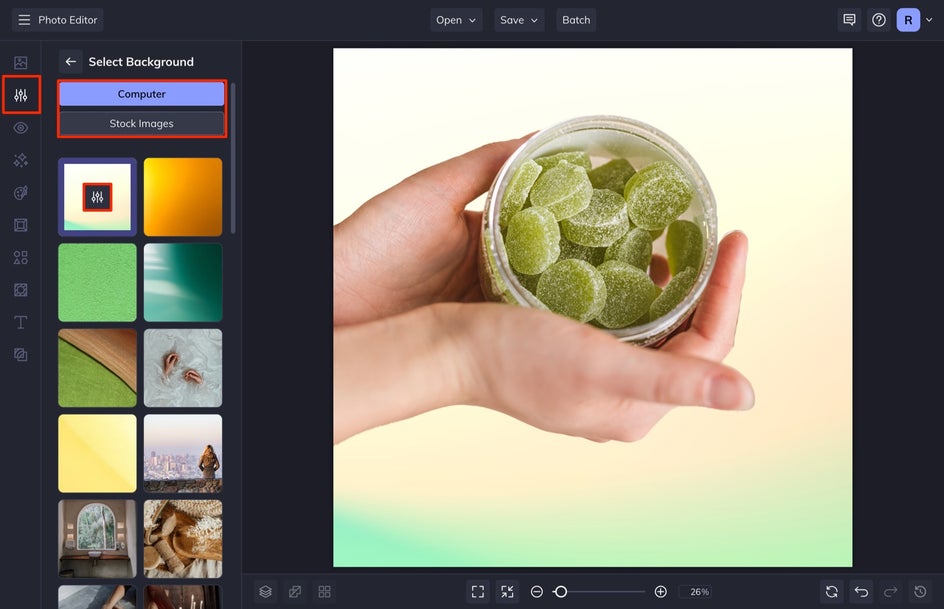
You can replace the background of your image with a photo you already have or you can replace it with one of the thousands of stock images we have by selecting Stock Images. Once you have your image uploaded, select the image to set it as your background. You can also click on the image thumbnail to access the image settings and Edit Background for further editing options.
Once you are done, select the back arrow until you reach the main BG Remover menu, and then select Apply. It is okay if your original subject doesn’t yet match the background’s coloration. We will adjust that next.
Step 2: Isolate the Subject and Make Adjustments
Any tool that has an Erase tab will give you the option to use the Isolate Subject option, allowing you to independently edit the selected subject, separate from the background itself.
We are first going to make adjustments to the exposure. It is important to make sure that the product itself is highlighted when you are editing. This way, the eye will be focused on the product first.
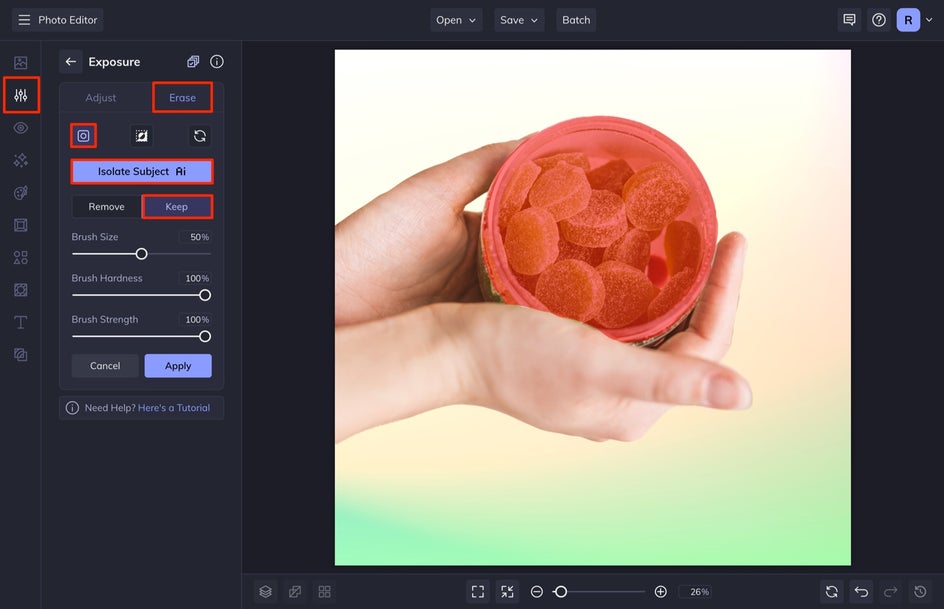
To do this, select the Edit tab in the left-hand menu and then select Exposure from the Essentials drop-down. Select the Erase tab and then select Isolate Subject. Make sure that the Show/Hide Mask is on so you can see if you need to make any adjustments to the selection. We need to here, so we are going to use the brush, select the Remove tab, and then brush over the area of the mask that we want to remove. Once you have the subject masked, any adjustments you make will only be applied to the selected mask.

Head back to the Adjust tab to make your edits. The goal here is to make adjustments to the subject, or product, so that it blends with the same lighting as the background. We adjusted the Brightness, Contrast, Highlights, and Shadows. When you are finished, select Apply.
With this same process, you can selectively adjust the Color, Tint, and more to your subject. We are going to quickly adjust the Color. We used the same method as above to Isolate Subject and then apply the edits in the Adjust tab. Do this for each tool you want to use on your isolated subject. Remember, the goal is to make your product pop!
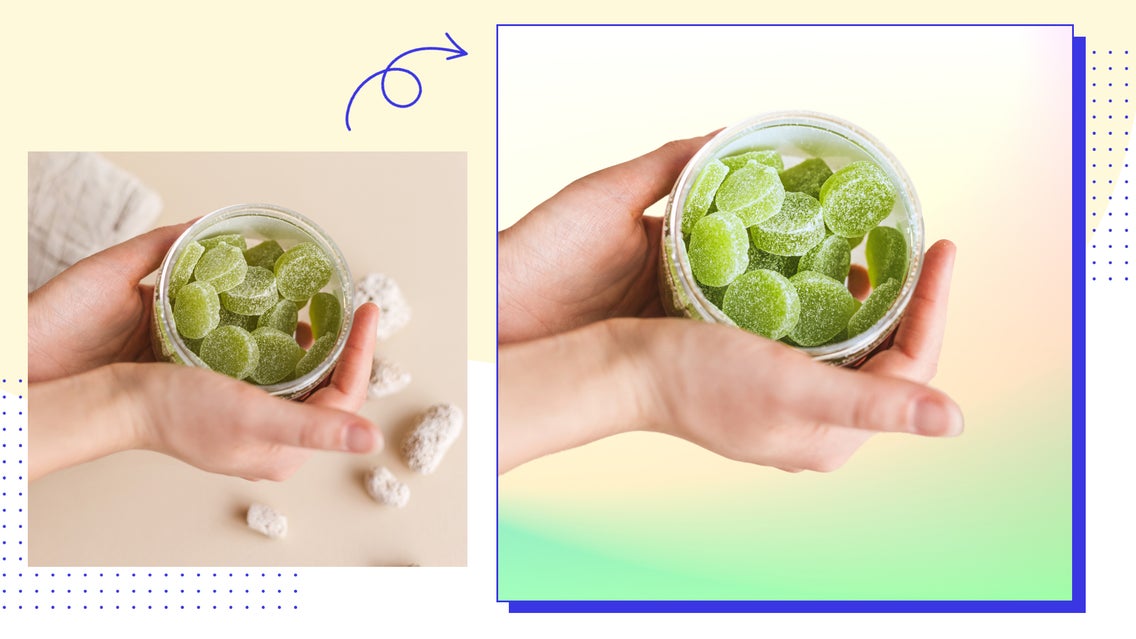
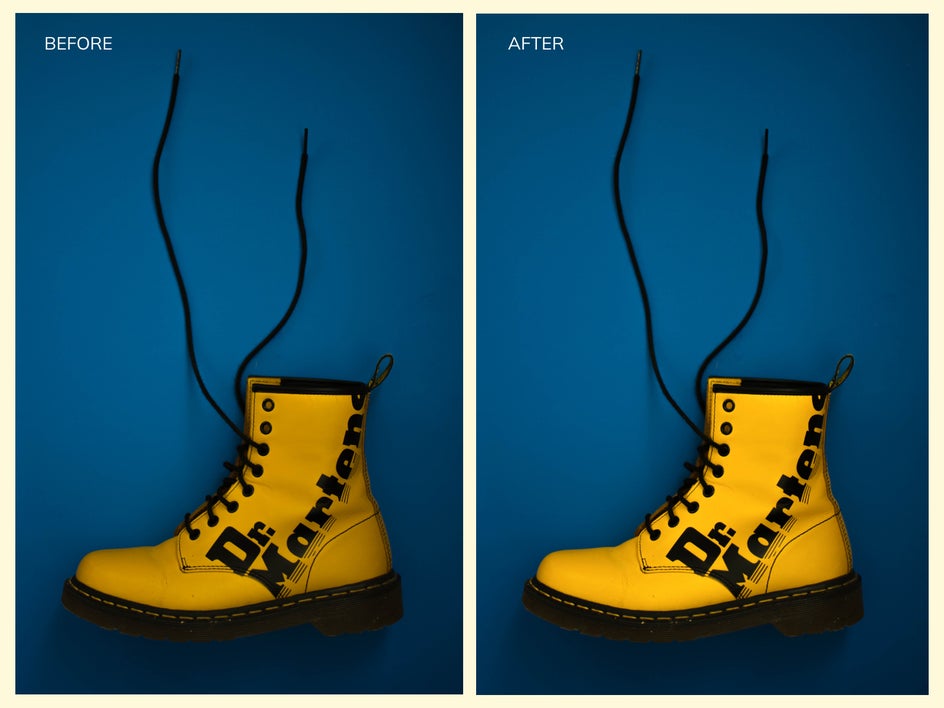
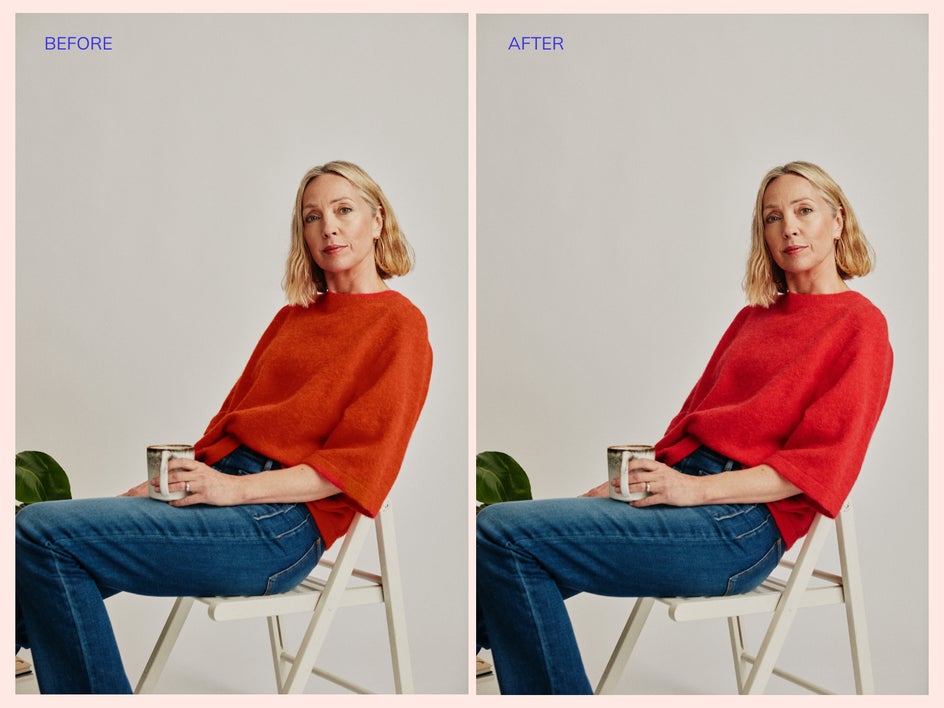
Check out the before and after of this product shot and see how you can turn a product photo into an enhanced product shot simply by changing the background and making some adjustments in the Essentials tab.

Edit Product Photography From Start to Finish
With BeFunky, you've got everything you need to edit product photography. You can make basic edits like adjusting background color, or you can get as complex as changing the background to a new image and making a marketing post straight from BeFunky’s Photo Editor. These amazing tools and more are ready to be put to use for everything product photography-related.