How to Add a Metallic Overlay to Your Design Elements
One of the most popular graphic design trends over the past few years has been to add metallic elements, whether it be through text, icons, or patterns. Doing so doesn’t just look great, but is also a fantastic way to draw your viewer’s eye to the most important aspects of your design.
In the past, you needed some pretty fancy design skills to achieve this look – but not anymore! Thanks to BeFunky’s handy Clipping Mask feature, knowing how to add metallic overlays to your graphic designs is so easy. Keep reading, because we’ll show you how!

Metallic Graphic Design Inspiration
Every good graphic design uses shapes, color, and typography to catch the eye and convey a powerful message. Adding metallic elements into your designs is a great way to make use of each of these elements while adding a boost in texture to truly capture attention.
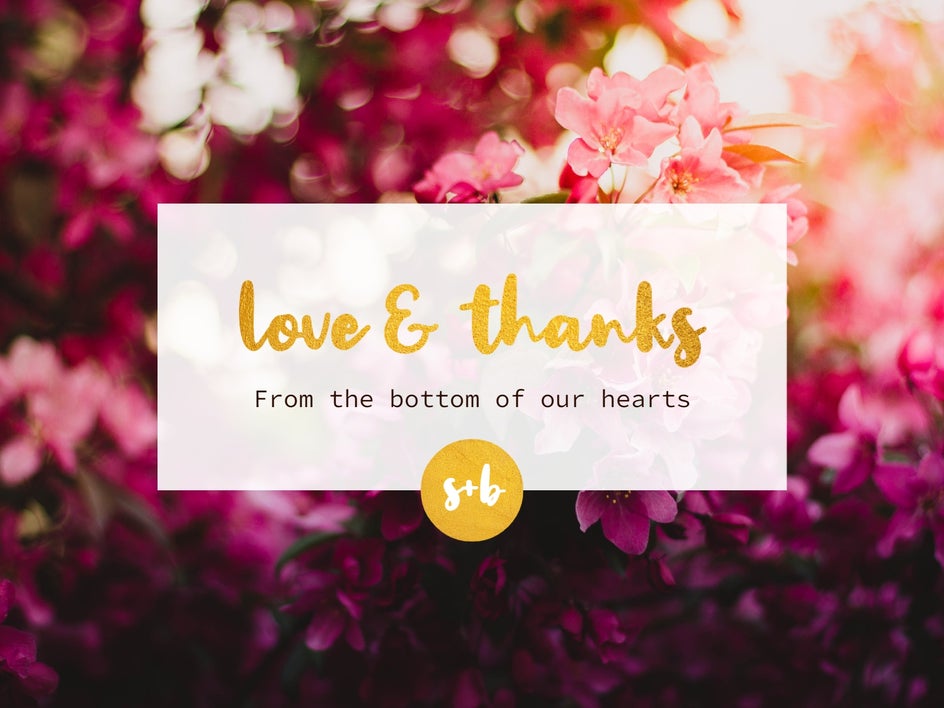
From elegant stationery and glittery greeting cards to grungy posters and more; you can achieve just about any look you’re going for through the use of metallics in your projects.
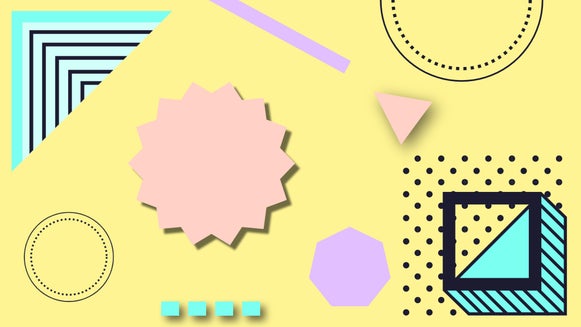
Metallic Patterns
Incorporating metallic patterns into the background of your designs can take them from flat and ordinary to shiny and extraordinary! It’s a great way to add extra texture and make it more eye-catching.
You can use BeFunky’s Graphics tab to find the perfect vector graphics and icons to turn into a patterned background. From crisscrossed lines (like in the example above) to repeating icons, you’ll find everything you need to get the pattern you want. Then, add a metallic texture and see how it shines.
Metallic Text
Incorporating metallics into the text of your designs can make it really stand out. If you’re wanting to highlight a specific message, try adding a metallic touch to your textboxes, for example. Alternatively, you can add a metallic texture to just one word or phrase, as we’ve done below.
BeFunky also has a wide range of free fonts available to use in your graphic designs, and any one of them can be made metallic. If you’ve got a specific font in mind that’s not in our library, you can easily add it and start designing with it right away.

Metallic Icons and Graphics
Adding metallic details to the supporting graphics in your design is another quick way to add extra flair to your creations. Our Graphic Library has an endless array of vector graphics and icons to choose from. No matter what kind of design you’re working on, you’re sure to find the perfect graphics for enhancing it!
From basic shapes to ultra-specific graphics for every theme, we’ve got it all. Just type your search term into our Graphics Library search bar and you’ll find what you’re looking for.

How to Create Metallic Design Elements Using BeFunky
Now that you’re feeling inspired, it’s time to try your hand at creating your own metallic design elements. To get started, head to the Graphic Designer.
Step 1: Choose a Template or Blank Canvas
Firstly, choose if you’d like to add a metallic design element to an existing template or a blank canvas. For this tutorial, we’ll be showing you how easy it is to add metallic overlays to a predesigned greeting card template.
[metallic-graphic-designs-tutorial-1]
When you find a design you wish to edit, just click on it then select Use This Template.
[metallic-graphic-designs-tutorial-2]
Step 2: Upload Your Metallic Overlay
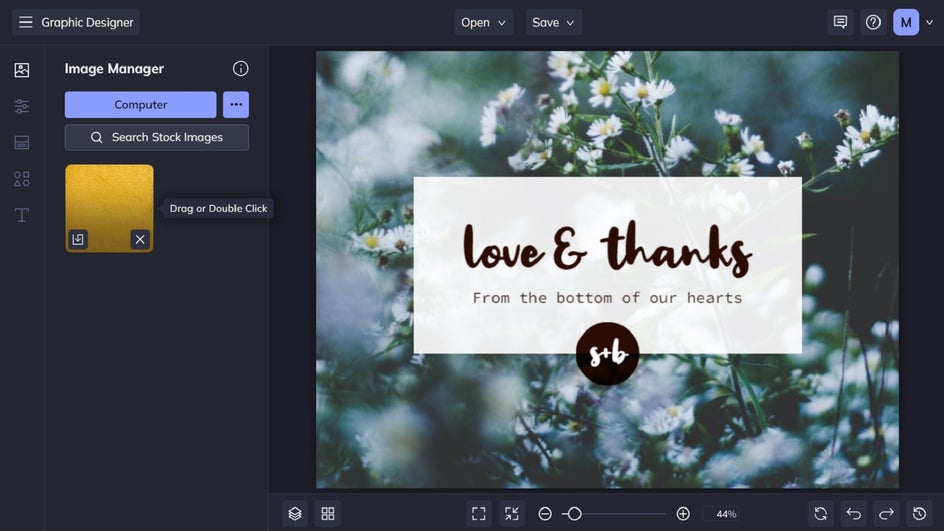
The next step is to choose your metallic overlay or “clipping mask”. This is an image featuring your chosen metallic texture. To do this, navigate to the Image Manager in the main menu on the left. If you’re using a metallic image from your own files, click Computer. Alternatively, you can click the button with the three dots (“…”) to upload a metallic image from your BeFunky account, Google Photos, or Google Drive.
[metallic-graphic-designs-tutorial-3]
If you wish to use a metallic stock image instead, then there are a ton to choose from within our Stock Image Library. Just click Search Stock Images to access this, then type your search term (such as “metallic”, “glitter”, or “gold”, for example) into the search bar in the top left.
When you see a metallic image that takes your fancy, simply click on it to select it. Any image you select will then be added to your Image Manager to use within your project.
[metallic-graphic-designs-tutorial-4]
Step 2: Overlay Your Metallic Photo Onto Your Element
Now, this is where the magic happens, as you’ll be using your metallic image(s) from the previous step as a clipping mask. Our clipping mask feature makes it easy to fill text or graphics with images because there's no need to cut out images to fit complex shapes. It’s therefore the easiest way to make your design elements metallic!
To use the clipping mask feature, drag and hover your metallic image thumbnail from the Image Manager over your design element until it turns blue. Then, drop it to fill the element.
When you do this, the Image Properties menu will pop up.
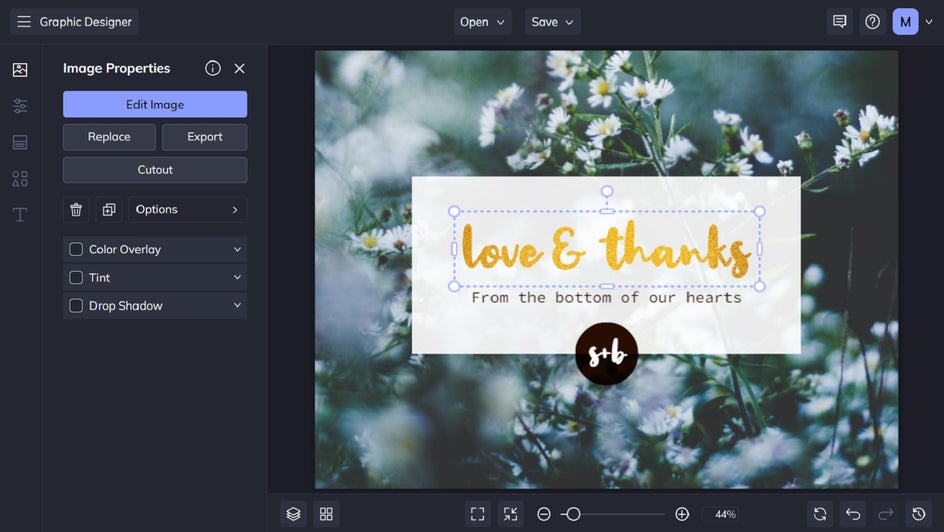
You can continue this process until you find the perfect image to use as your metallic clipping mask.
Pro Tip: Double-click your clipping mask to enter into edit mode, where you can stretch and manipulate the metallic texture to suit your design element, if necessary.
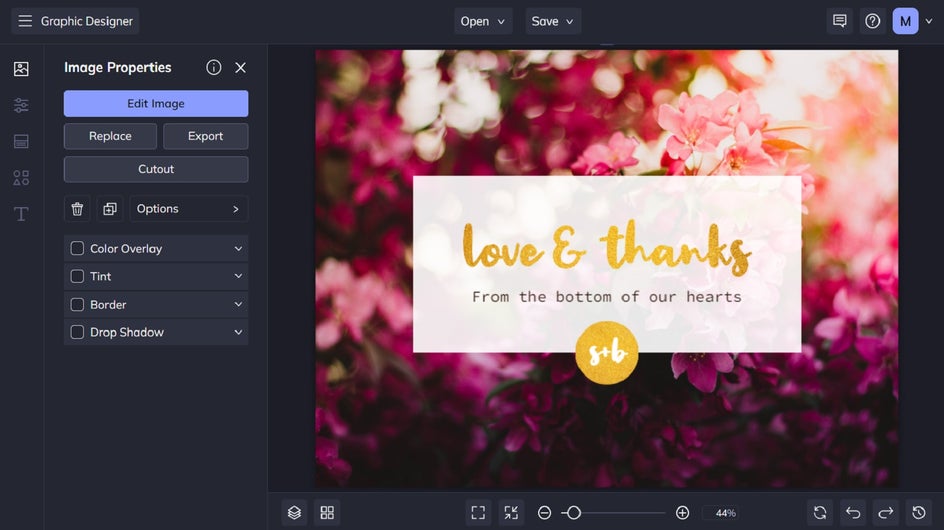
Step 3: Make Any Other Adjustments Necessary
Before you finalize your design, feel free to adjust any existing elements on your template or add extra elements if needed. For example, you can add or edit text or graphics. Additionally, you can swap out any existing photos or even change your template’s background color. In this example, we’ve swapped out the existing background photo.
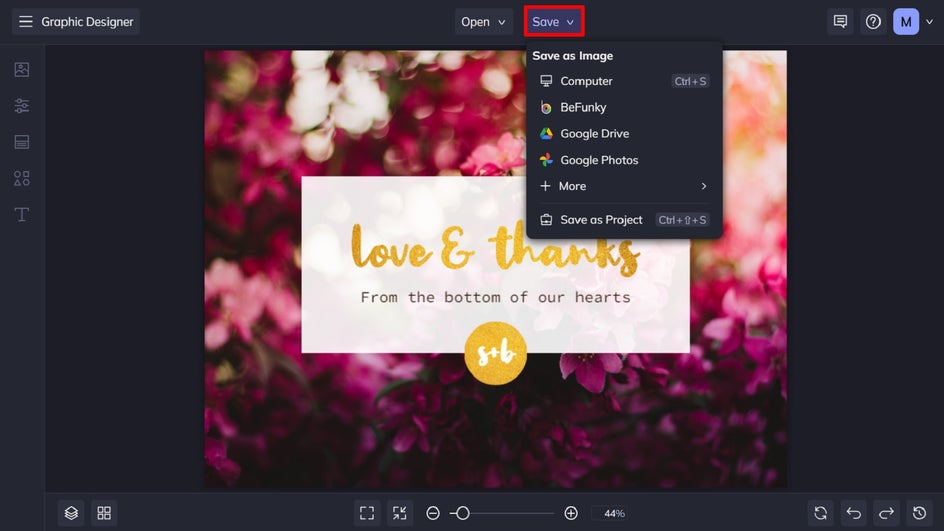
Step 4: Save Your Metallic Design
When you’re happy with how your new metallic design looks, it’s time to save it. Click Save at the top of the screen, then select your desired save location.
Metallic Overlays – the Easy Way
See how the metallic elements really make the overall design pop? The process is simple but so effective!
Who would’ve thought you could create metallic graphic designs within just minutes? BeFunky’s Graphic Designer, along with the easy-to-use Clipping Mask feature, makes doing so a breeze!
Ready to create your own metallic design elements? Check out the Graphic Designer to see what you can create.