


How to Design a Beautiful Menu for Free
Making a menu should be simple, right? You receive one at every restaurant, glance at one at every bar, and are presented one at every wedding. But when you actually sit down to design your own menu, you may realize you don’t know where to start! This is because menus need to be extremely user-friendly, provide lots of information, and fit the style of your restaurant or event. Plus, they must achieve all this while remaining aesthetically pleasing. Creating a menu is such a difficult balancing act that a professionally designed menu can cost upwards of $600 – and, in some cases, over $2000. But don’t despair! In this tutorial, we’ll show you how to create your own amazing-looking menu for free, including our best menu-writing tips and how to customize professional menu templates exactly to your liking.
Maybe you need a printable menu for your next pop-up, or want to elevate your next dinner party. Maybe you’re finally opening up your dream restaurant, or simply want to make room in your wedding budget. Whatever the case, the menu templates and tools available in the Graphic Designer make it easy to create an original menu.
How Do I Start Writing a Menu?
So how do you make a menu from scratch, even if you’ve never done it before? Well, as always, getting started is the hardest part. Our first tip is to write everything down, just to get some momentum going. What food will be on your menu? What drinks? If you’re creating a menu for a restaurant, how do you want to organize it: By course, by meal (breakfast/lunch/dinner), by type of food, or something else? If it’s for an event like a party or wedding, will there be courses? How many?
Then, decide how much detail you want to go into, and write the descriptions for your menu items ahead of time. This will make the design process that much easier, because you already know how much space you’ll need on the page.
It’s always a good idea to look at other menus for inspiration, including those at your favorite eateries. What menus speak to you? Why is that? How might you achieve something similar? Your needs will be different if you’re a paid service, like a restaurant or catering business, or if you’re hosting an event like a dinner party. Try browsing Google or Pinterest for the type of menu you want to make, and figure out what kind of menu works best for the kind of service or event you’re providing. Once the text of your menu is ready and you have a good idea of what you want your layout to look like, you’re already more than halfway there!
How to Design a Menu Layout
As we mentioned, looking at other menus is one of the best ways to determine your own menu layout. Consider the intention behind your favorite menu designs and you’ll be able to emulate those in your own layout. Never copy someone else’s menu directly, but don’t be afraid to take inspiration from multiple sources to create your perfect menu!
Whether it’s a hosted event, a catering business, or a restaurant, you’ll probably have at least three parts to your menu: The appetizers, the main courses, and the desserts. These sections make the simplest starting point for your menu.
When it comes to hosting events, where your guests don’t need to pay or have paid in advance, there is typically a fixed menu with three to four courses: The appetizer, the main course, and the dessert. Because there aren’t many options, you can afford to have a top-to-bottom layout, with food listed in the order it will be served. This is also the case in restaurants with a prix fixe menu.
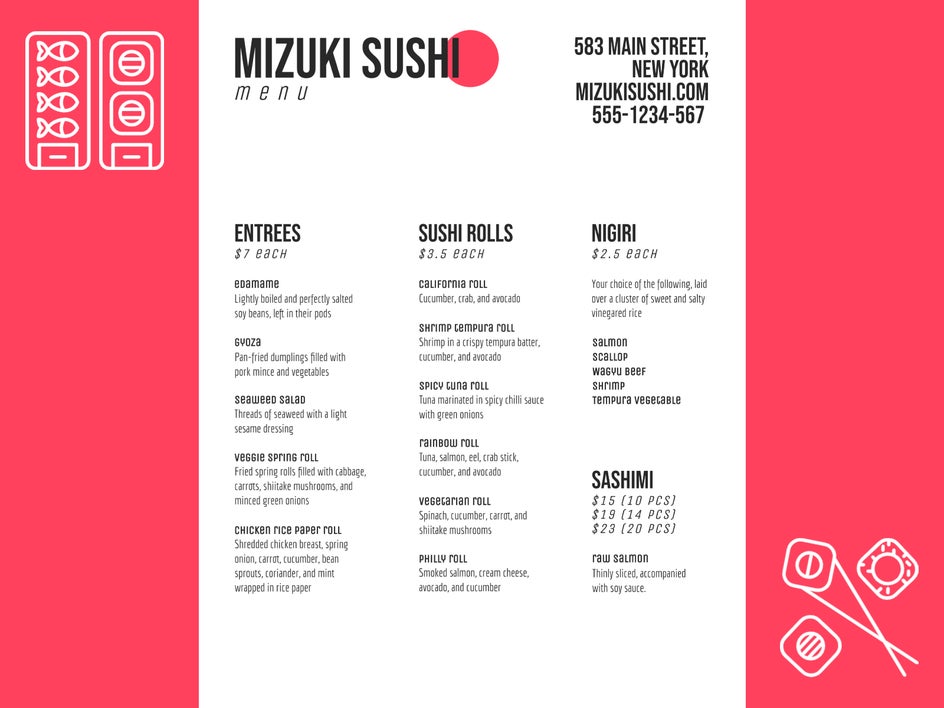
When it comes to standard restaurant menus, organization is key. Plenty of research has been done on the psychology of menu design, and the recommended layout for a standard menu is known as the “Golden Triangle.” The Golden Triangle is based on the fact that your customers’ eyes will be drawn first to the center of your menu, followed by the top right corner, and then the top left. Rather than assuming your customers will read your entire menu in detail, you can put more profitable offerings in these areas of the menu, and make better sales overall.
Aside from the Golden Triangle, people’s eyes generally scan from left to right, and they are expecting similar foods to be grouped together. Keep these tips in mind to help you create the most user-friendly menu possible!
Where to Download Free Menu Templates
One of the simplest and cheapest ways to create a menu is to use a template, but these often require expensive downloads or complicated software to use – or, if they’re free, they don’t look professional or unique enough for your needs. With the Graphic Designer, you have access to free, professionally designed menu templates that are fully customizable. Choose a free template and edit it to your liking, or scroll through the dozens of other menu options designed for restaurants, weddings, bars, and more.
These templates are easy to edit even without any graphic design experience. In addition, you’ll have a huge free library of fonts, stock photos, and hand-drawn graphics at your fingertips! The Designer also has hundreds of tools in case you have more serious customization needs. Whatever you’re looking for, you’ll be able to find it all in one place – and you won’t have to download a thing until you save your finished product.
How to Design the Perfect Menu
If you’re not already a seasoned graphic designer, then the perfect menu starts with the perfect template. And luckily, the Graphic Designer has dozens to choose from! Once you’ve picked your template, you can customize the fonts, images, graphics, and even the layout to your needs. All it takes is five steps from start to finish.
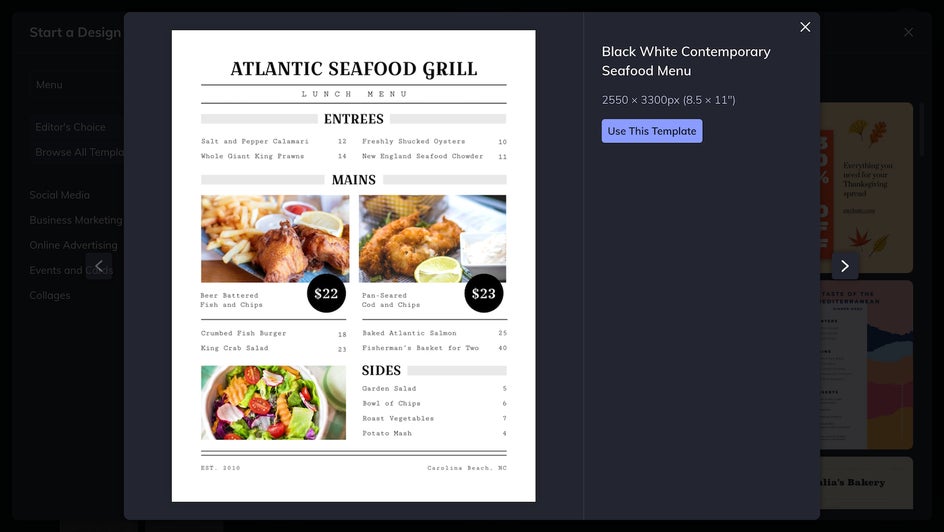
Step 1: Choose Your Menu Template
The Graphic Designer has templates for restaurants, bars, weddings, and coffee shops, all of which can be customized for any business or event. To access them, just type “Menu” into the Templates search bar.
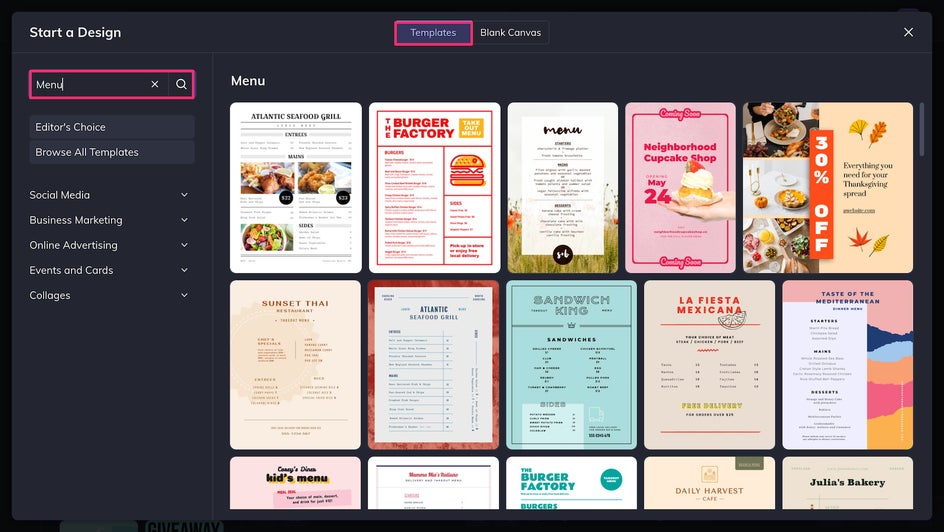
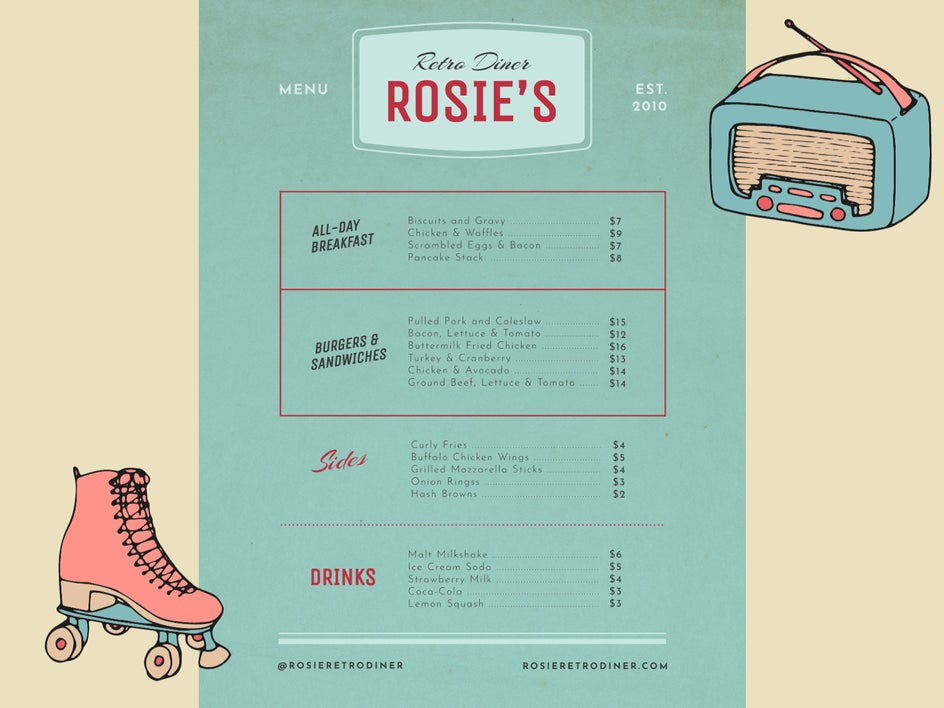
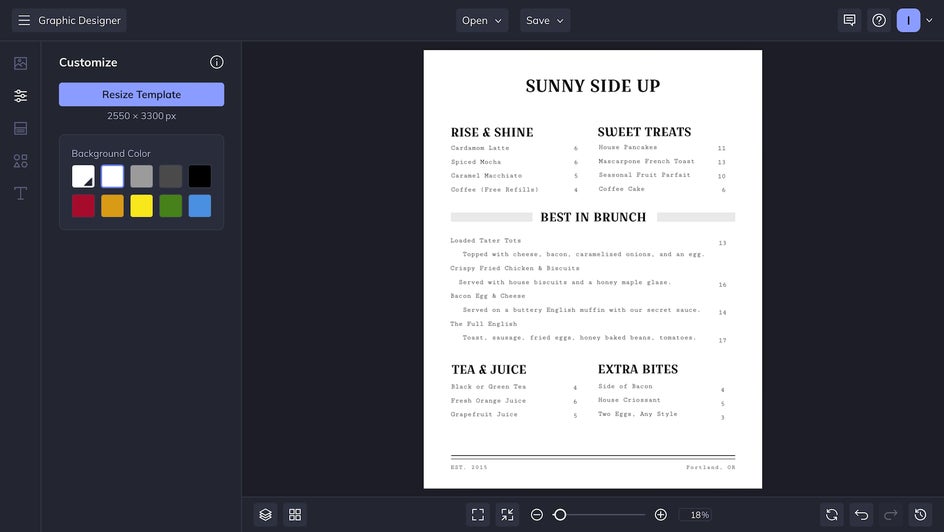
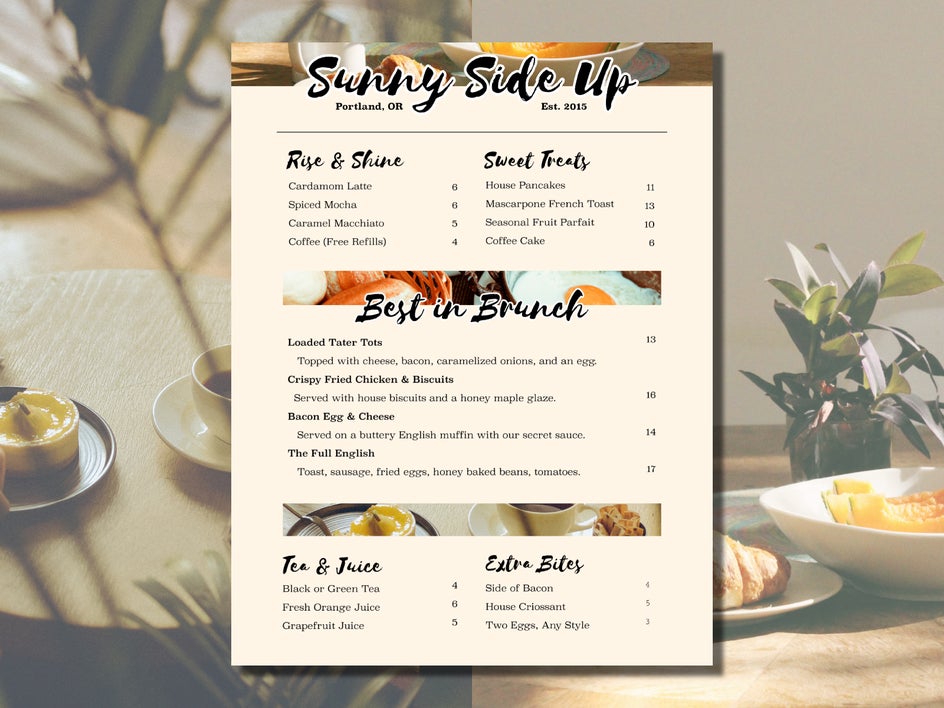
Today we’re going to be customizing a free menu template for a brunch restaurant.
Step 2: Customize Layout and Text
To rearrange the layout of your menu, just click and drag elements to wherever you need them to be. Feel free to use filler text while you edit. Don’t forget to use the blue guidelines to line everything up.
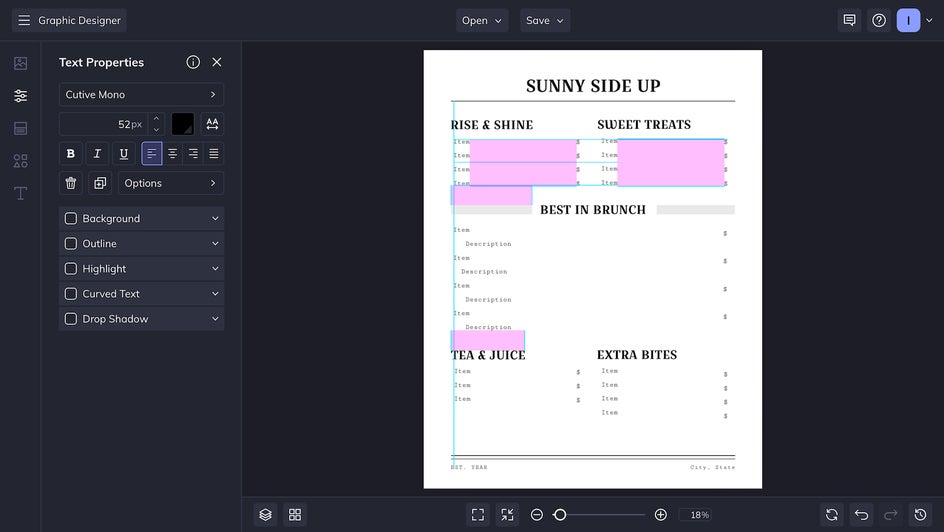
Following the Golden Triangle rule, we’re putting our main offerings in the center of the page, secondary entrees in the upper right, and our high-profit margin drinks in the upper left corner. Once the layout is finished, we can add our own text.
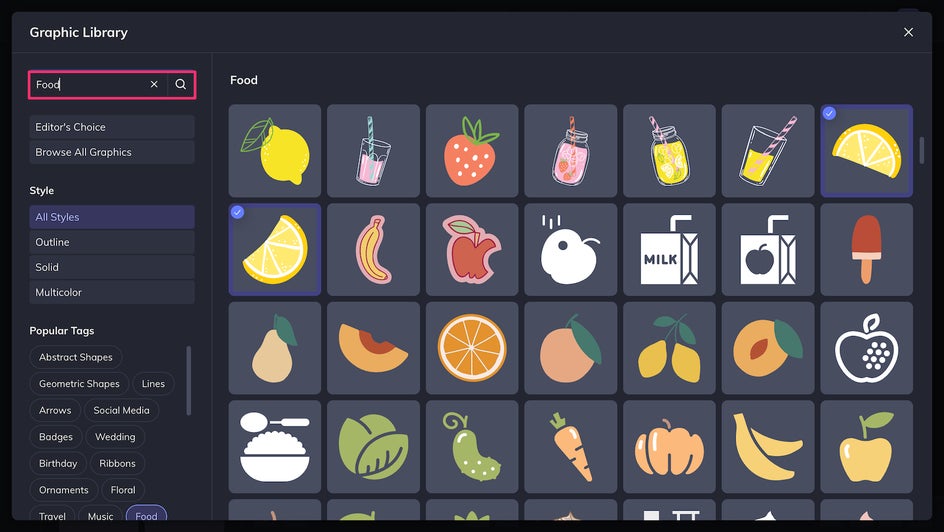
Step 3: Add Graphics and Images
While we don’t need images of any particular dish for this menu, the page should still look unique and visually interesting. The Graphic Designer includes access to thousands of free stock photos and graphics. You can search for relevant graphics in the Graphic Library, accessible by clicking the shapes icon on the left-hand side. Here are some beautiful hand-drawn food graphics we could use for this menu:
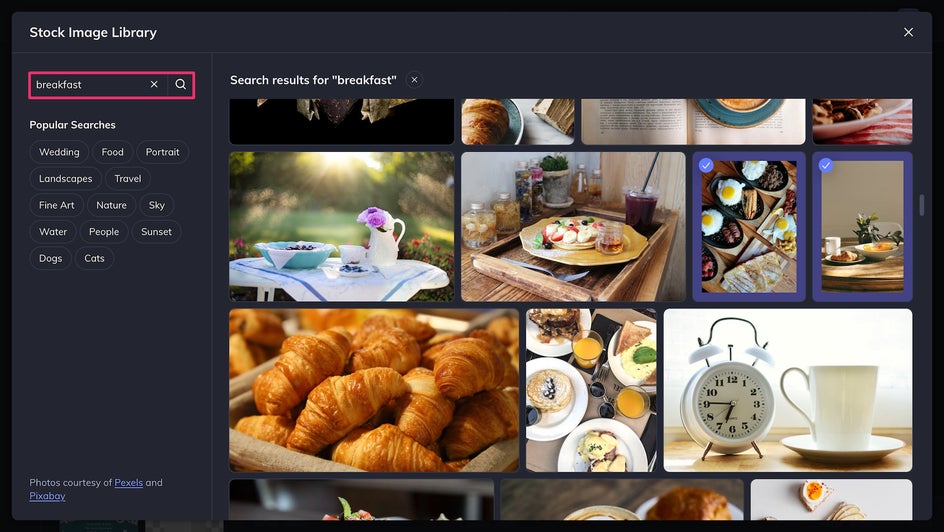
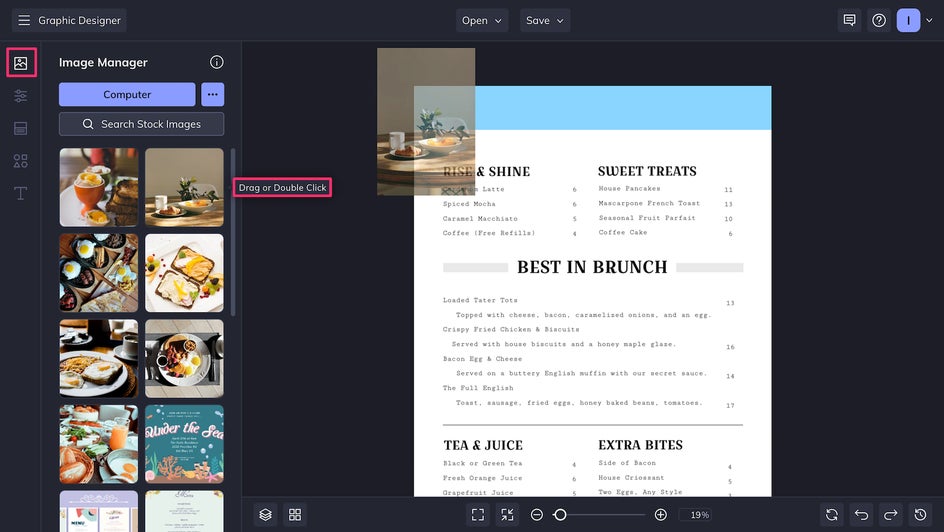
However, because of limited space, stock photos might work better for this particular menu. Just head over to the Image Manager on the left and click Search Stock Images. Here, looking up “Breakfast” gives us some beautiful photos that we can use as both dividers and decor.
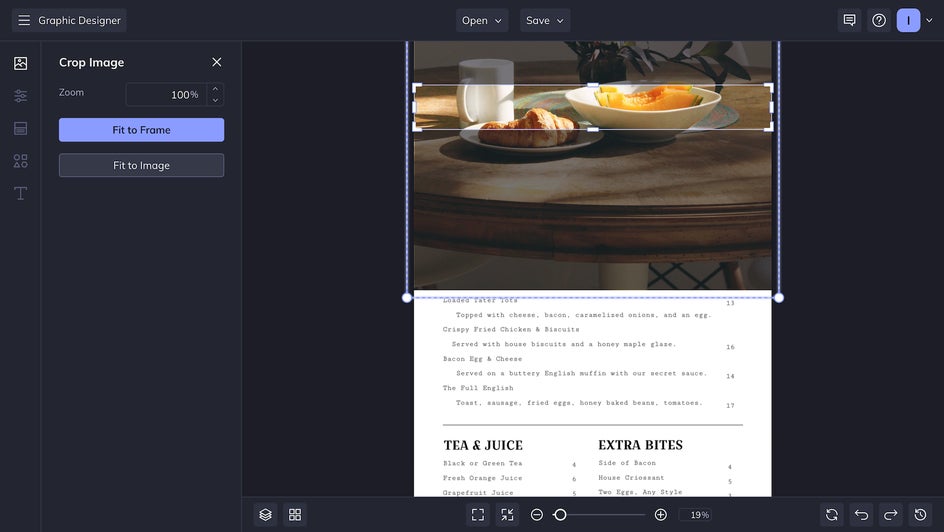
Clipping masks are a great way to simplify the process of adding images. By creating a rectangle in the Graphics tab, we can use it as a placeholder for any photos we might need, and easily try out different photo options.
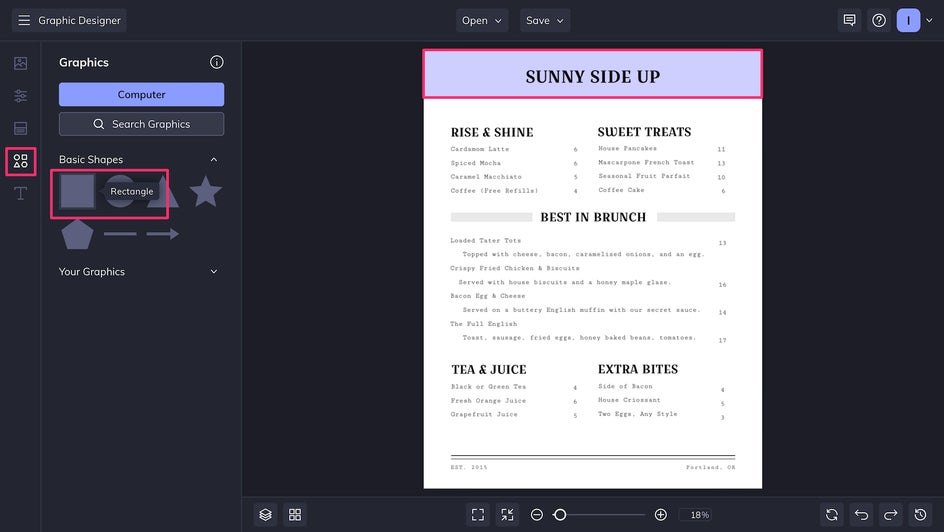
Without clipping masks, you’d have to crop and adjust every new photo you want to try out individually!
To edit which part of your image shows through the clipping mask, just double-click it and drag around to adjust.
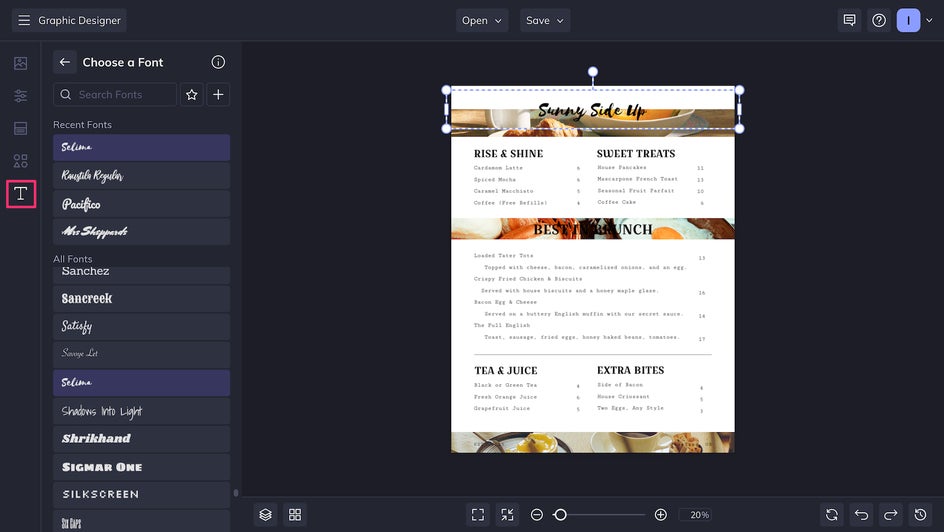
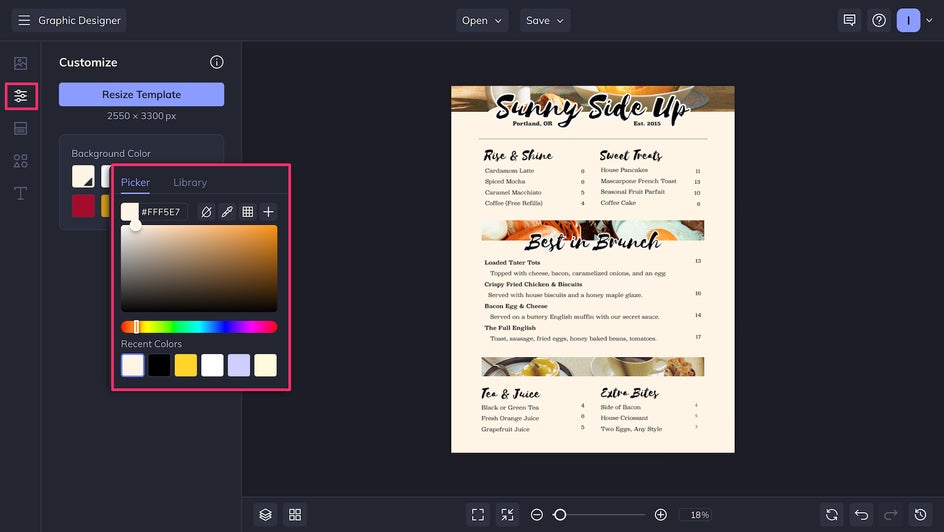
Step 4: Customize Fonts and Colors
The Graphic Designer has dozens of fonts to choose from, but you should stick to just two or three for a menu: One for section titles, one for dishes and descriptions, and possibly one more for the name of your restaurant/event. Focus on fonts that fit the style and energy of your restaurant. Our brunch restaurant is cozy and classic, so we used a handwritten cursive and traditional serif.
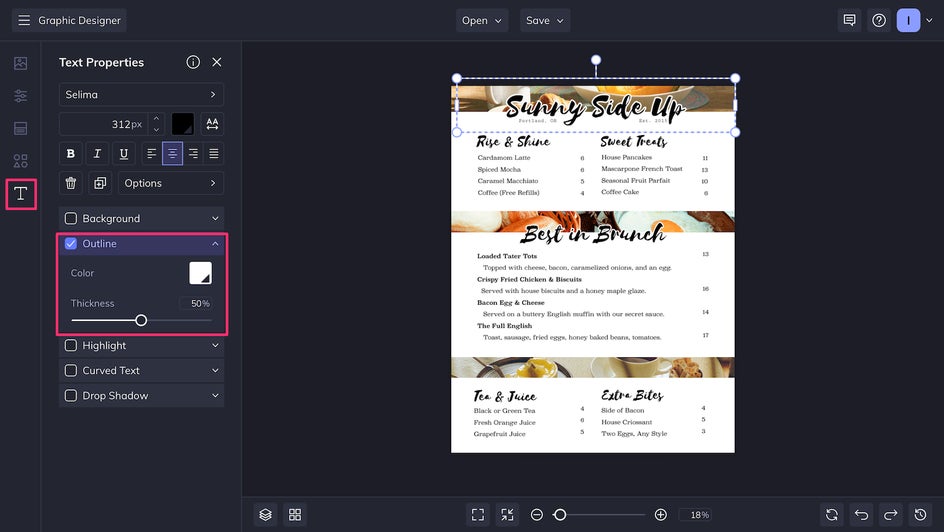
If your text isn’t showing properly because it overlaps an image or graphic, try using an outline, drop shadow, or even a highlight.
As a final touch, we’re going to change the background of the menu from white to a light yellow in the Customize tab. This is a slightly more unique choice and ties the whole page together!
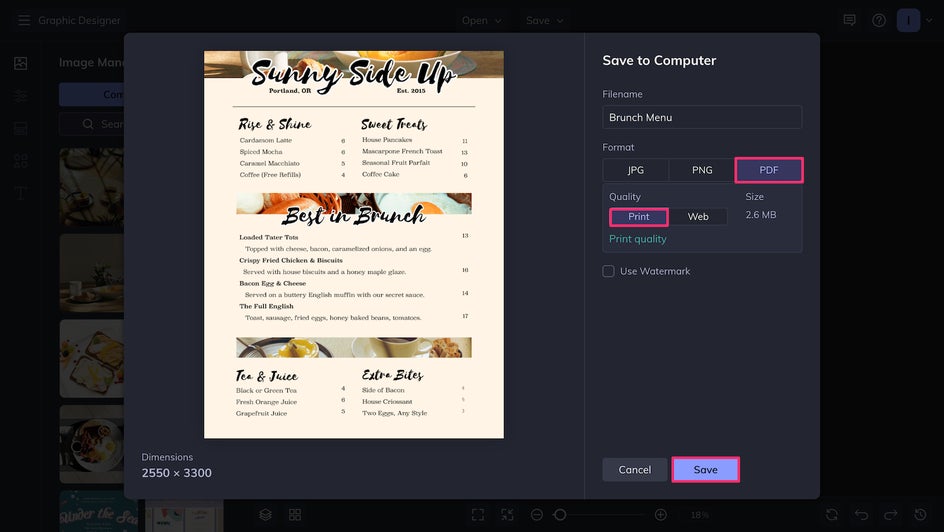
Step 5: Save Your Menu
To download your finished menu, just click the Save button at the top of the page. If this menu will be printed, make sure to save it as a high-quality PDF! Saving as a PNG will work better for online menus.
And that’s it! In just a few minutes, without spending a cent, you’ve got your very own menu. This same process can be used for any type of menu: Dinner parties, bars, cafés, weddings, market stands, and more. The sky’s the limit!
Design Your Own Menu for Free Today
Whether you need a menu for a small business or a big event, the Graphic Designer’s menu templates have you covered. In just five easy steps, you’ll have a finished menu at your fingertips that’s tailor-made just for you! Just because it’s free doesn’t mean it can’t look amazing. Try creating a menu for yourself today in the Graphic Designer.


