How to Turn Your Photo Into a Landscape Watercolor Painting

It’s no wonder that some of the prettiest watercolor paintings feature landscapes as the subject. The watercolor effect looks amazing with a variety of landscapes – beaches, snow-capped mountains, cactus-dotted deserts, and virtually everything in between. If you’ve ever wanted to convert a landscape photo into a watercolor painting but lacked the supplies (and maybe art skills as well), BeFunky’s Watercolor effects, located in the Artsy tab, are the easiest way to get the job done. Simply upload a photo to our Photo Editor, add a watercolor filter, and you’re done!
The best part about BeFunky’s collection of Watercolor effects is that they’re fully customizable, making it easy to create one-of-a-kind works of art with your photos. Want to learn how? Keep reading because we’ll show you everything you need to know!
How to Convert Photos to Watercolor Paintings
Follow along to start transforming your favorite photos (or stock photos) into brilliant watercolor paintings.
Step 1: Upload a Photo
First, head to the Watercolor category of the Artsy tab and drop your image file right onto the canvas. Alternatively, click the Open button to choose a file from your computer. You can also upload a photo from your BeFunky account, Facebook, and more from the same dropdown.
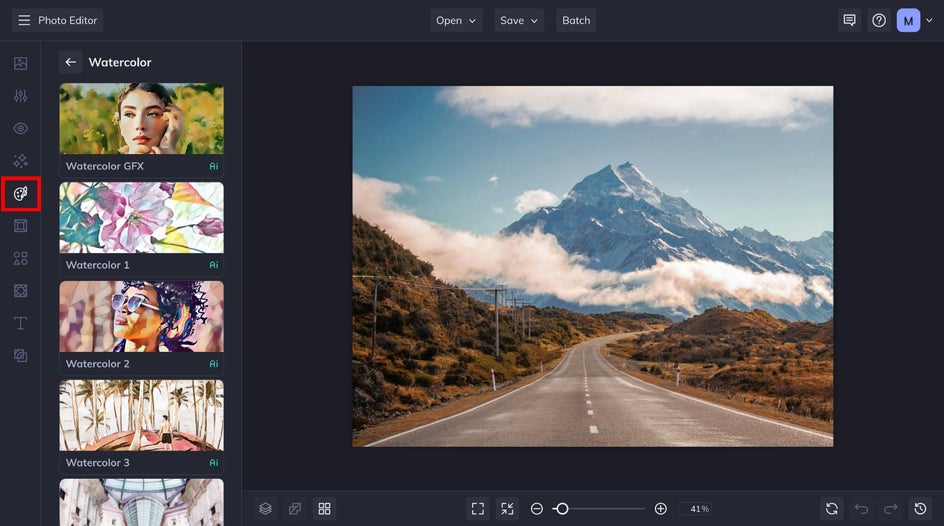
Step 2: Choose a Watercolor Effect
Each time you click on a different Watercolor effect, you’re able to preview what it looks like when applied to your landscape photo. Browse our assortment of effects and feel free to use the slider to increase or decrease the amount as you go along.

Step 3: Customize the Watercolor Effect
Once you find the effect you want to use with your photo (we decided that Watercolor GFX was perfect for this one), you can customize the effect even further by clicking on the Settings menu, which is located on the effect thumbnail.

Each effect will have its own unique Settings menu. In the Settings menu for the Watercolor GFX effect, for example, you’re able to adjust the Amount, Fidelity, and Variation. Simply drag the sliders to increase and decrease until the watercolor filter looks just right.
Once it looks perfect, click Apply to go from photo to watercolor painting.
Step 4: Save Your Landscape Painting
When you’re ready to save your image, click the Save button at the top of the Photo Editor. You’ll be presented with several options for saving photos – to your computer, BeFunky account, Facebook, and more.

Choose a destination, and follow the prompts to give your image a file name and export.
Photo to Watercolor Landscape Results
Worlds easier than breaking out the art supplies, right? BeFunky’s Watercolor Effects come with everything you need to get the look you want.


Photo to Watercolor Landscape Inspiration
Wondering what kinds of landscape photos work best with BeFunky’s Watercolor filters? The answer is pretty much any landscape – the more detailed the better. Here are a few of our favorite looks:
Expansive Nature Shots
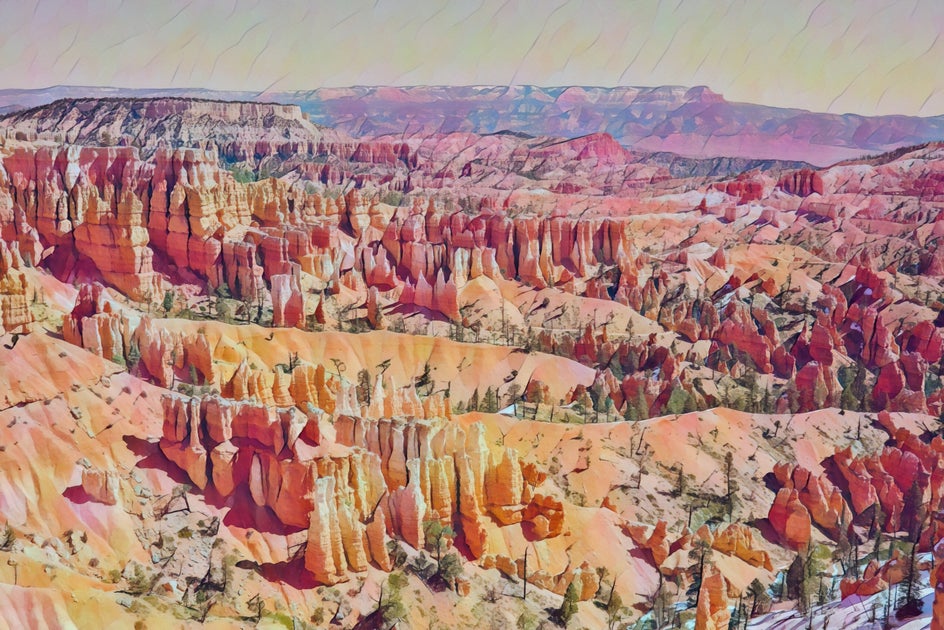
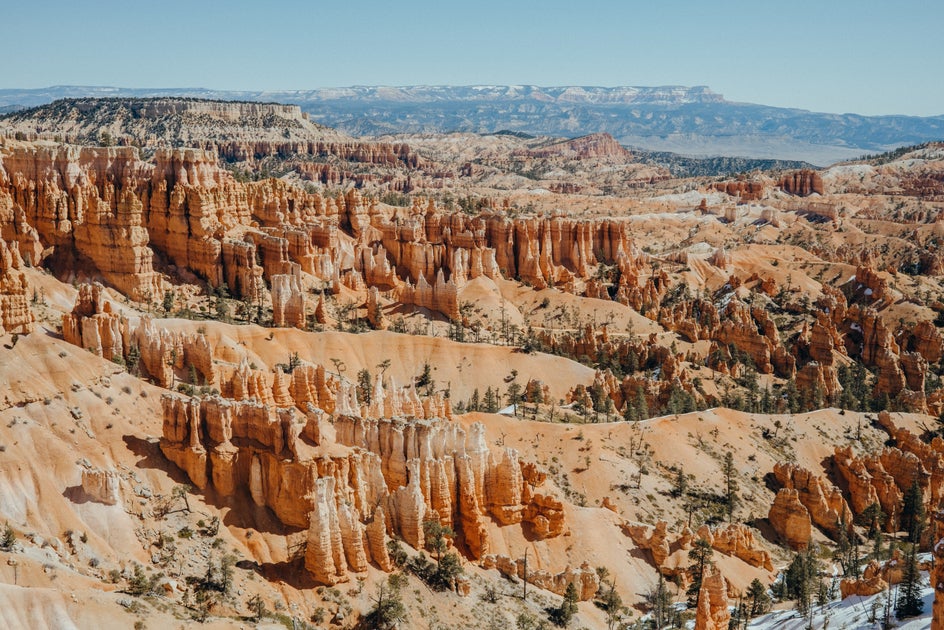
Enahance the natural wonder of an expansive nature shot with Watercolor DLX 2. This effect adds just the right colors to this desert canyon to transform it into a colorful work of art.
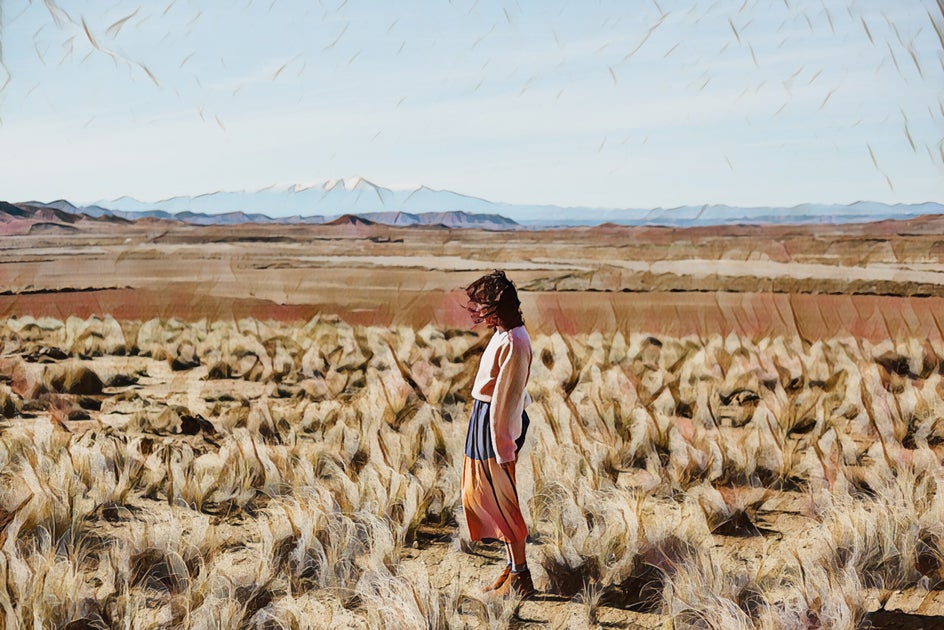
Roadside Landmarks
Going on a road trip? Turn those landmarks you love into watercolor landscapes with or without a person in the shot. Our Watercolor DLX 3 effect makes this one shine.

Vibrant Cityscapes
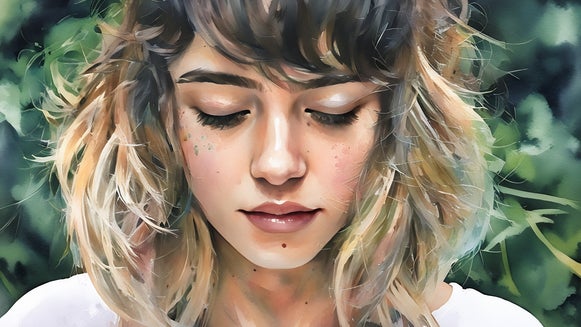
Hopefully, you have a long list of places you’ve been that mean a lot to you, and tons of photos to remember them by. Keepsake photos like that are perfect as watercolor paintings – like this one with our Watercolor GFX Effect.


Go From Landscape Photo to Watercolor Painting – In Seconds
Watercolor has always been one of the most popular mediums for recreating landscapes, and for good reasons too. The art style’s soft hues, whimsical brushstrokes, and ability to layer colors create the dreamiest scenes.
Ready to get started with these amazing Watercolor effects by BeFunky? Check out the Photo Editor to see the full collection of Watercolor effects for yourself!