Clarify Noisy Nighttime Photos With the Denoiser
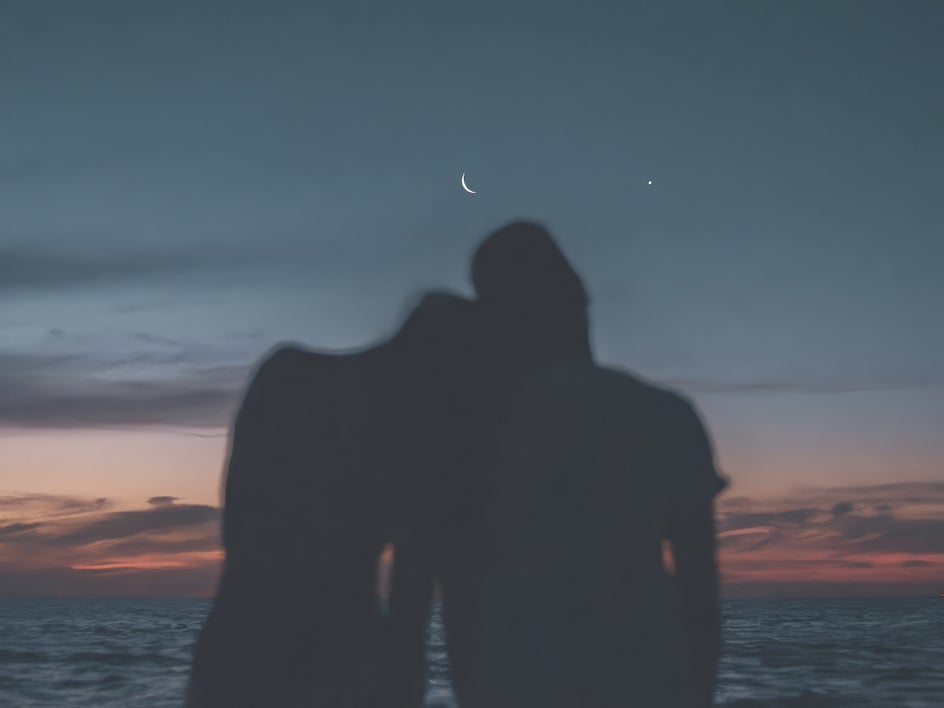
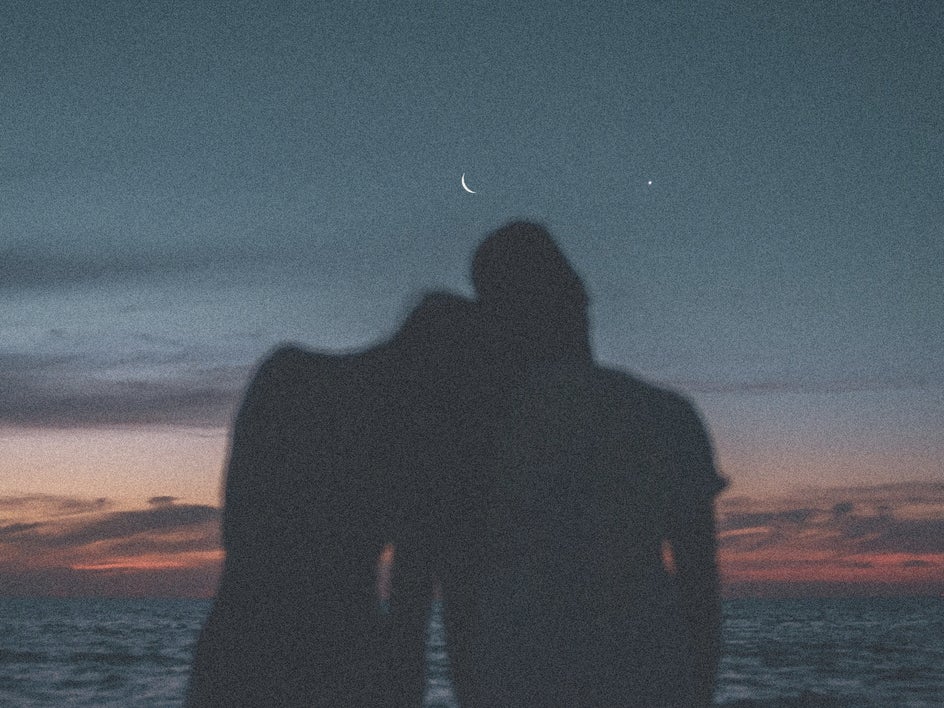
Have you ever captured a scene you love at night, only for it to look grainy? In photography, this is referred to as "noise." It creates random pixels that make an image look grainy, blotchy, or speckled, and reduces a photo’s quality and sharpness. Noise is a problem in all digital photography, but it's especially noticeable in low-light situations or when using high ISO settings.
If you’re wondering “Can I fix a noisy photo?”, you’re in luck. It might not be possible to always take night pictures without noise, but you can correct them thanks to BeFunky’s revolutionary Denoise tool.
Keep reading, because we’ll show you how you can quickly and easily fix grainy night photos!
Why Are My Night Photos Noisy?
Night photos can often be noisy due to various factors, including high ISO settings, long exposure, sensor size and quality, and image processing.
Using high ISO settings amplifies the signal from the sensor, making it more light-sensitive and allowing for better capture of low-light scenes. However, this increased sensitivity also comes with a downside: it intensifies any noise present in the image.
In addition to ISO settings, long exposures can also contribute to the presence of noise. When the sensor is exposed to light for an extended period, it has more time to accumulate noise, which can result in a grainy appearance in the final image. The size and quality of the camera's sensor also play a significant role in noise production. Smaller sensors tend to produce more noise compared to larger, newer sensors, which have better noise reduction capabilities.
Even after capturing the image, the process of editing can introduce or amplify noise. Adjusting brightness, contrast, or saturation can enhance existing noise, making it crucial to use high-quality photo editing software that offers noise reduction tools - like BeFunky! These tools help minimize noise while preserving the overall image quality, ensuring a cleaner and more professional-looking final result.
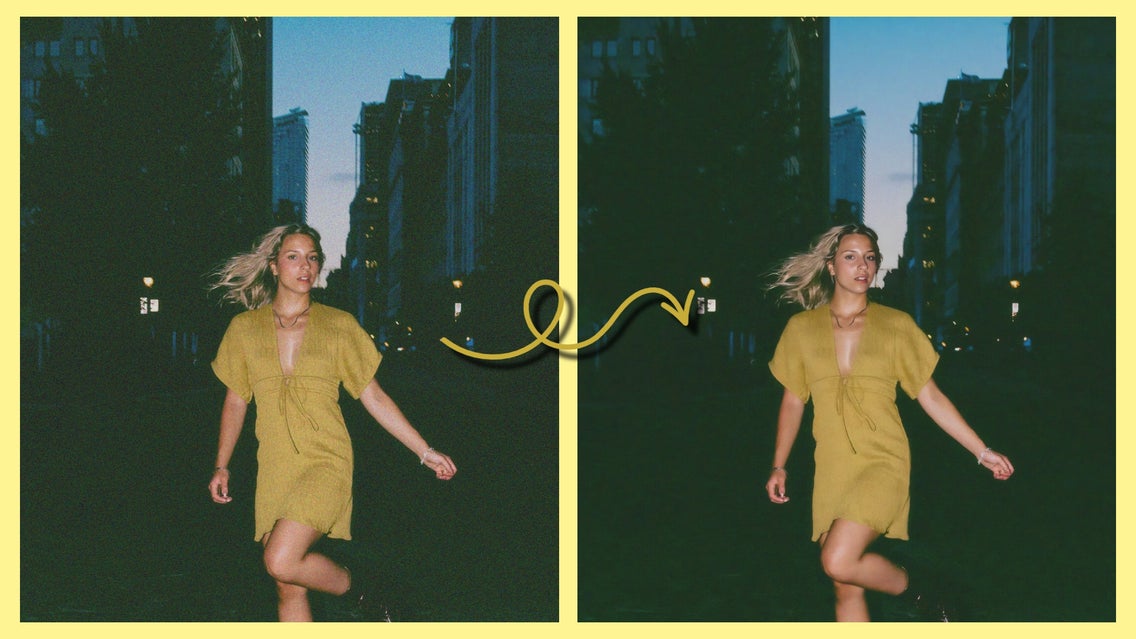
How to Reduce Noise in Night Photography Using BeFunky
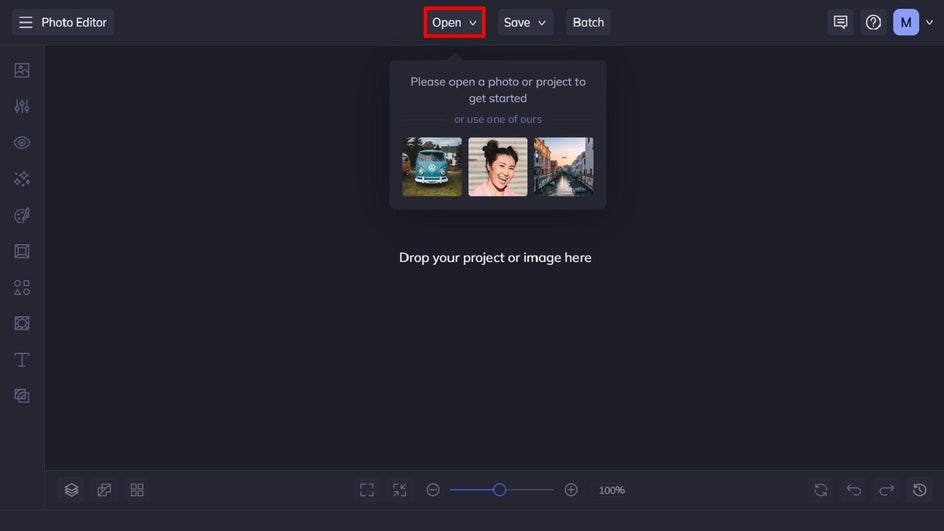
Ready to fix nighttime photo noise in your own image? To get started, head to the Photo Editor and open the image you wish to denoise.
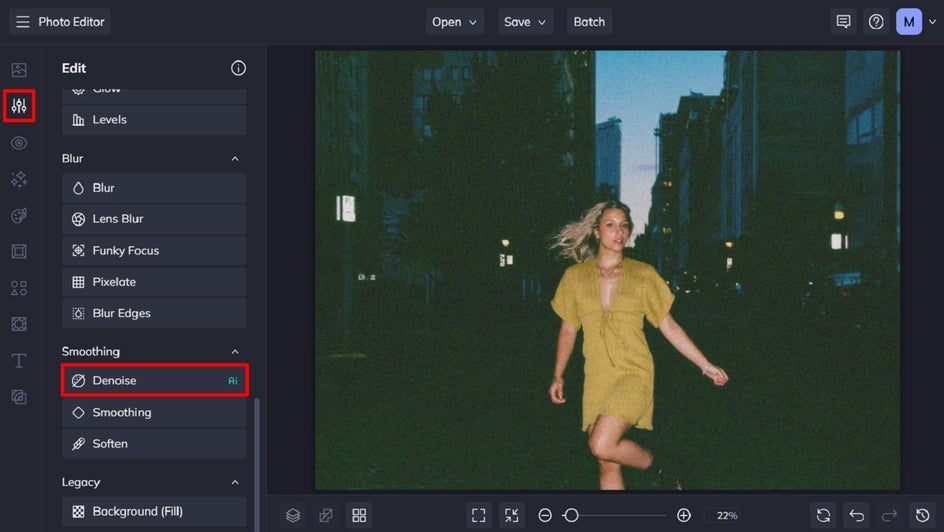
Step 1: Navigate to the Denoise Tool
You’ll find the Denoise tool located in the Edit section of the main menu, underneath Smoothing. Alternatively, you can click here to go directly to the tool.
Step 2: Adjust and Apply the Denoiser
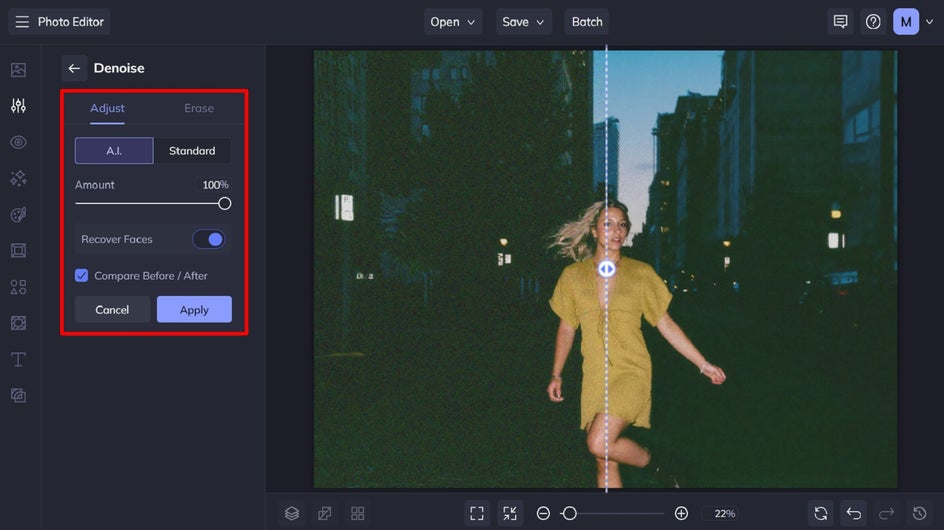
When you click on the Denoise tool, you have two options: A.I. or Standard.
Initially, the A.I. version of the Denoise tool will automatically be applied. If your image has a face, remember to toggle the Recover Faces button to make the faces clearer and perfectly in focus. To control how strong the tool is, adjust the Amount slider. You can also use the Compare Before/After button to see a slider on your image which allows you to compare the before and after versions of your photo.
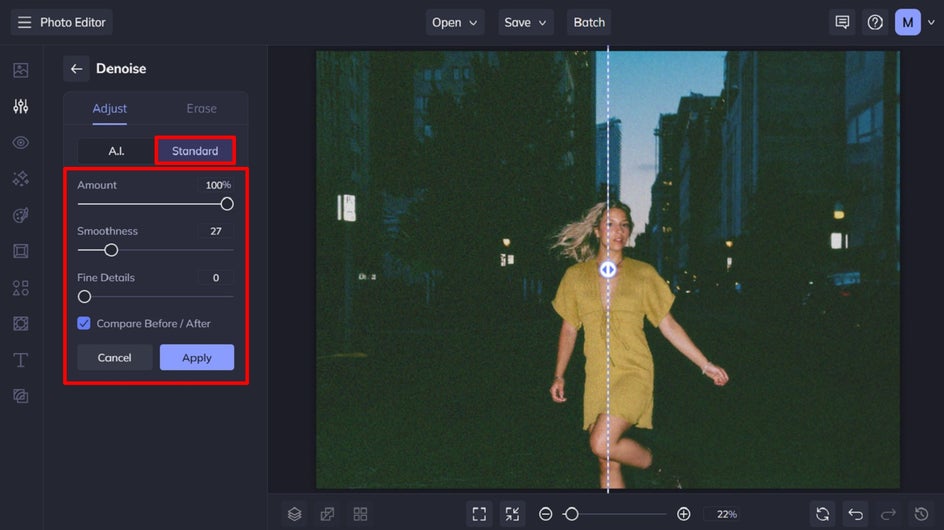
Want to customize the Denoise effect’s settings further? Simply toggle to Standard to be able to adjust elements including Smoothness and Fine Details, in addition to Amount.
By increasing the smoothness, the appearance of the pixels will be enhanced, resulting in a smoother overall look. This adjustment helps blend the noise with the image’s existing pixels, creating a more cohesive and uniform look.
The Fine Details slider, on the other hand, enhances the depth and contrast of your subjects, making them stand out instead of blending into the photo's background.
Once you’ve finished applying the Denoise effect, click Apply.
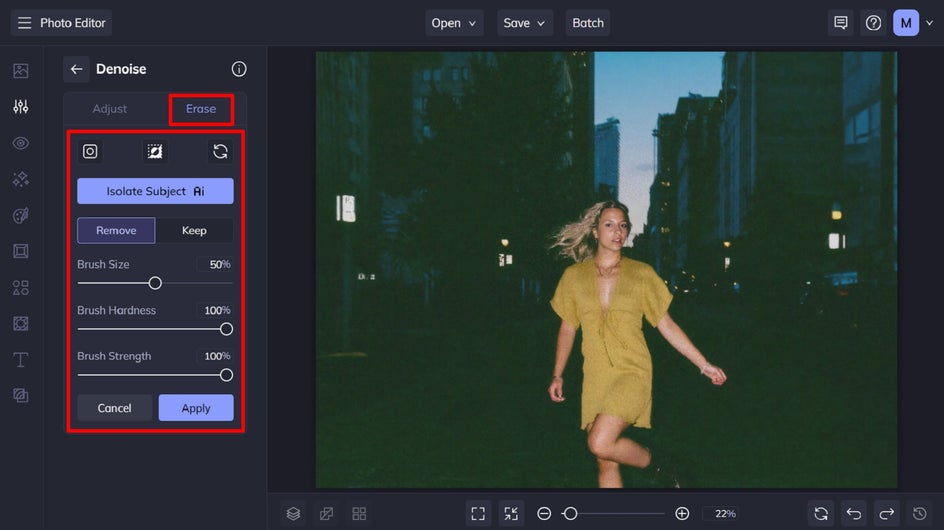
Step 3: Apply the Denoise Tool Selectively (Optional)
If you don’t want to apply the Denoise tool to your entire photo, you also have the choice to apply it selectively to parts of your image. To do this, just click on the Erase tab at the top.
Clicking on the Isolate Subject button allows you to apply the Denoise effect to just your photo’s subject or only the background. You can also adjust the Brush Size, Brush Hardness, and Brush Strength sliders to “paint” the Denoise effect onto different areas of your image. Toggle between the Remove and Keep tabs to either apply or remove the effect from selected parts.
Then, just click Apply to apply those changes.
Step 4: Save Your Denoised Image
Once you’ve finished removing the noise from your night photo, it’s time to save it. Click Save at the top of the screen and select your desired save location.

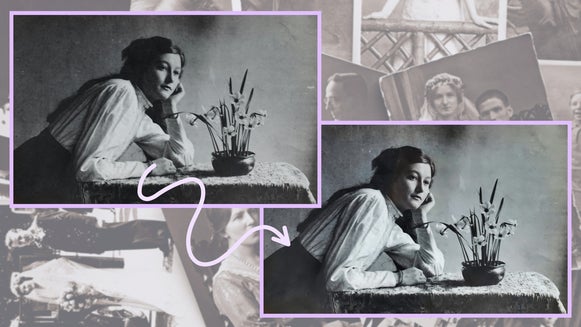
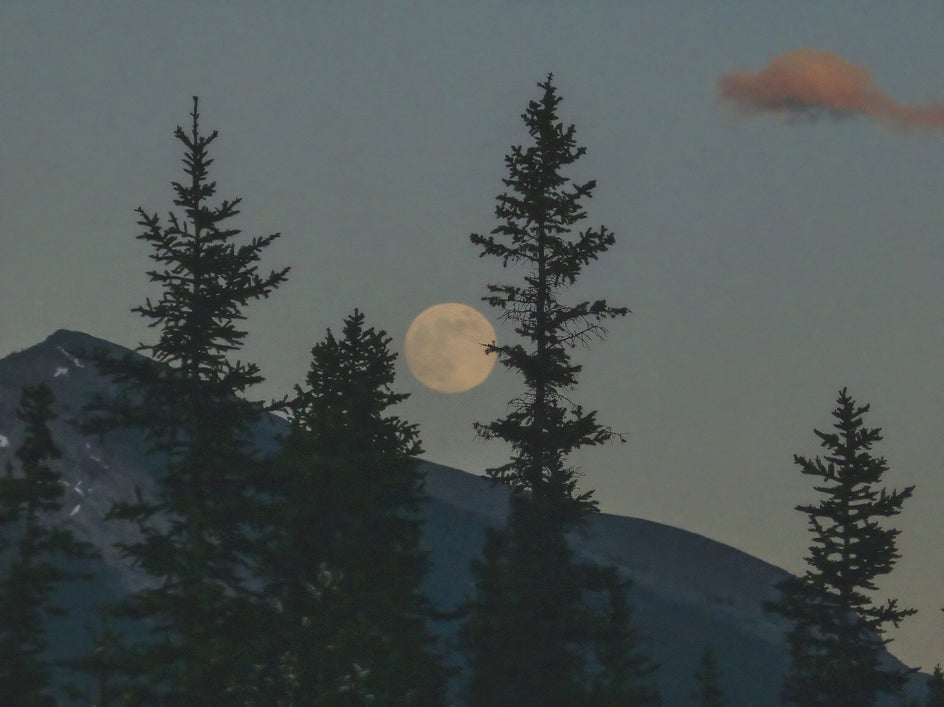
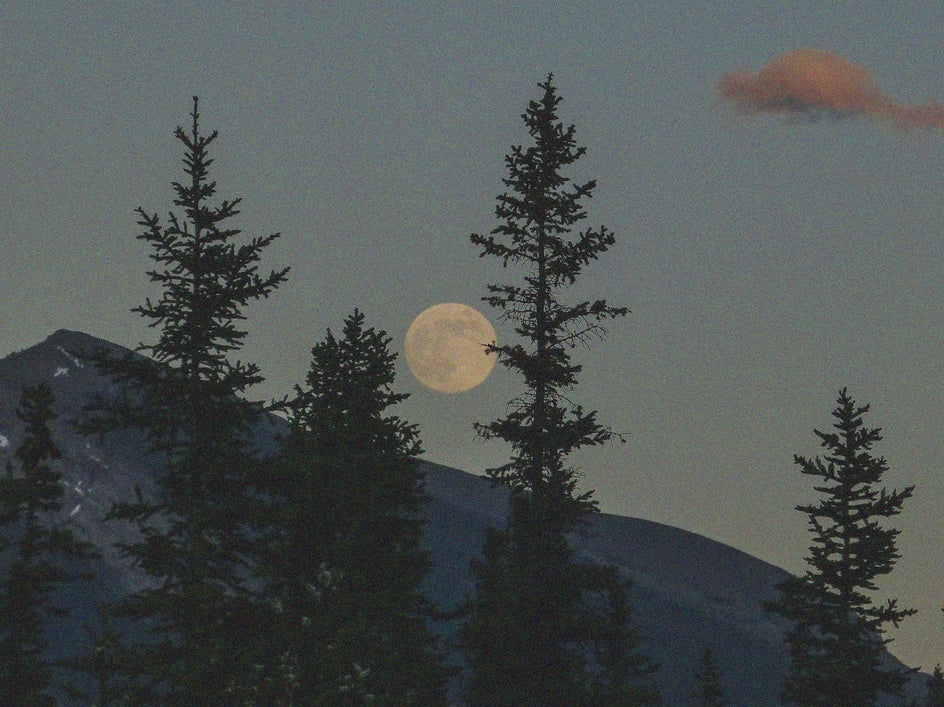
Final Result: A Night Picture Without the Grain
All it took was a few clicks for the Denoise tool to completely remove the unsightly noise from this nighttime photo. How easy was that?


Remove Noise in Nighttime Photography
Don’t delete an otherwise beautiful night photo just because it contains nighttime noise. Thanks to BeFunky’s Denoise tool, reducing noise in night photography is easy.
Have a nighttime photo that needs clarifying? Check out the Denoise tool to remove noise in seconds!