Fix a Lens Blur With Deblur AI
There are many technical issues that cause lens blurs and it can be pretty annoying once you transfer your footage from the camera or phone to the computer and see that some of your images don’t look crisp or clear.


If you have a lens-blurred image that you want to clarify look no further than BeFunky’s Deblur tool in the Photo Editor. This tool uses AI to detect a blur and remove it so that you don’t have to have any ruined images – at least from a lens blur!
What Is a Lens Blur?
Before we get into how to remove a lens blur, let’s take a look at what a lens blur is – because it isn’t always a bad thing. A lens blur is when a wide aperture is used to achieve a narrow depth of field. This can cause your backgrounds to be out of focus, or blurry. Lens blurs can occur naturally and unintentionally, or even artificially and intentionally.
Sometimes, photographers want to add a Lens Blur effect to their images, giving them an artistic look. The benefit of this is that when you do it intentionally, you can create depth of field and emphasize your subject, like in the case of using a tilt-shift lens.
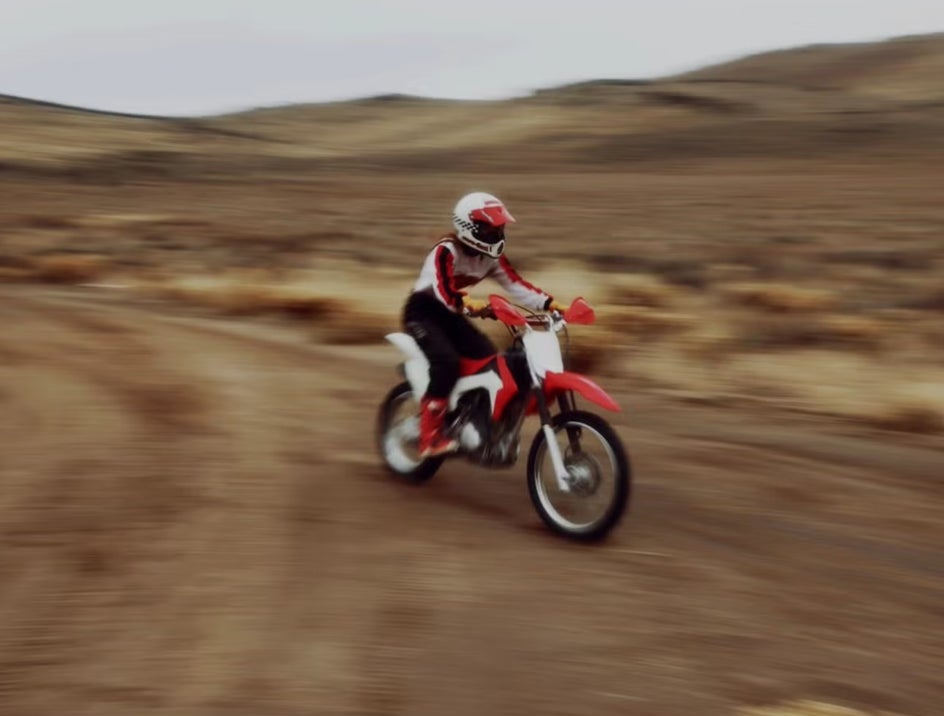
Not only that but photographers who know how to add lens blurs can create some really artistic shots that show movement and creativity, like when you add a motion blur to your image like in the example above.
How to Avoid Taking Lens Blurred Images
Unintentional lens blur happens if your lens is not correctly focused on your subject. While most modern cameras have autofocus, even with it activated, your images may not come out clear. Let’s take a look at some of the main ways you can avoid an unintentional lens blur when taking photos.
1. Make Sure Your Lens is Clean of Dust Particles
Sometimes there can be dust on your lens, causing your autofocus to jump back and forth between the dust particle and the scene you are trying to shoot.
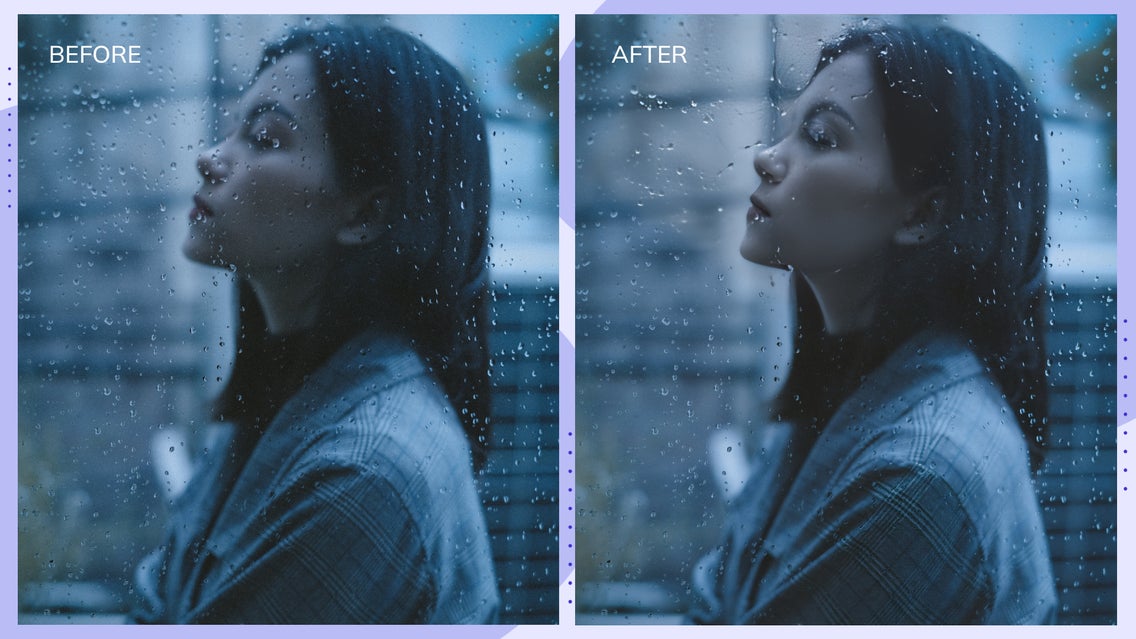
You can see this same focus-jumping effect when you are trying to take a photo of a scene through a window with raindrops on it. The camera can have a hard time detecting what to focus on. In some cases, it can be best to turn off the autofocus and use manual focus to make sure that your subject is in focus, rather than something else that’s obstructing the foreground.

2. Use a Tripod to Ensure Stability
We’ve already discussed why motion blurs happen in your photography and one of the main reasons is having a slow shutter speed. This is also true for lens blurs. The faster your shutter speed, the crisper your image focus will be. It is best to keep your shutter speed as fast as you can for the environment you are in.
If you need to have a lower shutter speed in order to compensate for the lack of light in the area you are in, make sure you use a tripod with the camera set to a timed delay or use a remote! This will ensure that you have the least amount of shake possible when capturing your image.
3. Check the Aperture
Apertures can cause lens blur if it is too wide or too narrow. If you are using a wide aperture like f/2.8, then your focus range also cuts down, making it harder for your entire subject to be in focus. This is a great setting for portraits because it gives you great depth of field and makes your image backgrounds blurry and diffused, but the wider your aperture (or smaller the number), the shallower your focus point.


You may notice that with a wide aperture, even a portrait might have your subject’s arms in focus with their body being out of focus. Just make sure that your aperture is set to the correct focal point for what you are shooting.
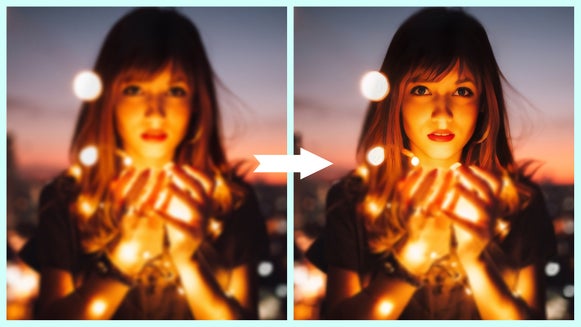
How to Fix a Lens Blur With the Deblur Tool
If you upload a photo and notice that you need to fix a lens blur, BeFunky’s Deblur tool puts the power of AI to work. This tool uses AI to analyze blurry photos and fill in the blanks for crystal-clear results.
To start, open BeFunky’s Photo Editor and upload your lens-blurred image. Or, head straight to the Deblur tool by clicking here.
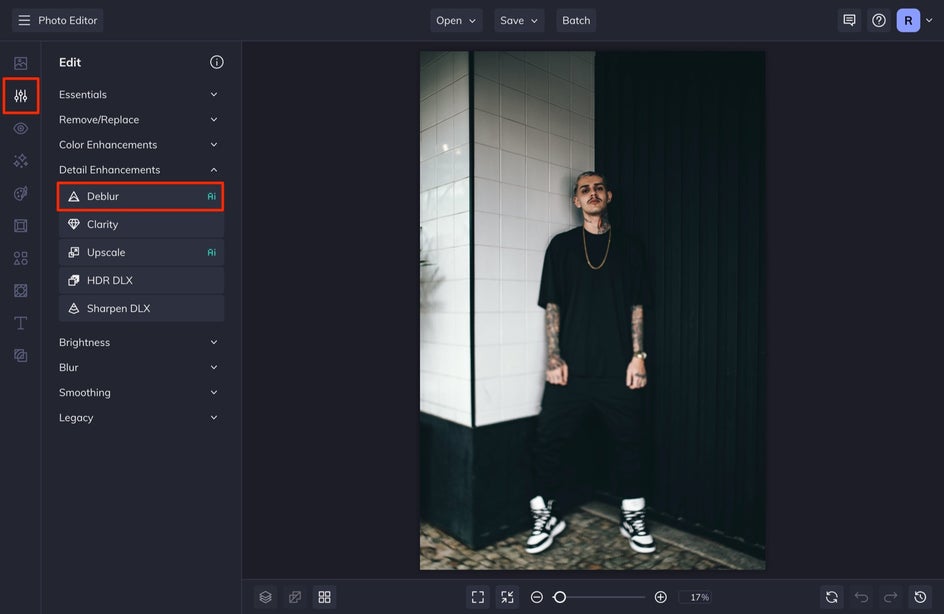
Step 1: Use the Deblur Tool
Click on the tool and in seconds you’ll see a before and after slider to compare the original to the results. You can uncheck the Compare Before / After selection if you’d rather just see the after. Once selected, you will see the Blur Type tabs: Focus and Motion. We are going to select the Focus tab for this tutorial.

If you are deblurring a photo that has a face in it, make sure you select Recover Faces. It will usually auto-detect the faces in your image and automatically apply this feature. This feature uses A.I. to sharpen and enhance facial features, bringing the blurriest facial features back into focus.
When you are satisfied with the effect, select Apply.
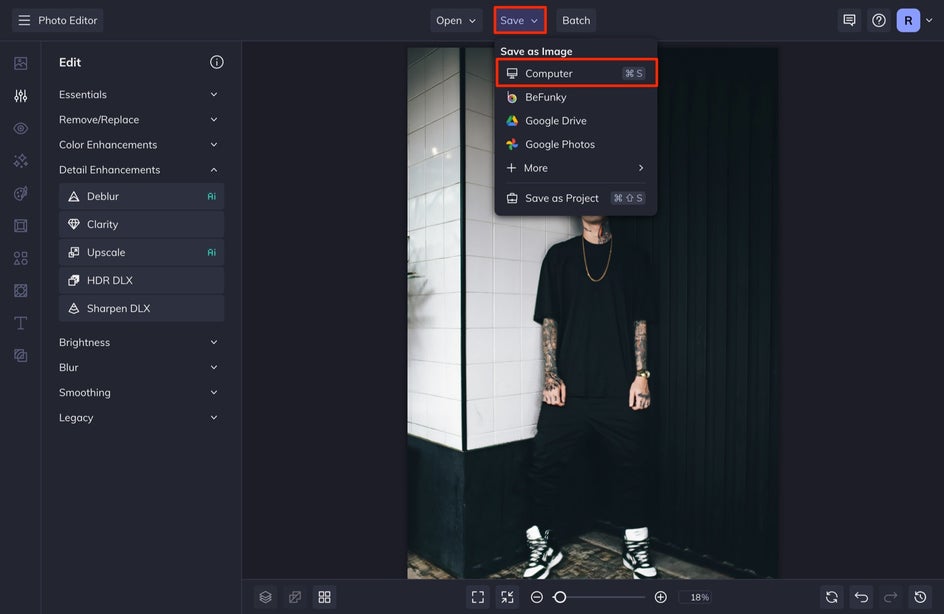
Step 2: Save the Deblurred Photo
When you've finished editing, click the Save button at the top of the screen and then select Computer. Save your image as a high-quality JPG.
Deblur Lens Blurred Images in Seconds
This tool allows you to deblur images in seconds and makes removing lens blurs a breeze. When you are ready to start deblurring your images, use BeFunky’s Deblur tool to get started.