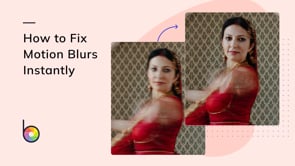
How to Fix Motion Blurs With the Deblur Tool

Blurred photos can happen to anyone – even with the best lighting and timing. Whether it’s a moving subject, shaky hands, or low lighting, motion blur can leave your images looking soft or unfocused. But before you think about deleting them, try BeFunky’s AI-powered Deblur tool. With just a few clicks, you can fix motion blur and bring your photos back into focus – no reshoots or complex editing required.
In this tutorial, we’ll show you how to use the Deblur tool to correct motion blur and sharpen your images instantly. You’ll also find inspiration for creative ways to use it in real-world photography, from candid portraits to dynamic city shots.
What Causes Motion Blur?
Motion blur usually happens when something moves during the exposure – whether that’s your camera or your subject. There are two common types:
- Subject Motion – Your camera is steady, but your subject moves (like someone dancing or a pet running).
- Camera Shake – Your subject is still, but the camera moves slightly during the shot (common in low light or handheld photos).

How to Remove Motion Blur in Seconds
BeFunky’s Deblur tool intelligently analyzes your photo and applies sharpening to areas affected by motion blur. Here’s how to fix your image:
Step 1: Open the Deblur Tool
Head to BeFunky's Deblur tool and upload your blurry photo. You can drag and drop an image, or choose one from your computer, BeFunky library, or cloud storage.

Step 2: Apply the Deblur Tool
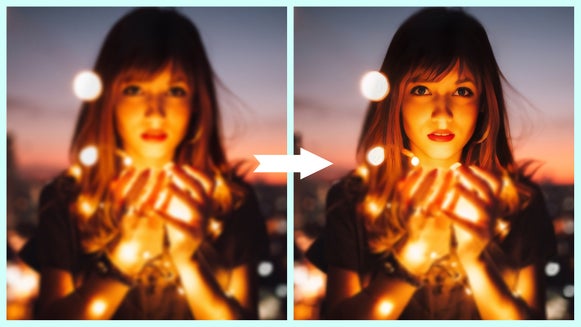
Once you open the tool, choose Motion under Blur Type. This is designed specifically to correct motion blur from movement or camera shake. Then sit back and watch as the Deblur tool identifies motion blur and corrects it automatically. You’ll see a noticeable difference in sharpness and clarity right away.

If your image contains a person or multiple faces, check the Recover Faces box to enhance facial details even further. And to compare the results, make sure to use Compare Before / After to toggle between the original and enhanced versions.
Once you're satisfied with the results, click Apply.
Step 3: Save and Share Your Edited Photo
Once your photo looks sharper and clearer, click Save at the top of your canvas. You can download your image in multiple formats or share it directly to social platforms – perfect for quick turnarounds.

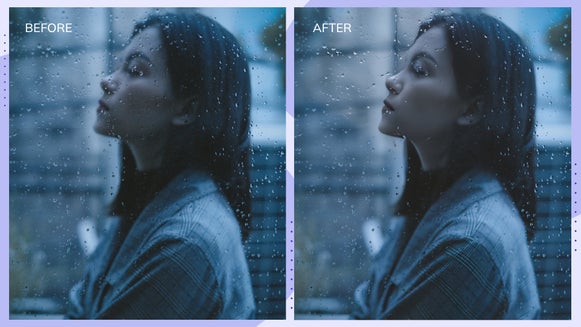
See the Difference Deblur Can Make
BeFunky’s Deblur tool makes it easy to rescue shots that would otherwise be unusable. Instead of discarding your blurry photos, you can sharpen details, improve definition, and highlight what matters – all in seconds.
Whether you're working on casual snapshots or artistic compositions, Deblur ensures your vision comes through clearly.


More Ways to Use the AI-Powered Deblur Tool
Deblur isn’t just for fixing mistakes – it’s a powerful way to enhance motion-heavy photos across all types of photography. Here are a few creative examples:
City Movement
Urban environments are full of life – and motion. Whether it’s a cyclist speeding through an alley, taxis zooming past a crosswalk, or bustling pedestrians during golden hour, city scenes can be hard to capture without blur. Deblur allows you to keep that lively energy intact while improving focus on your subject, such as a street musician or passerby.


Candid Portraits
From spontaneous smiles at a birthday party to energetic group selfies at an event, candid portraits often suffer from slight blur. Unlike traditional sharpening tools, Deblur uses AI to enhance facial details without flattening the image.

Want more portrait tips? Check out How to Fix Blurry Portraits With the Deblur Tool to see how Deblur transforms out-of-focus faces into crisp, polished images.
It’s also a great tool for low-light street photography, where camera shake is more common. Pair it with the AI Image Enhancer to correct lighting and tone in the same workflow.
Nature Photography
Outdoor photography presents its own challenges. Flowing water, wind-swept trees, or moving wildlife can introduce unintentional blur. With Deblur, you can emphasize fine details in the scene – like the veins of a leaf or the texture of rocks near a waterfall – without losing the sense of natural motion.


This technique is especially helpful when your shot includes both static and dynamic elements. For example, you might want to keep the motion in a waterfall but bring clarity to the moss-covered rocks nearby.
Restore Clarity to Every Photo
With BeFunky’s Deblur tool, you don’t have to settle for soft or blurry images. Whether it’s a once-in-a-lifetime moment or a daily snapshot, you can bring clarity back to your photos with just a click. Explore the AI Deblur tool to fix motion blur, sharpen details, and create polished photos that look like you planned them all along.