Create Movement With the Blur Tool

Photography allows us to capture moments in time, yet sometimes elements of the scene don’t always translate through the camera. One of these is movement, for example, which plays a vital role in expressing the speed and excitement of a moment.
Rather than trying to perfect your blurred motion photography settings to perfectly capture movement, there is an easier way. By post-processing your images to contain background motion, you can quickly and easily turn any static image into an enthralling scene.
So, how do you add movement blur to a photo? With BeFunky’s Blur effect in the Motion setting! Keep reading, because we’ll show you everything you need to know to achieve this look.
How Do You Create a Motion Blur Using BeFunky?
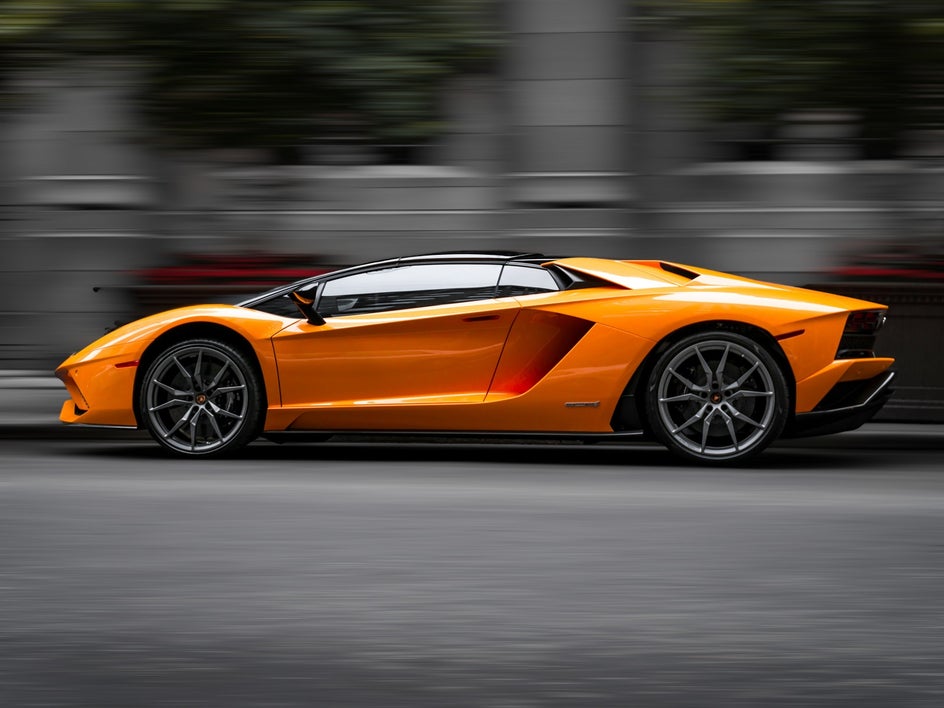
Ready to create your own motion blur effect? To get started, head to the Photo Editor, then open a photo of your choice. For this example, we’ll be using a photo of a car to show you just how easy this effect is to achieve using BeFunky!
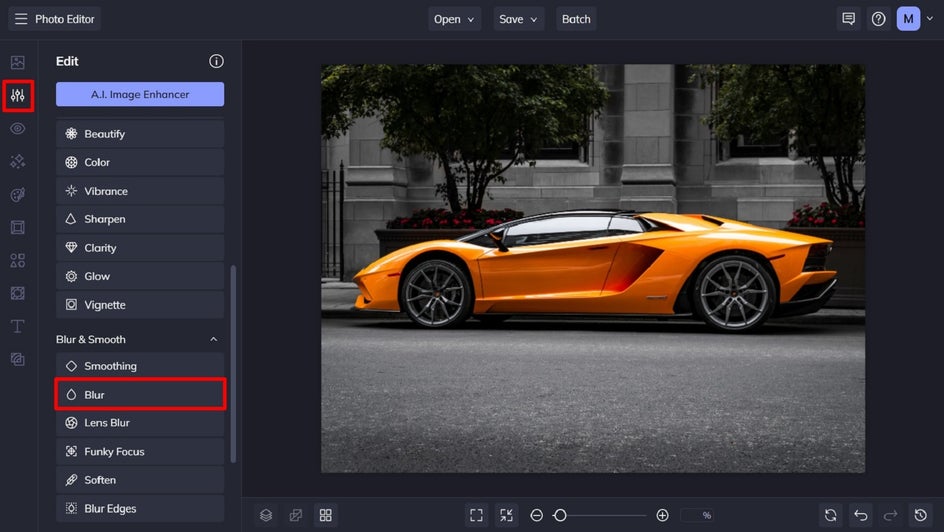
Step 1: Click on the Blur Tool
Navigate to the Edit menu on the left of the screen, then scroll down to click on Blur.
Step 2: Isolate Your Photo’s Subject
Within the Blur tool, click on Erase. Then, click Isolate Subject.

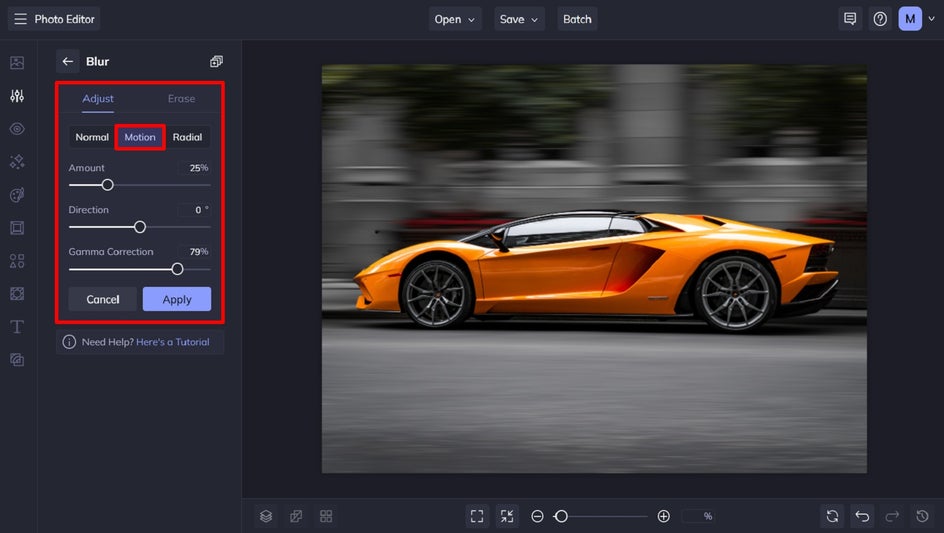
Step 3: Adjust the Motion Blur Effect
Now, click back to Adjust, then select Motion to create a motion blur effect. You can then use the sliders below to adjust the effect’s amount, direction, and gamma correction.
Once you’re happy with how your background motion effect looks, click Apply.
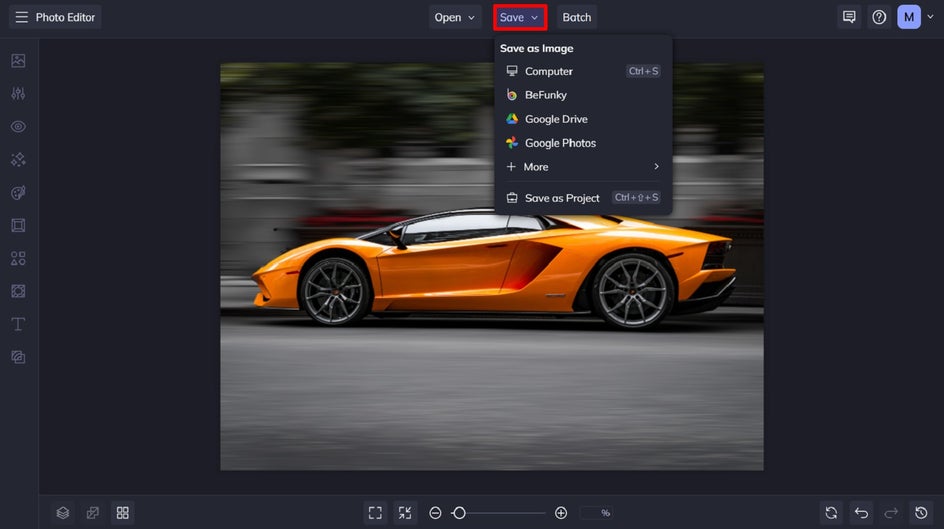
Step 4: Save Your Motion Blur Image
When you’ve finished editing your image, it’s time to save it. Click Save at the top of the screen, then select your desired save location.
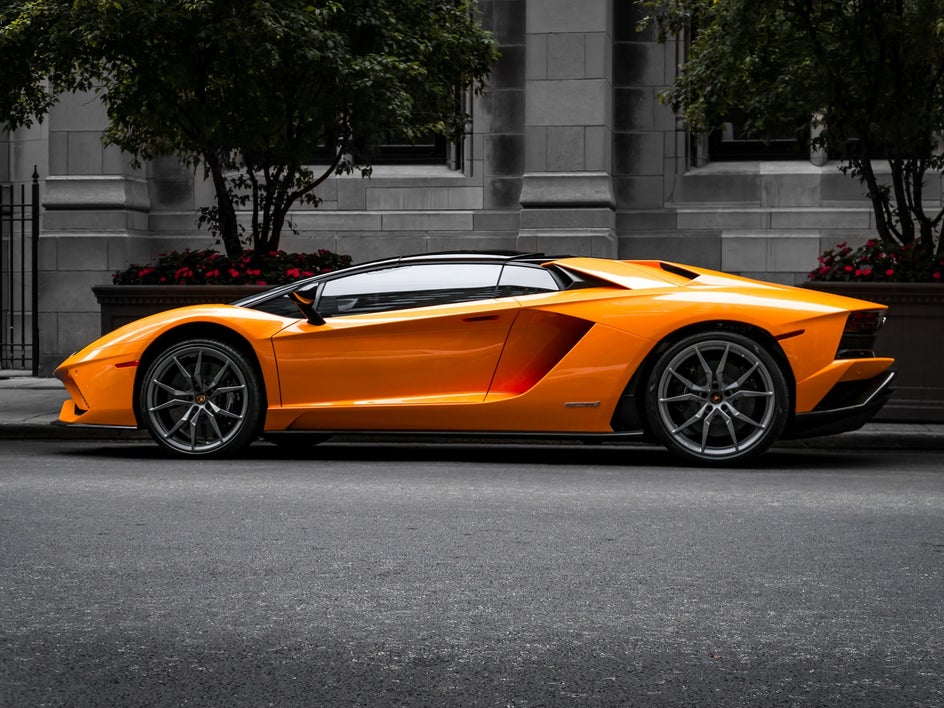
Final Results – Motion Blur Effect
As you can see, BeFunky’s Blur effect is the perfect way to mimic how the surroundings of an object in motion would look.
How to Motion Blur a Picture on Your Phone?
BeFunky also has a handy mobile app that lets you edit photos, design graphics, and create collages on the go. Using the app, you can quickly and easily add a motion blur effect to any image that you please. You can even upload your image straight to social media to share with your followers!
The process within the app is the same as the steps outlined above, so why not give it a try?
Motion Blur Photography Inspiration
BeFunky’s motion blur effect doesn’t just stop with photos of cars. There are also many other types of photos you can add a background motion blur to. We’ve included the top examples below!
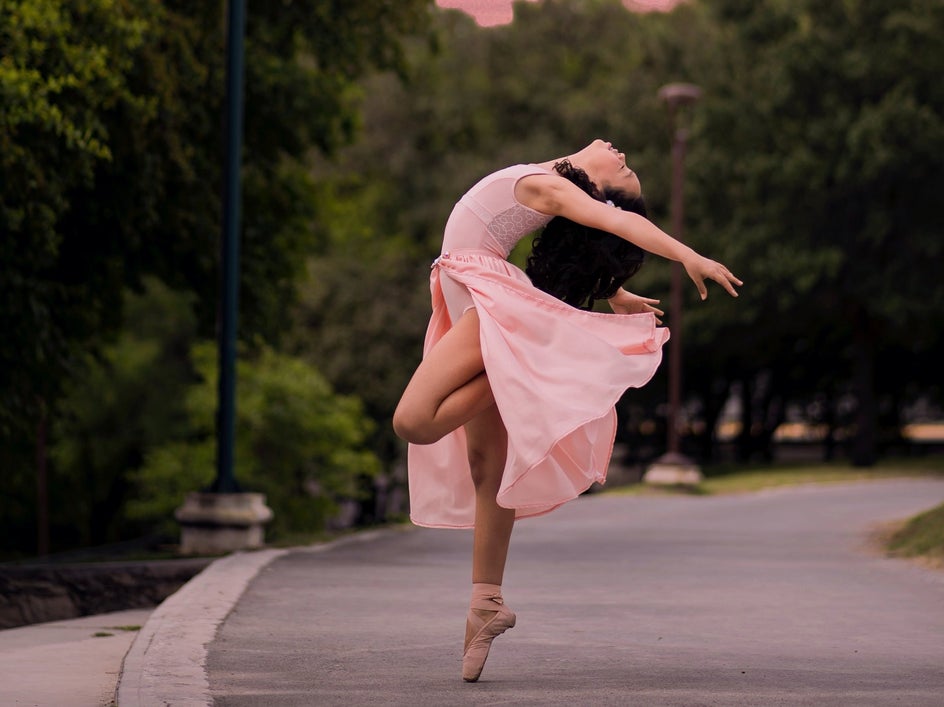
Dance Photography
Capturing a dancer mid-twirl can create the most ethereal photos. However, in order to truly capture the essence of the dancer, there needs to be a sense of movement within the image. As you can see in the example below, the Blur effect is perfect for doing just that!

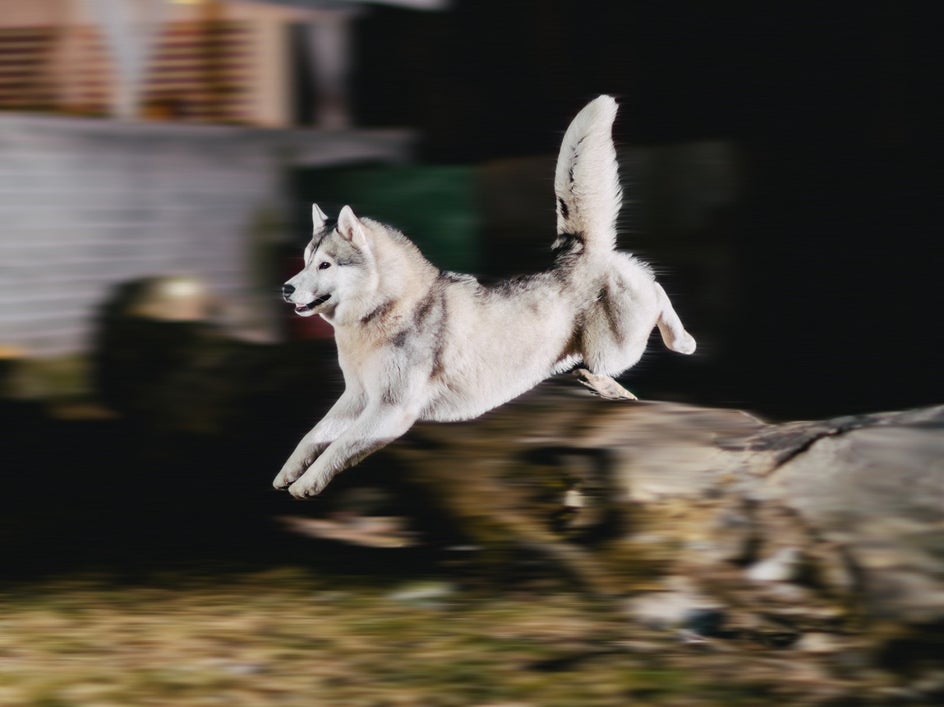
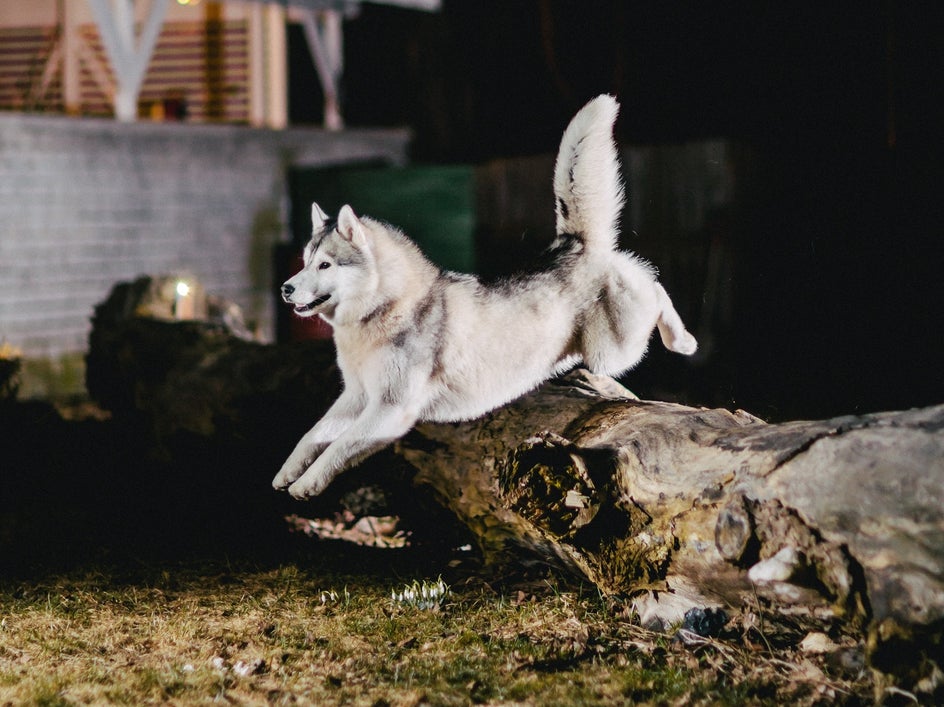
Animal Photography
Animals are often unpredictable in their movements, yet capturing them in action can produce some powerful photos – especially when they’re running, jumping, or in mid-flight. In this example, we added a slight motion blur to emphasize the speed at which the dog is jumping. It’s subtle, yet effective!
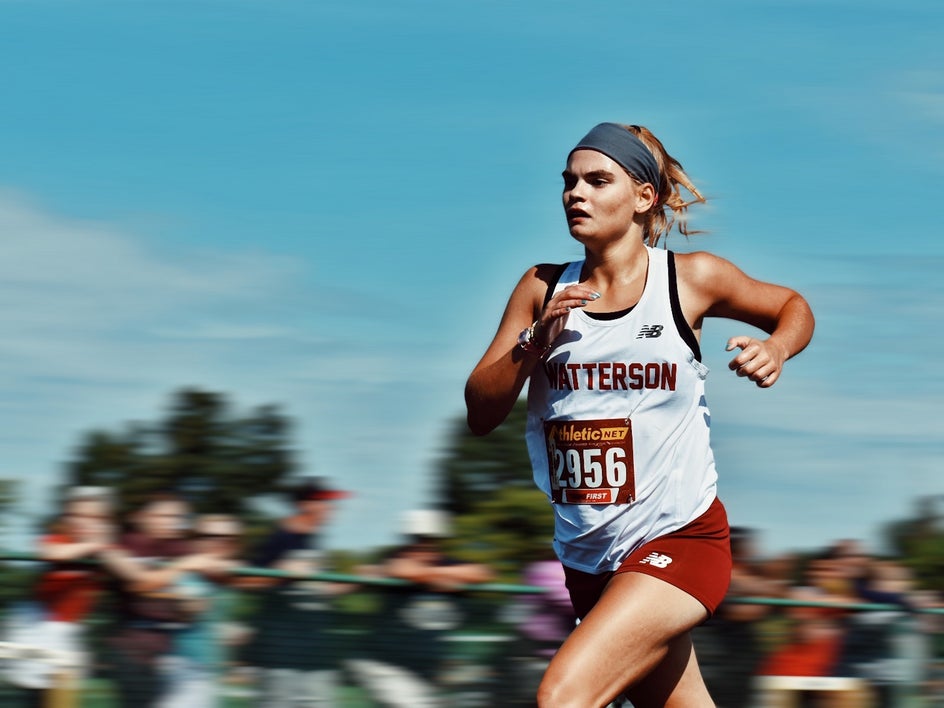
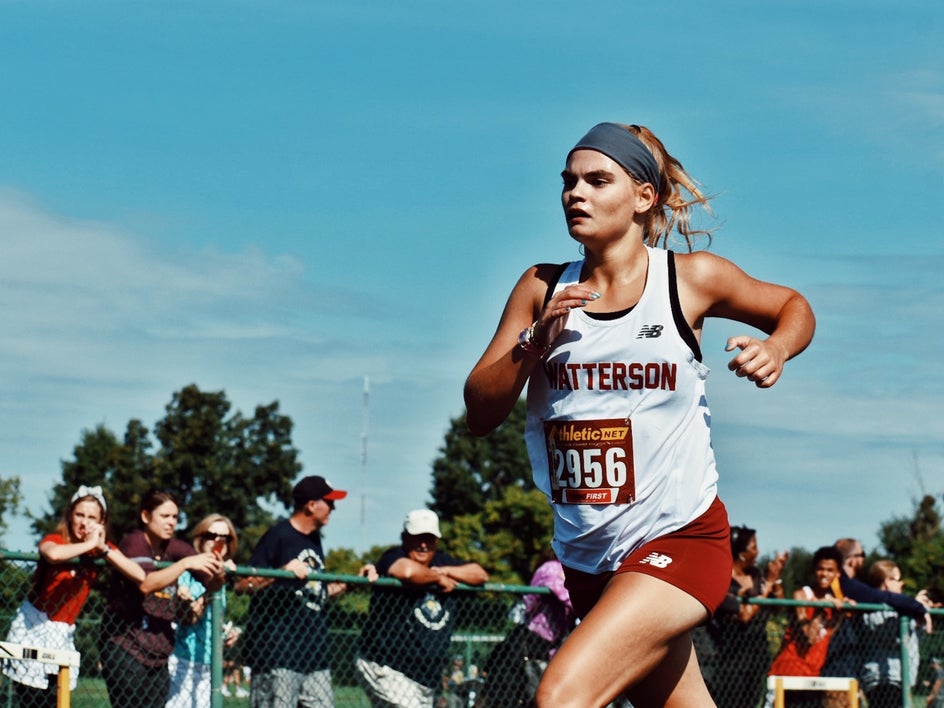
Sports Photography
Whether it’s the desperate sprint to the finish line or that dive onto home base, there are plenty of moments in sports that deserve their very own motion background photo. While your initial sports photography capture might be crisp and clear, the Blur effect can easily isolate your subject in action and add the right sense of movement to really honor the moment.
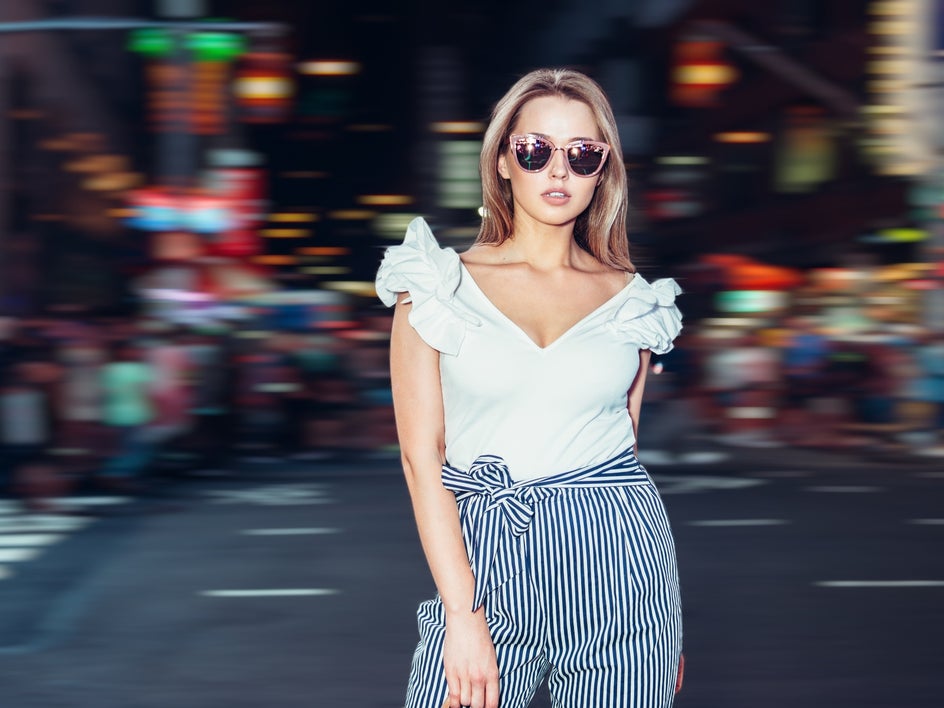
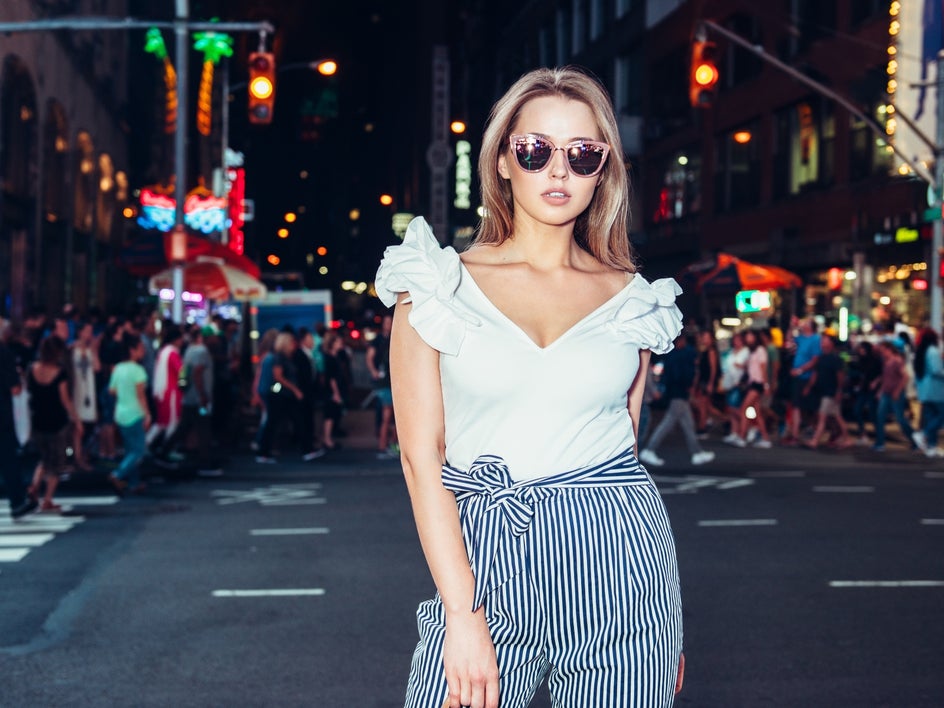
Time-Lapse Effect
There’s something mesmerizing about a time-lapse photo that captures a subject perfectly still, while their background features the blurry business of a city street. Rather than setting up your camera and tripod – not to mention making your model stand still for a long time – you can now just use BeFunky’s Blur effect to achieve the same look in seconds.
Make a Move With the Motion Blur Tool
Whether you use the Blur effect on your desktop or mobile, you’re sure to quickly and easily add movement to any image. It’s as simple as isolating your subject and adjusting the Motion Blur effect to create an eye-catching and realistic sense of movement.
Go on, visit the Photo Editor to try out the Blur tool for yourself!