How to Design Custom Greeting Cards Online

Even with the world going digital, greeting cards continue to be a staple for conveying thoughts and sentiments to the people we care most about, especially greeting cards for all occasions. That’s the good part about greeting cards is that they can be sent as a holiday greeting card for Christmas, Easter, and Valentine’s Day, or to convey more intimate sentiments like thank you’s, anniversaries, and well-wishes.

We are going to show you how you can design your own 5x7 greeting card using BeFunky’s Card Maker, found in the Graphic Designer. The best part is that you can create your very own greeting cards for free from our selection of free greeting card templates. If you have a BeFunky Plus account, there are endless options available for you.
How to Customize a Greeting Card
BeFunky has tons of templates to choose from. You can either choose a template and change the text for a quick and easy greeting card, or you can easily customize templates to achieve the exact design you want. We are going to start with one of our free templates in BeFunky’s Card Maker to get started.
Step 1: Choose a Template
Select a design from the Templates tab if you want to use a pre-made design, or select Blank Canvas if you want to create your own and start from scratch. We are going to use a free premade template to create a well-wishes card that says “You’re One Tough Cookie.”
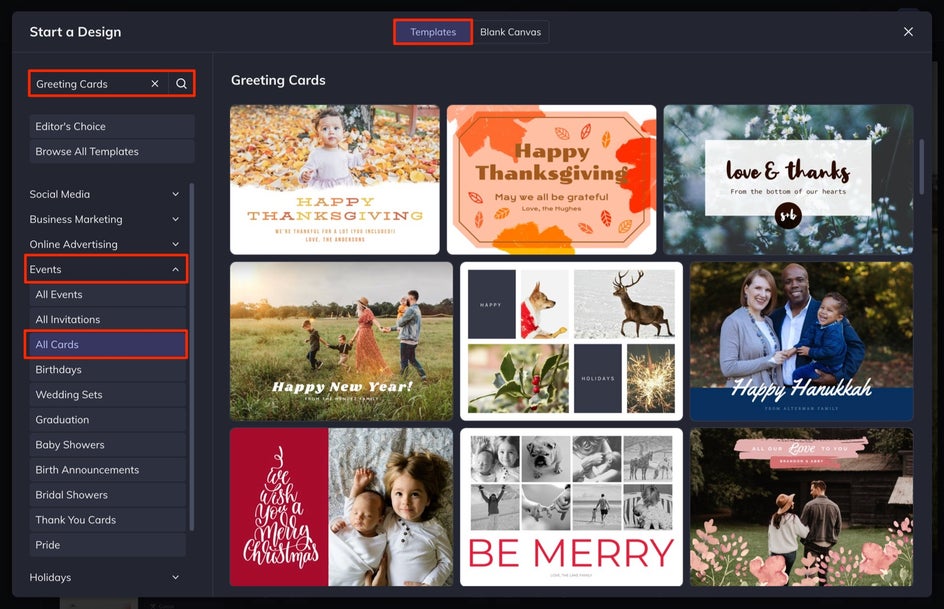
Simply, select the template you want to use, and then select Use This Template to start customizing your design.
Step 2: Add Your Image
If you have a design that has an image in it that you need to change, here is how to do it.
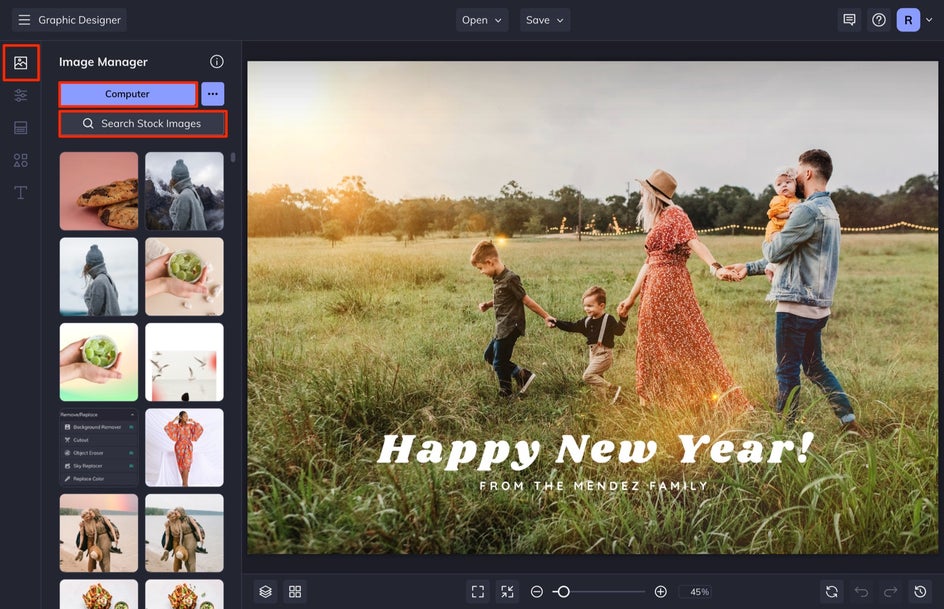
Select Image Manager from the left-hand menu. You can either select your own image to put in there by selecting Computer or you can choose from thousands of free stock images that BeFunky offers by selecting Stock Images. Simply select the images you want once the search menu pops up and the images will be automatically added to your Image Manager library.
You can then drag and drop your image from the Image Manager and hover it over the image of your choice on your design. When you release, the image will automatically populate into the area.
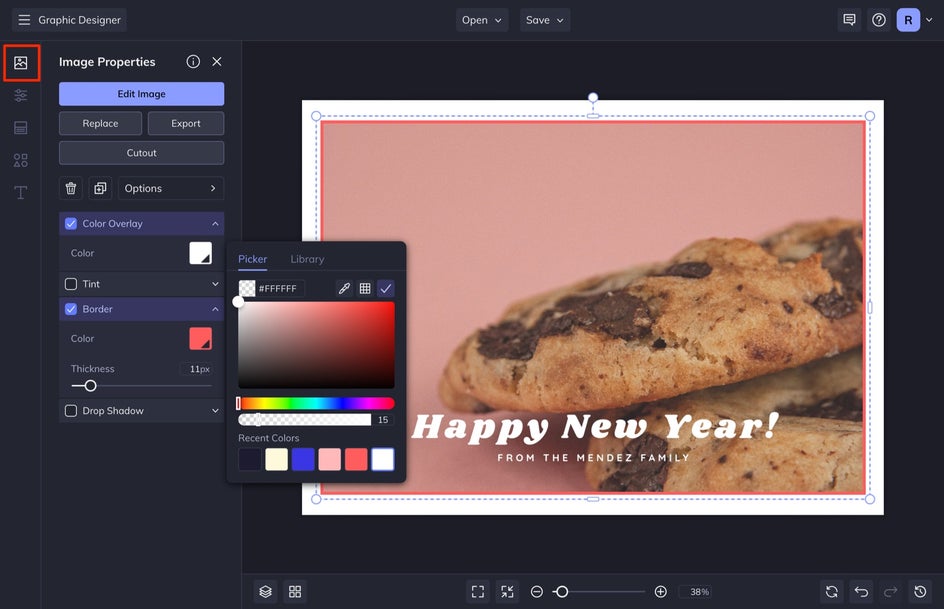
With the new image selected, you can customize things like Size, or add a Border, Color Overlay, or Tint. I choose these customizations when I need to alter the image so that it doesn’t take away from the message of the greeting card. For this one, I am adding a Border to the image and adding a slight white Color Overlay by moving the Opacity down to 13. I am also adjusting the size of the image by clicking and dragging the corner of the image inward and then repositioning it so that it is centered on the canvas.
Step 3: Personalize the Message
Next, we are going to adjust the text. Our message is going to say, “You’re One Tough Cookie.” You can either use this if you are creating a well-wishes card, or use your own phrase!
Select the Text tab from the left-hand menu. Next, double-click on a text box in the design and type in your custom text. Do this with each text box in your design.
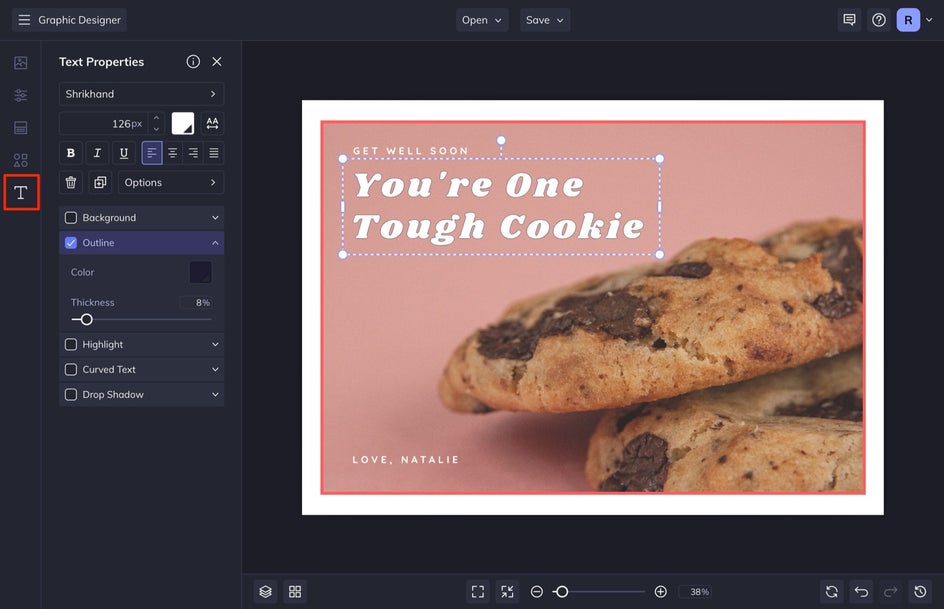
You can then customize your text further by adjusting the Font, Size, Color, and more in the Text Properties menu that appears when you single-click any text box in your design. If you want to add more text boxes, select a text box and press “D” on your keyboard to duplicate your text, or select Add Text from the Text menu. I usually like to duplicate my text because it also duplicates the text properties that you have assigned to that specific text box.
Step 4: Personalize the Design
I like to make sure that all of my colors are synced at this point. For this design, I need to adjust the background color and you can do this by selecting the Customize tab in the left-hand menu.

Select the first swatch and then choose the background color of your choice from the Color Picker.
If you want to add any graphics to your design, select Graphics from the left-hand menu and then select Search Graphics to select some new design elements from our catalog of over a thousand free graphics.
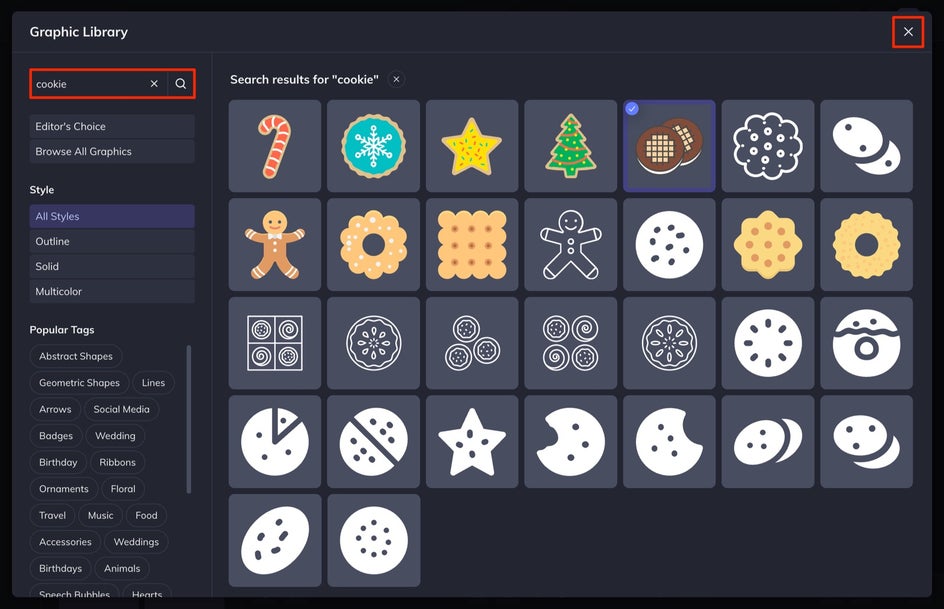
I like this design without any added graphics, but if you choose to add some, simply search for the graphic you want, click it, and it will be automatically added to Your Graphics.
Next, click and drag your element from the library to the canvas and position it where you want it. With the graphic selected, you can then customize the Graphic Colors and even add a drop shadow if you want.
Step 5: Save & Share Your Card
When you are finished with your design, click on the Save menu at the top of your canvas. We are going to send this as a physical card, so we need to save it as a PDF and make sure that the Print tab is selected. If you are sending this as a digital card, you can simply save it as a JPG.

At this point, I like to select Save as Project so that if I need to make any changes in the future, I will have a copy that I can edit at a later time.
Design Standout Greeting Cards With BeFunky
Whether it's a holiday, celebration, or you just want to say a quick thank you, BeFunky’s Card Maker makes designing your own custom greeting card easier than ever. Not only is designing your own greeting card a cheaper alternative to purchasing one in the store, but it also allows you to customize the message and the design exactly how you want it.