Design the Perfect Baby Shower Thank You Card
A baby shower is a time to celebrate bringing a new life into the world. You gather with close friends and family in excitement for the baby to come. After the celebration, sending a thank you card doubles as a memento for the event and an expression of your gratitude. With BeFunky’s Thank You Card templates, you can customize your shower thank you cards to capture any sentiment and theme you choose.
Starting to design a baby shower thank you card begins with choosing one of the many Thank You card templates. Similarly, you can use a baby shower-themed Invitation template to create cohesion between your invitations and thank you cards.
How to Create a Baby Shower Thank You Card
In all the excitement that comes with planning a baby shower, the last thing you want to worry about is designing creative thank you cards to send out afterward. Thankfully, BeFunky offers an easy way to create a lasting memory for your guests. Choosing a thank you card theme that is already designed for baby showers will save you a lot of time.
Step 1: Choose a Template
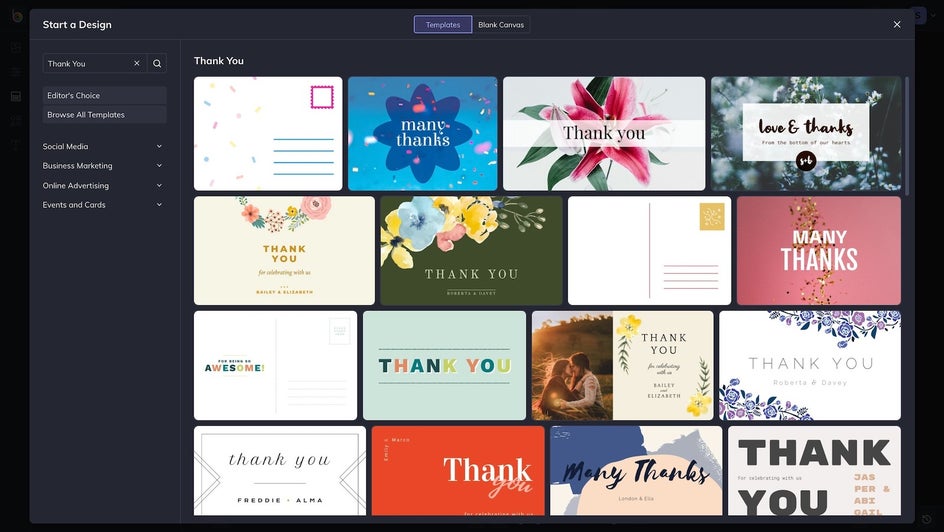
BeFunky is filled with thank you card template options. Click on this link to browse our available templates.
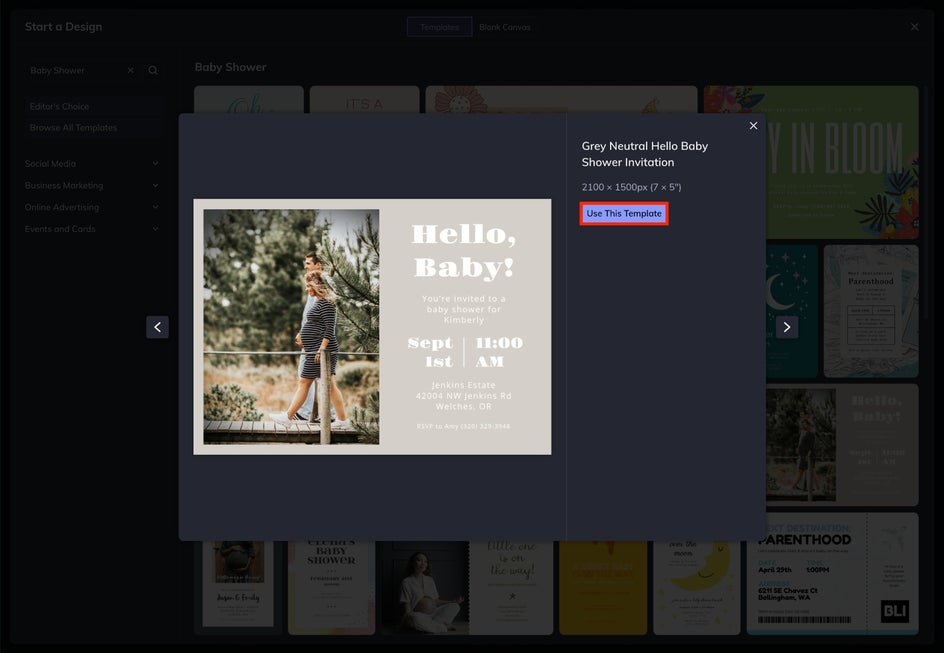
Or, if you want to start with a template that can be used to create a corresponding baby shower invitation, type “baby shower” in the search bar in the top left corner. That is what we'll do for this example.
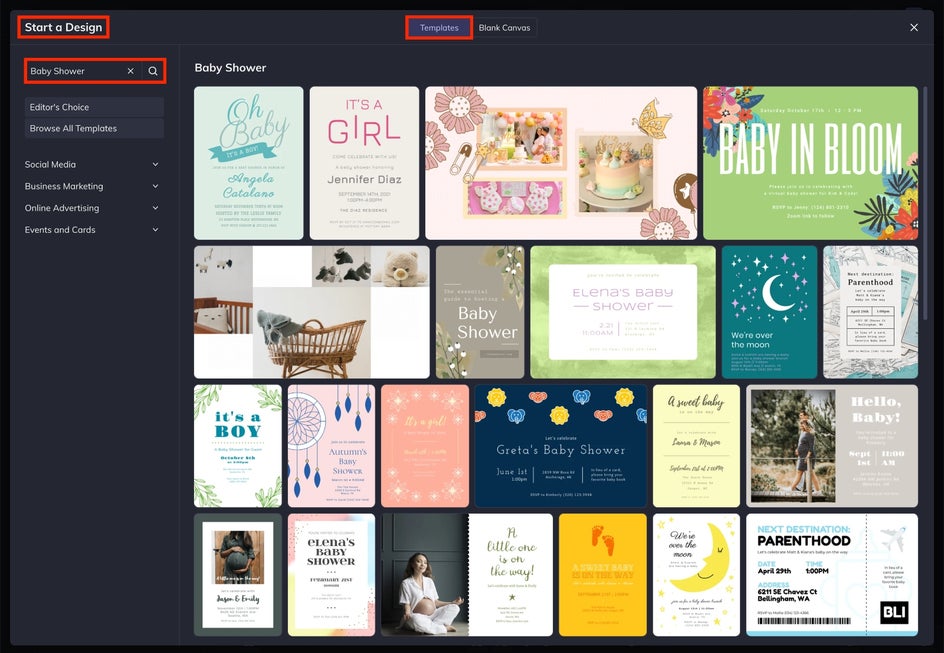
Once you’ve chosen the template you want to work with, click it. This will open the template in a pop-up window. Click the blue Use This Template button to load the template in the Graphic Designer. Now you’re ready to start editing!
Step 2: Update the Photos and Background
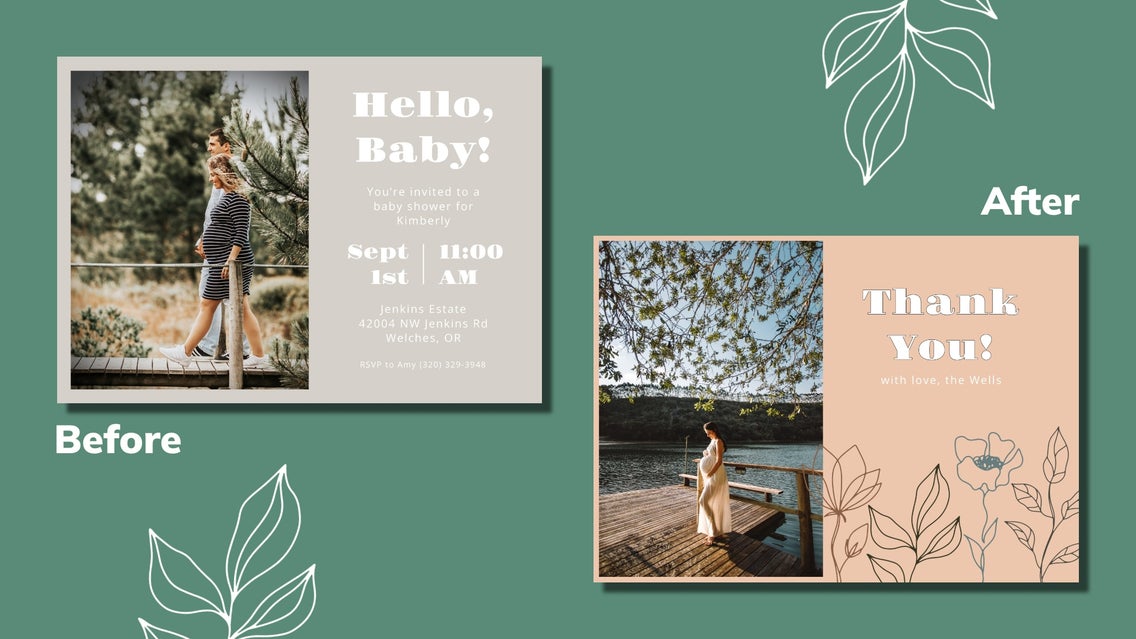
First, you need to upload a photo for your baby shower thank you card. Navigate to the Image Manager by clicking the topmost icon on the vertical left icon menu. You can click the blue Computer button to upload an image from your computer or click Search Stock Images to choose a more abstract image from the Stock Library.
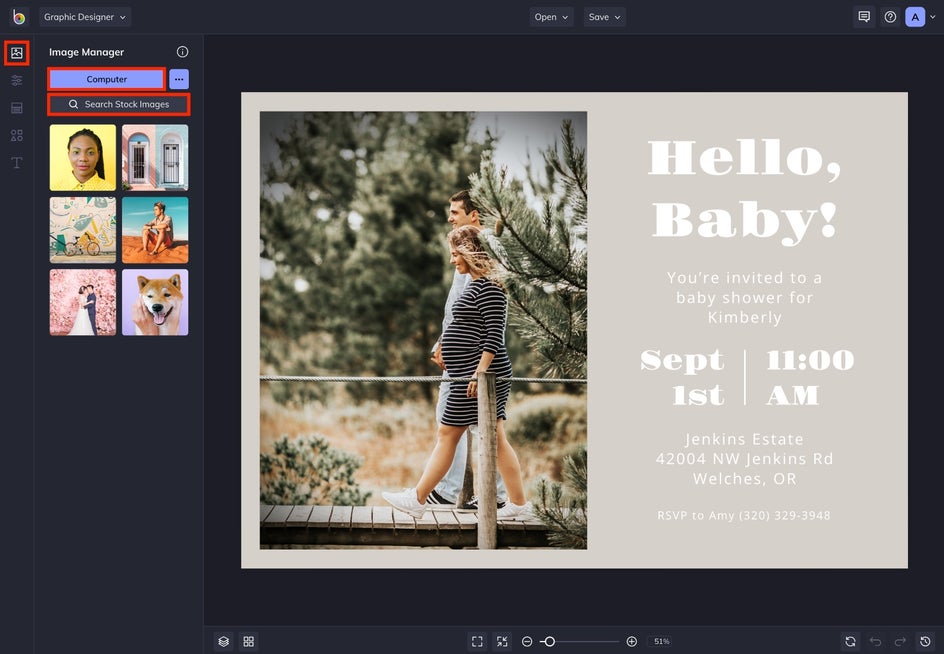
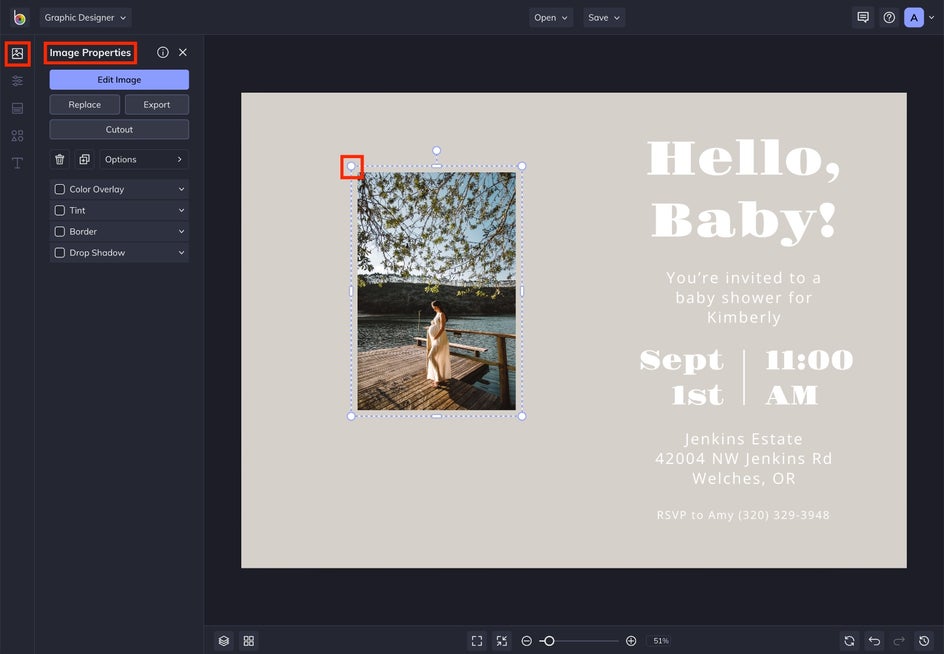
Once you’ve uploaded an image, it will appear Image Manager to the left of the screen. Double-click or click and drag the photo for it to appear in the template. Use the white dots that appear in the corners of the selected image to adjust its size and shape.
If you want to change the background color of your template, head to the Customize tab by clicking the second icon on the left icon menu. Click the small black arrow of the first colored square in the Background Color box. This will open a small pop-out menu allowing you to customize your thank you card’s background color.
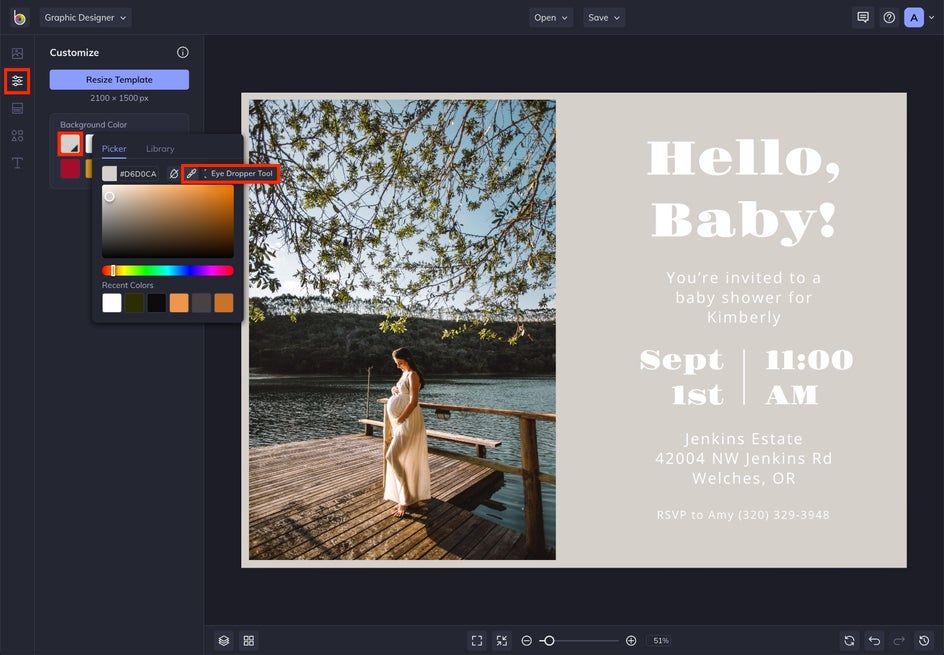
Pro Tip: Use the Eye Dropper Tool to make sure the background color is similar to a color in your thank you cards main image. This will ensure your entire creation looks and feels cohesive.
Step 3: Add a Nice Message
Make sure you leave a nice thank you message on the baby shower thank you card. Double-click on a text box to highlight the text and edit it, or delete it by clicking the "Delete" button on your keyboard. A selected text box will open the Text Properties menu to the left. Use this menu to adjust the font, size, and other features of the text.
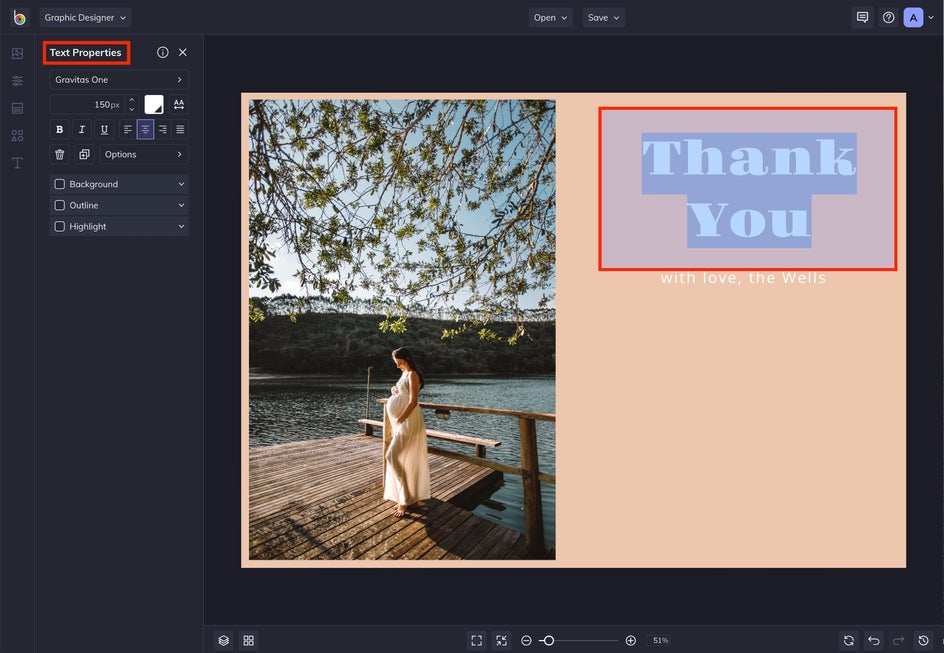
A simple "thank you" or something more in-depth are both great options. Make sure the text on your baby shower thank you resonates with you and the celebration.
Step 4: Upload Graphic Elements
Next, let’s add graphics to the template. Navigate to Graphics by clicking the second to last icon in the vertical left icon menu. You can choose to upload your own graphics by clicking the blue Computer button or select a graphic from BeFunky’s massive graphics library by clicking Search Graphics. Adding graphics to your thank you card is an excellent way to add character to your template.
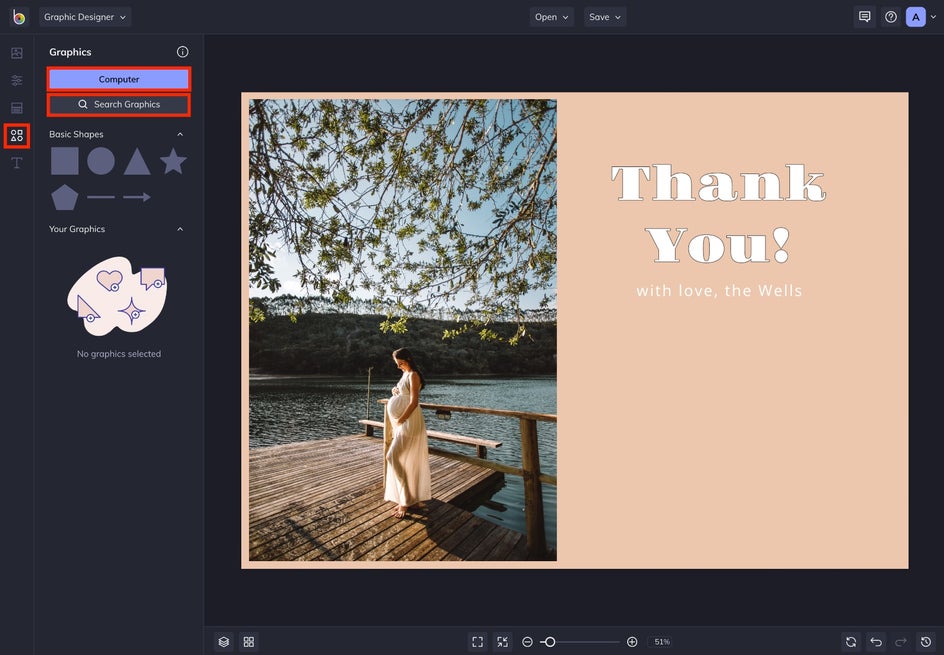
Selecting the graphic opens the Graphic Properties menu that allows you to customize it. Feel free to play around with different borders, lines, and shapes to make your thank you card look unique.
Step 5: Save Your Thank You Card
Now that your design has been finalized and you’re happy with the final product, it’s time to save and share your creation! Click the Save dropdown menu to save your design to your computer.

Express Yourself With a Baby Shower Thank You Card
Designing a thank you card for your baby shower isn’t a challenging or lengthy process when using BeFunky's Invitation Maker or Baby Shower templates. You can easily create an expression of gratitude for the joyous event.