


The Many Uses of Washi Tape and How to Design Your Own
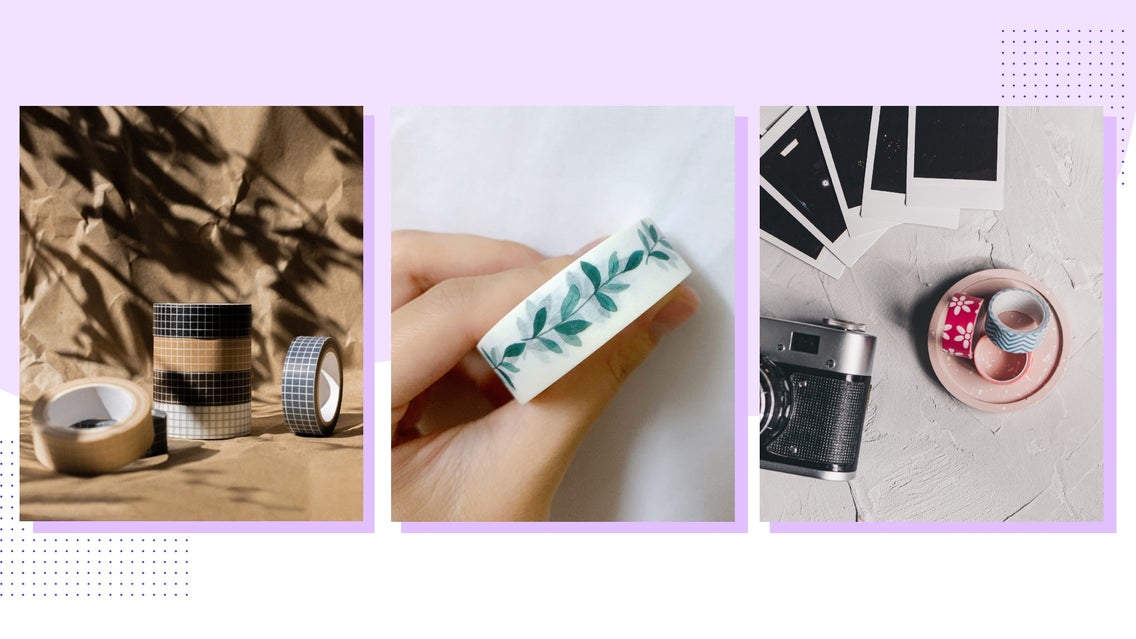
Washi tape is a multipurpose tape that comes in an array of colors, sizes, textures, and designs. You’ve probably come into contact with Washi tape in craft stores, usually in the scrapbooking aisle. This can be a fun decorative craft, but can also be used in bigger ways like creating your own customized Washi tape for your small business to enhance your brand identity.
Washi tape is traditionally printed on rice paper so it is semi-translucent, but because of its inventive process, it holds the brightness and boldness of the pigments that you otherwise wouldn’t be able to replicate. Let’s look at the many uses of Washi tape and then we will teach you how you can create your very own custom Washi tape with BeFunky’s Graphic Designer.
The Many Uses of Washi Tape
Washi tape was invented by a company called Kamoi Kakoshi Co. on behalf of a group of women who used masking tape in bookmaking. They partnered together to invent Washi tape so that they could have more, brightly colored tape options, as well as decorative designs. These are some of the many uses of Washi tape that you can do today.

Organizing and Labeling
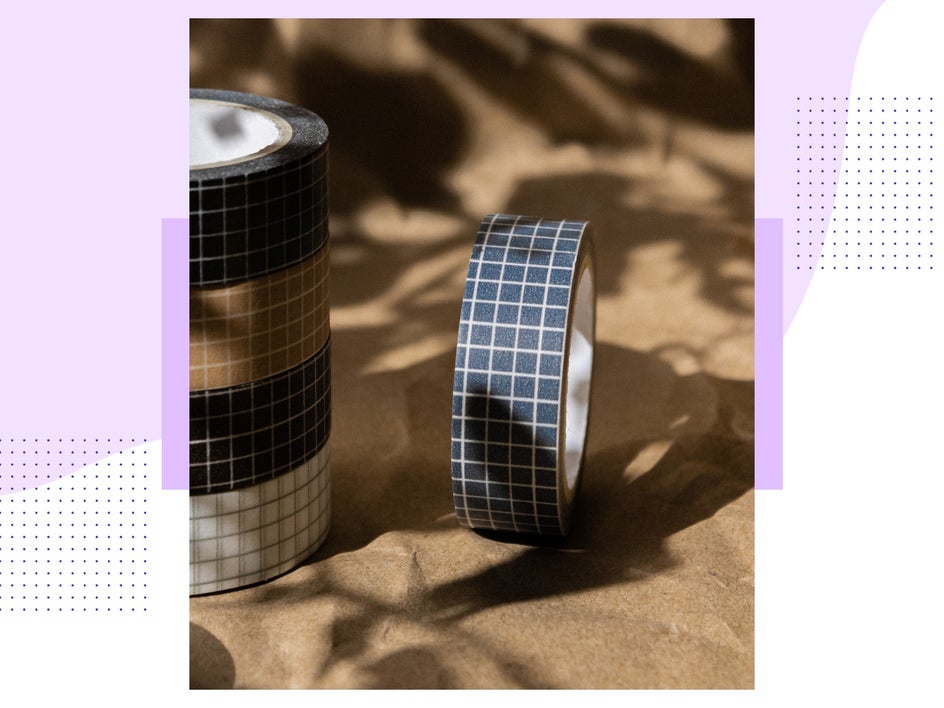
Washi tape can be used for organizing and labeling file folders, craft bins, and food storage containers. Not only is it the perfect size for labeling, but it can brighten up otherwise traditionally boring labeling processes. You can use different colored Washi tapes to label different categories you’re organizing.
If you are organizing products for your small business, Washi tape makes it easy to sort and label your products into bins so that you can easily remember what is in each bin – saving you time, and ultimately money!
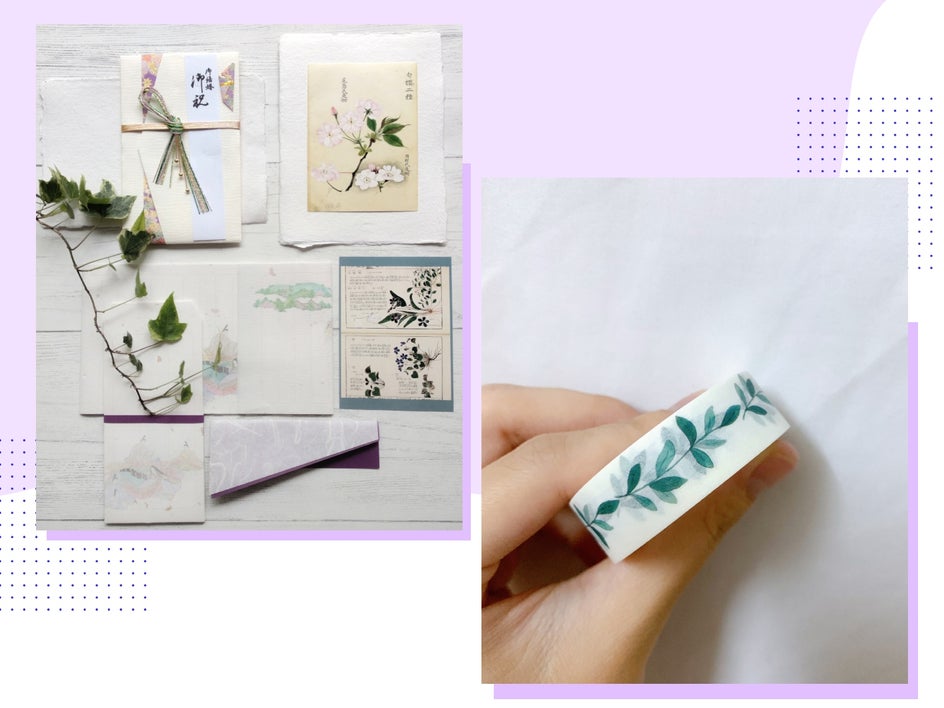
Scrapbooks, Journals, and Planners
These two options make Washi tape fun. You can use it decoratively or practically. The cool thing about Washi tape is you don’t have to use it like traditional tape.
Because it is decorative, you can use it to make cute layouts in scrapbooking like creating a frame around a picture or folding it in half to make little flags (which can also be done to make cake or cupcake toppers). I like using washi tape in order to make book tabs for my journal or planner so that I can turn to specific pages quickly.
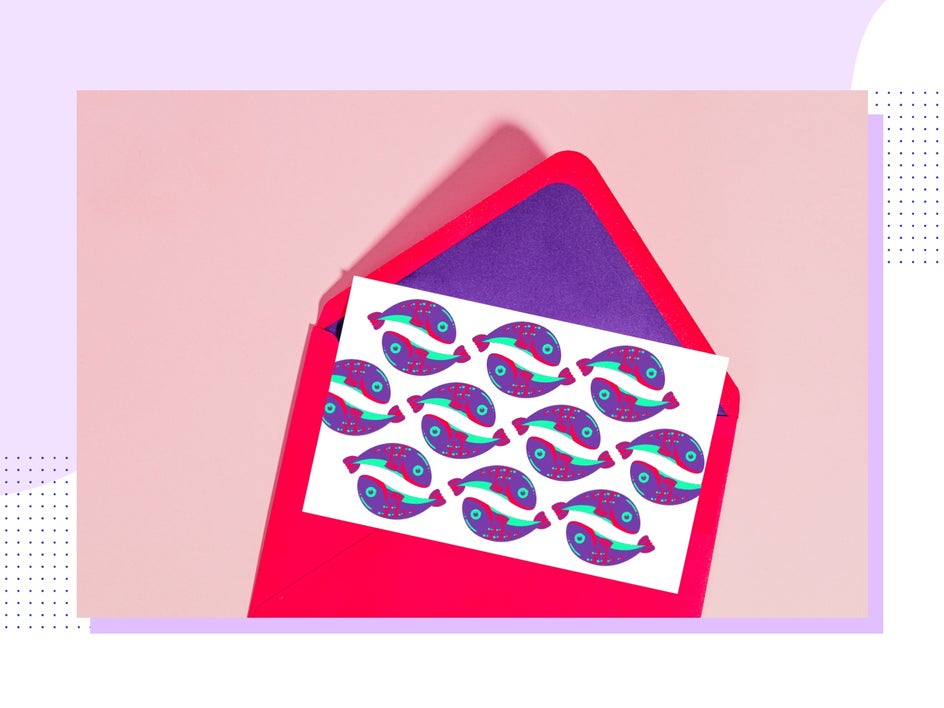
Letters and Packaging
Although snail mail is less common, we all love getting a letter that is not a bill or bank statement, especially if it is decorated cutely. You can make a border around your envelope with Washi tape, or seal the back of your envelope with a cute design.
The other great use for Washi tape is on your packages. This is where I like to use Washi tape for brand identity as a small business. Trading out boring masking tape for decorative Washi tape is an easy way to strengthen your branding and brand awareness. Washi tape can also be used to seal small baggies and other products that you may have for your business.
How to Design a Seamless Washi Tape Pattern
We are going to show you how to customize your own Washi tape in a seamless pattern so that you can order your own rolls! It is relatively inexpensive to do this and a good next step if you are looking to upgrade your packaging or projects!
As a note for small businesses: When building your brand identity, you may have opted out of creating a brand pattern. This is a great time to create one because this peek-a-boo brand element helps to strengthen your brand awareness. Creating a pattern for your brand doesn’t necessarily need to include your logo; it can, but it doesn’t have to.
Let’s say that you’re a bakery that has a spring color palette with yellows and blues and you use a lot of lemons or fruits in your designs. You can create a lemon-patterned Washi tape that would fit with your other brand elements. When you are ready to start designing your Washi tape, head to BeFunky’s Graphic Designer and follow these steps:
Step 1: Choose the Specs
It is important to begin by working with a Washi tape printer like Noissue. I usually start here so that I can design specifically for the specs they provide. Specs stands for specifications and is simply the blueprint that the printer needs in order to correctly print your project. If you can’t find them on their site, just reach out to them and ask for the specs regarding the product you want to order. They will usually respond right away.
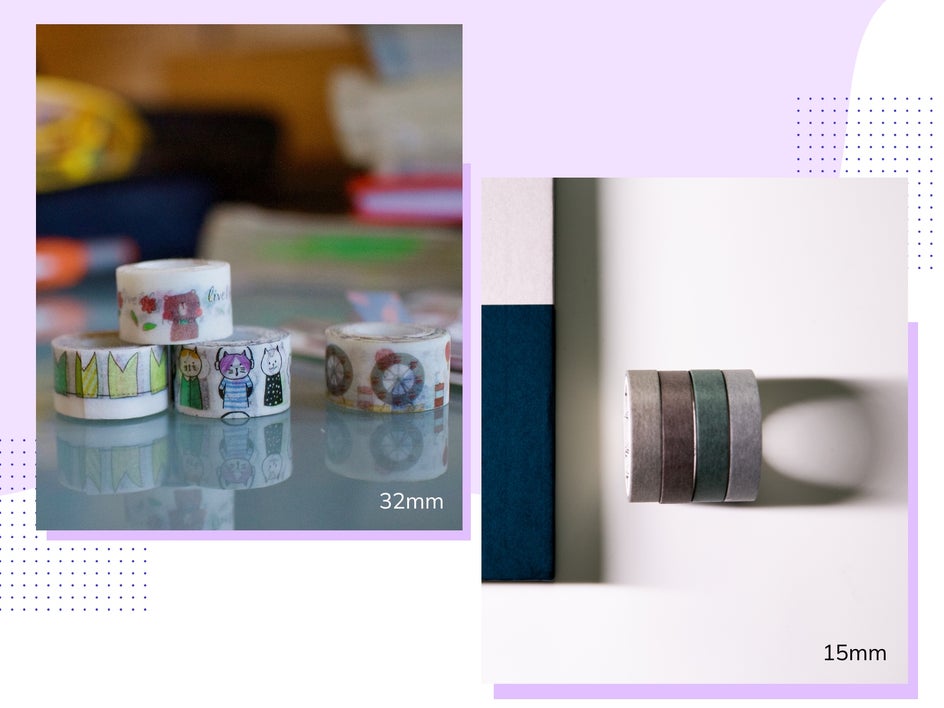
A standard Washi tape’s width ranges from 15mm to 32mm wide. We are going to design for a 32mm wide Washi tape, which is about 1.2 inches. Note that one of the specs the printer may want you to accommodate for is Bleeds. Bleeds refer to the printer’s cutting guidelines. Bleed is printing that goes beyond the canvas. This ensures that when your design is cut, the design goes all the way to the edge of the paper or tape, and there isn’t any blank space during the cutting process.
Typically, you will add an extra 1mm to the top and bottom of your tap. If we are designing a 32mm tape, we will want our design file to be 34mm, so that when they cut it to be 32mm, the design goes all the way to the edges.
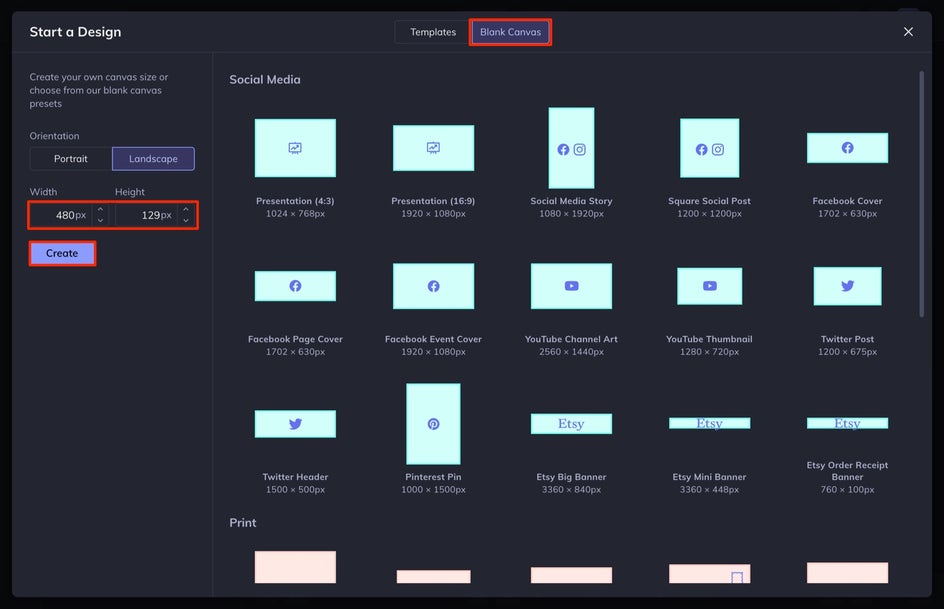
In BeFunky’s Graphic Designer, select Blank Canvas and then set the Width to 480 px and the Height to 129 px – this will make it so the canvas lays horizontally, which is a bit easier for designing. 129 is 34mm converted into pixels. We are going to design a pattern that is about 5 inches long (480 px) and is seamless so that the entire Washi tape roll looks like one long pattern. Remember, depending on the company you use, your specs might be a little different. Since we are converting mm to px, we'll use this site to get the correct sizing for our canvas.
As a note: Different companies require you to design and save your file differently. Typically, there are a few standards for printing. First, you need to ask for the specs, which we discussed above. Sometimes the printer will ask you to save your file as 300dpi, which simply means to have a high-resolution file for printing – we will discuss this in the last step. The printer may also ask for appropriate Bleeds, which we also discussed above – but it is important to know these things before you design, so that you can create the file accordingly.
Step 2: Design a Custom Washi Tape
When creating a custom design, make sure to keep your design simple. Remember that your design is only 32mm, so you want to make sure that what you design can be seen at that size (1.2 inches) – this includes any text you may incorporate! You can do some test prints at home to ensure the sizing is how you like it before you get it professionally done.
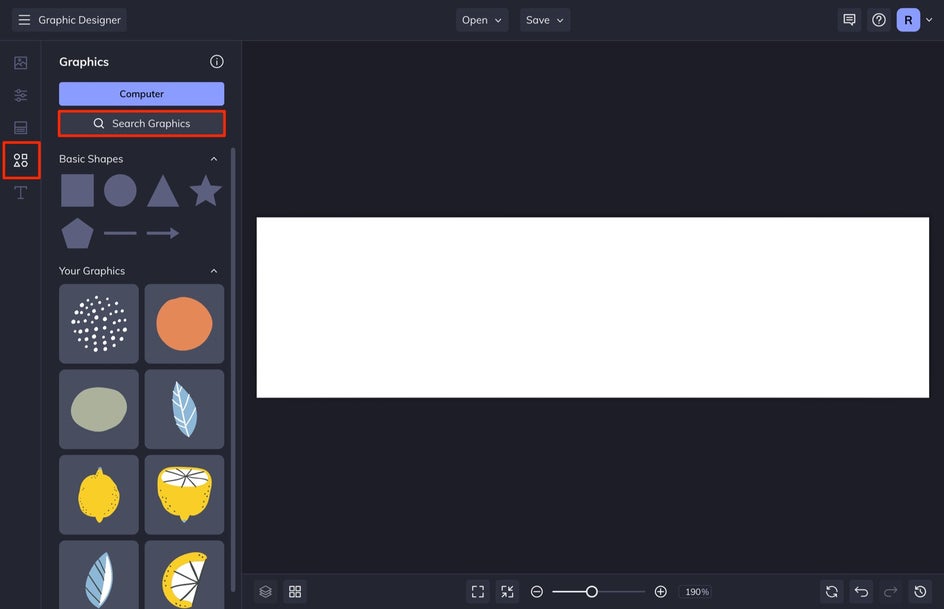
Now it’s time to select your visual assets. Do you want to do a floral design? Do you want to create a cute design with an object you love like donuts or cats? Do you want to do a text design? When you are ready to start designing, select Graphics from the left-hand menu and then select Search Graphics. We are going to make a cute and floral lemon design.
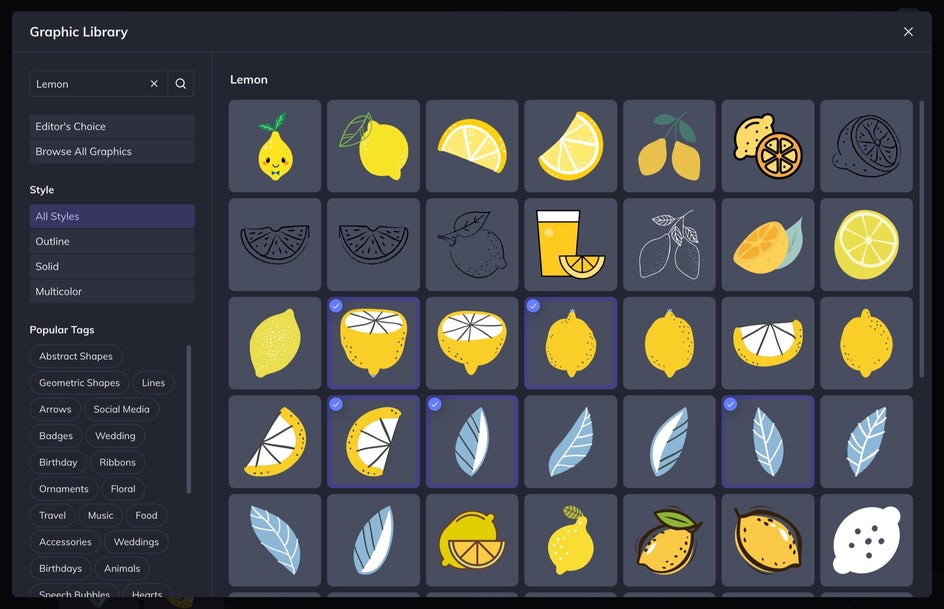
In the Graphics Library that appears, simply search for the graphics you want and then select the ones you want to use. They will be automatically added to your Graphics Manager, indicated by a blue checkmark. When you’ve selected the ones you want, exit the Graphics Library at the top right corner.
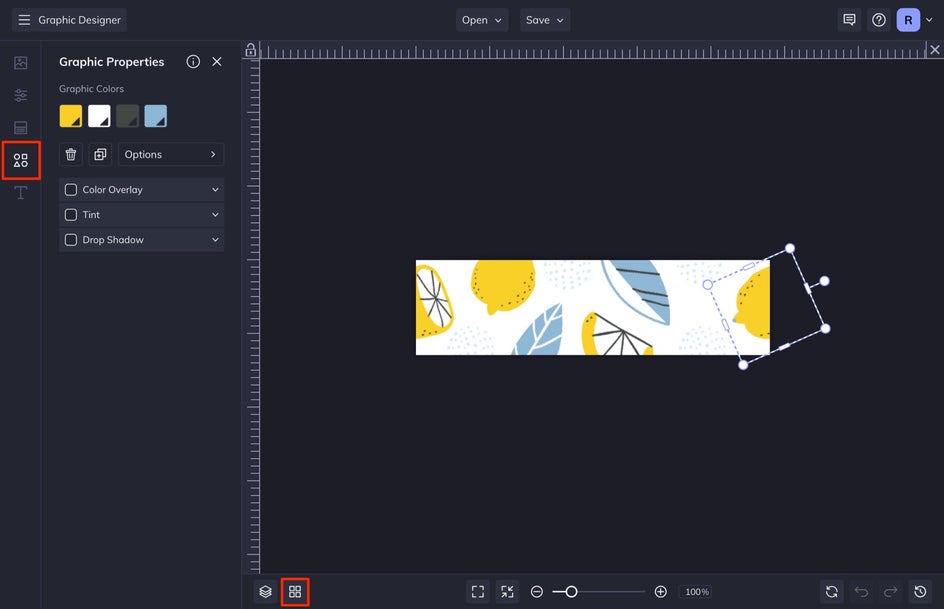
To add the graphics to your canvas, double-click or drag and drop them directly onto your canvas. First arrange the elements in the center in the formation you want, being careful to avoid the left and right edges. In order to make the design seamless, we have to do something specific on the edges.
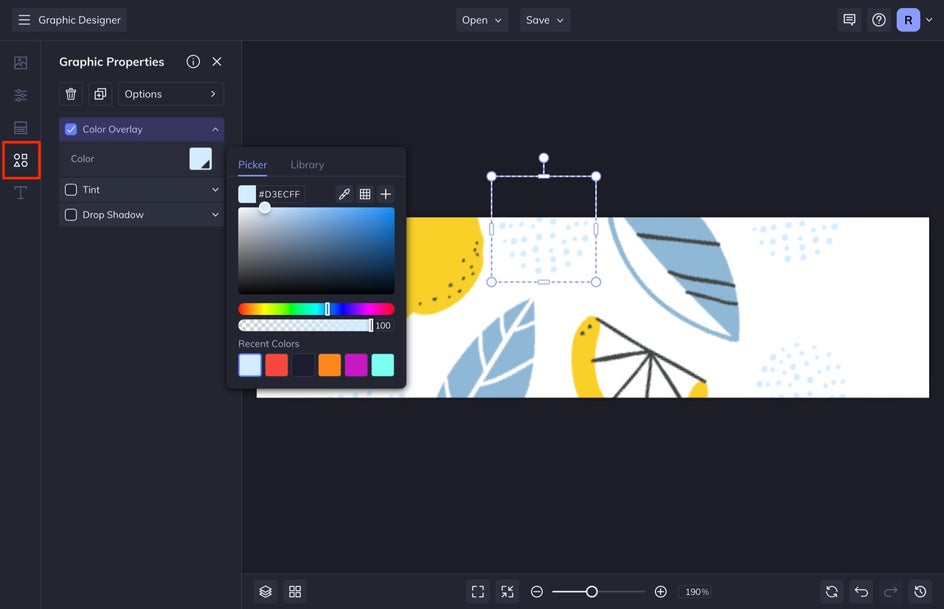
You can customize the graphics in the Graphics Properties menu that appears when you select one of the graphics. Select the color swatch to change the Color. Remember to keep the design simple, since it will be about an inch wide! It looks larger on your screen when designing than it will be in real life.
Step 3: Align the Graphics for a Seamless Pattern
In order to make sure your design is seamless, certain design elements will need to appear as two separate halves on opposite sides of the canvas. Check out Step 2 of this article. Isabelle says that once you’ve added the graphics to your design, take one of the graphics and move it so that the left side is cut vertically at the edge of the canvas. To ensure your design is seamless, choose a landmark on your graphic that helps you decide where to cut it off.
For us, it is one of the freckles on the lemon. We know exactly where to cut it off on both the left and right sides. After you place the graphic on one side and align it to your landmark, hit the “D” key on your keyboard to duplicate the graphic. Move this to the other edge of the canvas, so that the right side is cut off in the same spot as the left. I make sure that my Snapping and Display Distances are ON in the Settings menu at the bottom left of your canvas. This helps to align the top and bottom of the graphic you are trying to match up.
You might see that your graphics look a bit pixelated when the canvas is zoomed in. Remember that the final version of this tape is only about an inch wide, so your graphics won’t look pixelated in the final version. To get a more honest representation of what your design will look like, you can zoom out.
Step 4: Save Your Washi Design for Print
When you are finished with your design, it is time to save your file! You will need to save your file as a high-quality print. You can achieve this in BeFunky by selecting Save and then Computer. Once the Save to Computer menu appears select the PDF tab and then select Print for the Quality.

Make sure you also Save as Project so that if the printer has any recommendations for revision, you can come back to your project in BeFunky to make the necessary edits.
Transform Your Branding With Custom Washi Tape
Now you have all the steps you need to design your very own custom Washi tape. After you save your file, upload it to any Washi tape company that allows you to use your own designs. Try customizing your own Washi tape in BeFunky’s Graphic Designer!


