How to Take and Edit Self-Timer Photos From Your Phone
Though the first camera with an internal timer was produced in 1956, getting a good shot without a person standing behind the camera wasn’t really possible until the last two decades. Now, digital cameras and smartphones allow you to take amazing photos using the timer feature – if you know how to use it. In this article, we’ll cover our best tips for taking great self-timer photos, as well as how to edit them to perfection using the BeFunky Photo Editor.
When to Use Your Smartphone’s Camera Timer
Camera timers are often used to include the whole group when taking photos of friends and family. Just set up your timer to around ten seconds you have plenty of time to get situated in the shot!

You can also use your camera timer to take stand-out selfies: Most phones’ back cameras are higher-quality than the back camera, and allow you to capture more unique angles. On some phones, modes like the portrait setting are only available with the back camera.
Another advantage of using a tripod and the self-timer feature is that you’re able to eliminate any jitter due to unsteady hands, resulting in sharper and brighter photos.
How to Take Good Self-Timer Photos
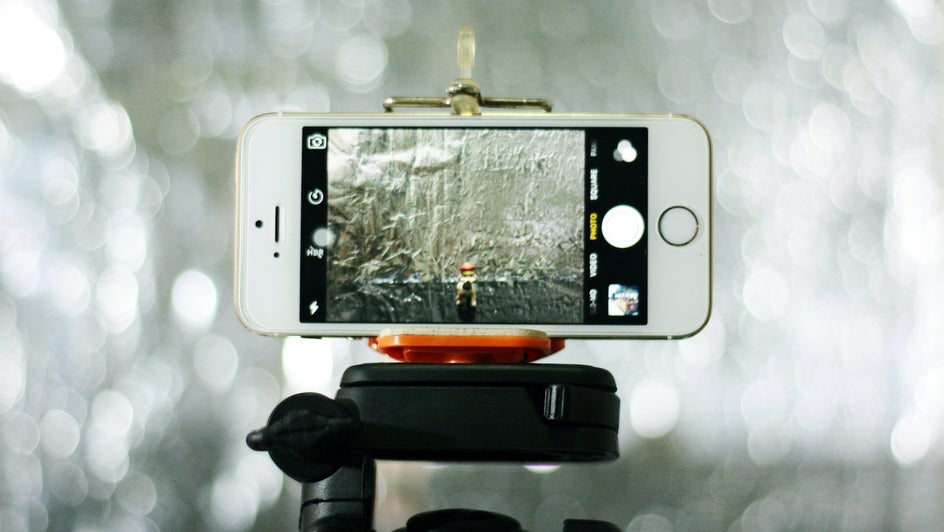
To get amazing photos using your phone camera’s self-timer, it’s best to have a tripod so that you can set up your phone anywhere. There’s nothing worse than having nowhere to place your phone when you want to get a picture in front of some beautiful scenery! You can easily buy a phone tripod for around $20 online or at an electronics store.
Taking good self-timer photos means setting up the shot thoroughly beforehand. Always check the lighting and the composition of your photo. Consider taking a few test shots to see the final result.
How to Use the Camera Timer on an iPhone
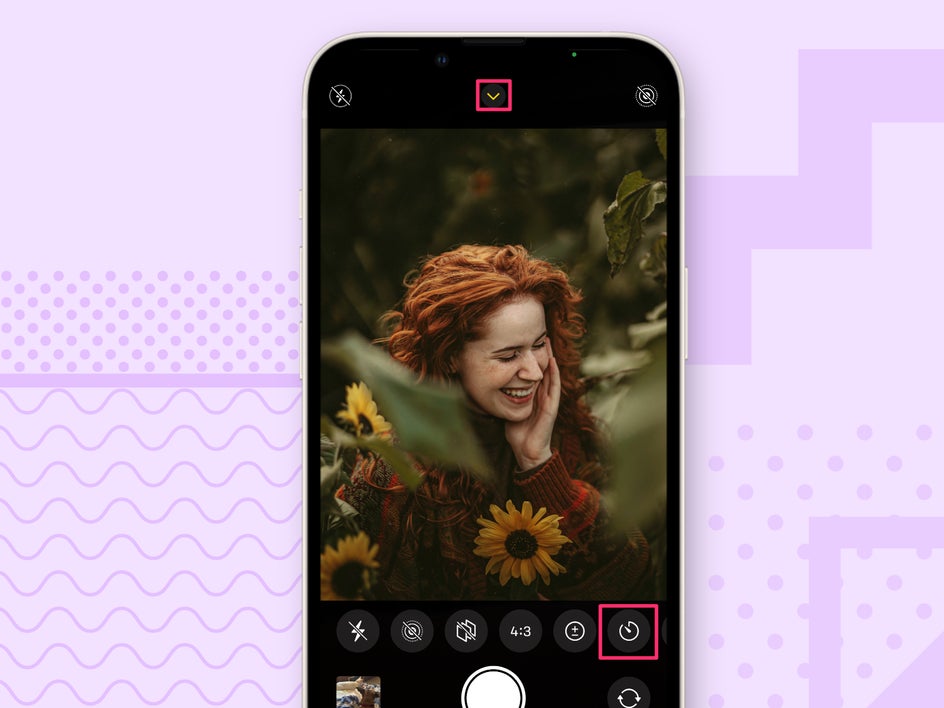
Once you know where all the tools are, using the camera self-timer on any smartphone takes just a few clicks. For an iPhone, after you’ve opened the Camera app, just click the little arrow at the top of the screen. Your camera options will now open at the bottom of the screen. Scroll to the left until you see the Timer icon.
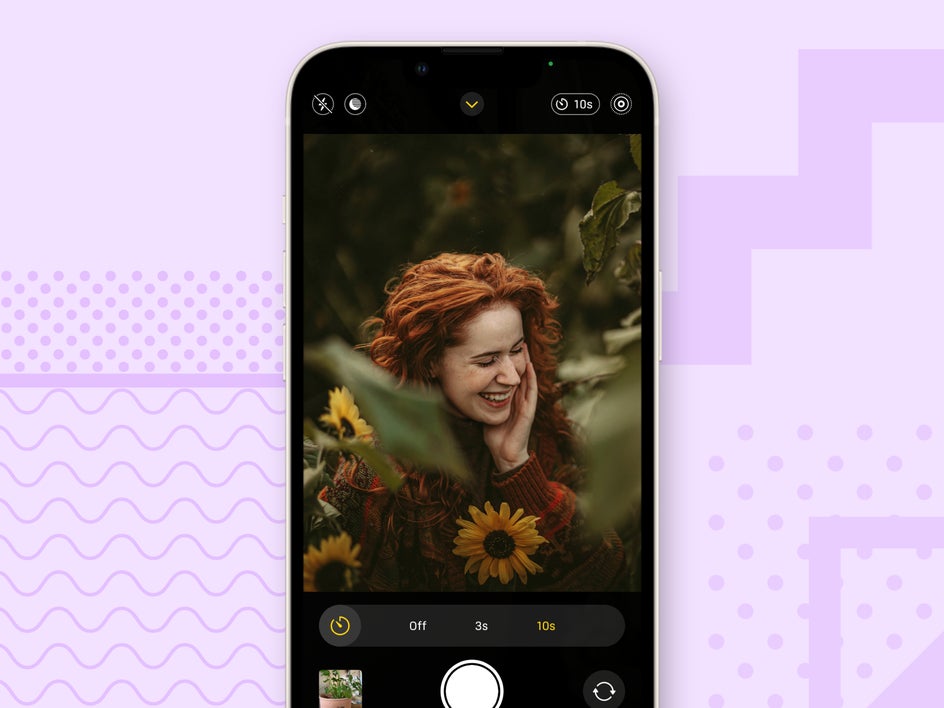
Click the Timer and choose how long of a delay you want. You’ll have the option of 3 seconds or 10 seconds. The flash will indicate how many seconds have passed so you can get situated for your photo in time.
Before starting the timer, make sure you physically adjust your iPhone so that your subject will be in frame. If you want, you can take a few shots without the timer first to confirm that both the lighting and composition are just right. However, you can always adjust these things in post using the Photo Editor!
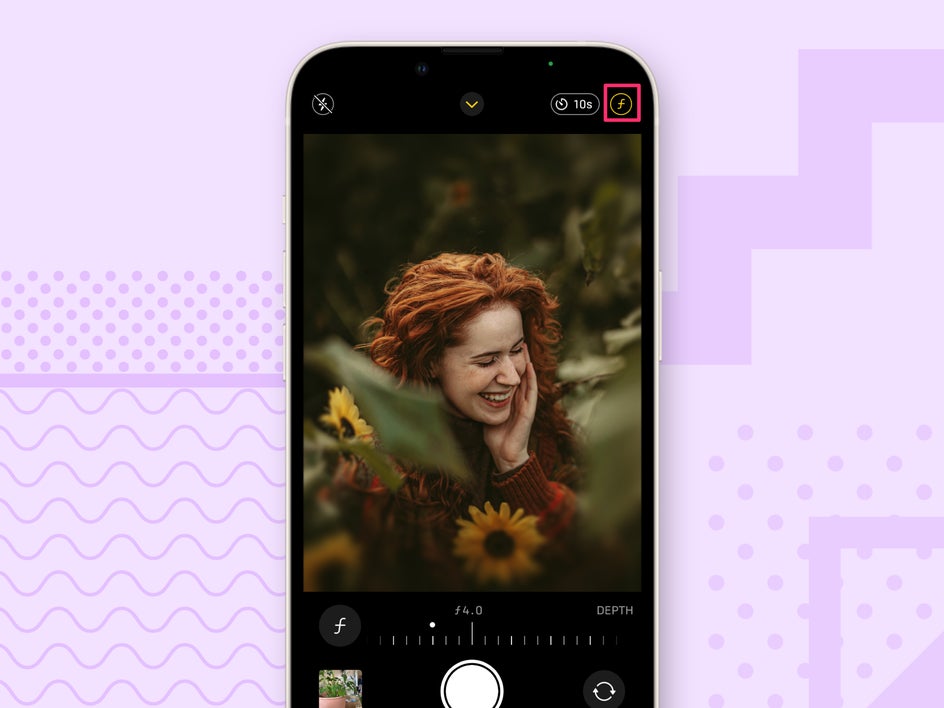
If you’re taking a photo in Portrait mode, you can let the lens adjust to the subject automatically or you can use this opportunity to change the depth (focal point) using the f button in the upper right corner.
How to Use the Camera Timer on an Android
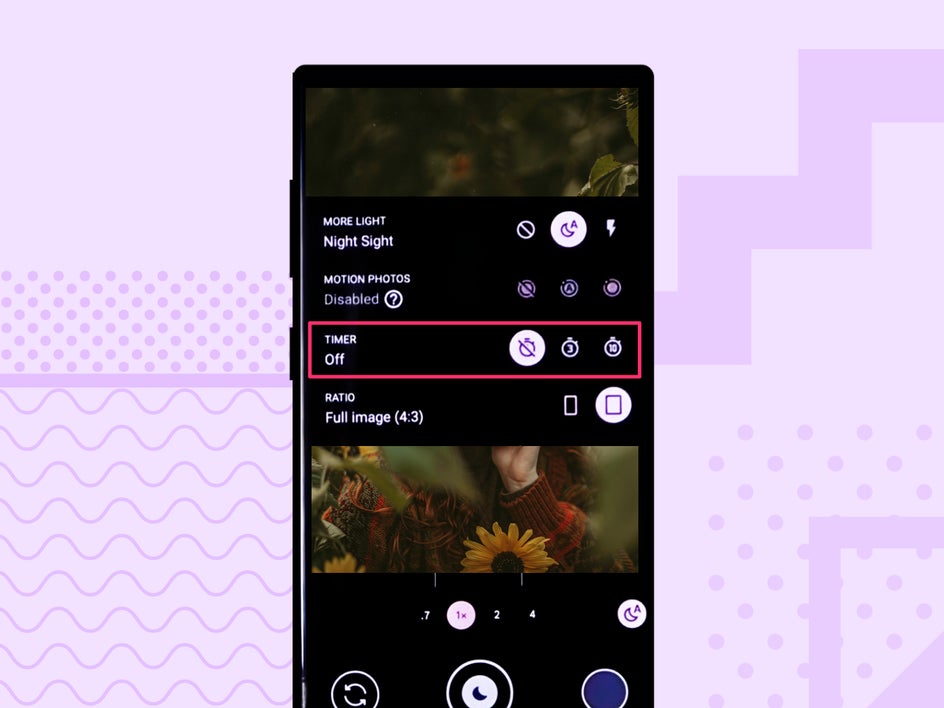
To use the camera timer on your Android phone, you’ll simply want to swipe down from the top of the screen. The Timer will give you the option of 3 seconds or 10 seconds.
Don’t forget to use a tripod for the clearest possible photos!
How to Edit Self-Timer Photos
If you make sure to set up your shot beforehand and use a tripod, your self-timer photos will turn out as if someone had been standing behind the camera all along. But to really put your images over the top, you can adjust the lighting, composition, blur, and more using the free Photo Editor. You can do this from your desktop or edit right from your phone with the BeFunky mobile app.
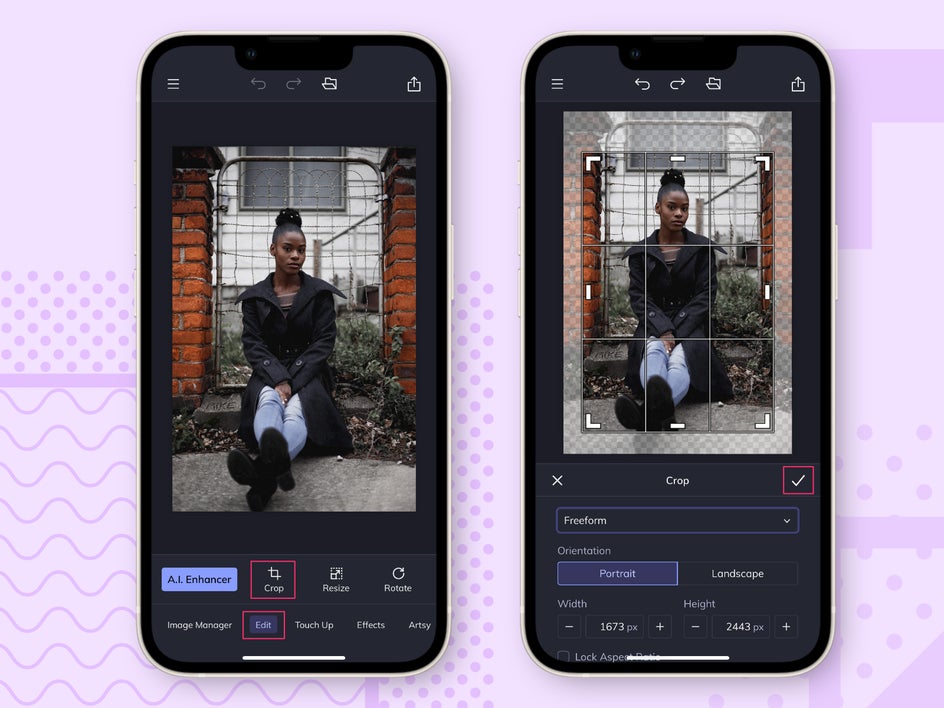
Step 1: Crop
After you’ve uploaded your self-timer photo from your camera roll to the Photo Editor, you’ll have hundreds of tools at your fingertips. A great place to start is by cropping the photo so that you’re happy with the composition. Just use the Crop tool in the Edit tab.
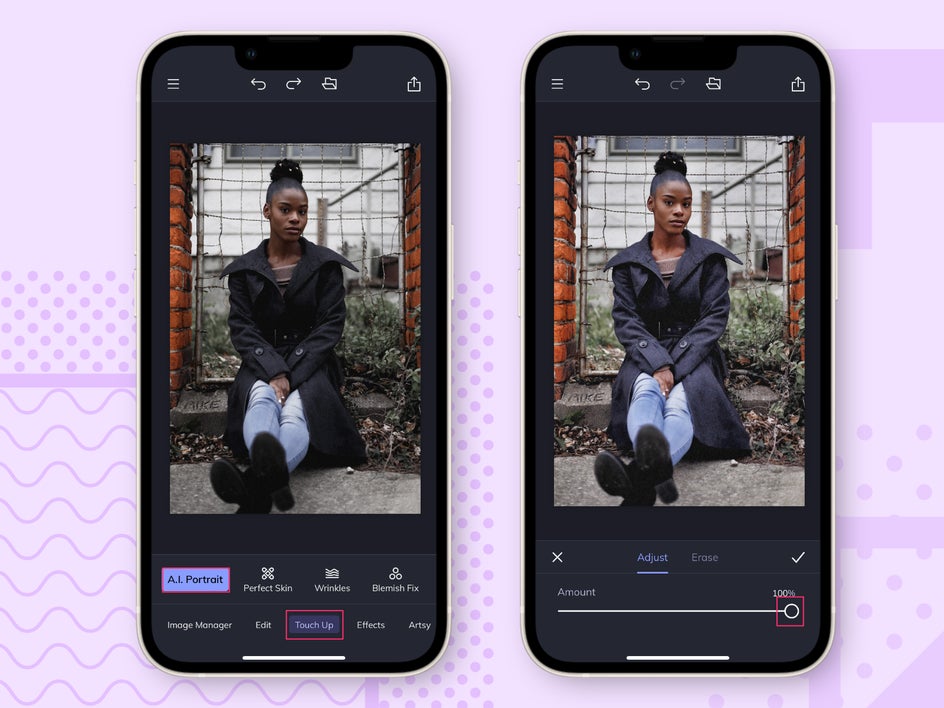
Step 2: Enhance
For quick and easy editing, you can use BeFunky’s A.I. Portrait Enhancer tool, found in the Touch Up tab. This will edit for lighting and color, and is specifically tuned to make portraits look their best.
Step 3: Edit
If you still feel the need to edit the lighting or touch up any blemishes after using the Portrait Enhancer, you’ll find dozens of helpful tools in the Edit and Touch Up tabs. Here we’re going to use the Color tool to boost the warmth of the image just a bit.

The precision of the adjustment sliders makes it easy to edit for shadows, saturation, temperature, and more.
Step 4 Add Effects
You can make your self-timer photo even more unique by adding any one of BeFunky’s many Effects. Here we’re using Summer to add a pop of color similar to a light leak from film cameras. You can even customize the effect using the adjustment sliders!

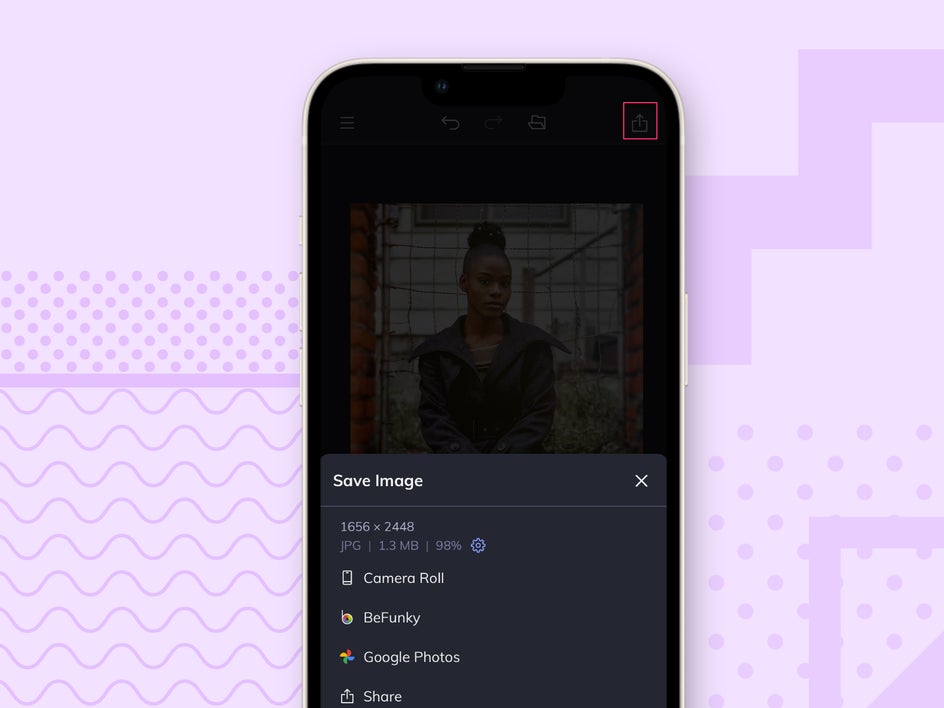
Step 5: Save Your Self-Timer Image
Once you’re done editing, saving is a breeze. Just click the Save button in the upper right corner to save to your phone, to BeFunky, or to another location.
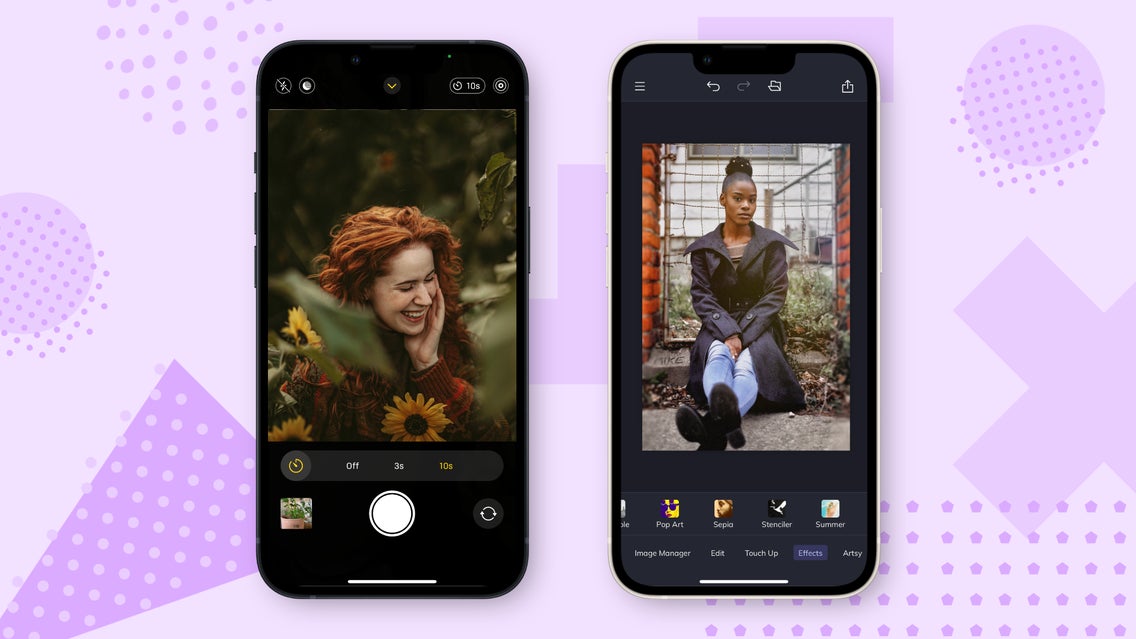
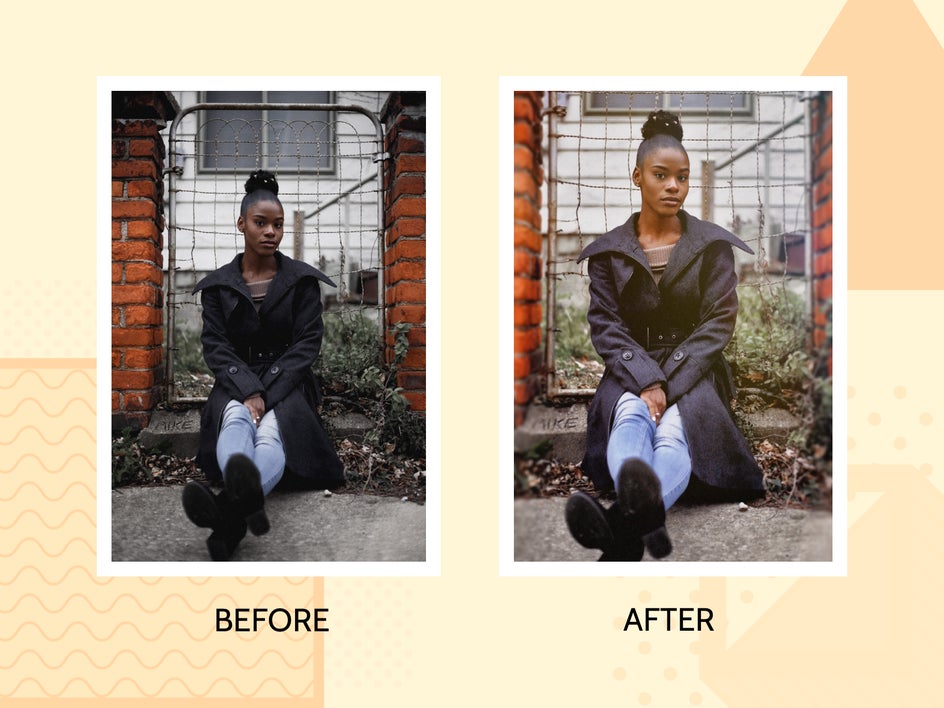
And that’s it! Here are our final results:
Take Better Self-Timer Photos Today
Gone are the days of being left out of group shots or asking strangers to take your photo. You can set up your smartphone to be your own photographer! Just follow the tips above and you’ll get better group photos, more flattering selfies, and better travel shots. Plus, achieve professional-level editing right from your phone with the BeFunky mobile app!