How to Replace Skies for Editorial-Quality Results

Outdoor photos often capture natural light, candid emotion, and stunning scenery – but the sky doesn’t always show up how you want it to. Harsh lighting, dull clouds, or blown-out skies can distract from an otherwise perfect image. Whether you’re shooting editorial portraits, lifestyle content, or product photography, the Sky Replacer makes it easy to enhance your skies without needing a reshoot. In just a few clicks, you can transform your outdoor photos and elevate the entire look.

Why Replace Skies in Editorial Photography
Natural light photography is beautiful, but unpredictable. With the Sky Replacer, you can take control of one of the most stubborn elements in outdoor shooting and make sure every image aligns with your creative intent.
- Fix overexposed or flat skies while keeping your subject crisp.
- Match the sky to the lighting and mood you were going for.
- Turn good shots into portfolio-quality images in seconds.
How to Replace the Sky of Any Photo
Sky replacement is perfect for refining lifestyle, portrait, or editorial photos with minimal editing. Here’s how to do it:
Step 1: Open the Sky Replacer
Head to the Sky Replacer, found in the Edit tab under Remove/Replace. Upload the photo you want to enhance to get started. The tool will automatically isolate the sky in your image. Click Change Sky.

Step 2: Choose a New Sky
Next, click on Image and choose Select Sky to browse BeFunky’s collection of skies – or upload your own.

Soft clouds, pastel tones, or warm sunset skies often add the most impact to portrait and editorial shots. But depending on how busy your foreground is, you may opt for a more neutral blue or grey sky.
Once you've chosen a sky, click on the Settings icon to refine it further.

Step 3: Edit the Sky and Foreground
Start in the Colors tab to adjust the new sky’s contrast, color, and lighting. Then use the Adjust tab to fine-tune things like Blur, Fade Edge, Shift Edge, and more for a natural blend.

Want to enhance your subject without switching tools? Click the back arrow to return to the main Sky Replacer menu, then select Edit Foreground. You can easily adjust exposure, temperature, and more – all without leaving the Sky Replacer workflow.
Step 4: Apply and Save
Once you’re happy with how your sky and subject look, head back to the main menu and click Apply to lock in your changes.

Click Save at the top of the screen and choose your destination. Your photo is now ready to share, print, or add to your portfolio.

The result is a photo that feels polished and expressive – with a sky that enhances the mood and complements your subject without overpowering it. Whether you're editing for a client, your portfolio, or a creative concept, the Sky Replacer helps you achieve a cohesive, professional finish with just a few clicks.


Creative Ways to Elevate Outdoor Edits
The right sky can enhance the mood of a photo without stealing focus from your subject. Whether you're capturing portraits, fashion shoots, or lifestyle moments, here are a few ideas to make your skies work harder for your composition:
Fix Unflattering Skies
An overexposed or underexposed sky can overpower your subject and throw off the balance of your shot. Replacing it with a more evenly lit sky – or adjusting the tones of the original – helps refocus the viewer’s attention and gives your photo a cleaner, more deliberate finish.


Match the Mood to the Moment
Use warm, glowing skies to enhance a nostalgic vibe, or opt for ethereal clouds to give your shot a cinematic edge. From product shots to fashion photography, the Sky Replacer helps your background match your story.


Unify the Look of a Series
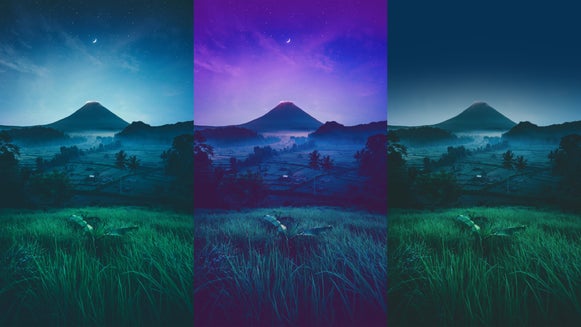
When you’re editing multiple images from the same shoot or campaign, skies that don’t match or don't quite fit the intended aesthetic can feel jarring. Replacing them with a consistent tone or lighting style makes your collection feel seamless and professionally polished.


Get Editorial-Quality Results With the Sky Replacer
You’ve already captured the perfect light, expression, and setting – now you can make sure the sky supports your vision too. The Sky Replacer gives you an easy way to refine outdoor photos and deliver work that looks consistent, cohesive, and gallery-worthy.
Try the Sky Replacer today and take your outdoor photography to the next level.