


Kids Portraits: Try These Creative DIY Ideas!
It might sound cliché, but it’s true: kids grow up in the blink of an eye. Therefore, it’s vital that you capture long-lasting memories of their childhood that will stand the test of time.
Nothing is quite as effective at this as those youthful portraits that take center stage within any parents’ or grandparents’ home. But rather than displaying a run-of-the-mill portrait, why not consider adding a creative twist?
Don’t worry – if you need some easy DIY kids portrait ideas, you’ve come to the right place. From DIY silhouette photos and colored background images, to mixed media images and more – the following creative children’s portrait ideas are sure to add some fun to your home decor!
Idea 1: Portrait Against a Simple Backdrop
For a modern and minimalistic take on kids’ portraits, why not consider removing the backdrop and replacing it with either a crisp white or colorful background? This allows you to create multiple portraits of your children (or a single child) which are cohesive and easily fit in with any home decor style.
The best part is that this type of artistic child portrait is so quick and easy to create using BeFunky’s Background Remover! Just upload your kid’s portrait to the Photo Editor, then let the Background Remover tool work its magic. Here’s a full tutorial to show you how – whether you wish to leave the background white or add a custom-colored hue.

Idea 2: Black Silhouette Against Your Child's Artwork
This artistic portrait idea for children takes creativity to a whole new level! By combining your child’s silhouette with an artwork they created themself, you’ve got a unique and special artwork that will always hold a special place in your heart.
Wondering how to make a children’s silhouette when you don’t have any graphic design experience? While it might seem complicated, creating a DIY silhouette photo against an artwork isn’t hard to do at all.
Follow the first three steps in the tutorial above to choose a blank canvas, upload your portrait, and remove your portrait’s background. Then, just follow these two steps below!
Step 1: Turn Your Portrait Into a Silhouette
Click on your portrait layer and then from the Image Properties panel that appears, click Color Overlay.
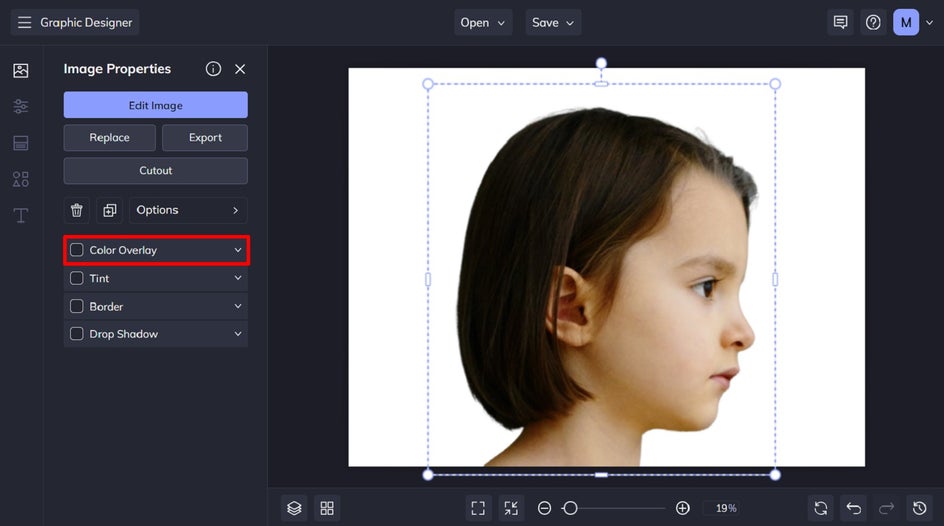
You can choose any color you wish for your silhouette. For this example, we’re using black.
Step 2: Add Your Artwork as a Background
Next, it’s time to add your child’s artwork image as a background to your silhouette. If you haven’t already scanned your child’s artwork to turn it into a digital file, now is the time!
Navigate to the Image Manager, then click Computer to upload your artwork from your computer’s files.
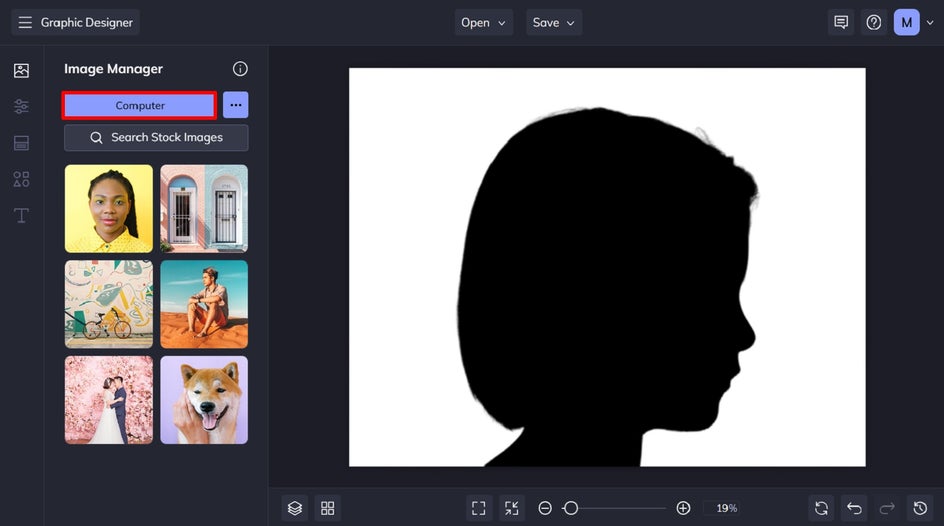
Once within your Image Manager, simply drag and drop it onto your canvas. Then, using your cursor, drag the image’s corners to make it fill your canvas.
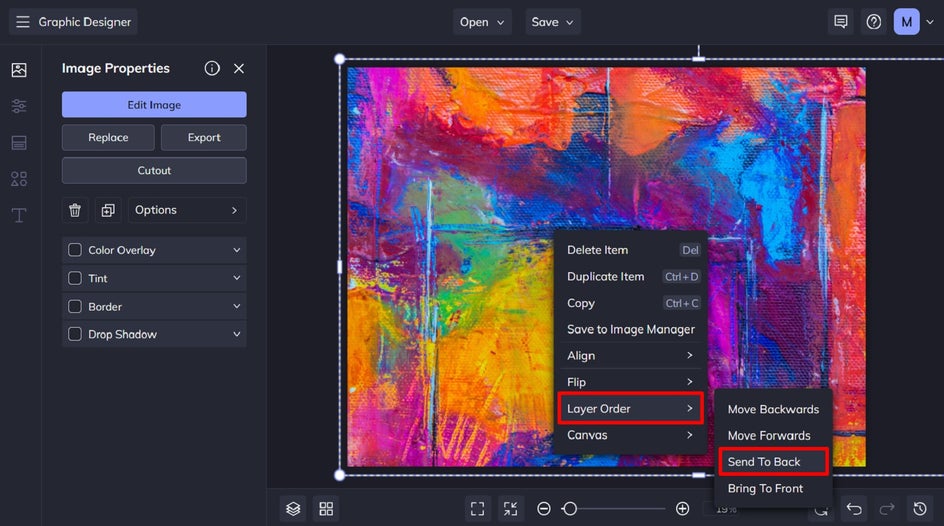
If your artwork is in front of your silhouette, just right-click on your artwork image, then select Layer Order > Send to Back.
Then, all that’s left to do is to save your artwork so it’s ready to print, frame, and hang. So easy!

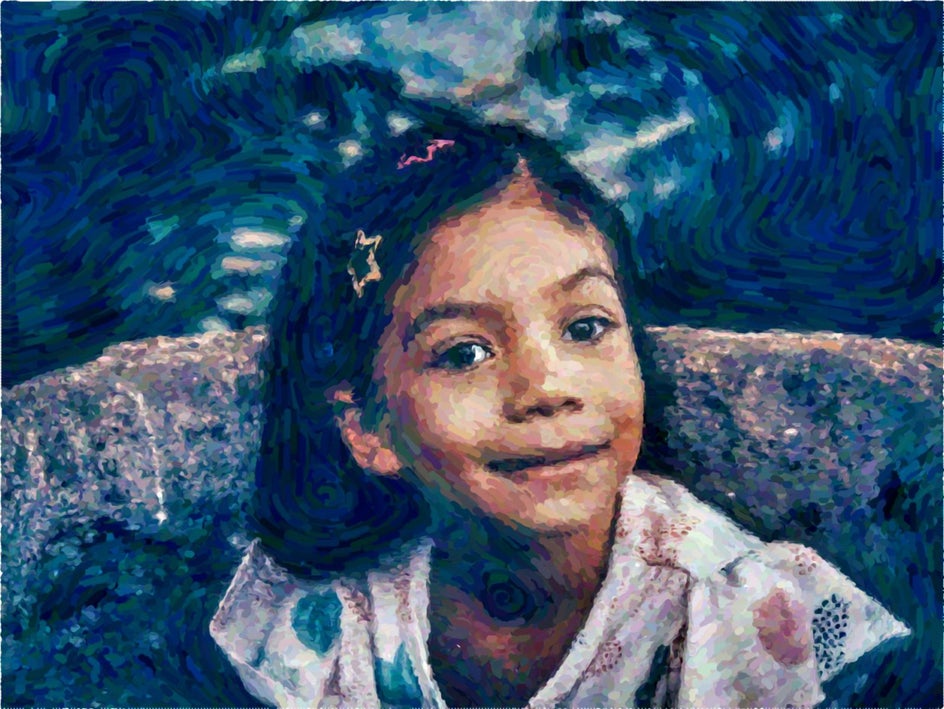
Idea 3: Apply An Artsy Effect
When it comes to turning a photo into art, BeFunky’s Artsy Effects are your hero. Located within the Photo Editor, these photo effects allow you to turn any photo into a work of art – whether that’s a watercolor or oil painting, a sketch, line drawing, etc.
All you have to do is open the portrait you wish to edit in the Photo Editor. Then, navigate to the Artsy Effects tab and select your desired art style. We’ve got a step-by-step tutorial to show you how it’s done!

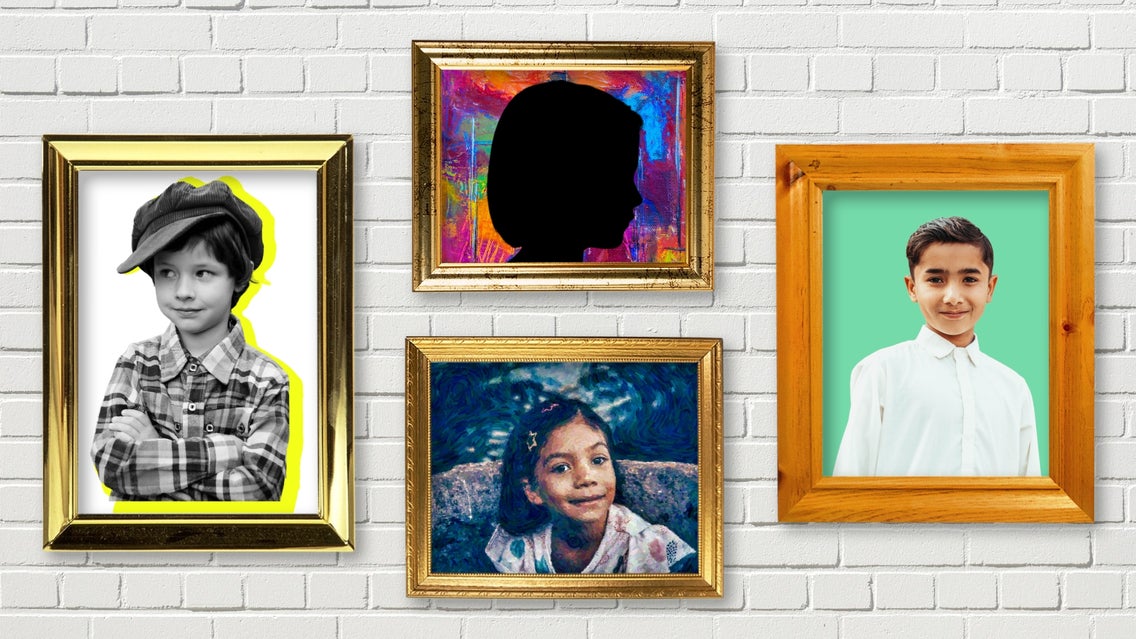
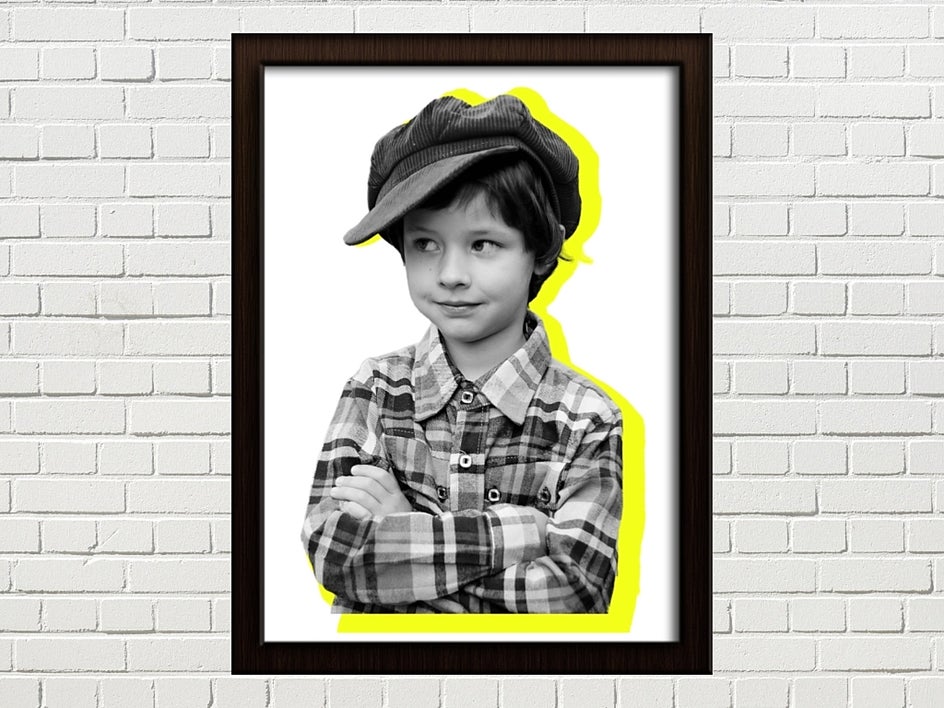
Idea 4: A Black and White Cutout Portrait With a Neon Drop Shadow
You may have seen this artistic style of portrait doing the rounds on social media and wondered how you could create something similar for your own children. Creating such an artwork can cost a small fortune when enlisting the services of a graphic designer or artist. However, by using BeFunky’s Graphic Designer and photo editing tools, you can create your own for free! Follow the tutorial here!
Creative Children’s Portraits Made Easy
Thanks to the tools available in BeFunky’s Photo Editor and Graphic Designer, you don’t need to spend a small fortune to produce creative portraits of your kids. With tools like our revolutionary Background Remover, as well as our wide range of photo effects, turning your cherished portraits into works of art has never been easier!
Ready to create your own creative children’s portraits? Head to our Photo Editor to get started!


