Master HDR Photography Instantly
Every time you snap the shutter on your camera, you give your viewers a glimpse of what it’s like to view the world through your eyes. Unfortunately, photos rarely do life experiences justice. When you take a picture, there are many things that can diminish the true beauty of the scene you’re capturing. Highlights can get washed out, colors can fall flat and shadows can overtake an image, which all take away from the special moment you’ve caught on film. Luckily, there is a way to restore your photos and more accurately recreate your experiences. With BeFunky’s easy-to-use HDR effects, you can reanimate your photographs, restore details and create realistic images that help you share your experiences with the world.
HDR in a Nutshell
HDR stands for high dynamic range. When a photo has a high dynamic range, it has a wide range of lights and darks, which creates life-like results. Unfortunately, many cameras have a difficult time accurately capturing the wide tonal ranges found in HDR photography. Instead of capturing colors and recreating a scene as it is, they tend to create their own version of a scene, which is usually a bit duller than the real experience. The result is highlights turning white, dark colors becoming ominous blobs and lower overall image quality.
Luckily, you can create HDR photography in post processing. But, creating HDR effects with advanced software like Photoshop takes a great deal of time and effort. Photographers must take multiple shots of the same scene and then meticulously blend them together with complicated photo retouching programs. When done right, it creates a single photo that combines the best lighting and coloring of all three images. While the results are great, the process is tedious, to say the least. To save time and effort, you can use BeFunky to create beautiful HDR photography, regardless of your photo-editing skills. It couldn’t be easier to do either! BeFunky has taken Photoshop’s advanced method for creating HDR photography and simplified it to a single step.
Pro Tip: Use HDR effects to transform mediocre photography into more memorable images.
A Time and Place for Everything
HDR effects are not right for every photograph though. It may be tempting to apply BeFunky’s HDR effect to all of your pictures, but the HDR effect can actually harm the quality of certain types of images. Photos that capture movement can become blurry, images that already have vivid colors can become washed out and high-contrast scenes can turn grainy.
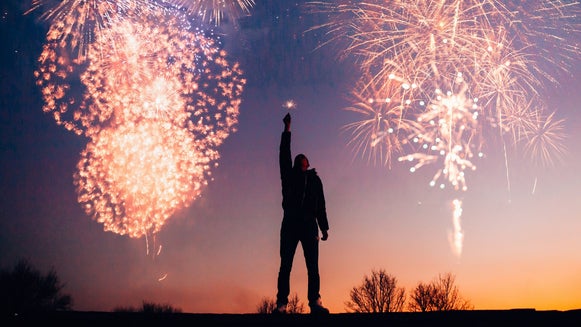
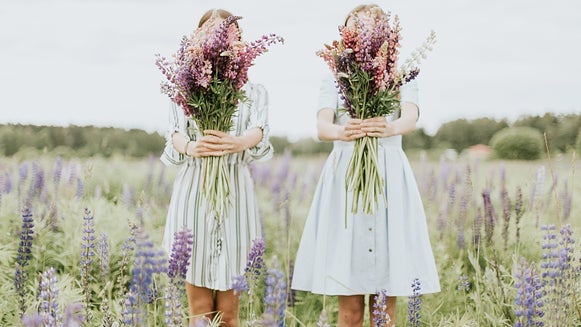
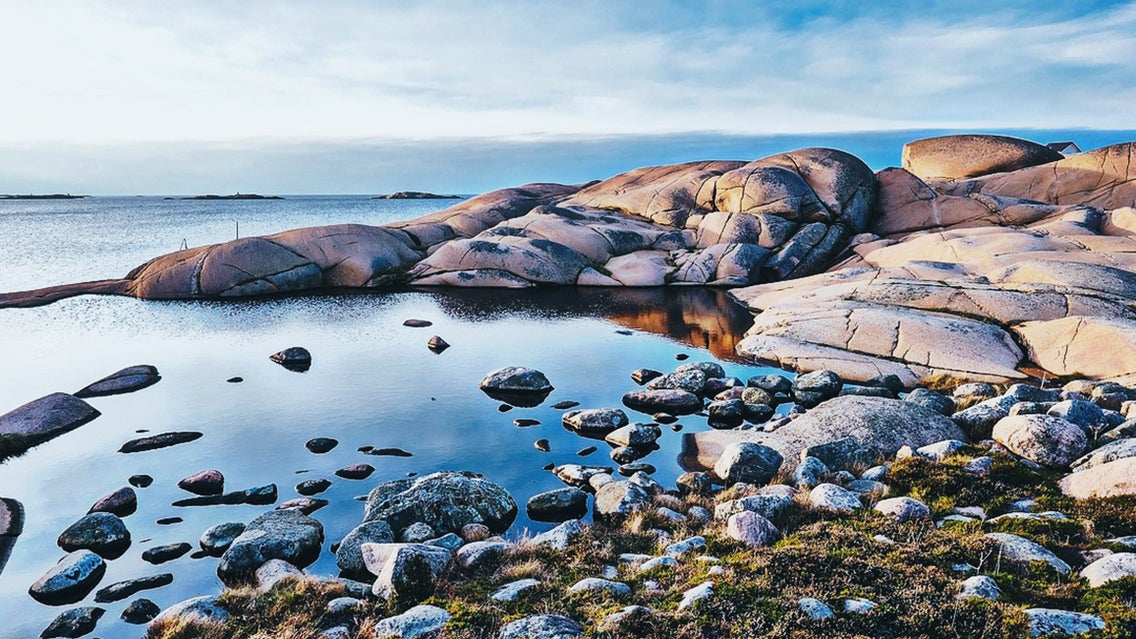
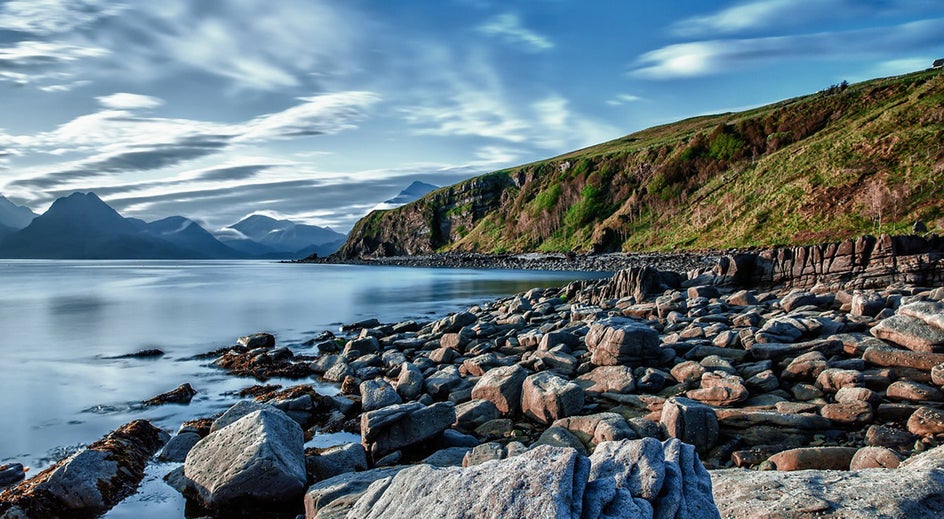
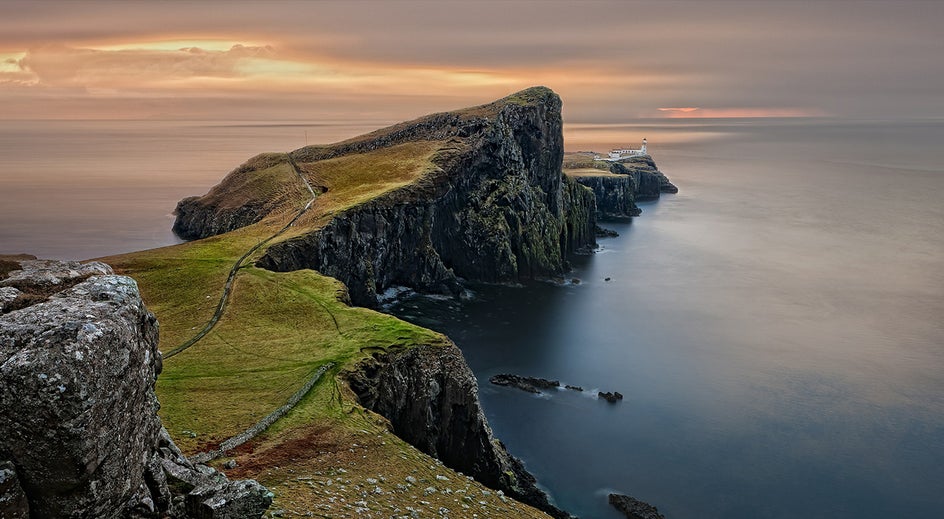
But just as there are certain images you shouldn’t use HDR effects on, there are images that work exceptionally well with HDR. Landscapes often have great contrast between land and sky, which is difficult for any camera to capture. With HDR, you can bring out all of the detail and create an equally stunning landscape and skyline. Images with direct sunlight can have harsh lighting, dark shadows and bright glares that affect image quality. By using an HDR effect on these photos, you can even out lighting and create well-balanced images. Photos that use backlighting tend to throw exposure off and create a dark appearance. By applying an HDR effect, you can brighten the foreground without washing out any areas of your photo.
Pro Tip: Most cameras have an HDR setting, but to get optimal results, you should create your HDR effect in post-processing.
Instant HDR Effects
With BeFunky’s Photo Editor, you can instantly create HDR photography. No need to take multiple shots of the same scene, forget about using advanced post-processing photo software and don’t waste your time spending hours retouching photos. With BeFunky, all you need is a single image and a few minutes of your time.
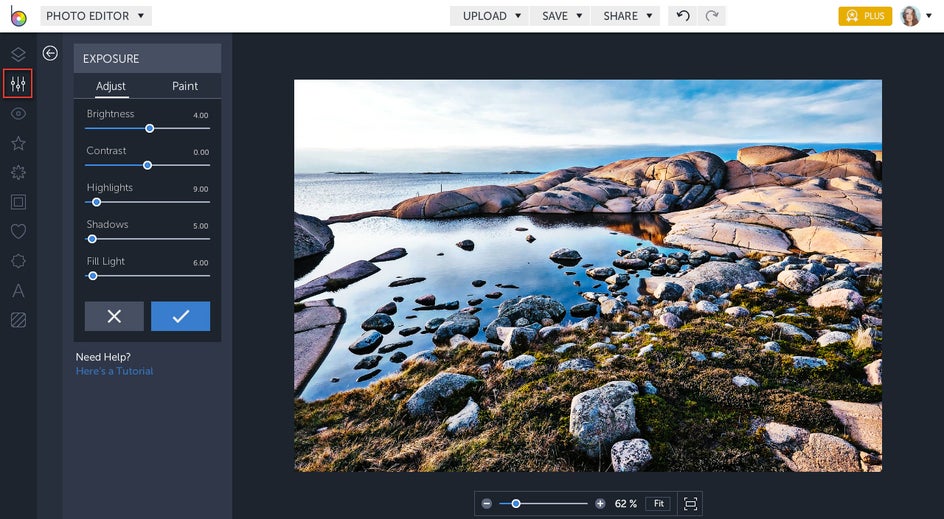
To get started, upload an image to the Photo Editor. Remember, it’s best to use HDR effects on images with backlighting, sunlight or on landscapes. Once you’ve uploaded your photo, choose Effect from the menu on the left side of your screen and scroll down to HDR. Once you click on it, you will be presented with several HDR effect options. Select one, and then drag the sliding scale to adjust the intensity of the effect.
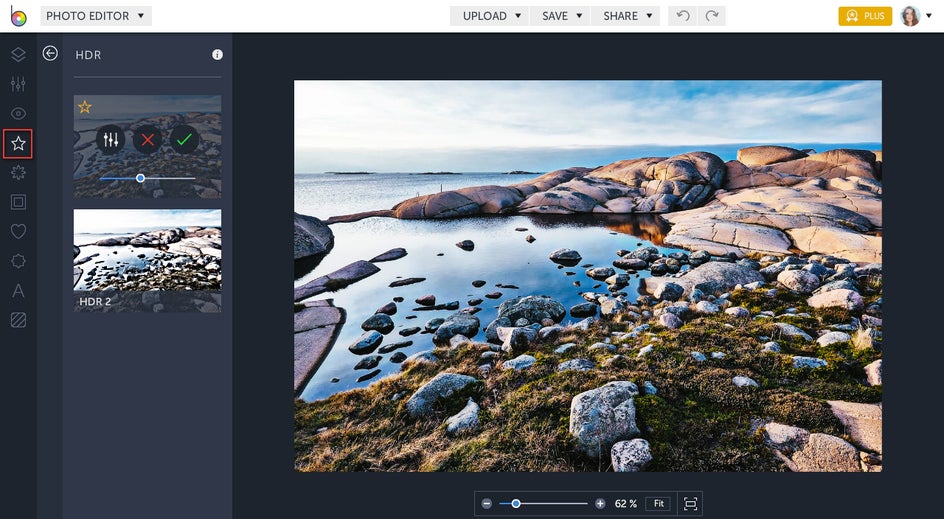
Pro Tip: To apply the HDR effect selectively, click on Settings and then choose Paint.
Getting Hands-On with HDR
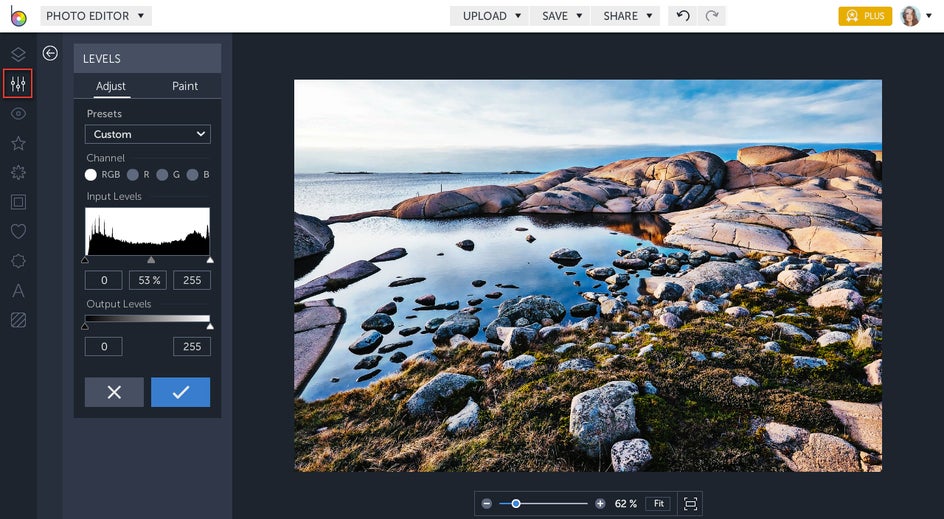
For a more hands-on approach to creating HDR photography with BeFunky, try the Levels tool. To get started, upload an image to the Photo Editor. Then, look under the Edit menu, scroll down to the Miscellaneous section and choose Levels. Next, look at the histogram, which determines the range of tones found in your image. Shadows are represented by the spikes on the left, midtones are in the middle of the chart and highlights are depicted by the spikes on the right.
You can control this histogram to customize the contrast in your image and create a high dynamic range of color for your photo. On the far left you’ll see a black triangle, which represents the darkest area of your photo. Click on this triangle and drag it slightly towards the middle of the histogram to force more dark tones into your image. On the far right is a white triangle, which represents the lightest areas of your image. Click and drag it towards the center of the histogram to force more highlights into your image. When you do, it will widen the tonal range in your photo, balance exposure and create an instant HDR effect.
Pro Tip: If you make a mistake, you can undo your work by choosing the Erase option from the Paint menu.
Everything in Moderation
The point of HDR photography is to more accurately recreate a scene. By improving contrast and capturing a range of light that more closely resembles what the human eye is capable of seeing, HDR effects enhance realism and help transport your audience to the scene you’ve captured. But, it doesn’t take much to overdo HDR effects and go from realistic to over-edited.
The first mistake you want to avoid is over-sharpening your photo. Clarity helps to enhance a sense of realism, but when too many details are highlighted, it can create halos in your image. Using an abundance of contrast is another common issue with HDR photography. Although contrast can be used for added drama, you should always keep exposure and contrast well-balanced in your photos. The third and most common HDR photography mistake is over-saturating colors. Although vivid colors are attractive, if a photo consists of all brightly saturated hues, it can be a strain on your viewer’s eyes.
Pro Tip: HDR is not a cure-all; make sure your photograph has good composition, lighting and exposure to begin with.
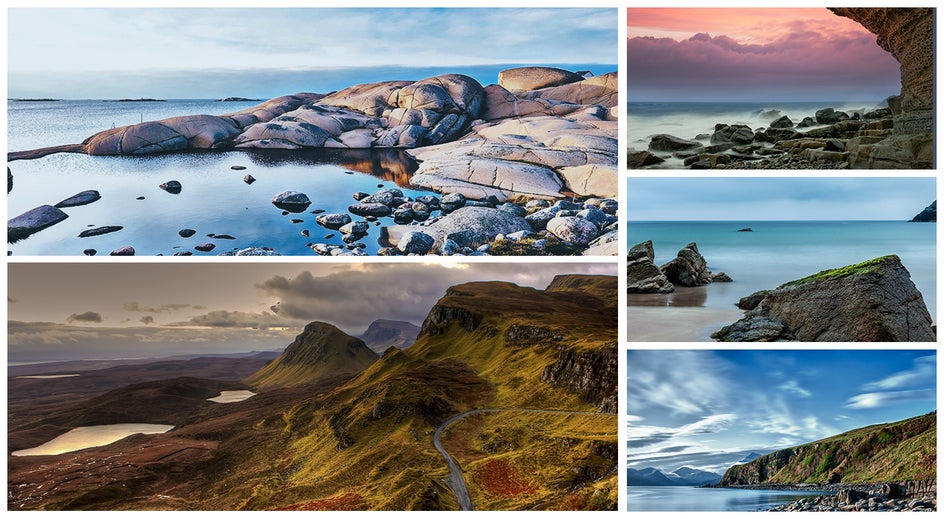
Share The Entire Experience
HDR photography certainly helps to more accurately recreate an experience for your audience, but it doesn’t tell the whole story. To tell the entire narrative of your experience, try creating an HDR photo collage.
To get started, enter BeFunky’s Collage Maker. When you do, you will automatically be in the Image Manager, which will let you upload your newly edited HDR images. Next, click on Layouts from the menu on the left side of your screen and choose a template (you can also use our Collage Wizard, which will instantly create a collage from your images). Once you’ve selected a template, simply click on your images and drag them onto your template to create your story. Then, feel free to customize your collage with BeFunky’s Patterns, Graphics, Fonts and more.
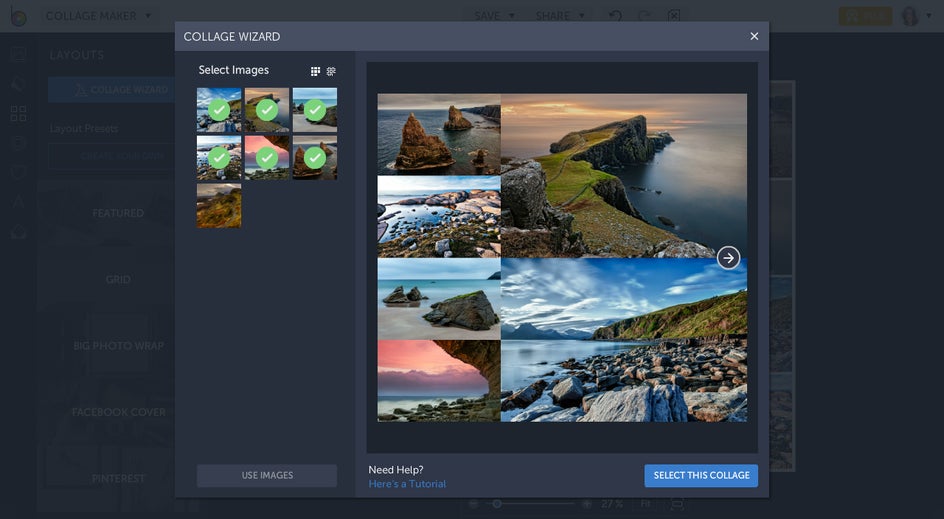
Pro Tip: Use HDR images that have a variety of compositions, colors and perspectives to make your collage more interesting.
Make sure your photography does every one of your life experiences justice and create memorable HDR images with BeFunky!