The Best Poster Maker for Marketing Your Events
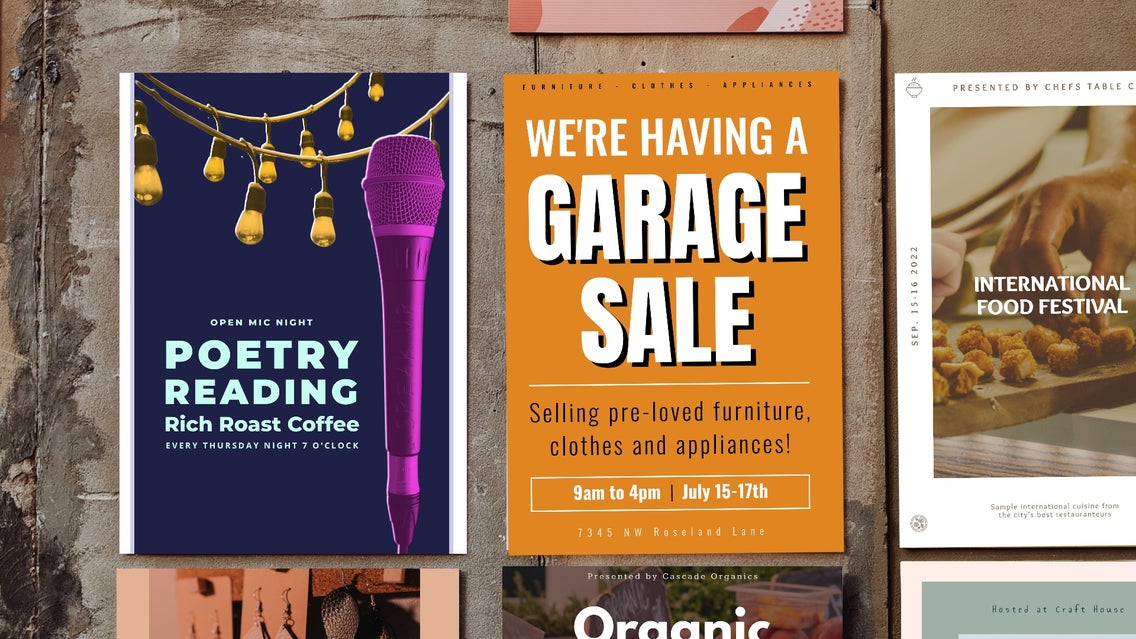
You might think that present-day marketing has all gone digital and print advertising is a dying effort. But what happens when you need to share with a more localized demographic for your event or workshop? One of the most effective ways of targeting a local demographic is to create posters to hang around town in the areas where your target market is most likely to see them. This might be a coffee shop, record store, yoga studio, or any place that’s relevant to your event and the audience whose attention you want to grab.
Print advertising is also a relatively cheap medium, especially when you have the tools to design posters yourself. Using BeFunky’s Poster Maker, you’ll have access to pre-sized and fully customizable poster templates for you to create eye-catching posters in just a few clicks!
What Makes An Eye-Catching Poster?
To make an eye-catching poster, it’s important to ask yourself what kind of call to action you’re trying to promote in your poster design. Are you promoting attendance at a local event? Are you asking folks to head to your website or sign up for updates? Once you know how you want your poster to affect your audience, here are a few tips to really grab their attention!
Choose the Perfect Color Palette
By choosing a color palette that is uniquely yours, you can define your aesthetic and help attract the people you want to view your poster! Consider what types of color combinations are best suited for your particular event. If you’re doing a floral arrangement event you may want to look at light natural tones, as opposed to a store opening that might be suited for bold, stand-out gem tones to catch the eye.
Decide the Poster Layout and Hierarchy
Design the layout of your poster by deciding how you want text and imagery intermixed throughout it. Go for clear, concise text and images that complement your layout without overcrowding.
Text hierarchy invites the eye to navigate the poster in an organized way. Muddled designs will lose the interest of viewers you’re looking to attract! Decide what the main focus of your poster is, and reflect that in the largest text. Keep in mind that you want to inform your audience of the what, when, where, and how to find more information.
Use Graphics and Images
When choosing an image-driven design, try to stick with one image. Too much imagery can make your poster design look overcrowded or busy. When choosing a graphic-driven design, you’ll want to find that balance between a creative design and clear, readable text. You can use graphics to create a scene with shapes and lines, incorporate color blocking, and combine shapes to create an item you want to use as your main element.
Whatever look you’re going for, BeFunky’s Poster Maker has the perfect solution. After finding the template that best suits your design needs, you can customize all of the image, graphic, and text elements to make an attention-grabbing poster for your event. Keep reading for a step-by-step tutorial!
How to Design the Perfect Event Poster
When you’ve decided how you want the end result of your poster to look, head to the Poster Maker and choose a template that will help you achieve it. Read along for a short tutorial on how to design your own event poster using BeFunky’s ready-made poster templates.
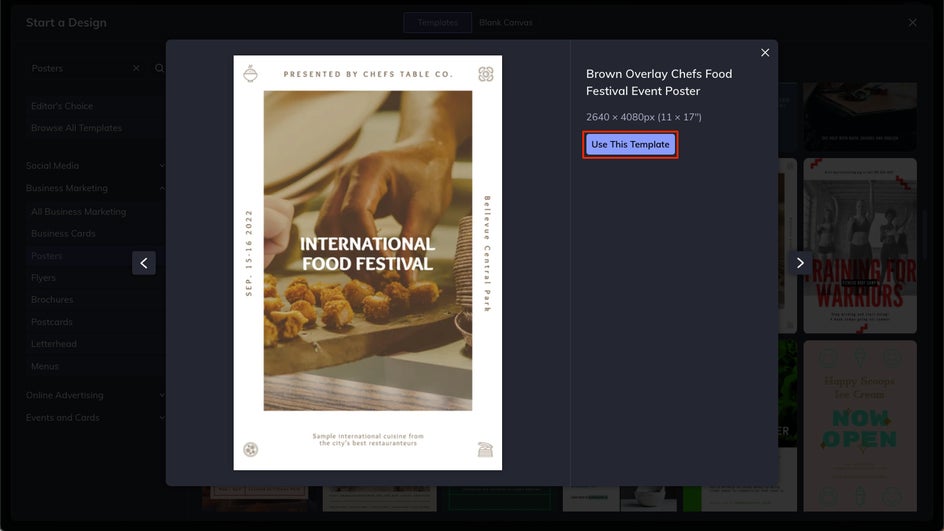
Step 1: Choose a Template
Head over to the Graphic Designer and under the Templates section, choose Business Marketing and then Posters. Click onto the poster template you’d like to edit, then click Use This Template to populate it onto your canvas.
Step 2: Add Your Own Images
If you have your own images you want to use in the template, click on the Image Manager icon on the left-hand menu to import them into BeFunky. You can click the Computer, or drag and drop images directly onto the canvas.
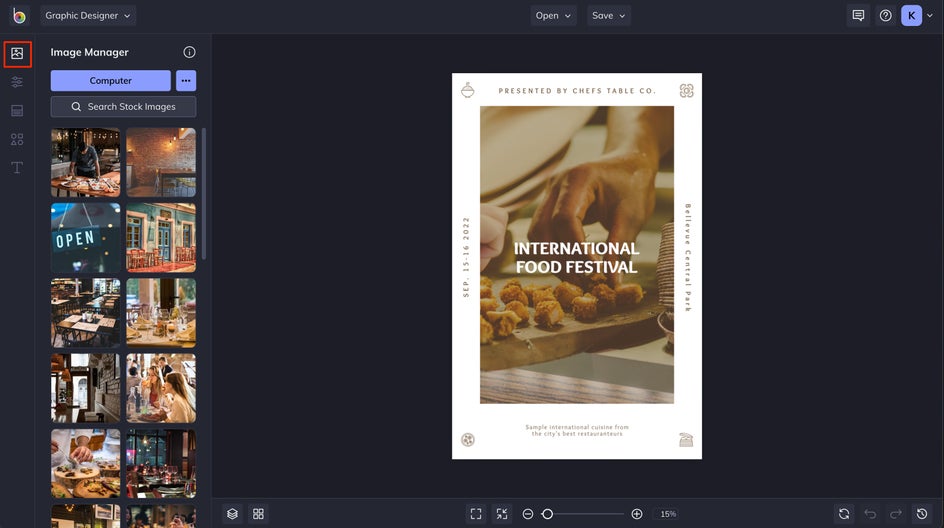
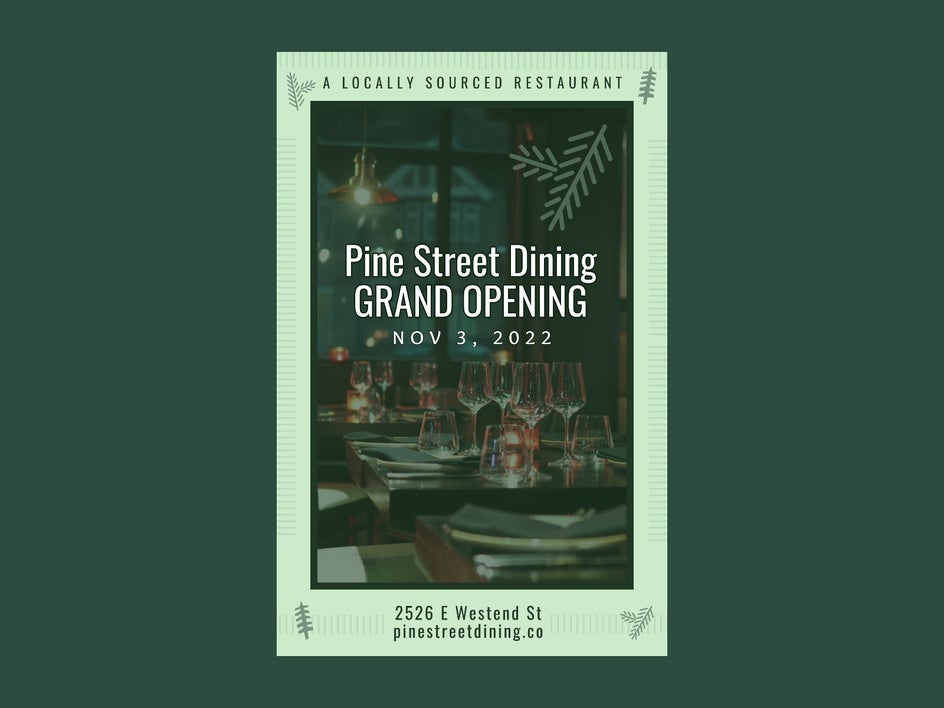
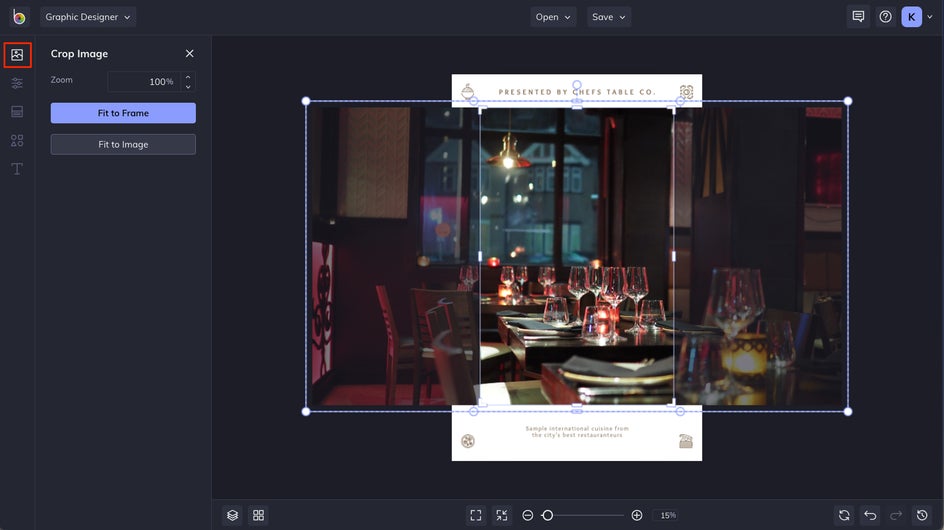
The image you add will retain all of its formatting and properties within the template. In this example, you’ll see it absorbs the opaque overlay that helps the text stand out.
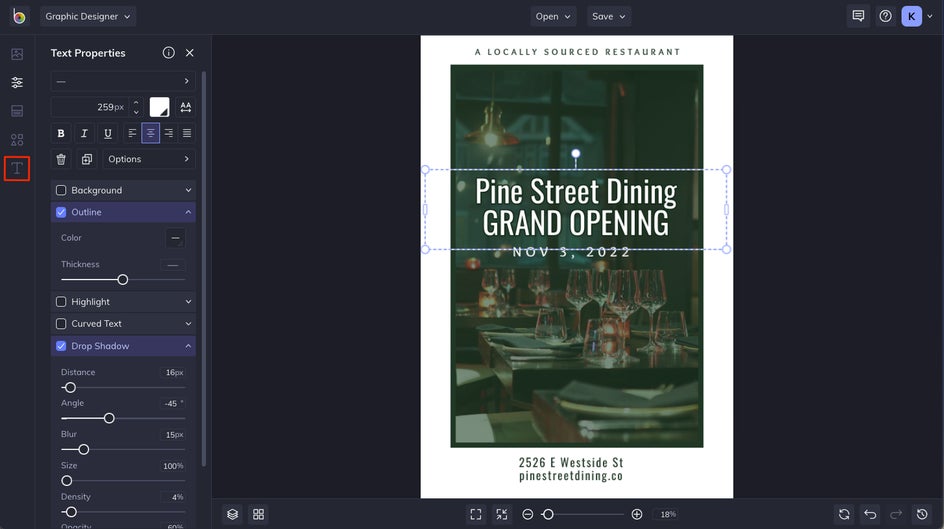
Step 3: Customize the Text and Color Scheme
Next, let's add some important details and personal flair to the poster. Click any text box on your template to start typing. Notice that any time you have a text box selected, a Text Properties menu will appear. Use this to change text color, size, or add even more distinguishing characteristics.
If you need to add extra text boxes, select the Text tab from the menu on the left and click the Add Text button to add a new textbox. You’ll also see some pre-formatted text options like Body text and Headings. Click on any of those to see them appear on the canvas.
Next, head to the Customize tab to choose a different background color. If you have a specific HEX Color Code, you’re using you can add it here to the color picker.
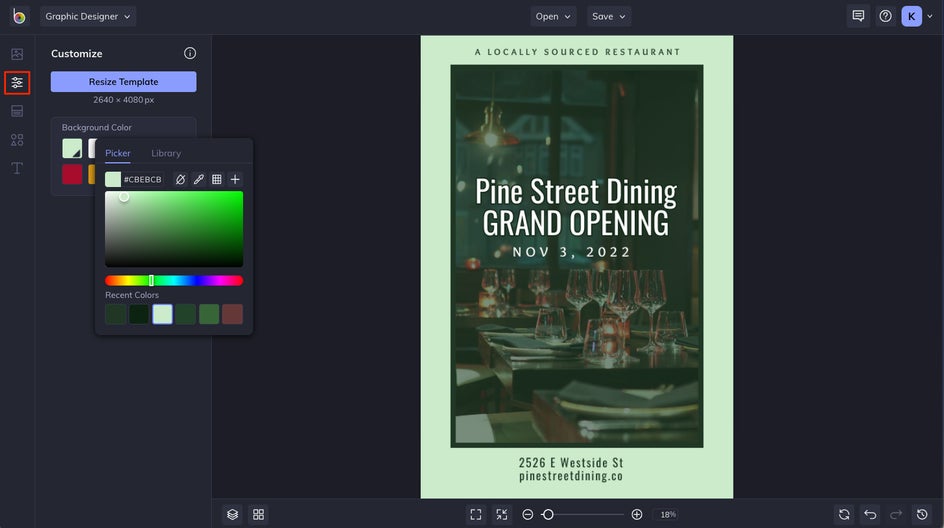
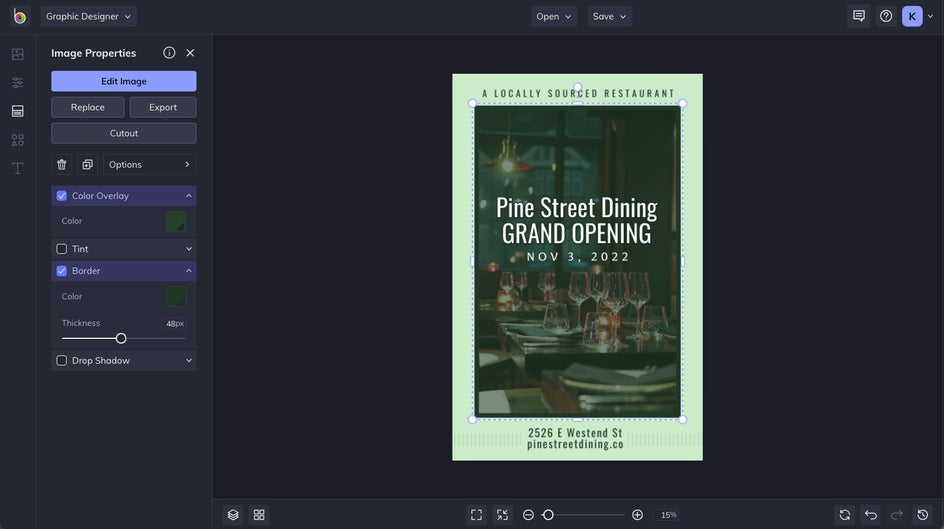
Here, we also added a different color overlay to the image, as well as a border to give it some distinction from the background.
Step 4 (Optional): Add Extra Graphic Design Elements
Even if you’ve gone with an image-driven design, using a few graphic elements can help to elevate your poster and highlight important text. Choose graphics that don’t overwhelm the text in your image, and complement the theme of your poster.
In the Graphics tab from the left-hand menu, you can choose from thousands of graphics to add in shapes, lines, or anything you’d like to spruce up your poster. Click on Search Graphics to search the Graphic Library, then select the ones you’d like to use. When you close out, you’ll see them available to add to the canvas.
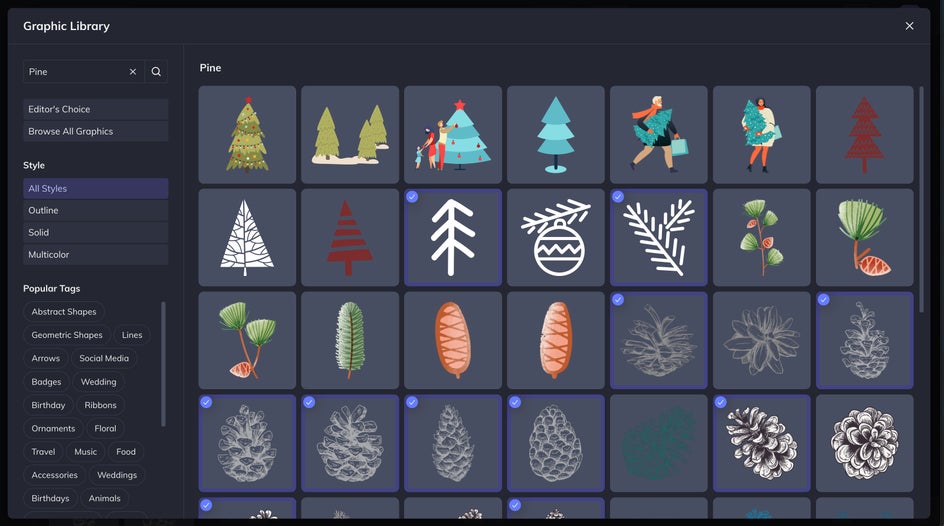
Drag and drop them onto the canvas, then use the small white circles surrounding the graphic to rotate and resize the graphic how you’d like.

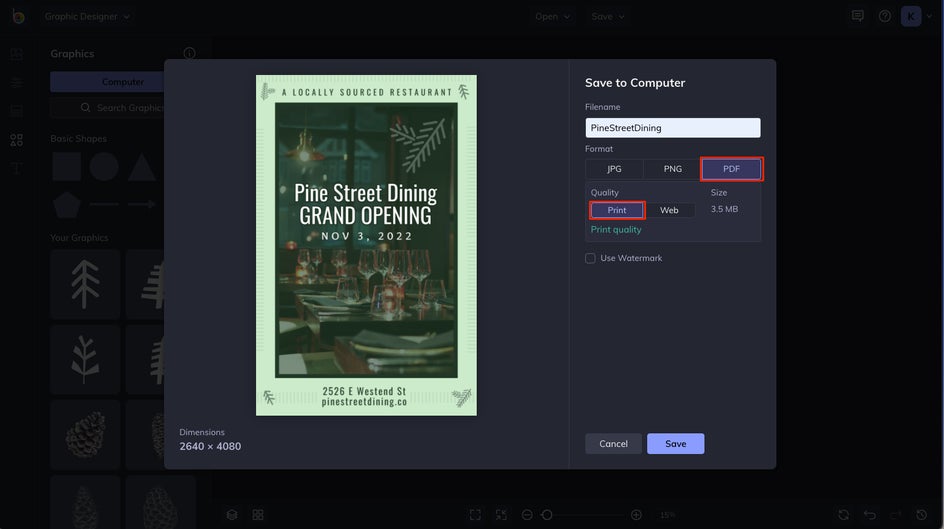
Step 5: Export Your Design for Print
Once you feel that all of the elements are in the right places, make any last adjustments to text size, color, and placement.
Head over to the Save menu, and choose Computer as your save location. To save for print, you’ll want to choose PDF as the file format, and make sure Print is selected as the Quality type. From here, you can print files out yourself using your own printer, or take your optimized files to local print shops.
You may also consider saving a copy of your work as a BFD file, which will retain all the original image layers as an editable project in case you need to come back to work on it later. To do this, go back to the Save menu and choose Save as Project.
Promote Your Events with Easy to Customize Poster Templates
When designing a marketing poster, it's important to think about what you want to convey to your audience. By designing posters with clear and intentional design and text, you can promote your full aesthetic and attract your chosen demographic to reach out to you! With BeFunky’s Poster Maker, it’s so easy to lay out all of the information you need to share with potential visitors, with professional-quality templates that you can update in minutes!